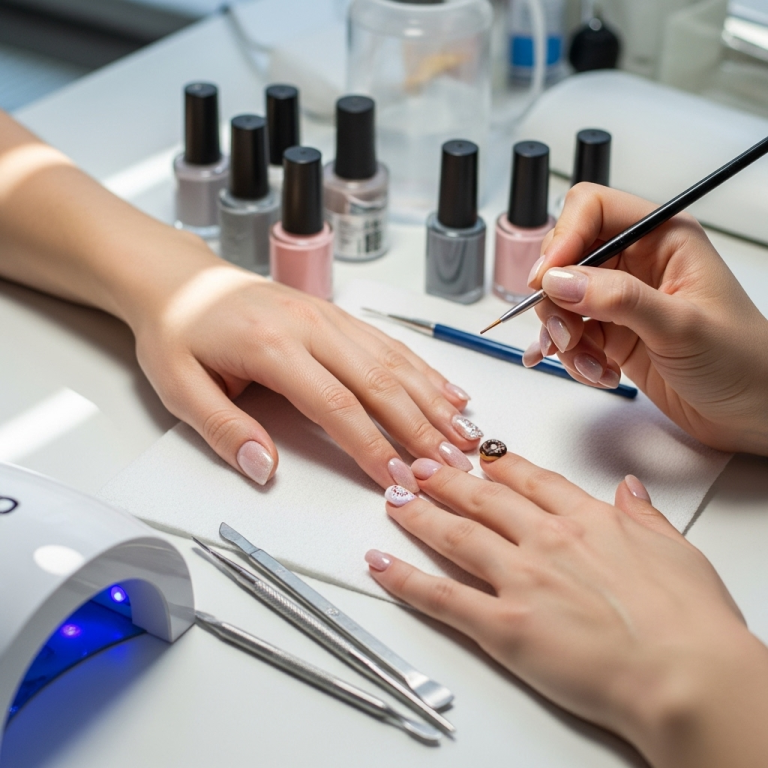
Strawberry milk nails are a sheer, milky pink polish that mimics the delicate hue and subtle translucence of strawberry-infused milk. This essential, easy-to-achieve style offers a clean, chic, and universally flattering look for any occasion, perfect for beginners wanting a polished finish.
Ever scroll through your feed and see those gorgeously soft, milky pink nails and wonder how to get that dreamy look? You’re not alone! Strawberry milk nails have taken the nail world by storm, and for good reason. They’re chic, versatile, and oh-so-easy to achieve. Whether you’re rocking short nails or long, almond-shaped beauties, this trend offers a touch of elegance without being overpowering. Let’s dive into how you can recreate this essential style yourself!
What Exactly Are Strawberry Milk Nails?
Imagine the softest, most delightful pink you can think of, but with a milky, sheer finish. That’s essentially strawberry milk nails! It’s not a vibrant, opaque fuchsia or a pale, frosty pink. Instead, it’s a delicate, translucent hue that looks like it’s been kissed by a strawberry and swirled into a creamy base. This unique sheer quality allows your natural nail to peek through subtly, creating a natural-looking, healthy glow.
The trend is all about achieving a smooth, ethereal vibe. It’s less about bold color and more about a soft, almost ethereal wash of pink. Think of the color of a perfectly blended strawberry milkshake – that’s the inspiration! It’s the ultimate quiet luxury for your fingertips, making them look effortlessly polished.
Why Are Strawberry Milk Nails So Popular?
There are several reasons why this particular shade has become a go-to for so many:
- Universally Flattering: The milky pink tones tend to complement a wide range of skin tones, making it a safe and stylish choice for almost everyone.
- Minimalist Chic: In a world of intricate nail art, strawberry milk nails offer a beautiful dose of simplicity. They’re clean, elegant, and never go out of style.
- Versatile: They work perfectly for professional settings, casual outings, or even special occasions. They’re the kind of nails that go with everything.
- Easy to Achieve: Unlike complex designs, this look is relatively simple to paint on, making it ideal for DIY manicures.
- Healthy Glow: The sheer finish gives a look of healthy, well-maintained nails, which is always a win!
Essential Tools and Materials You’ll Need
To achieve the perfect strawberry milk nail look at home, you’ll want to gather a few key items. Don’t worry, it’s nothing overly complicated! These essentials will help you get that smooth, milky finish:
| Tool | Description | Why It’s Important for Strawberry Milk Nails |
|---|---|---|
| Nail File | For shaping your nails. | Helps create a clean canvas for polish. A smooth edge prevents snags and makes polish application easier. |
| Nail Buffer | Smoothes ridges and adds shine. | Creates an even surface for the polish to adhere to, ensuring a smooth, streak-free finish. Buffing also adds a natural sheen. |
| Cuticle Pusher/Remover Balm | To gently push back and care for cuticles. | Clean cuticles make polished nails look extra neat and professional. |
| Base Coat | A clear polish applied before color. | Protects your natural nails from staining and helps the color polish last longer. It also provides an even base for application. |
| Milky Pink Nail Polish | A sheer, creamy pink polish. | This is the star of the show! Look for polishes labeled “sheer,” “milky,” or “jelly” in a soft pink shade. |
| Top Coat | A clear polish applied after color. | Seals in the color, adds high shine, and protects your manicure from chipping. |
| Optional: White Nail Polish | A tiny amount of opaque white. | Can be used to slightly lighten a pink polish to achieve the perfect milky hue. |
How To Achieve the Perfect Strawberry Milk Nails: A Step-by-Step Guide
Ready to get those dreamy strawberry milk nails? It’s simpler than you think! Follow these easy steps for a flawless at-home manicure.
Step 1: Prep Your Nails
Start with clean, dry nails. Gently push back your cuticles using a cuticle pusher or an orangewood stick. If you have any rough edges or hangnails, carefully trim them. Shape your nails to your desired length and shape using a nail file. A smooth nail edge helps polish go on evenly.
Step 2: Buff for Smoothness
Lightly buff the surface of your nails with a nail buffer. This will smooth out any ridges and create a nice, even base for the polish. Don’t over-buff; just a light sweep is enough to create a satiny finish.
Step 3: Apply Base Coat
Apply one thin layer of your favorite base coat. Let it dry completely. This step is super important because it protects your natural nails from staining (especially important with colored polishes!) and helps your manicure grip better, making it last longer. Check out resources like the U.S. Food and Drug Administration (FDA) for insights into cosmetic product safety, including nail products.
Step 4: The Milky Pink Application
Now for the magic! Apply your sheer, milky pink polish. For a subtle look, one coat might be enough. If you want a bit more color saturation or opacity, apply a second thin coat. The key here is thin coats. Thick coats can look streaky and take forever to dry. The goal is to build up the color gradually while maintaining that beautiful, translucent effect.
- Tip for the Perfect Shade: If your pink polish is a little too sheer or a bit too vibrant, you can transform it! Mix a tiny drop of opaque white nail polish into your pink or add a very small amount of pink into a milky white polish. Experiment on a piece of paper first to get the shade just right before applying to your nails.
Step 5: Let It Dry (Patience is Key!)
Allow each coat of polish to dry thoroughly before applying the next. This is crucial for a smooth, chip-free finish. If you’re in a hurry, you can use a quick-dry top coat between polish layers or invest in a nail drying accelerator spray.
Step 6: Seal with Top Coat
Once your color coats are completely dry, apply a generous layer of your favorite top coat. Cap the free edge of your nail by running the brush along the tip. This helps prevent chips and adds that gorgeous, glossy finish that makes strawberry milk nails look so professional and appealing. For extra shine and longevity, you can add another layer of top coat after 2-3 days.
Step 7: Final Touches
Once the top coat is dry, consider applying a drop of cuticle oil to nourish the skin around your nails. This adds a final touch of polish and keeps your hands looking healthy and moisturized.
Variations and Creative Twists on Strawberry Milk Nails
While the classic milky pink is stunning on its own, there are fun ways to personalize the strawberry milk nail trend. Don’t be afraid to play around and make it your own!
1. Sheer Coral Twist
For a warmer take, opt for a sheer polish with subtle coral undertones. This variation leans more towards a “peach milk” vibe and is particularly beautiful for warmer skin tones or during spring and summer.
2. Hint of Glitter
Want a touch of sparkle? Add a sheer glitter polish over your milky pink base. A fine, iridescent glitter can add subtle dimension without overpowering the soft look. You could also do a glitter accent nail for a more subdued sparkle.
3. French Tip Refresh
Elevate the classic French manicure by using a milky pink for the base and opting for a delicate white or even a slightly deeper pink for the tips. This offers a subtle update to a timeless style.
4. Ombre Effect
Create a soft ombre by blending the strawberry pink with a sheer nude or even a very pale white. This gives a gradient effect that’s subtle yet captivating.
5. Tiny Accents
For those who love a minimalist detail, consider adding a single tiny dot, line, or a small geometric shape in a contrasting color (like white, gold, or a deeper pink) on one or two nails. It’s the perfect way to add a personal touch.
Strawberry Milk Nails vs. Other Pink Nail Trends
The world of pink nails is vast! Here’s how strawberry milk nails stand out from some of their popular pink cousins:
| Trend Name | Description | Key Difference from Strawberry Milk Nails |
|---|---|---|
| Classic Pink | Opaque, solid pink in various shades (hot pink, bubblegum, baby pink). | Lacks the sheer, milky quality. Strawberry milk nails are translucent and softer. |
| Ballet Slipper Pink | A very pale, soft pink, often with a subtle sheen. | Strawberry milk is typically slightly more saturated and has a distinct milky undertone, giving it more depth. Ballet slipper can sometimes lean more frosty. |
| Jelly Pink | Highly translucent, vibrant pink with a “gel-like” appearance. | Jelly pinks are usually more sheer and can be more intensely colored. Strawberry milk has a milky opacity that softens the color. |
| Dolly Nails | Often refers to pastel pinks, sometimes with a slightly glossy finish. | “Dolly” can encompass a broader range of soft pastels. Strawberry milk is specifically about that milky pink hue. |
| Clean Girl Aesthetic Nails | Minimalist, natural-looking nails, often nude or sheer pinks. | Strawberry milk nails are a specific shade within the clean girl aesthetic, focusing on the milky pink. Other clean girl nails might be more sheer nude or clear. |
Caring for Your Strawberry Milk Nails
Keeping your gorgeous strawberry milk nails looking their best is all about consistent care. Here are some tips to make your manicure last and keep your nails healthy:
- Reapply Top Coat: As mentioned, a fresh layer of top coat every 2-3 days can refresh the shine and add protection against chipping.
- Moisturize: Keep your hands and nails hydrated! Use hand cream regularly, especially after washing your hands.
- Cuticle Oil is Your Friend: Apply cuticle oil daily to keep your cuticles soft and prevent them from becoming dry and ragged. This enhances the overall polished look.
- Be Gentle: Avoid using your nails as tools! Don’t pick at labels, scrape things, or pry open containers with your nails, as this can lead to chips and breaks. If you need to do manual tasks, consider wearing gloves.
- Avoid Harsh Chemicals: When cleaning or doing chores, wear rubber gloves. Harsh cleaning products can strip moisture from your nails and cuticles.
- Touch-Ups: For minor chips, you might be able to carefully touch them up with a tiny bit of your polish, followed by top coat. However, if the wear is significant, it might be time for a fresh application.
When to Avoid Opaque Polish (And Why Sheer is Better)
Opaque polishes are fantastic for bold color statements. However, for the strawberry milk nail look, sheer or milky polishes are essential. Here’s why:
- Achieving the “Milk” Effect: Opaque polishes simply don’t offer the translucent, diffused color that defines the strawberry milk trend. They’ll just look like a solid pink.
- Natural Look: The sheer quality allows your natural nail bed to show through, creating a softer, more natural, and “real” look.
- Hiding Imperfections (Subtly): While not as concealing as opaque polish, the milky quality can softly blur minor imperfections on the nail surface, giving a smoother appearance than clear polish.
- Ease of Application: Sheer polishes are often more forgiving. Streaks are less noticeable, and a slightly uneven coat can blend in beautifully due to the translucence. Opaque polishes require more precision to avoid showing brush strokes.
- Longevity of Appearance: Because sheer polishes show less obvious growth at the cuticle line and are less prone to visible chips on the surface, they can often look good for a little longer between manicures.
Frequently Asked Questions About Strawberry Milk Nails
Here are some common questions beginners might have about this popular trend:
Q1: Can I achieve strawberry milk nails with any pink polish?
A: While you can try to lighten an opaque pink, it’s best to use a polish specifically labeled as “sheer,” “milky,” or “jelly” in a soft pink shade. These formulas are designed to give you that translucent, milky effect. You can also achieve it by mixing a tiny bit of white into a sheer pink.
Q2: Is this trend good for short nails?
A: Absolutely! Strawberry milk nails look fantastic on all nail lengths, including short and natural nails. The soft color and chic finish make even short nails look polished and elegant.
Q3: How many coats of polish do I need?
A: This depends on the specific polish formula and the look you’re going for. Generally, one or two thin coats are sufficient. Two coats will give you a bit more color saturation and opacity while still maintaining the sheer, milky quality. Always let each coat dry before applying the next.
Q4: What if my polish looks streaky?
A: Streaks can happen, especially with sheer polishes! Ensure you’re applying thin, even coats. For sheer polishes, slight streaking can often blend out as the polish dries and you apply subsequent coats. A good base coat and top coat also help smooth the finish. If it’s very streaky, consider adding a tiny bit of white polish to slightly thicken the formula, or add a final, thicker layer of quality top coat to smooth everything out.
Q5: Can I do this with gel polish?
A: Yes! Many gel polish brands offer sheer milky pink shades that are perfect for this trend. The application process is similar, but you’ll need a UV or LED lamp to cure each layer.
Q6: What skin tones do strawberry milk nails suit best?
A: One of the biggest appeals of strawberry milk nails is that they are incredibly versatile and flattering on a wide range of skin tones. The soft, diffused pink tones tend to enhance natural undertones beautifully.
Q7: How do I prevent my nails from looking washed out?
A: If you feel the color is too light, try adding a second thin coat or slightly deepen the shade by mixing in a touch more pink. Ensuring your nails are moisturized and healthy also contributes to a vibrant, non-washed-out look. A good quality top coat will also help the color pop with shine.
Conclusion
And there you have it! Strawberry milk nails are more than just a trend; they’re a timeless staple for anyone seeking a chic, effortless manicure. From their universally flattering hue to their easy application, it’s no wonder they’ve captured hearts everywhere. Whether you opt for the classic milky pink or add your own creative twist with a hint of coral or subtle glitter, this style is a fantastic way to boost your confidence and express your personal taste.
Remember, the beauty of strawberry milk nails lies in their soft, diffused glow. Don’t be afraid to experiment with different shades of sheer pink and find the perfect tone that makes you feel fabulous. So grab your favorite milky pink polish, follow these simple steps, and get ready to rock your most elegant and dreamy nails yet. Happy polishing!

