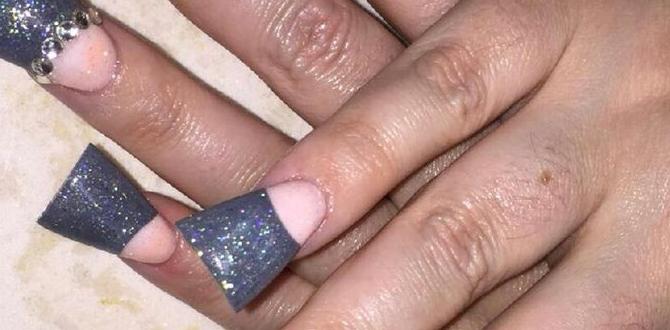
Stiletto ombre nails are a trendy and chic combination, blending the dramatic shape of stilettos with the smooth color transition of ombre. They’re a stunning way to elevate your look, offering versatility from subtle washes to bold statements. This guide breaks down essential designs and how to achieve them with ease.
Dreaming of show-stopping nails that turn heads? Stiletto ombre nails offer that perfect blend of edgy glamour and soft sophistication. The sharp, pointed stiletto shape naturally elongates your fingers, while the gradient ombre effect creates a captivating depth. But where do you begin with this stylish combination? It can feel a little overwhelming trying to pick the perfect ombre shades or even understand how to achieve that flawless blend on such a dramatic nail shape. Don’t worry! We’re here to demystify stiletto ombre nails with easy-to-follow advice and inspiration. Get ready to discover genius designs that are both essential and achievable, no matter your skill level. We’ll cover everything from classic ombres to dazzling new takes, making sure your next manicure is your best one yet!
What Are Stiletto Ombre Nails?
Stiletto ombre nails are a manicure style that combines two popular trends: the stiletto nail shape and the ombre technique. The stiletto shape is characterized by its long, tapered sides that meet in a sharp point at the tip. Ombre, on the other hand, refers to a gradient effect where one color gradually fades into another. When these two are fused, you get a dramatic and visually stunning nail look. Think of it as a beautiful color flow on a sharp canvas!
Why Stiletto Ombre Nails Are So Popular
This nail style has taken the beauty world by storm for several reasons. The stiletto shape itself is inherently glamorous and elongating, making hands appear more slender and elegant. Adding an ombre effect introduces a softness and dimension that can range from incredibly subtle to strikingly bold, depending on the color choices and intensity of the gradient. This versatility allows stiletto ombre nails to suit a wide array of personal styles and occasions, from everyday chic to special event flair. They offer a unique way to express creativity while enhancing natural beauty.
Essential Stiletto Ombre Nail Designs for Beginners
Ready to dive into the world of stiletto ombre? Starting simple is key to mastering any new technique. These beginner-friendly designs are stylish, achievable, and offer a fantastic introduction to this gorgeous trend.
1. Classic White to Nude Ombre
This is the ultimate in sophisticated grace. A soft transition from a creamy nude at the cuticle to a clean white tip creates an elegant, almost bridal look. It’s subtle, chic, and incredibly flattering on all skin tones. This design mimics the natural progression of nails, adding just a touch of amplified polish.
- Why it’s great for beginners: The color palette is forgiving, and the blending is less noticeable than with vibrant hues.
- Tip: Start with a good quality nude base and a sheer white polish. Use a makeup sponge to gently dab the white towards the tip, blending downwards.
2. Soft Pink to White Baby Boomer
A twist on the classic, the “Baby Boomer” nails are a softer, more diffused version of the French manicure. It blends a soft pink at the base into a milky white tip. On a stiletto nail, this creates a beautifully elongated and refined appearance. It’s the epitome of understated elegance.
- Colors: Milky pink base, sheer white tip.
- Application: This requires patience. Layering sheer polishes and using a slightly damp makeup sponge for blending is the easiest way for beginners to achieve this diffused look.
3. Pastel Gradient Dreams
Embrace your softer, more playful side with pastels! Think delicate transitions from baby blue to lavender, mint green to baby pink, or peach to pale yellow. These light, airy colors are perfect for spring and summer, and their gentle hues make blending a breeze.
- Best for: A whimsical, romantic vibe.
- Pro-tip: For a smoother blend, consider using gel polishes, as they have a self-leveling quality. You can also explore color-shifting pastel polishes for an even more magical effect.
4. Subtle Glitter Fade
Add a touch of sparkle without going overboard. A subtle glitter ombre starts with a solid color at the cuticle (or nude/pink base) and fades into a fine glitter polish towards the stiletto tip. This adds dimension and a hint of glamour that’s perfect for evening wear or a festive occasion.
- How to achieve it: Apply your base color. Then, use a makeup sponge to apply the glitter polish, concentrating it at the tip and dabbing downwards to create the fade.
- Glitter types: Opt for fine-milled glitters for a more sophisticated blend. Chunky glitters can be harder to blend smoothly on longer nails.
5. Monochrome Elegance (Black to Grey or White)
For a modern and chic look, a monochrome ombre is stunning. A smooth fade from deep black to a dark grey, or even black into white for a high-contrast effect, looks incredibly dramatic and sophisticated on a stiletto shape. This design speaks volumes with its simplicity.
- Key colors: Black, charcoal grey, white.
- Technique: Start with the darkest color at the tip and work your way down towards the cuticle, gradually lightening the shade. A stipple brush or a makeup sponge can help create a smooth transition.
Tools and Materials You’ll Need
Having the right tools makes all the difference when creating stiletto ombre nails at home. Don’t worry, you likely already have some of these!
- Nail Files: For shaping your nails into the perfect stiletto. A good quality file is essential for smoothness.
- Buffer: To smooth the nail surface for better polish adhesion.
- Base Coat: To protect your natural nail and help polish last longer.
- Polishes: Your chosen color polishes for the ombre effect. Consider gel polish for a smoother, longer-lasting finish. You can find great beginner gel polish kits to get started.
- Top Coat: To seal in your design and add shine.
- Makeup Sponges: Cut into small pieces, these are your best friend for creating the ombre blend. A dense sponge works best.
- Small Brush (e.g., eyeshadow brush) or Stipple Brush: For diffusing colors and cleaning up edges.
- Nail Polish Remover & Cotton Swabs: For cleaning up any mistakes around the cuticle and nail edges.
- Cuticle Oil: To rehydrate and nourish your cuticles after the manicure.
Step-by-Step Guide: Creating Your Own Stiletto Ombre Nails
Ready to get creative? Follow these steps to craft beautiful stiletto ombre nails. This guide focuses on using traditional nail polish for ease, but gel polish can be used with similar principles and a UV/LED lamp for curing.
Step 1: Prepare Your Nails
This is the foundation for a flawless manicure.
- Shape Your Stilettos: File the sides of your nails inwards towards a central point. Start by filing one side at an angle towards the center, then repeat on the other side. Ensure they are symmetrical. Aim for a gentle taper, not an overly aggressive point, especially if you have shorter nails. For tips on shaping, you can refer to general nail grooming guides from reputable sources like the NailPro magazine.
- Smooth the Surface: Gently buff the surface of your nails to remove any ridges and provide a smooth canvas for polish.
- Cleanse: Wash your hands and ensure nails are free from oils or lotion. Wipe with an alcohol-based cleanser or nail polish remover to remove any residue.
Step 2: Apply Base Coat
Apply one layer of your favorite base coat. Let it dry completely. This protects your nails and helps prevent staining, especially if you’re using dark colors.
Step 3: Apply Your Base Ombre Color (Optional but Recommended)
If you’re doing a nude or pastel ombre, you might want a sheer, even base color. Apply one or two thin coats of your lightest shade (e.g., nude, sheer pink). Let it dry fully.
Step 4: Create the Ombre Effect with a Sponge
This is where the magic happens!
- Cut your sponge: Cut a makeup sponge into a rectangular piece, about 1-2 inches long.
- Apply polish to sponge: Apply stripes of your chosen colors directly onto the sponge. For a classic nude-to-white, apply a stripe of nude and a stripe of white, slightly overlapping them. For other ombres, place your colors side-by-side from darkest to lightest, working from the tip downwards.
- Press and Blend: Gently press the sponge onto your nail, starting from the cuticle and rolling it slightly towards the tip. You may need to apply more polish to the sponge and repeat this process a few times to build the gradient.
- Repeat on all nails: Do one nail at a time or do both index fingers, both middle fingers, etc., to avoid the polish drying too much.
Step 5: Refine the Blend and Clean Up Edges
Once you have the basic gradient, you might need to soften the lines.
- Soften Lines: If the transition is too harsh, you can use a clean section of the sponge with just a tiny bit of the lighter color to gently dab over the transition line, softening it further. A small brush dipped in nail polish remover can also be used to gently feather the colors together.
- Clean Up: Dip a small brush or cotton swab in nail polish remover and carefully clean up any polish that got onto your skin around the nail. This step is crucial for a professional finish.
Step 6: Apply Top Coat
Once your ombre design is dry and you’re happy with the blend, apply a generous layer of top coat. Make sure to cap the free edge (paint a little bit along the tip of the nail) to help prevent chipping. A glossy top coat will really make the colors pop and the gradient look smooth.
Step 7: Hydrate with Cuticle Oil
After your top coat is completely dry, apply a drop of cuticle oil to each nail and massage it in. This nourishes your cuticles and adds a final touch of polish to your gorgeous new nails.
Advanced Stiletto Ombre Designs to Inspire You
Once you’ve mastered the basics, you can experiment with these more intricate and eye-catching designs:
1. Chrome Accents on Ombre
Add a touch of futuristic shimmer by incorporating chrome powder. A popular look is a nude or milky white ombre with a chrome powder applied over the blended area, giving it an ethereal, metallic sheen. You can also do a full chrome powder overlay on a subtle color ombre.
2. Glitter Placement
Instead of a full glitter fade, strategically place glitter. This could mean a concentrated amount of glitter just on the stiletto tip, a scattered effect over the gradient, or even a delicate line of glitter separating two colors in the ombre.
3. Dual-Tone Stiletto Ombre
This is a bold take where you might have two distinct colors that meet in an ombre effect. For example, a deep blue fading into a vibrant orange, or a hot pink fading into a lime green. This demands precise color choices and good blending skills.
4. French Ombre Stiletto
Combine the French manicure with ombre! Instead of a solid white tip, the tip of the stiletto begins with a soft white ombre that gradually fades into the nail bed. This is essentially a refined “Baby Boomer” stiletto.
5. Abstract Swirls and Lines
Once you’re comfortable with blending, add abstract elements. A pastel ombre can be adorned with delicate gold foil flakes, or a monochrome ombre can have thin, sharp white lines drawn across it for a modern art feel. You can find inspiration for abstract nail art from various design blogs and platforms, like those featured on Refinery29.
Table: Stiletto Ombre Color Palette Ideas
Choosing the right colors is key to achieving your desired look. Here are some popular and inspiring color combinations for stiletto ombre nails:
| Look/Vibe | Color Transition | Occasion/Style Notes |
|---|---|---|
| Classic Elegance | Nude to Creamy White | Perfect for weddings, formal events, or everyday sophistication. |
| Soft Romance | Baby Pink to Milky White (Baby Boomer) | Gentle and flattering, ideal for a sweet, feminine aesthetic. |
| Springtime Fresh | Peach to Pale Pink | Light, airy, and cheerful. Great for warmer seasons. |
| Ocean Breeze | Light Blue to Teal/Turquoise | Cool, refreshing, and vibrant. Suits beach vacations or casual chic. |
| Sunset Glow | Yellow to Orange to Pink | Bold and tropical. A statement look, fantastic for parties or summer trends. |
| Mystic Nights | Deep Purple to Navy Blue | Rich, deep, and enchanting. Suitable for evening wear or a sophisticated edge. |
| Monochrome Chic | Black to Charcoal to Grey | Modern, edgy, and versatile. Pairs well with almost any outfit. |
| Fiery Passion | Red to Orange to Yellow | Dramatic, hot, and attention-grabbing. For when you want your nails to make a statement. |
Maintaining Your Stiletto Ombre Nails
To keep your gorgeous stiletto ombre nails looking their best, a little maintenance goes a long way:
- Wear Gloves: Protect your nails from harsh chemicals and water when doing chores. Dishwashing and cleaning can chip polish and weaken nails.
- Moisturize: Regularly apply hand cream and cuticle oil. Healthy cuticles and skin make your manicure look polished and prolong its life.
- Avoid Using Nails as Tools: Resist the urge to use your nails to open cans, scrape things, or pick at labels. This can cause chips and breaks, especially on pointed stiletto shapes.
- Touch-Ups: For minor chips or fading, you can carefully apply a thin layer of top coat to refresh the shine. If the ombre blend starts to fade, you might be able to gently blend a little more color with a sponge or brush.
- Reshaping: If a nail loses its point or becomes uneven as it grows, carefully file it back into shape. Be gentle to avoid damaging the polish or nail.
Frequently Asked Questions (FAQ)
Q1: Can beginners really do stiletto ombre nails at home?
Absolutely! While it might take a little practice, stiletto ombre nails are achievable for beginners. The key is to start with simpler color palettes and focus on clear steps, using tools like makeup sponges to help with the blending.
Q2: What’s the best way to get a smooth ombre blend?
Using a dense makeup sponge is often the easiest method for beginners. Apply thin layers of polish and build the color gradually by dabbing. Ensure each layer is slightly dry before applying the next. Gel polish can also offer a smoother, self-leveling blend.
Q3: How do I prevent the stiletto shape from breaking?
Stiletto nails are inherently more prone to breaking due to their sharp tips and potential length. Ensure your nails are healthy and strong, use a good base and top coat, and be mindful of your hands. Avoid using your nails as tools and consider reinforcing them with a builder gel if you find they break easily, following guidance from nail care professionals.
Q4: Can I achieve stiletto ombre with regular nail polish, or do I need gel?
You can definitely achieve stiletto ombre nails with regular nail polish! Gel polish offers a more durable finish and can sometimes give a smoother blend due to its formula, but practice with regular polish will yield great results too. You’ll just need patience for drying times between coats.
Q5: How long do stiletto ombre nails typically last?
With proper application and care, regular nail polish stiletto ombre nails can last anywhere from 5-7 days before showing signs of wear. Gel polish ombre nails, on the other hand, can last 2-3 weeks.
Q6: What if my ombre blend isn’t perfect?
Don’t worry, a perfect blend often takes practice! You can often fix minor imperfections by gently dabbing the transition area


