Get stunning stiletto nail designs with rhinestones! Learn how to add sparkle and glam to your ultra-chic stiletto nails with essential tools and easy techniques. Perfect for beginners who want to elevate their manicure game.
Looking to add some serious bling and pizazz to your already fabulous stiletto nails? You’ve come to the right place! Stiletto nails, with their elegant, pointed shape, are a showstopper on their own, but adding rhinestones can take them to a whole new level of glamour. If you’ve ever admired those sparkling nails and thought, “I could never do that!” – think again! We’re going to break down stiletto nail design ideas with rhinestones into simple, achievable steps. Get ready to shine brighter than ever!
This guide is designed to make rhinestone nail art accessible to everyone, no matter your experience level. We’ll cover everything from the essential tools you’ll need to the best ways to apply rhinestones so they stay put and look absolutely breathtaking. Let’s dive into the dazzling world of stiletto nails and rhinestones, and you’ll be creating your own masterpiece in no time!
We’ll start with the absolute must-have items. Then, we’ll walk through the application process step-by-step. Finally, we’ll explore some of the most popular and breathtaking stiletto nail design ideas with rhinestones. So grab your favorite polish, and let’s get ready to sparkle!
Why Stiletto Nails & Rhinestones are a Match Made in Heaven
There’s something undeniably chic about stiletto nails. Their dramatic, elongated shape naturally draws attention and conveys sophistication. Think of them as the perfect canvas for adding extra flair. When you combine this elegant silhouette with the sparkle of rhinestones, you create a manicure that’s not just a polish job, but a true work of art.
Rhinestones offer an immediate way to add texture, dimension, and that irresistible touch of glamour. They catch the light beautifully, making your hands the center of attention. For anyone looking to express their personality and add a touch of luxury to their everyday look, stiletto nails adorned with rhinestones are an incredible choice. They give you a chance to experiment with bolder styles and feel a little extra special with every move you make.
This combination is popular because it strikes a perfect balance: the stiletto shape provides a strong, elegant foundation, while rhinestones add the playful, eye-catching details. It’s versatile, too! Whether you’re heading to a special event or just want to brighten your day, rhinestone stiletto nails can be customized to fit any occasion and personal style.
Your Rhinestone Stiletto Nail Arsenal: Essential Tools
Before we start sticking, let’s talk tools! Having the right equipment makes all the difference. Don’t worry, you don’t need a professional salon setup to achieve stunning results. Here’s what you’ll want to gather:
- Nail Polish or Gel Polish: Your base color is key! Choose shades that complement your rhinestone colors or provide a striking contrast.
- Top Coat & Base Coat: Essential for nail health and shine, and for making your rhinestones stick.
- Rhinestones: These come in countless shapes, sizes, and colors. Start with a variety pack to see what you love!
- Tweezers: Fine-tipped tweezers are your best friend for picking up and placing tiny rhinestones precisely.
- Wax Pencil or Dotting Tool: These tools help you transfer the rhinestones from their packaging to your nail with ease. (A wax pencil is great for picking them up, and a damp dotting tool can help place them.)
- Nail Glue or Rhinestone Adhesive Gel: For a strong hold, especially for larger or heavier embellishments. Some top coats can also hold smaller gems.
- Small Brush/Applicator: For picking up and placing small gems.
- Clear Acrylic Powder (Optional): Can be used with liquid monomer to “cap” rhinestones for extra durability once placed.
- Rubbing Alcohol or Nail Cleanser: To ensure your nails are clean and free of oils before application.
Having these items prepped will make your rhinestone application smooth and enjoyable. It’s like having the right brushes for an artist – they enable your creativity!
| Tool | Primary Use | Tips for Beginners | Best For |
|---|---|---|---|
| Fine-Tipped Tweezers | Picking up and placing small rhinestones. | Grip gently to avoid dropping tiny gems. Look for angled tips for better visibility. | All rhinestone sizes. |
| Wax Pencil | Picking up flat-backed rhinestones. | Gently press the tip onto the stone; it will stick. If it’s not picking up, the wax might be too old or dry. | Flat-backed rhinestones, especially smaller ones. |
| Dotting Tool (damp end) | Placing rhinestones and dabbing adhesive. | Moisten the tip slightly to pick up gems. Use it to nudge stones into place. | All rhinestone sizes; works well with adhesive. |
| Nail Glue/Adhesive Gel | Securing rhinestones to the nail. | Apply a small bead. Too much can flood the nail. | Larger, heavier, or oddly shaped rhinestones; for long-lasting hold. |
Step-by-Step: Applying Rhinestones to Your Stiletto Nails
Ready to add some sparkle? Follow these easy steps for beautiful rhinestone stiletto nail designs!
Step 1: Prepare Your Canvas
Clean your nails thoroughly. Buff them gently to remove any shine and oils. Apply a base coat to protect your natural nail and help your polish adhere better. Let it dry completely.
Step 2: Apply Your Base Color
Apply 1-2 coats of your chosen nail polish or gel polish. Make sure each coat is completely dry before moving on. If you’re using gel polish, cure it according to the product instructions under a UV/LED lamp.
Step 3: Plan Your Design
This is where the fun begins! Decide where you want your rhinestones to go. Will it be a full flood of sparkle, a delicate accent, an outline, or a pattern? You can apply rhinestones while your polish is wet (for quick application on regular polish and less secure hold) or use adhesive for a stronger bond. For longevity, especially with gel polish, using a specific rhinestone adhesive or a bead of top coat is recommended.
Step 4: Apply Adhesive (If Needed)
If you’re using nail glue or a rhinestone adhesive gel, apply a small dot or thin line exactly where you want your rhinestone(s) to go. If you’re using top coat with gel polish, apply a small amount of uncured gel where the rhinestone will sit. Be precise!
Step 5: Pick Up & Place Your Rhinestones
Using your tweezers, wax pencil, or dotting tool, carefully pick up a rhinestone. Gently place it onto the adhesive or wet polish on your nail. Press down lightly to ensure it adheres well.
For collections of rhinestones, sometimes it helps to pick up a stone, place it, and then use your dry dotting tool or a toothpick to nudge it perfectly into place next to others.
Step 6: Secure Your Sparkle
For Regular Polish: As soon as the polish is still slightly tacky, try placing your rhinestones. You can then carefully brush a tiny bit of top coat around each rhinestone (not over it, unless it’s a specific rhinestone top coat). This locks them in place.
For Gel Polish: If you used a bead of uncured gel, carefully place your rhinestone. Then, cure the nail under your UV/LED lamp. Once cured, you can apply a fine bead of top coat around the base of the rhinestone to further secure it and smooth the surface. Be careful not to cover the rhinestone itself, as this will dull its sparkle. Cure again if you add this extra layer of top coat.
Using Nail Glue/Adhesive Gel: Apply the glue/gel, place the rhinestone, and let it dry completely according to the product instructions. Some professionals like to “cap” these with a thin layer of builder gel or acrylic for ultimate durability, but this takes practice.
Step 7: Final Top Coat (Optional but Recommended)
Once all your rhinestones are firmly in place and any adhesive or gel has cured, you can carefully apply a final layer of top coat. Be very careful to avoid flooding over your rhinestones, as this can make them lose their sparkle. You can use a fine-tipped brush to apply top coat only on the nail surface around the gems. If using gel, cure one last time.
Stiletto Nail Design Ideas with Rhinestones: Sparkle & Shine!
Now for the creative part! Stiletto nails are incredibly versatile for rhinestone designs. Here are some ideas to get your inspiration flowing:
1. The Classic French Tip Sparkle
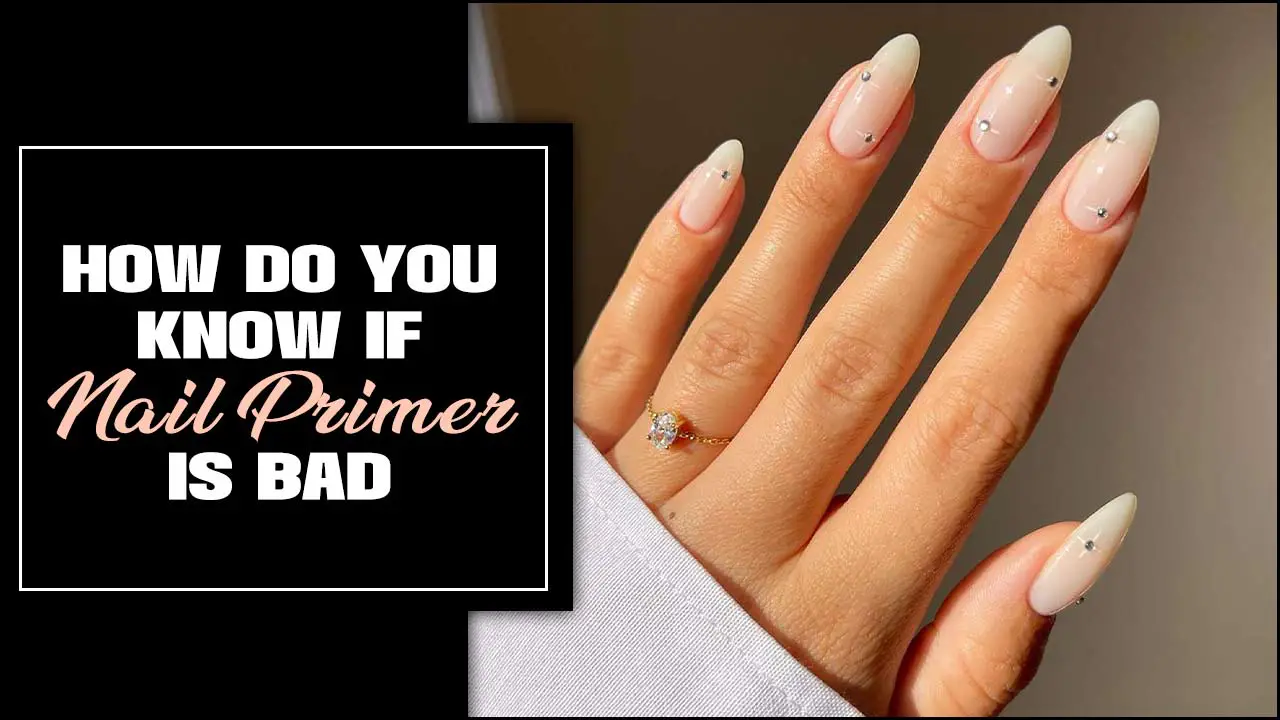
Elevate the timeless French manicure by adding rhinestones to the tips. You can place a single rhinestone at the apex of each free edge, or line the entire tip with tiny crystals for an ultra-glamorous look. This is a sophisticated way to incorporate bling.
2. Accent Nail Allure
Choose one nail (often the ring finger) to be your statement piece. Cover it entirely with rhinestones in a gradient or a full sparkle. You can use different sizes and colors of stones to create depth and interest. The other nails can be a solid complementary color.
3. Full Rhinestone Coverage
Why stop at one nail? For maximum impact, cover all your stiletto nails in rhinestones. This is a bold choice perfect for special occasions. Consider using the same color and size for a cohesive look, or mix it up with a playful pattern.
4. Geometric Patterns & Lines
Stiletto nails provide a perfect shape to create geometric designs. Use rhinestones to form clean lines, triangles, squares, or even intricate patterns on your nails. This polished look is surprisingly easy to achieve with careful placement.
5. Ombre Sparkle
Combine the popular ombre effect with rhinestones. Start with a cluster of rhinestones at the cuticle or the tip, and have them fade out towards the other end of the nail, blending seamlessly with your ombre polish.
6. Single Gem Statement
Sometimes, less is more. A single, well-placed, larger crystal (like a Swarovski or a faceted gem) at the base or tip of each stiletto nail can be incredibly elegant and striking. It adds just enough sparkle without being overwhelming.
7. Floral or Swirl Motifs
Get creative! Arrange smaller rhinestones to form delicate flowers, leaves, or flowing swirls. These intricate designs require a bit more patience but yield stunning results, transforming your nails into miniature art pieces.
| Design Style | Rhinestone Types Recommended | Application Area | Overall Effect |
|---|---|---|---|
| French Tip Sparkle | Small to medium round rhinestones, crystal AB. | Along the free edge of the nail. | Elegant and sophisticated glamour. |
| Accent Nail Flood | Mixed sizes and shapes (round, pear, marquise). | Full coverage on one or two nails. | Bold statement, eye-catching focal point. |
| Geometric Lines | Small, uniform round rhinestones. | Forming outlines, grids, or diagonal stripes. | Modern, precise, and polished. |
| Ombre Fade | Small round rhinestones, graduating in size. | Starting dense at one end and thinning out. | Subtle shimmer that blends into the polish. |
| Single Gem Accent | Larger, faceted crystals, statement gems. | At the cuticle, the apex of the tip, or centered on the nail bed. | Minimalist chic, subtle luxury. |
| Floral/Swirl Motifs | Tiny to small round rhinestones, sometimes tiny teardrops or leaves. | Arranged in freehand patterns. | Intricate, delicate, and artistic. |
Tips for Longevity and Preventing Rhinestone Mishaps
We all want our beautiful rhinestone stiletto nails to last! Here are some tips to keep your sparkle in place:
- Prep is Key: Always start with clean, dry, and oil-free nails. This ensures the best adhesion for polish and rhinestones.
- Don’t Skimp on Base Coat: A good base coat protects your nail and creates a smooth surface for polish.
- Proper Adhesive Use: Use just enough nail glue or adhesive gel. If you use too much, it can flood the nail and look messy, or even cause your rhinestones to lift. If using top coat with gel, ensure it’s a thick consistency or use a dedicated rhinestone gel.
- Seal Around the Edges: Once your rhinestones are applied and cured, you can use a fine-tipped brush to carefully apply a thin layer of top coat around the base of each rhinestone. This helps to further secure them and prevent snagging. Be very careful not to flood the top of the rhinestone itself, as this will dull its shine.
- Avoid Harsh Chemicals: Try to protect your nails from harsh cleaning products or solvents. Wear gloves when doing chores!
- Gentle Filing: If you need to file your nails, be extremely careful around embellished areas. Consider filing in one direction rather than sawing back and forth, and avoid filing directly over the rhinestones.
- “Capping” with Gel/Acrylic: For ultimate durability, especially on nails that see a lot of action or for larger embellishments, consider layering a thin coat of builder gel or acrylic around the rhinestones and over the nail service. This creates a protective bubble. This technique is best learned from professional tutorials or a nail tech, as improper application can ruin the design.
- Consider Rhinestone Types: Some rhinestones are coated for durability (like those with an “AB” finish that adds an iridescent rainbow effect). While beautiful, these coatings can sometimes be more prone to wear than clear crystals. For maximum longevity, seek out high-quality crystals.
Choosing the Right Rhinestones for Your Stiletto Designs
The world of rhinestones can seem a bit overwhelming at first, but choosing the right ones is part of the fun! Here’s a quick guide:
- Material: Most rhinestones are made of glass or plastic. Glass rhinestones tend to have more sparkle and depth, especially higher-quality ones like Swarovski crystals. Plastic ones are lighter and more affordable, great for beginners and large designs.
- Backing:
- Flat-backed (hot fix or no-hotfix): These are the most common for nail art, adhering directly to the nail surface or adhesive.
- Pointed-backed: Less common for nails, as they require a specific adhesive or enamel to set them.
- Shapes: The classic round shape is versatile. But you can also find pear-drop, marquise, square, star, heart, and even tiny accent shapes. Mixing shapes can add interesting texture.
- Colors & Finishes: Clear crystals are timeless. “AB” (Aurora Borealis) crystals have a rainbow shimmer that’s very popular. You’ll also find them in every color imaginable, as well as metallic finishes.
- Sizes: Rhinestones are often measured in “ss” (stone size) numbers, like ss3, ss5, ss10, etc. Smaller numbers mean smaller stones. Having a range of sizes allows for creating gradients, outlines, and filling spaces effectively.
For beginners, starting with a mixed pack of small to medium-sized, flat-backed, clear or AB round rhinestones is a great way to experiment. You can find these readily available online or at beauty supply stores.
Frequently Asked Questions (FAQ)
Q1: How do I get rhinestones to stay on my nails longer?
A1: Ensure your nails are clean and oil-free. Use a strong nail glue or rhinestone adhesive gel. For gel polish, use a bead of uncured gel and cure thoroughly. Applying a thin layer of top coat around the base of the rhinestones (not over them) after they’re set, and curing again, also helps seal them in. Protecting your nails with gloves during chores is also crucial!
Q2: What’s the easiest way to pick up tiny rhinestones?
A2: A wax pencil is fantastic for picking up flat-backed rhinestones – the wax helps them adhere to the pencil tip. Fine-tipped tweezers are also a must-have. For very tiny gems


