Stiletto nail design ideas with diamonds are the ultimate way to add instant glam and a touch of luxury to your manicure. These dazzling designs are surprisingly easy to achieve and perfect for making a statement for any occasion.
Hey nail lovers! Ever look at those stunning, sparkling nails and think, “Wow, I wish I could do that?” You’re in the right place! Stiletto nails are naturally dramatic and elegant, and adding diamonds takes them to a whole new level of fabulous. Whether you’re a complete beginner or just looking for some fresh inspo, we’re going to break down how to get that essential glam. Get ready to make your fingertips shine!
Why Stiletto Nails + Diamonds = Pure Glamour
Stiletto nails are known for their sharp, tapered shape, mimicking the heel of a stiletto shoe. This elegant silhouette already screams sophistication. When you introduce diamonds – whether they’re tiny rhinestones, Swarovski crystals, or even larger statement gems – you’re not just adding sparkle; you’re adding dimension, texture, and an undeniable allure. It’s a combination that’s both bold and incredibly chic, perfect for turning heads and boosting your confidence.
Getting Started: Your Diamond Stiletto Toolkit
Before we dive into the beautiful designs, let’s make sure you have the right tools. Don’t worry, it’s not complicated! Having these handy will make your diamond stiletto journey so much smoother and more enjoyable.
Essential Tools for Diamond Stiletto Nails:
- Nail File: For shaping your nails into that perfect stiletto point.
- Nail Glue or Strong Top Coat: To securely attach your diamonds. A strong, non-wipe top coat is often best for longevity.
- Tweezers: Precision is key! Fine-tipped tweezers are a lifesaver for picking up and placing small diamonds.
- Rhinestones/Crystals: Choose a variety of sizes and shapes for maximum impact or stick to one for a minimalist sparkle.
- Gel Polish and UV/LED Lamp (Optional but Recommended): For a durable, high-shine finish that makes diamonds pop.
- Clear Top Coat: To seal everything in and add that glossy finish.
- Dotting Tool or Wax Pencil: For picking up and precisely placing diamonds, especially smaller ones.
Diamond Stiletto Design Ideas for Every Occasion
Now for the fun part! Let’s explore some dazzling stiletto nail design ideas featuring diamonds. We’ll cover everything from subtle accents to full-on Blingdom.
1. The Classic Single Sparkle
Best for: Beginners, subtle elegance, everyday wear.
This is the perfect entry point into the world of diamond stiletto nails. It’s understated yet incredibly effective. Simply apply your base color, let it dry, and then use a tiny dot of nail glue or a dab of your strong top coat on one nail (often the ring finger) near the cuticle. Carefully place a single, beautiful crystal using your tweezers or dotting tool. Seal it with a top coat, being careful not to flood the crystal.
2. The Diagonal Drip
Best for: Adding a modern twist, accent nail glamour.
Imagine a stream of diamonds cascading down your nail. For this look, you’ll create a diagonal line of small to medium-sized diamonds across one or two nails. Start placing them from the tip of the nail down towards the cuticle, or vice-versa, in a slightly staggered pattern to mimic a drip. This design adds a dynamic feel to your stilettos.
3. The Full-Couture Tip Sparkle
Best for: Making a statement, special events, ultimate glamour.
This is for those who want to go all out! Cover the entire tips of your stiletto nails with an array of diamonds. You can use one size of crystal for a uniform look or mix different sizes for a more textured, opulent feel. This takes a bit more patience, but the result is absolutely breathtaking – pure runway glamour.
4. The French Tip Facelift
Best for: A sophisticated, updated classic.
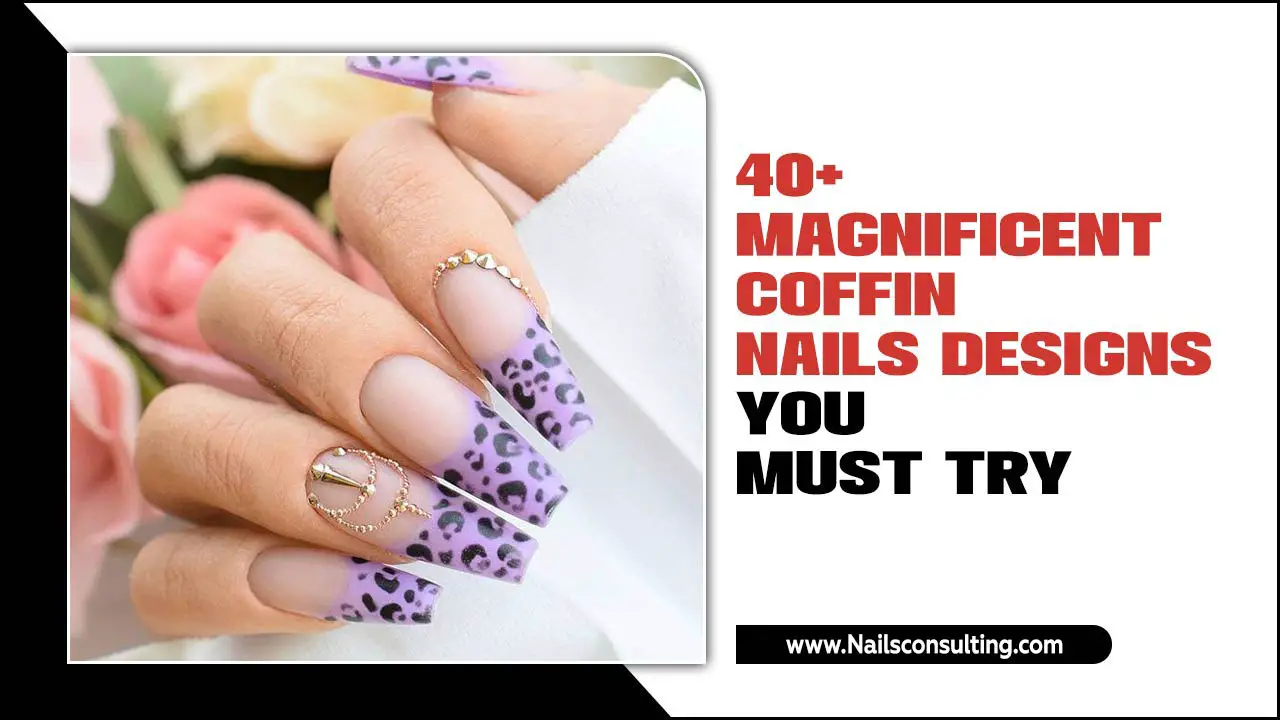
Give the traditional French manicure a diamond makeover! Instead of a white tip, create a thin, sparkling tip using tiny diamonds or a fine glitter mixed with gel. You can also place a small cluster of diamonds at the apex of the smile line. This is a chic way to wear diamonds without being overpowering.
5. Geometric Gem Placement
Best for: Modern, minimalist glamour, artistic flair.
Think lines, grids, and specific shapes. Use diamonds to create geometric patterns on your nails. A single line of diamonds running up the center of the nail, a small cluster forming a triangle, or outlining a negative space design can be incredibly striking. This design is all about precision and clean lines.
6. Gradient Glamour
Best for: A soft, fading sparkle effect.
Create a fading effect with your diamonds. Start with a dense cluster of diamonds at the base or tip of the nail and gradually use fewer diamonds as they move up or down, creating a beautiful ombre sparkle. This technique looks stunning with iridescent or AB (Aurora Borealis) coated crystals.
7. The Full Nail Encrustation (Advanced)
Best for: The ultimate showstopper, experienced nail artists.
This is where you cover almost the entire nail surface with diamonds. It’s a labor of love that results in a fully encrusted, dazzling masterpiece. This usually requires a strong builder gel or acrylic to adhere and build up the surface for the gems. It’s a sure way to make your stiletto nails unforgettable.
Tips for Application and Longevity
Applying diamonds to stiletto nails is an art, but with a few insider tips, you can ensure your bling stays put and looks flawless.
Application Steps:
- Prep Your Nails: Start with clean, dry, and properly shaped stiletto nails. Ensure your base coat and color coats are fully cured and have no sticky residue (unless you’re using a gel top coat, which will have a tacky layer).
- Choose Your Adhesive: For regular polish, a strong nail glue or a thick, non-wipe top coat works best. For gel manicures, use your gel top coat. Apply a small bead of adhesive where you want to place the diamond.
- Place Your Diamond: Using fine-tipped tweezers or a wax pencil, carefully pick up the diamond and gently press it into the adhesive. Wiggle it slightly to ensure it’s adhered.
- Build Your Design: Continue placing diamonds according to your chosen design. Work in small sections to prevent adhesive from drying out before you place the gems.
- Seal the Deal: Once your design is complete and the adhesive is dry, carefully apply a top coat around the diamonds, making sure not to cover their facets. For gel nails, cure under your lamp. For regular polish, let it dry completely. If you’re worried about the edges lifting, you can use a tiny brush to apply a bit more top coat along the base of each gem.
Keeping Your Bling Intact: A Pro Guide
We’ve all been there – a beautiful diamond manicure, and then poof, a gem is gone! Here’s how to make your diamond stilettos last:
- Use Quality Adhesives: Invest in good nail glue or a high-quality gel top coat specifically designed for nail art.
- Don’t Flood the Gems: When applying top coat, avoid getting it on the surface of the diamonds, as this can dull their shine. Brush carefully around them.
- Be Gentle: Avoid harsh scrubbing, picking at things with your nails, or using them as tools. Think of your dazzling stilettos as delicate works of art!
- Consider Builder Gel: For full encrustations or frequently lost gems, a layer of builder gel applied strategically can provide extra security. You can learn more about builder gels and their uses on resources like essie.com’s guide to gel polish, which also touches on application techniques transferable to enhancements.
- Regular Checks: A quick once-over each day can help you spot and fix any loose diamonds before they fall off completely.
Diamond Types to Consider for Your Stilettos
The type of diamond or crystal you choose can dramatically change the look and feel of your stiletto nail design. Here’s a quick rundown:
| Diamond Type | Description | Best For |
|---|---|---|
| Rhinestones (Glass/Acrylic) | Most common, affordable, available in countless colors and finishes. | Beginner designs, full coverage, experimenting with color. |
| Swarovski Crystals | High-quality, renowned for their brilliant sparkle and precision cutting. Often have AB coating for iridescent effect. | Luxury accents, statement nails, maximizing sparkle and shine. |
| Flat-Back Gems | Designed with a flat underside for easy adhesion to the nail surface. Less likely to snag. | Most nail art applications, especially for designs that require precise placement. |
| 3D Charms/Jewels | Larger, often multi-dimensional pieces that sit on top of the nail. | Statement pieces, focal points on accent nails. |
| Caviar Beads | Tiny metallic or resin beads used to create texture and subtle bling. | Creating textured effects, accents for French tips, subtle sparkle. |
Color Combinations That Pop with Diamonds
While diamonds are naturally dazzling, pairing them with the right nail polish color can elevate your stiletto design even further. Consider these pairings:
- Classic Red: A deep, classic red with strategically placed diamonds provides a timeless, glamorous look perfect for a night out.
- Nude/Beige: A sophisticated nude base makes diamonds stand out with an elegant, understated feel. It’s chic and professional.
- Black: Black and diamonds are a match made in heaven. This combo is inherently edgy and opulent, creating a dramatic contrast
- Deep Jewel Tones: Emerald green, sapphire blue, or amethyst purple create a rich, velvety backdrop that makes light-reflecting diamonds truly sparkle.
- Pastels: Soft pinks, baby blues, or lavenders paired with crystals offer a romantic, delicate, and dreamy aesthetic.
- Metallic Finishes: Silver, gold, or rose gold polish can complement or enhance diamond accents, creating a cohesive metallic gleam.
Styling Your Diamond Stilettos: Confidence is Key
Part of the magic of stiletto nail design ideas with diamonds is how they instantly elevate your whole look. These nails are a statement piece, so let them shine! You don’t need to overburden yourself with flashy jewelry when your nails are already doing the talking.
Think about the occasion: for a formal event, a simple diamond accent on each nail might be perfect. For a night out with friends, a more elaborate design on an accent finger will add that extra flair. Remember, confidence is the best accessory. Wear your sparkling stilettos with pride!
Frequently Asked Questions About Diamond Stiletto Nails
Q1: Are stiletto nails bad for your natural nails?
A: Stiletto nails themselves, if properly applied and maintained, are not inherently bad for your natural nails. The shape is created either by filing (if using your natural nails) or with extensions (acrylics or gels). The key is proper application, gentle filing, and avoiding forceful removal, which can cause damage to the natural nail plate.
Q2: How do I keep my diamonds from falling off my stilettos?
A: To keep diamonds on your stilettos, use a strong nail glue or a good quality gel top coat. Apply the adhesive precisely where the diamond will sit. After application, gently brush a top coat around the base of the diamond, being careful not to cover its facets. Allow ample drying/curing time. For extra security on gel nails, consider using a tiny bit of builder gel at the base of the diamond.
Q3: Can I do diamond stiletto nails at home?
A: Absolutely! With the right tools like fine-tipped tweezers, nail glue or gel top coat, and a selection of rhinestones, you can create beautiful diamond stiletto nail designs at home. Start with simple designs and gradually work your way up to more intricate patterns as you gain confidence and practice.
Q4: What kind of diamonds are best for nail art?
A: For nail art, flat-back rhinestones and crystals are generally the easiest to work with. They adhere well to the nail surface. Swarovski crystals offer superior long-lasting sparkle but are more expensive. Acrylic or glass rhinestones are affordable alternatives. The size and shape depend on your desired design – smaller ones are great for lines and accents, while larger ones make good focal points.
Q5: How long do diamond stiletto nails usually last?
A: The longevity of diamond stiletto nails can vary. If applied perfectly over a gel manicure with a strong top coat, they can last for 2-3 weeks. If applied over regular polish, they might last from a few days to about a week, depending on how careful you are. Proper application and avoiding rough activities are crucial for maximizing wear time.
Q6: Can I put diamonds directly onto my natural stiletto-shaped nails?
A: Yes, you can apply diamonds directly onto natural nails shaped into stilettos. Ensure your natural nails are strong and healthy, or consider using a nail strengthener. Use a good quality nail glue or a durable top coat. If you want them to last longer, applying them over a gel polish base and top coat is highly recommended, as gel provides a more robust surface for adhesion.
Conclusion
There you have it! Stiletto nail design ideas with diamonds are your passport to effortless glamour. We’ve explored everything from the simplest single sparkle to more elaborate designs, armed you with the essential tools, and shared pro tips for application and longevity. Remember, nail art is all about self-expression and having fun. Don’t be afraid to experiment with different colors, diamond shapes, and placements to find what makes you feel fabulous.
Whether you’re heading to a special event or just want to add a touch of luxury to your everyday, diamond stilettos are a brilliant choice. So grab your tweezers, pick out your favorite gems, and get ready to let your nails do the talking. Happy dazzling!

