Stiletto marble nails are a stunning blend of elegant shape and artistic pattern, offering a sophisticated yet trendy look that’s surprisingly achievable for beginners. This guide breaks down how to get this designer manicure at home with simple steps and essential tips.
Hey, nail lovers! Are you ready to add some serious glam to your fingertips? We’re diving into the world of stiletto marble nails, and trust me, it’s as gorgeous as it sounds. Sometimes, getting that perfect salon look at home can feel a little daunting, especially with fancy designs. But don’t worry, I’m here to guide you. We’ll make these chic, eye-catching nails a reality for you, no pro experience needed! Get ready to transform your nails into miniature works of art.
What Exactly Are Stiletto Marble Nails?
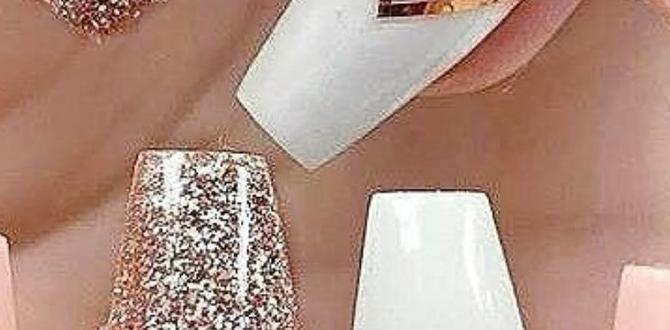
Let’s break it down: “Stiletto” refers to the nail shape – long, tapered, and pointed like a stiletto heel. It’s a dramatic and elegant silhouette that elongates the fingers beautifully. “Marble” is the nail art technique that mimics the swirling, veined patterns of real marble stone. Think of those luxurious countertops and elegant sculptures, but miniaturized and perfected for your nails!
So, stiletto marble nails are essentially nails shaped into a stiletto with intricate, stone-like marbling designs painted on them. It’s a truly sophisticated and high-fashion look that can be customized with endless color combinations. It’s the perfect way to make a statement, whether for a special occasion or just to brighten your everyday.
Why You’ll Love Stiletto Marble Nails
There are so many reasons why this trend has captured the hearts of nail art enthusiasts everywhere:
- Chic and Sophisticated: The combination of the elegant stiletto shape and the luxurious marble pattern creates an undeniably high-end look.
- Versatile: From classic black and white to vibrant jewel tones or soft pastels, you can play with colors to match any outfit or mood. Marble doesn’t have to be beige!
- Unique: No two marble designs are exactly alike, ensuring your nails are a truly one-of-a-kind masterpiece.
- Eye-Catching: Prepare for compliments! These nails are a guaranteed conversation starter and a fantastic way to express your personal style.
- Surprisingly Achievable: With the right tools and a little practice, you can recreate this stunning effect at home.
Essential Tools for Stiletto Marble Nails
Gathering the right supplies is the first step to DIY success. Don’t be intimidated by the list; many of these are standard nail art items you might already have!
For Shaping the Stiletto:
- Nail Clippers: To trim your nails down to a manageable length before shaping.
- Nail File (100/180 grit): A coarser grit file (around 100-150) is great for shaping, while a finer grit (200-240) is good for smoothing.
- Emery Board: For refining the shape and smoothing edges.
- Optional: Nail Buffer: To give your natural nail a smooth surface if not using press-ons or tips.
- Optional: Nail Tips or Forms: If you want to add length and help achieve the perfect stiletto shape without relying solely on your natural nail.
- Nail Glue (if using tips): Strong adhesive for securing tips.
- Cuticle Pusher: To gently push back cuticles for a clean canvas.
- Alcohol Pads or Acetone: To clean and dehydrate the nail surface.
For Creating the Marble Effect:
- Base Coat: Crucial for protecting your natural nail and helping polish adhere.
- Base Color Polish: The main color for your marble (e.g., white, nude, black).
- Accent Color Polishes: Lighter and darker shades to create the marble veins (e.g., grey, gold, pink, blue).
- Top Coat: To seal the design, add shine, and protect your manicure.
- Fine-Tipped Nail Art Brush or Toothpick/Dotting Tool: For drawing the delicate veins. A toothpick is a great beginner-friendly option!
- Clean-up Brush: A small, stiff brush (like an old eyeliner brush) dipped in acetone for tidying up polish mistakes around the cuticle.
- Acetone or Nail Polish Remover: For cleaning your brush and for the clean-up brush.
- Paper Towel or Palette: A disposable surface to mix colors or place drops of polish for marbling.
Step-by-Step Guide to Stiletto Marble Nails
Let’s get started! Follow these simple steps to create your own show-stopping stiletto marble nails at home.
Step 1: Prep Your Nails for Shaping
Start with clean, dry nails. Push back your cuticles gently using a cuticle pusher. If you have any old polish on, remove it completely. If you’re using nail tips for added length, this is where you’ll apply them according to the product’s instructions, using nail glue to securely attach them to your natural nail.
Step 2: Shape the Stilettos
This is where the magic of the stiletto shape happens.
- Trim: If you’re shaping your natural nails, trim them down so they are slightly longer than you want the final stiletto to be.
- File: Using your nail file (start with a coarser grit if needed, then move to finer), begin filing the sides of your nail inwards towards the center. Imagine drawing two straight lines from the top corners of your nail down to a single point at the free edge.
- Refine: Gently file the tip to create a clean point. Take your time and file in one direction to avoid weakening the nail.
- Smooth: Use a finer grit file or an emery board to smooth any rough edges.
- Buff (Optional): Lightly buff the surface of your nail to create a smooth canvas.
Pro Tip: It’s sometimes easier to achieve the sharp point by filing slightly longer and then carefully refining the tip. For a perfectly uniform look, nail tips or forms are highly recommended for beginners. Check out resources like Allure’s guide on perfect manicures for general nail prep tips.
Step 3: Apply Base Coat and Base Color
Apply one layer of your clear base coat to protect your nails and ensure a smooth finish. Let it dry completely. Then, apply your chosen base color (the dominant shade for your marble) in two thin, even coats. Make sure each coat is fully dry before applying the next. This solid color will be the background for your marble veins.
Step 4: Create the Marble Effect
This is the fun part! There are a few ways to achieve a marble look, but here’s a popular and beginner-friendly method:
- Prepare Your Palette: On a piece of paper towel or a clean palette, place a couple of small drops of your accent color polish directly next to each other. You might use a lighter shade and a slightly darker shade, or black and white.
- Draw Veins: Dip the very tip of your fine-tipped nail art brush, toothpick, or dotting tool into one of the accent colors. Gently draw thin, wispy lines onto your base-colored nail. Think of how veins naturally appear in stone – they aren’t perfectly straight!
- Add Depth: Now, dip your brush/tool into the second accent color and draw more wispy lines, letting them intersect and overlap with the first set. Aim for an organic, natural flow. You can also add a tiny touch of a third color if you like!
- Blend (Gentle Swirls): Using a clean toothpick or the tip of your brush, gently swirl the lines together. Don’t over-swirl, or you’ll muddy the colors. The goal is to create a marbled pattern, not a blended mess!
- Repeat: Work on one nail at a time so the polish doesn’t dry out too quickly.
Beginner Tip: Start with simple lines and subtle swirls. If you make a mistake, quickly wipe it off with a brush dipped in acetone and try again. It’s okay if your first attempt isn’t perfect – practice makes progress!
Step 5: Add Details and Refine
Once you’re happy with the initial marble pattern, you can add a few more delicate lines here and there to enhance the “veining.” Don’t overdo it! Let the design dry for a few minutes. Then, take your clean-up brush dipped in acetone and carefully tidy up any polish that has gotten onto your skin or cuticles. This step makes a huge difference in achieving a professional finish.
Step 6: Apply Top Coat
Once the marble design is completely dry to the touch, apply a generous layer of your clear top coat. Make sure to cap the free edge of your nail by running the brush along the tip. This seals in the design, adds a beautiful glossy shine, and helps prevent chipping. Apply a second coat after the first is mostly dry for extra durability.
Pros and Cons of Stiletto Marble Nails
Like any trend, there are things to consider:
| Pros | Cons |
|---|---|
| Extremely stylish and fashionable. | The stiletto shape can be prone to breaking if not cared for properly. |
| Elongates the fingers for a graceful look. | The pointed tip can catch on things and may require a period of adjustment. |
| Marble art is unique and allows for endless color creativity. | Can be time-consuming to achieve intricate marble designs at home. |
| Looks stunning on various skin tones and with different outfits. | Requires maintenance, especially if you have active hobbies or work with your hands frequently. |
| Relatively easy to maintain with proper care. | The pointed shape might not be comfortable or practical for everyone’s lifestyle. |
Tips for Maintaining Your Stiletto Marble Nails
To keep your gorgeous stiletto marble nails looking their best for as long as possible:
- Wear Gloves: Always wear gloves when doing household chores, washing dishes, or using cleaning products. Harsh chemicals can break down polish and weaken nails.
- Be Gentle: Avoid using your nails as tools for opening cans or scraping. The stiletto shape can be more delicate at the tip.
- Moisturize: Keep your cuticles and hands hydrated with cuticle oil and hand lotion. Healthy cuticles make your manicure look cleaner and prolong its life. Apply cuticle oil daily.
- Carry a Small File: If you notice a chip or a snag on the tip, gently file it smooth to prevent further damage.
- Touch-ups: If the shine fades or you get a small chip, a quick application of top coat can revive your manicure.
- Safe Removal: When it’s time to remove them, soak your nails in acetone rather than trying to pry them off. This is especially important if you used nail glue or gel polish. For gel, consider visiting a salon for safe removal.
Color Combinations to Try
The beauty of marble is its adaptability. Here are some popular and stylish color combinations to inspire you:
- Classic & Chic: White or cream base with black and grey veins. Add a touch of metallic silver or gold polish for a touch of luxury.
- Elegant Neutrals: Beige or nude base with soft brown, cream, and subtle gold veins. Perfect for a sophisticated everyday look.
- Bold Statement: Black base with vibrant jewel tones like emerald green, sapphire blue, or deep ruby red veins.
- Soft & Dreamy: Pastel pink or lilac base with white and baby blue veins, perhaps with a hint of pearlescent shimmer.
- Monochromatic Magic: Use different shades of the same color family – for example, a light grey base with charcoal and white veins.
- Metallic Mix: A nude or white base with swirling veins of rose gold, silver, or holographic glitter polish.
Don’t be afraid to experiment! You can add glitter accents, small rhinestones, or even use metallic foils for an extra pop. The possibilities are truly endless, allowing you to create a look that’s uniquely you.
Frequently Asked Questions about Stiletto Marble Nails
Q1: How long does it take to do stiletto marble nails at home?
For beginners, it can take anywhere from 45 minutes to 1.5 hours, depending on your speed and the complexity of the design. Once you get more practice, you’ll likely find it quicker!
Q2: Can I do marble nails without special brushes?
Absolutely! A toothpick, a straightened-out paperclip, or even the tip of a fine-tipped pen can work wonders for creating marble veins. Just ensure you have a steady hand and clean them between color applications.
Q3: Is the stiletto shape difficult to maintain?
The stiletto shape requires a little more care than a traditional round or square nail, as the pointed tip can be more prone to snagging or breaking. Being mindful of what you do with your hands and avoiding using your nails as tools is key.
Q4: How do I prevent my marble design from looking messy or muddy?
The secret is to use very little polish on your brush/tool and to swirl very gently and minimally. Work one nail at a time, and allow the initial veins to set slightly before adding more. If you accidentally over-blend, it’s okay to wipe it off with acetone and start fresh on that nail!
Q5: What type of polish works best for marble effect?
Cream finish polishes (traditional nail lacquer) work wonderfully for marble effects. Gel polishes can also be used and offer more durability and shine, but they require a UV/LED lamp to cure. Water marbling techniques involve dropping polish into water, which yields a different, often more intricate, marbled effect but requires specific techniques and products. For beginners, painting the marble on the nail surface is generally the easiest approach.
Q6: Can I achieve stiletto marble nails on short nails?
While the stiletto shape is most dramatic on longer nails, you can certainly file shorter nails into a tapered point. The marble effect is also achievable on shorter lengths, making it a versatile design. However, for the classic stiletto look, adding length with nail tips or extensions is recommended.
Q7: Where can I find inspiration for stiletto marble nail designs?
Websites like Pinterest, Instagram, and beauty blogs are fantastic resources. Search for hashtags like #stilettonails, #marblenails, and #nailart for endless ideas. Reputable beauty magazines and even architectural websites can also provide color palette and pattern inspiration!
<h2 id

