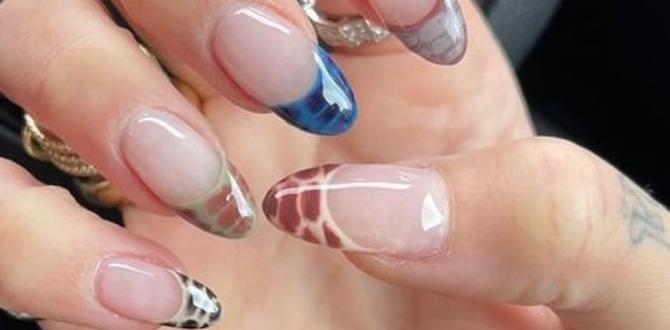
Stiletto black nails are a timeless and chic choice that instantly elevates any look. This guide will show you how to achieve this sophisticated style effortlessly, even if you’re a beginner. Get ready for stunning, sharp nails that exude confidence and ease!
—
Dreaming of nails that are both dramatically stylish and surprisingly easy to pull off? Stiletto black nails are the answer! They’re a classic for a reason, offering a sleek, sophisticated vibe that works for almost any occasion. But sometimes, diving into a new nail shape or color can feel a bit daunting. You might wonder if you can really achieve that sharp stiletto point at home or if black polish is too bold. Don’t worry! This guide is here to demystify the process. We’ll walk through everything you need to know, from shaping your nails to applying that perfect deep black. Get ready to fall in love with your new favorite manicure. Let’s make your nails the ultimate style statement, the easy way.
Why Stiletto Black Nails Are a Style Game-Changer
Black is more than just a color; it’s an attitude. When paired with the elegant, sharp silhouette of a stiletto shape, it becomes a powerful style statement. Stiletto black nails are incredibly versatile. They can add a touch of edgy glamour to a casual outfit or provide a sophisticated finish to evening wear. The length and sharp point of the stiletto shape elongate the fingers, creating a visually slimming and graceful effect. Plus, black is universally flattering and never goes out of style. It’s a look that says you’re confident, put-together, and have a keen eye for timeless fashion.
For beginners, the idea of achieving a perfect stiletto shape might seem intimidating. You might be picturing complicated filing techniques or worrying about breakage. The good news is that with the right tools and a little patience, you can achieve salon-worthy results right at home. It’s about understanding the basic steps and using products that make the process smooth and forgiving. We’ll break down exactly how to get there, step-by-step, making it totally achievable.
Understanding the Stiletto Nail Shape
Before we dive into the how-to, let’s get acquainted with the stiletto nail shape. It’s characterized by its long, tapered sides that meet at a sharp, pointed tip. Unlike coffin nails (which have a flat, squared-off tip), stilettos are all about that dramatic point. This shape, when executed well, is incredibly striking and visually elongates the fingers.
There are a few variations:
- Classic Stiletto: The most common, with sides tapering to a sharp point.
- Almond Stiletto: A softer version where the point is less severe, blending into a more rounded tip. This can be a great starting point if you’re new to the stiletto look.
- Sculpted Stiletto: Often achieved with acrylics or gel, this shape can have more dimension and a very precise, sharp point.
For a beginner-friendly approach, we’ll focus on shaping your natural nails or using tips to achieve a classic stiletto. The key is patience and a gentle hand.
Gathering Your Stiletto Black Nail Essentials
To achieve flawless stiletto black nails, having the right tools makes all the difference. Think of this as your starter kit for nail perfection!
Essential Tools and Products:
- Nail File (Medium Grit): A good quality file is crucial for shaping. Look for one around 180-240 grit for natural nails.
- Nail Clippers: For trimming excess length before filing.
- Buffer Block: To smooth out any ridges and create a good surface for polish.
- Cuticle Pusher/Orange Stick: To gently push back your cuticles for a clean canvas.
- Top Coat: A must for shine, longevity, and protecting your color.
- Base Coat: Essential for preventing staining and helping polish adhere better.
- Black Nail Polish: Choose a high-quality formula for opaque coverage in one or two coats. Gel polish offers a longer-lasting finish if you have a UV/LED lamp.
- Optional: Nail Tips (Stiletto Shape): If you want added length or a more precise shape, stiletto nail tips are fantastic.
- Optional: Nail Glue (if using tips): A strong, reliable nail glue.
- Optional: Cuticle Oil: To nourish your cuticles after your manicure.
Having these items on hand means you’re ready to create your chic look without any last-minute dashes to the store. Investing in a few good quality items will serve you well for many manicures to come!
Step-by-Step Guide: Crafting Your Stiletto Black Nails
Let’s get to the exciting part! Follow these steps to create your stunning stiletto black nails. Don’t rush; enjoy the process. You’ve got this!
Step 1: Prep Your Natural Nails (or Apply Tips)
Start with clean, dry nails. If you have old polish on, remove it completely. Gently push back your cuticles with a cuticle pusher or orange stick. Avoid cutting them if you’re a beginner; pushing them back is safer and just as effective for a cleaner look.
If using nail tips:
Apply a small amount of nail glue to the underside of the tip where it will meet your natural nail. Press the tip firmly onto your natural nail for about 10-15 seconds until it adheres. Ensure it’s straight and centered. Repeat for all nails. Trim the tips to your desired starting length using nail clippers, leaving a little extra length for shaping.
Step 2: Shape Your Stilettos
This is where the magic happens! Take your nail file and start shaping. Keep your strokes smooth and deliberate.
- Visualize the Point: Imagine a line running from the side of your nail bed up to the center tip.
- File the Sides: Using your file at a slight angle, file one side of the nail (or tip) towards the center. Work from the edge of the nail (or tip) towards where you want the point to be. Use light, even strokes.
- Repeat on the Other Side: Do the same for the other side, meeting in the middle. Aim for a sharp, clean point.
- Refine the Tip: Once you have the basic point, use the file to gently smooth and sharpen the very tip. Be careful not to make it too sharp that it becomes prone to breaking.
- Check for Symmetry: Look at your nails from different angles to ensure both sides are even and the point is centered.
- Smooth Ridges: Use a buffer block to gently smooth out any rough spots on the nail surface and along the sides. This also helps polish adhere better.
Beginner Tip: If you find creating a sharp point difficult with your natural nails, consider starting with pre-shaped stiletto tips. They take a lot of the guesswork out of achieving the perfect silhouette.
Step 3: Apply Base Coat
Apply one thin layer of base coat to each nail. This protects your natural nails from staining (especially important with dark colors like black!) and provides a smooth surface for the polish to adhere to, helping your manicure last longer. Let it dry completely.
Step 4: The Black Polish Application
Now for the star of the show – the black polish!
- First Coat: Apply a thin, even coat of black nail polish. Start from the base of your nail and stroke towards the tip. For the sides, get close to the cuticle without touching the skin. Use three strokes for each nail: one down the center, and one on each side.
- Let It Dry Partially: Allow this first coat to dry until it’s no longer wet to the touch but still slightly tacky. This helps the subsequent coats adhere better and creates a smoother finish.
- Second Coat: Apply a second thin coat of black polish. This coat should provide full, opaque coverage. Again, work from base to tip with smooth, even strokes. If you see any streaks or unevenness, this second coat should even it out.
Pro Tip: If your black polish isn’t fully opaque after two coats, or if you want an extra-deep, almost patent-leather finish, apply a third thin coat. For gel polish users, follow your specific curing instructions after each coat.
Step 5: Seal with Top Coat
Once the black polish is dry (or cured, if using gel), it’s time for the top coat. This is crucial for shine, preventing chips, and adding that extra layer of protection to your beautiful stiletto shape.
- Apply Generously: Apply a good layer of top coat, making sure to cap the free edge of your nails. This means running the brush along the very tip of your nail to seal it. This is a key step in preventing tip wear and chipping.
- Add a Second Layer (Optional): For extra durability and a super glossy finish, you can apply a second layer of top coat after the first has dried for a minute or two.
Step 6: Final Touches
Once the top coat is completely dry (this can take longer than you think!), gently clean up any smudges around your cuticles with a small brush dipped in nail polish remover. Finish by applying a drop of cuticle oil to each nail and massaging it in. This hydrates your skin and makes your manicure look polished and complete.
Maintaining Your Stiletto Black Nails
To keep your stiletto black nails looking sharp and stylish, a little maintenance goes a long way. Remember, the stiletto shape is more delicate than other nail shapes, so handling them with care is key.
Tips for Longevity:
- Wear Gloves: When doing household chores, especially washing dishes or cleaning, wear rubber gloves to protect your nails from harsh chemicals and excessive moisture, which can weaken polish and nails.
- Avoid Using Nails as Tools: Resist the urge to use your sharp nail tips to pry things open or scrape surfaces. This is the quickest way to chip or break them. Learn more about nail care and preventing damage from the American Academy of Dermatology Association.
- Reapply Top Coat: Every 2-3 days, apply another layer of top coat. This refreshes the shine and adds an extra protective layer, significantly extending the life of your manicure.
- Keep Cuticle Oil Handy: Regularly applying cuticle oil helps keep the skin around your nails hydrated. Dry cuticles can peel and look untidy, detracting from the overall polished look.
- Be Mindful of Your Shape: When filing or buffing minor imperfections, always file in one direction to avoid weakening the nail structure.
With a little attention, your stiletto black nails will stay looking fabulous for as long as possible. It’s all about gentle care and consistent touch-ups!
Stiletto Black Nails: Pros and Cons
Like any nail trend, stiletto black nails come with their own set of advantages and disadvantages. Understanding these can help you decide if they’re the right choice for you and how to make the most of them.
| Pros | Cons |
|---|---|
| Chic & Sophisticated: Instantly elevates any outfit, offering a glamorous and polished look. | Delicate Shape: The sharp point can be prone to chipping or breaking, especially if not carefully maintained or if used for manual tasks. |
| Elongates Fingers: The stiletto shape is known for making fingers appear longer and more slender. | Requires Length: Best achieved on medium to long nails for the shape to be pronounced and not overly fragile. |
| Timeless Color: Black is a classic, versatile color that never goes out of style and suits everyone. | Potential for Staining: Dark polishes like black can sometimes stain natural nails if a base coat isn’t used. Using a good base coat and cuticle oil can help prevent this. |
| Durable with Gel/Acrylic: When applied professionally using gel or acrylic, stiletto nails can be quite durable and long-lasting. | Can Be High Maintenance: Due to their delicate nature, they might require more frequent touch-ups or careful handling compared to shorter, squarer nail shapes. |
| Self-Expression: Offers a bold way to express personal style and confidence in your look. | Learning Curve for Shaping: Achieving the perfect stiletto shape at home can take practice and patience for beginners. |
Frequently Asked Questions About Stiletto Black Nails
Here are some common questions beginners have about rocking the stiletto black nail look!
Q1: Can I achieve stiletto nails with short natural nails?
A1: It’s challenging to achieve a true stiletto shape with very short natural nails. The shape relies on length to taper towards the point. If your natural nails are short, using stiletto nail tips and glue is the best way to get the desired shape and length.
Q2: How long should my stiletto nails be?
A2: The ideal length depends on your personal preference and lifestyle. For a pronounced stiletto shape, you’ll need some length on the nail bed. Start with a moderate length that feels comfortable and manageable for you. Longer lengths are definitely achievable and look dramatic, but require more care.
Q3: Will black polish stain my nails?
A3: Dark polishes, especially black, can potentially stain natural nails if not applied correctly. Always use a good quality base coat before applying any color. Allow the base coat to dry completely before applying your black polish. After removing the polish, if you notice slight yellowing, a nail whitening treatment or cuticle oil can help.
Q4: How do I prevent my stiletto nails from breaking?
A4: To avoid breakage, focus on gentle handling. Wear gloves for chores, avoid using your nails as tools, and be mindful of your surroundings. Regularly reapplying top coat adds a protective layer, and keeping your nails and cuticles moisturized can help maintain their strength and flexibility.
Q5: How often should I reapply the top coat?
A5: For maximum durability and shine, reapply a layer of top coat every 2-3 days. This simple step helps seal in the color, prevents chips, and keeps your manicure looking fresh and glossy for longer.
Q6: Can I do stiletto black nails at home, or is it only for salons?
A6: Absolutely! You can achieve beautiful stiletto black nails at home. The key is having the right tools, taking your time with the shaping process, and using good quality polish. Using pre-shaped stiletto tips can also make the process much easier for beginners.
Q7: What if I accidentally make my stiletto point too sharp?
A7: If your point becomes too sharp and you’re worried about it snagging or breaking easily, you can gently file it down with a fine-grit file. Aim for a slightly softer point rather than a needle-sharp one. It’s better to err on the side of slightly less sharp for durability.
Conclusion
There you have it! Stiletto black nails are a powerful yet surprisingly achievable way to express your personal style and add a touch of effortless glamour to your look. From understanding the elegant shape to mastering the application of that perfect deep black polish, you’re now equipped with the knowledge and confidence to create this stunning manicure at home. Remember, practice makes perfect, so enjoy experimenting with the shaping and application. With the right tools, a little patience, and these easy-to-follow steps, your stiletto black nails will be turning heads for all the right reasons. So go ahead, embrace the drama, the sophistication, and the undeniable chicness of stiletto black nails. Your fabulous new look awaits!

