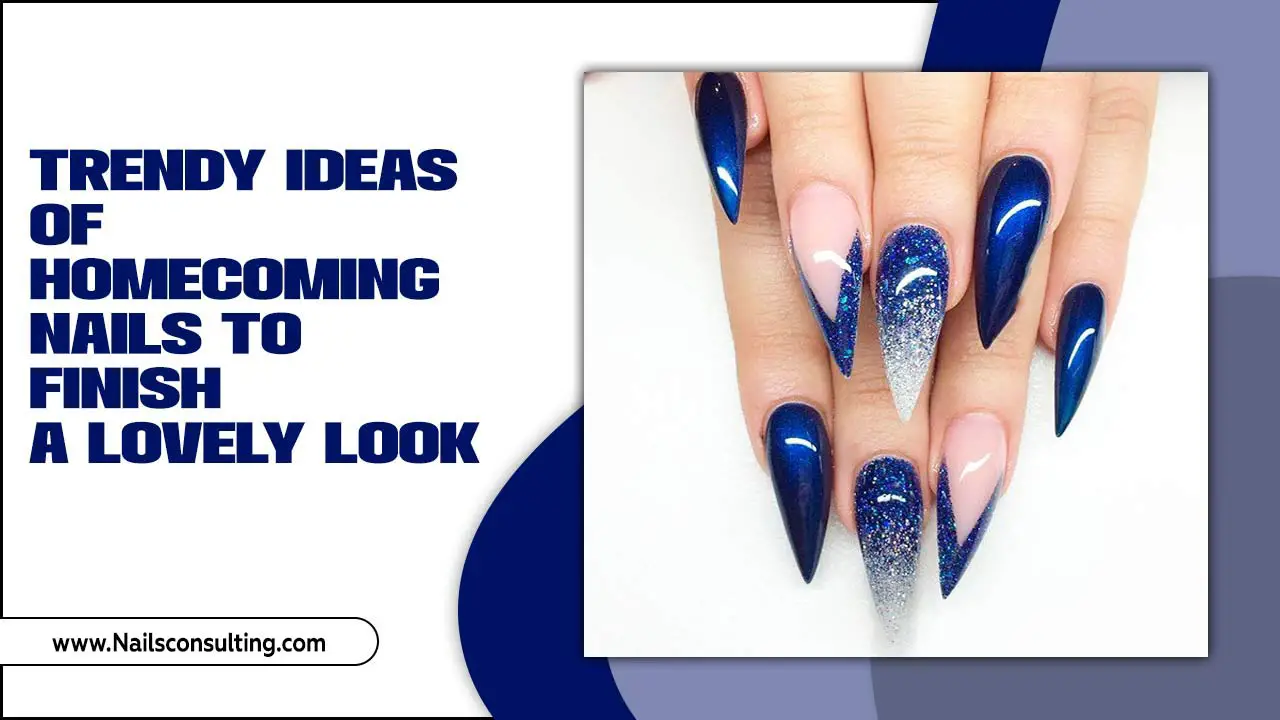
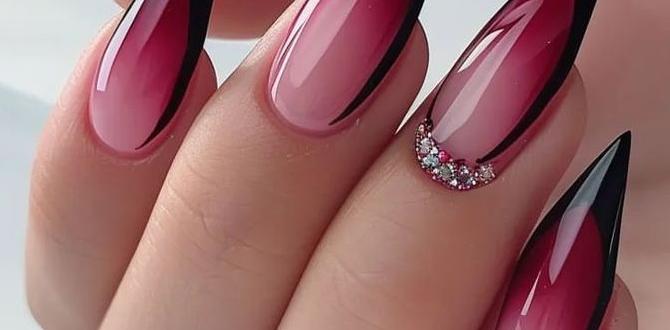
Stiletto aura nails are a trendy, gradient manicure where color “bleeds” from the center outwards on a stiletto-shaped nail. This guide breaks down achieving this eye-catching look, from prepping your nails to mastering the aura effect, making it simple for beginners to create this stunning style at home.
Hey nail lovers! Ever seen those gorgeous nails that seem to glow from within, with colors blending so smoothly? That’s the magic of aura nails, and when you put them on a chic stiletto shape, you get stiletto aura nails! They look super fancy, but guess what? You absolutely can create this dreamy effect yourself, even if you’re just starting out. Don’t worry about complicated steps; we’re going to walk through it together, making it fun and easy. Get ready to give your nails that captivating, radiant glow!
What Are Stiletto Aura Nails?
Stiletto aura nails are a vibrant fusion of two popular nail trends: the dramatic stiletto shape and the ethereal aura effect. The stiletto shape is characterized by its long, pointed tip, resembling a stiletto heel. The aura effect, on the other hand, is a technique where a gradient of color radiates outwards from a central point on the nail. When combined, stiletto aura nails create a mesmerizing, almost hypnotic look, with bold colors appearing to float and blend seamlessly on the sharp, elegant canvas of the stiletto nail.
This trend has taken the nail world by storm because it offers a unique blend of bold style and delicate artistry. The sharp lines of the stiletto shape provide a perfect structure for the soft, diffused colors of the aura, making each nail a miniature work of art. It’s a look that commands attention and expresses a bold, creative personality, all while maintaining an undeniable sense of chicness.
Why Stiletto Aura Nails? The Appeal Explained
So, what makes stiletto aura nails so captivating? It’s a combination of factors that speak to modern beauty trends and personal expression:
- Trendsetting Style: This look is undeniably runway-ready and Instagram-famous. Wearing stiletto aura nails means you’re on top of the latest nail art.
- Versatile Color Palettes: From soft pastels to vibrant neons and deep jewel tones, the aura effect can be achieved with virtually any color combination. You can match them to your outfit, your mood, or a specific vibe.
- Elegance Meets Edge: The stiletto shape inherently adds a touch of sophistication and drama. The aura effect softens this edge with its dreamy, blended colors, creating a perfect balance.
- Visual Depth: The gradient nature of the aura effect gives your nails a sense of dimension. It draws the eye and creates an illusion of depth that’s instantly fascinating.
- Expressive Canvas: Nails are a fantastic way to show off your personality. Stiletto aura nails offer a striking and artistic canvas for this self-expression.
- Flattering on All Skin Tones: With careful color selection, aura nails can be incredibly flattering. By choosing shades that complement your skin tone, you can enhance your natural radiance.
They’re more than just a manicure; they’re a statement! Whether you’re heading to a special event or just want to add a pop of color and glamour to your everyday look, stiletto aura nails deliver.
Gathering Your Stiletto Aura Nails Toolkit
Before we dive into the fun part, let’s make sure you have everything you need for a successful stiletto aura nail session. Having the right tools makes all the difference, ensuring a smoother application and a more professional-looking finish. No need to break the bank; many of these are everyday nail essentials!
Essential Tools and Products:
- Nail File & Buffer: For shaping your natural nails or applying tips, and for smoothing the nail surface.
- Nail Clippers: If you’re working with natural nails that need to be trimmed first.
- Cuticle Pusher/Orange Stick: To gently push back your cuticles for a clean nail bed.
- Base Coat: Prepares the nail for polish and helps prevent staining.
- Top Coat: Seals your design and adds shine.
- Nail Polish Colors: You’ll need at least two, ideally three or more, colors for the aura effect. Consider a bright base color and lighter or darker shades for the gradient.
- Stiletto Nail Tips (Optional): If you want to achieve the stiletto shape without growing your natural nails, these are a must.
- Nail Glue: If you are using nail tips.
- Nail Polish Remover: For any oops moments or to clean up edges.
- Lint-Free Wipes: To avoid fuzzy residue on your nails.
- Small Makeup Sponge or Cosmetic Wedge: This is your key tool for creating the aura gradient. A dense sponge works best.
- Clear Nail Polish or Gel Top Coat: To “melt” the colors together and create the gradient.
- Tweezers (Optional): For holding the sponge pieces if they get too messy.
- Patience and Creativity! The most important ingredients!
Choosing Your Colors: A Quick Guide
The beauty of aura nails lies in color! Here’s a little table to get your creative juices flowing:
| Aura Effect Type | Color Combinations | Vibe |
|---|---|---|
| Sunrise/Sunset | Orange, yellow, pink, or a touch of red. | Warm, vibrant, energetic. |
| Ocean Breeze | Blues, teals, greens, with a hint of white. | Calm, serene, refreshing. |
| Galactic Glow | Deep purples, blues, black, with silver or white accents. | Mysterious, cosmic, bold. |
| Pretty in Pink/Lavender | Various shades of pink or purple, maybe with white. | Soft, feminine, dreamy. |
| Neon Pop | Bright neons (e.g., lime green, hot pink, electric blue). | Fun, edgy, attention-grabbing. |
Don’t be afraid to experiment! The best color combinations are the ones you love.
Step-by-Step: Creating Your Stiletto Aura Nails
Ready to transform your nails? Follow these simple steps to achieve that stunning stiletto aura effect. We’re going to break it down so it’s super easy to follow along!
Step 1: Nail Prep is Key!
Start by getting your nails ready. This makes sure your polish lasts longer and looks its best.
- Cleanse: Remove any old polish with nail polish remover and a lint-free wipe.
- Shape: If you’re using natural nails, trim them to your desired length. Then, use your nail file to shape them into a stiletto point. File in one direction to avoid weakening the nail. If you’re using stiletto nail tips, this is where you’d glue them on securely now.
- Cuticle Care: Gently push back your cuticles with a cuticle pusher or orange stick.
- Buff: Lightly buff the surface of your nail to create a smooth canvas. This helps polish adhere better.
- Clean Again: Wipe your nails with a bit more remover to remove any dust.
Step 2: Apply Your Base Coat
A good base coat is essential for a long-lasting manicure. It protects your natural nail from staining and provides a sticky surface for your color coats to adhere to. Apply one thin layer and let it dry completely.
Step 3: Choose Your Base Color (Optional but Recommended)
For a more vibrant aura or a consistent background, consider applying one thin coat of a lighter or complementary color as your base. For example, if you’re doing a pink and orange aura, a pale peach or white base can make the colors pop more dramatically. Let this dry completely.
Step 4: Prepare Your Ombre Sponge
This is where the magic begins! Grab your cosmetic sponge or wedge. You’ll want to cut a small piece, about the size of your fingernail, or even smaller. Some people prefer to use a fresh piece for each nail to avoid color mixing. You can also lightly dampen the sponge with water and squeeze out the excess; this can help create a softer gradient effect.
Step 5: Apply Your Aura Colors
This step requires a bit of artistry and patience, but it’s totally doable!
- Color Application: On a clean surface (like a piece of foil or a tile), apply stripes of your chosen nail polish colors next to each other. Think about where you want the brightest part of your aura to be. For a classic aura, you might put your lightest color in the middle. So, if doing a pink-to-orange gradient, put pink in the center and orange on either side.
- Sponge & Dab: Gently press the edge of your prepared sponge into the polishes on your palette, picking up both colors.
- Transfer to Nail: Lightly and repeatedly dab the sponge onto the center of your nail. The goal is to transfer the color in a gradient. You’re building the color layer by layer.
- Build Intensity: Continue dabbing, building up the color intensity. You may need to reload your sponge with polish. Focus the most intense color in the center, letting it naturally diffuse outwards.
- Clean Up Edges: As you go, paint can get on your skin. Use an old brush dipped in nail polish remover to carefully clean up the edges around your nail for a crisp finish.
Pro Tip: If your gradient isn’t as smooth as you’d like, don’t worry! You can go back with a clean piece of sponge and lightly dab over the edges where the colors meet. Or, for a more blended look, apply a thin layer of clear polish or gel top coat over the dried colors on the nail and then gently dab with the sponge again to help meld them together. This is a key technique for achieving that seamless aura flow!
Step 6: Refine and Add Shine
Once you’re happy with the color gradient, let it dry thoroughly.
- Second Coat (If Needed): If the color isn’t as vibrant as you want, apply a second thin coat using the same sponging technique. Let it dry.
- Top Coat Magic: Apply a generous layer of your favorite top coat. This seals in the design, adds incredible shine, and helps the colors meld even further for that smooth, ethereal look. Make sure to cap the free edge of your nail (the tip) to prevent chipping.
Step 7: Final Touches
Once your top coat is completely dry, you can gently buff the surface if you notice any imperfections, or just admire your handiwork! If you’re using gel polish, cure each layer under a UV/LED lamp as per the product instructions.
Stiletto Aura Nails: Tips for Perfecting the Look
Achieving the perfect stiletto aura nail is a journey, and a few extra tips can make it a smoother, more enjoyable adventure. These little tricks will help you overcome common challenges and elevate your DIY nail game.
- Practice Makes Perfect: If this is your first time trying the aura technique, don’t expect flawless results immediately. Practice on paper or a nail wheel first to get a feel for how the colors blend and how much pressure to use with the sponge.
- Layering is Key: Don’t try to get the full intensity of color in one go with the sponge. Build it up gradually with multiple thin dabs. This gives you more control and results in a smoother gradient.
- The “Melt” Method: As mentioned before, a thin layer of clear polish or gel top coat applied over the dried colors can be a game-changer. After applying this clear layer, immediately and lightly dab with your sponge. This helps to fuse the colors together beautifully and reduces harsh lines. This is a professional secret for seamless blends!
- Color Choice Matters: Lighter shades tend to be more forgiving for beginners when creating the aura effect. If you’re using darker colors, you might need a very light or white base to help the blend show up better.
- Sponge Texture: Different sponges yield different results. Experiment with makeup sponges, cosmetic wedges, or even small pieces of pore sponge. A denser sponge will give sharper color transfer, while a more porous one can create a softer diffusion.
- Stiletto Shape Maintenance: The stiletto shape is prone to breakage if not cared for. Always file in one direction and be mindful of the pointed tips. For extra durability, consider using gel polish or acrylics if you’re aiming for very long stilettos.
- Cleanliness for Longevity: Ensure your nails are completely clean and free of oils before applying polish. This is crucial for good adhesion and preventing lifting. The CDC recommends proper hand hygiene before and after any nail care, which also helps maintain a clean working environment.
- Don’t Forget the Sealing Top Coat: A good quality top coat is your best friend for extending the life of your manicure and keeping that aura looking vibrant.
Troubleshooting Common Stiletto Aura Nail Issues
Even with the best intentions, sometimes things don’t go exactly as planned. Don’t get discouraged! Here are some common issues and how to fix them:
Issue: Harsh Lines Where Colors Meet
Solution: This is probably the most common hurdle. The “melt” method with a clear top coat layer and a light re-dabbing with the sponge is your best bet. You can also use a small, dry brush to gently blend the edges where the colors meet. Another trick is to apply a sheer, iridescent top coat over the whole nail once everything is dry to unify the colors.
Issue: Colors Not Showing Up Vibrantly
Solution: You might need a better base color. Try a coat of pure white or a very light pastel shade as your base before applying the aura colors. Also, ensure you’re dabbing enough color onto the sponge and applying it with enough persistence on the nail. Building color in thin layers is key; you can always add more!
Issue: Sponge Leaving Uneven Texture
Solution: This can happen if the sponge is too dry or you’re pressing too hard. Try lightly dampening your sponge (and squeezing out excess water) or using a finer-textured sponge. Apply color with a light, stippling motion rather than a heavy press. A very forgiving top coat applied after the pattern is dry can often smooth out minor imperfections.
Issue: Polish Is Sticking to the Sponge, Not the Nail
Solution: Make sure your nail is slightly tacky from the base or color coat. If it’s too dry, the polish won’t transfer well. Also, ensure you aren’t using too much polish on the sponge initially. A little goes a long way when building up the gradient.
Issue: Stiletto Tip Snaps or Breaks
Solution: This is more about prevention. Ensure your nail tips are filed in one direction and avoid using them as tools. If you’ve used artificial tips, ensure they are properly glued and perhaps reinforced with a gel or acrylic overlay if you want extreme length and durability. For natural nails, maintain a consistent length and avoid sudden impacts. If a break occurs, a nail repair kit or careful filing might save the day, but sometimes it means a re-do.
Maintaining Your Stiletto Aura Nails
You’ve put in the work, and your stiletto aura nails look absolutely amazing! To keep them looking their best for as long as possible, here are a few maintenance tips:
- Wear Gloves: When doing household chores, washing dishes, or anything involving prolonged water exposure, wear rubber gloves. Water can weaken nail polish and potentially lift edges over time.
- Avoid Harsh Chemicals: Cleaning supplies can break down the polish and dry out your nails. Always protect your nails with gloves.
- Moisturize Regularly: Apply cuticle oil and hand lotion daily. This keeps your nails and the skin around them healthy and prevents dryness, which can lead to chipping or breakage.
- Be Gentle with Your Tips: Stiletto nails are inherently sharp and can snag. Be mindful of your pointed tips when reaching into pockets, bags, or even just typing.
- Top Coat Touch-Ups: If you notice your top coat is losing its shine after a week or so, you can apply another thin layer to revive the look and add extra protection.
- Avoid Using Nails as Tools: Never use your sharp stiletto tips to pry open things or scrape surfaces. This is a sure way to damage your beautiful manicure.
With proper care, your stiletto aura nails can stay stunning for a good one to two

