Quick Summary
Star French tips are a fun, sparkly twist on the classic French manicure. They add a dazzling star accent to the tip of your nail, perfect for special occasions or everyday glamour. This guide simplifies creating star French tips, making them easy for beginners to achieve a salon-worthy look at home.
Feeling a little “meh” about your current nail game? If you’re dreaming of a manicure that’s both chic and a little bit magical, you’re in the right place! The classic French manicure is elegant, but sometimes, we crave a touch of sparkle, right? That’s where star French tips come in. They’re the perfect blend of timeless style and playful flair, adding a little “wow” factor to your fingertips.
But maybe you’ve looked at pictures and thought, “That looks too hard for me!” I get it. Nail art can seem intimidating. The good news? Mastering star French tips is totally achievable, even if you’re just starting out. We’ll break it down into simple, easy-to-follow steps. Get ready to discover how you can create these stunning, essential nails right at home.
What Exactly ARE Star French Tips?
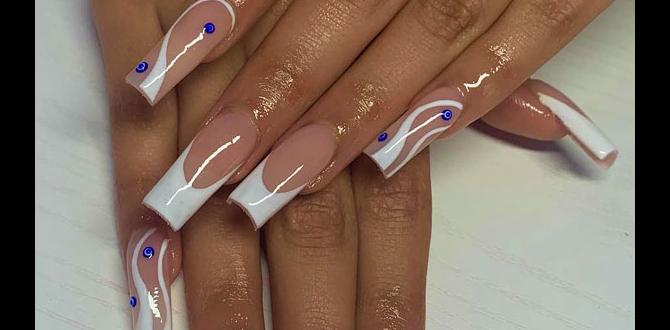
Think of the classic French manicure: a clean base, a white tip, and a smooth finish. Now, imagine adding a tiny, twinkling star right on that tip! That’s the magic of star French tips. It’s a subtle yet impactful detail that elevates the traditional look. Instead of a plain white stripe, you get a festive accent that catches the light and your eye.
These aren’t just for holidays or parties anymore! Star French tips can be your go-to for adding a bit of sparkle to your everyday. They’re versatile, letting you express your personality and add a touch of glamour without being over the top. Ready to learn how to make them yours?
Why Are Star French Tips So Essential?
Why do we love star French tips so much? It’s a combination of factors:
- Timeless with a Twist: They honor the enduring elegance of the French manicure while adding a modern, playful element.
- Versatility: They work for almost any occasion, from a casual day out to a formal event. A subtle shimmer can dress up any outfit.
- Confidence Booster: Beautiful nails can honestly make you feel more put-together and confident. A little sparkle goes a long way!
- DIY-Friendly Glamour: You don’t need to be a pro to achieve this look. With the right tools and a little practice, you can create salon-quality nails at home.
- Personal Expression: The size, color, and placement of the star can all be customized to your liking, making them uniquely yours.
Gathering Your Star French Tip Toolkit
Before we dive into the “how-to,” let’s make sure you have everything you need. Don’t worry; you probably already have some of these items, and the rest are easy to find:
Essential Nail Polish & Tools:
- Base Coat: Crucial for protecting your natural nails and helping polish adhere better.
- Your Nail Color Polish: This will be the base color for your nails. Nudes, soft pinks, or even sheer whites are popular choices.
- White or Color Polish for Tips: Your classic French tip color.
- Accent Polish: A glitter polish with small star-shaped glitter, or a metallic polish for drawing a tiny star.
- Top Coat: Seals everything in, adds shine, and extends the life of your manicure.
- Fine-Tipped Nail Art Brush or Dotting Tool: For precise application of the star detail. A very thin liner brush works wonders!
- Nail Polish Remover & Cotton Swabs/Pads: For cleaning up any mistakes and shaping your lines.
- Cuticle Pusher (Optional): To prep your nail beds nicely.
- Nail File & Buffer: For shaping and smoothing your nails.
Optional (But Helpful!) Items:
- Nail Stencils or Star Stickers/Decals: If freehand drawing isn’t your jam yet, these offer an easier way to get the star shape.
- Clean-up Brush: A small, flat brush dipped in remover for super clean edges around your cuticles.
Step-by-Step Guide to Stunning Star French Tips
Now for the fun part! Let’s get those nails looking fabulous. Remember to work in a well-lit area and be patient with yourself. Practice makes perfect!
Step 1: Prep Your Nails for Perfection
A great manicure starts with great prep. This is non-negotiable!
- Cleanse: Ensure your nails are clean and free from old polish. Wash your hands thoroughly.
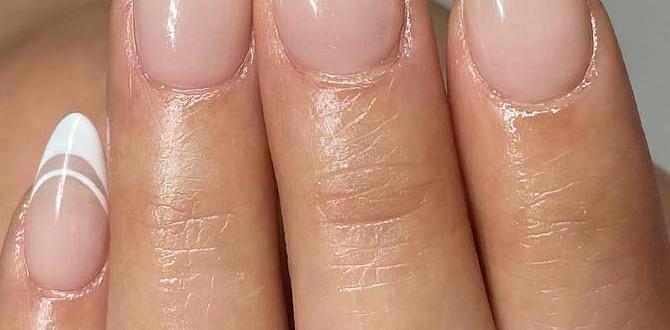
- Shape: File your nails to your desired length and shape. A classic square, squoval, or soft almond shape complements French tips beautifully.
- Buff: Gently buff the surface of your nails to create a smooth canvas. This also helps polish adhere better.
- Cuticle Care: Gently push back your cuticles if needed. Avoid cutting them, as this can lead to damage.
- Clean Again: Wipe your nails with nail polish remover to get rid of any dust or oils.
Step 2: Apply Your Base Coat
This is your nail’s protective shield! Apply one thin layer of base coat and let it dry completely. This prevents staining and gives your polish something to grip.
Step 3: Lay Down Your Base Color
Apply one or two thin coats of your chosen base nail polish (nude, pink, sheer white). Allow each coat to dry fully before applying the next. Patience here means a smoother finish!
Step 4: Create the French Tip
This is where the classic French manicure magic happens. There are a few ways to do this:
- Freehand: For the brave and steady-handed! Dip your fine-tipped brush into your white (or color) polish. Starting from one side of your nail, paint a curve across the tip. Connect with the other side. Aim for a smooth, even line.
- Using a Guide: You can use French tip guide stickers or even a regular band-aid with a hole cut out. Place the sticker just below where you want your tip to start, paint the tip, and carefully peel off the sticker while the polish is still slightly wet.
- Dotting Tool Method: Load a dotting tool with white polish and carefully draw the smile line.
Let this white tip layer dry completely. A fully committed dry here prevents smudging when you add the star!
Step 5: Add Your Dazzling Star
Here’s the showstopper! Choose your method for adding the star:
Method A: Using Glitter Polish with Star Glitter
- Dip your fine-tipped brush into the glitter polish. You want just a small amount of polish and a few star glitters on the tip.
- Carefully place the brush on the free edge of your white tip. Gently dab or lightly draw a small star shape. You might need to reposition the brush to form the points.
- Don’t worry if it’s not perfectly symmetrical! A little imperfection adds to the charm.
- If needed, use your brush to gently nudge the glitter stars into a star shape.
Method B: Drawing a Star with Metallic or Colored Polish
- Load your fine-tipped nail art brush with your metallic or colored polish.
- Lightly sketch a small star shape onto the white tip. Think small and dainty for a sophisticated look.
- You might need two thin coats to make the star pop. Let the first dry slightly before applying the second.
- It helps to practice drawing stars on a piece of paper first to get the feel for it!
Method C: Using Star Stickers or Decals
- Once your French tip is completely dry, gently pick up a star sticker or decal with tweezers.
- Carefully place it onto your white tip. Press down to ensure it adheres smoothly.
- If using a water-transfer decal, follow the package instructions (usually involving soaking in water).
This method offers the most precise star shape and is fantastic for beginners!
Step 6: Clean Up Any Mistakes
Mistakes happen! Grab a cotton swab or a clean-up brush dipped in nail polish remover. Carefully trace around your cuticle line and the base of your French tip to sharpen the edges and remove any stray polish. Precision is key here for that professional finish.
Step 7: Apply Your Top Coat
This is the grand finale! Apply one or two generous coats of your favorite top coat. Make sure to cap the free edge of your nails by swiping the brush along the very tip. This seals in your design, adds incredible shine, and prevents chipping, ensuring your star French tips last!
Step 8: Let It All Dry
Resist the urge to do anything with your hands for at least 15–20 minutes. For best results, allow your nails to cure for at least an hour before engaging in activities that could smudge them. Quick-dry drops or a fan can help speed this up!
Tips for Achieving Flawless Star French Tips
Want to take your star French tips from good to absolutely dazzling? Here are some pro tips:
- Thin Coats Are Key: Thicker polish is more prone to smudging and bubbling. Apply multiple thin layers instead of one thick one.
- Let Layers Dry: Seriously, this is the most important tip for avoiding smudges! Take your time between coats.
- Quality Tools Matter: Invest in a good quality fine-tipped brush or dotting tool. It makes a world of difference for detail work. Reputable beauty supply stores often have great options. According to beauty industry experts, the right tools significantly impact the outcome of intricate nail art.
- Practice Makes Progress: Don’t get discouraged if your first try isn’t perfect. Every time you do it, you’ll get better.
- Experiment with Colors: While white tips are classic, try a black base with silver stars, or a pastel base with holographic stars. The possibilities are endless!
- Star Size: For a chic look, keep the stars small and delicate. For a bolder statement, you can go slightly larger, but avoid overwhelming the nail.
- Placement: While the tip is traditional, consider off-center stars or tiny stars scattered along the smile line for a unique take.
Comparing Star Application Methods
Choosing the right method for adding your star detail can make all the difference. Here’s a quick comparison:
| Method | Ease for Beginners | Precision | Pros | Cons |
|---|---|---|---|---|
| Glitter Polish | Easy | Moderate | Quick application, buildable sparkle. | Can be chunky if too much is applied, hard to control exact shape. |
| Drawing with Polish | Moderate | High (with practice) | Full control over shape and color, very customisable. | Requires a steady hand and practice, can be time-consuming. |
| Stickers/Decals | Very Easy | Very High | Perfect, crisp shapes every time, fastest method. | Can sometimes lift at the edges if not sealed well, limited design options to what’s available. |
Maintaining Your Star French Tips
To keep your star French tips looking fresh and fabulous, follow these simple maintenance tips:
- Wear Gloves: When doing chores, especially washing dishes or cleaning, wear rubber gloves to protect your nails from harsh chemicals and prolonged water exposure.
- Avoid Using Nails as Tools: Don’t use your nails to scrape, pry, or open things. This is a quick way to chip or break them.
- Hydrate: Keep your hands and cuticles moisturized. Apply cuticle oil daily, especially before bed. This keeps your nails healthy and prevents the skin around them from looking dry and cracked.
- Touch Ups: If you notice a small chip or wear on the tip, you can carefully touch it up with polish and a fine brush, then reapply a thin layer of top coat.
- Reapplication: Most manicures last 1-2 weeks. When they start to look worn, it’s time to remove them and start fresh! Proper removal is key – never peel polish off. Use a good quality nail polish remover.
Frequently Asked Questions About Star French Tips
Q1: Can I do star French tips if I have short nails?
A1: Absolutely! Star French tips look adorable on short nails. Just make sure the star detail is scaled appropriately so it doesn’t overwhelm the nail bed. Smaller stars or subtle glitter work best on shorter lengths.
Q2: How do I prevent the white tip from looking streaky?
A2: Ensure you’re applying thin, even coats of your white polish. Let each coat dry slightly before the next. Using guides or stickers can also help create a cleaner, less streaky line.
Q3: What kind of polish works best for drawing the star?
A3: A good quality nail art polish with a fine brush or a metallic polish often works well. You want a polish that has good pigmentation and isn’t too thick or too watery.
Q4: How long do star French tips usually last?
A4: With proper application and care, star French tips can last anywhere from 7 to 14 days. The longevity depends on your nail type, how well you prepped, and how you treat your hands.
Q5: Can I do star French tips with gel polish?
A5: Yes! You can definitely achieve star French tips with gel polish. The process is similar, but you’ll need a UV/LED lamp to cure each layer. For the star detail, you can use gel art paints, fine glitter gels, or even carefully apply small foil or sticker decals before top-coating and curing.
Q6: How can I make my star French tips look more subtle for everyday wear?
A6: Opt for a sheer nude or pink base color. Instead of bright white tips, use a soft off-white or cream. For the star, use a fine glitter polish with a more subdued shimmer, or a metallic polish in a shade that matches your base.
Q7: My star glitter polish has big stars. How can I make them smaller?
A7: You can carefully use the tip of your nail art brush or a pair of tweezers to remove larger stars from the polish before applying it to your nail. Alternatively, you can use a brush to gently nudge and reshape the glitter on the nail itself into a smaller star shape before the polish dries.
A Wrap-Up on Your Fabulous Star French Tips
There you have it! Creating stunning star French tips is well within your reach. From selecting the perfect shimmer to mastering the delicate star detail, you’re now equipped to give your nails that extra sparkle and sophistication. Remember, the most important ingredients are patience, practice, and a willingness to have fun with your creativity.
Whether you choose the ease of stickers, the precision of drawing, or the sparkle of glitter polish, your star French tips are sure to turn heads. They’re a beautiful way to express your style and add a touch of magic to your day. So go ahead, grab your polishes, and get ready to shine!

