Want stunning stained glass effect nails? This guide breaks down how to achieve this beautiful nail art with a chic black outline, perfect for beginners. Get ready to create gorgeous, salon-worthy manicures right at home with simple steps and easy-to-find tools!
Imagine nails that look like intricate leaded glass windows, catching the light and turning heads. Stained glass effect nails are a dazzling trend that adds a touch of artistry and sophistication to any look. But if you’re new to nail art, the thought of recreating this intricate design might seem a bit daunting. Don’t worry! We’re here to show you that achieving this stunning effect is totally achievable. We’ll walk you through everything you need, from the best tools to a simple, step-by-step process. Get ready to decorate your fingertips with vibrant, translucent colors and elegant dark outlines, transforming your nails into miniature works of art!
What Are Stained Glass Effect Nails?
Stained glass effect nails are a nail art style that mimics the look of traditional stained glass windows. Think jewel-toned, translucent colors separated by dark, defined lines. These “lines” are typically black, creating a bold contrast that makes the vibrant colors pop. The translucent quality of the colors allows light to pass through, much like actual stained glass, giving your nails a beautiful, luminous glow. It’s a versatile art form that can be adapted to any color palette or style, from bold and bright to subtle and sophisticated.
Why Are Stained Glass Effect Nails So Popular?
This trend has surged in popularity for several reasons:
- Unique Aesthetic: It offers a distinct look that stands out from typical nail art. The combination of vibrant, translucent colors and sharp black lines is eye-catching and artistic.
- Versatility: You can customize the colors to match your outfit, mood, or season. Whether you love deep jewel tones for fall or bright neons for summer, stained glass nails can do it all.
- Chic Sophistication: Despite the bold colors, the clean lines and translucent effect can lend an air of elegance and refinement.
- Visually Interesting: The way the light interacts with the translucent polish creates a dynamic and engaging visual effect.
- DIY Friendly (with practice!): While it looks intricate, the technique is surprisingly adaptable for home manicures, especially with the right tools and a little patience.
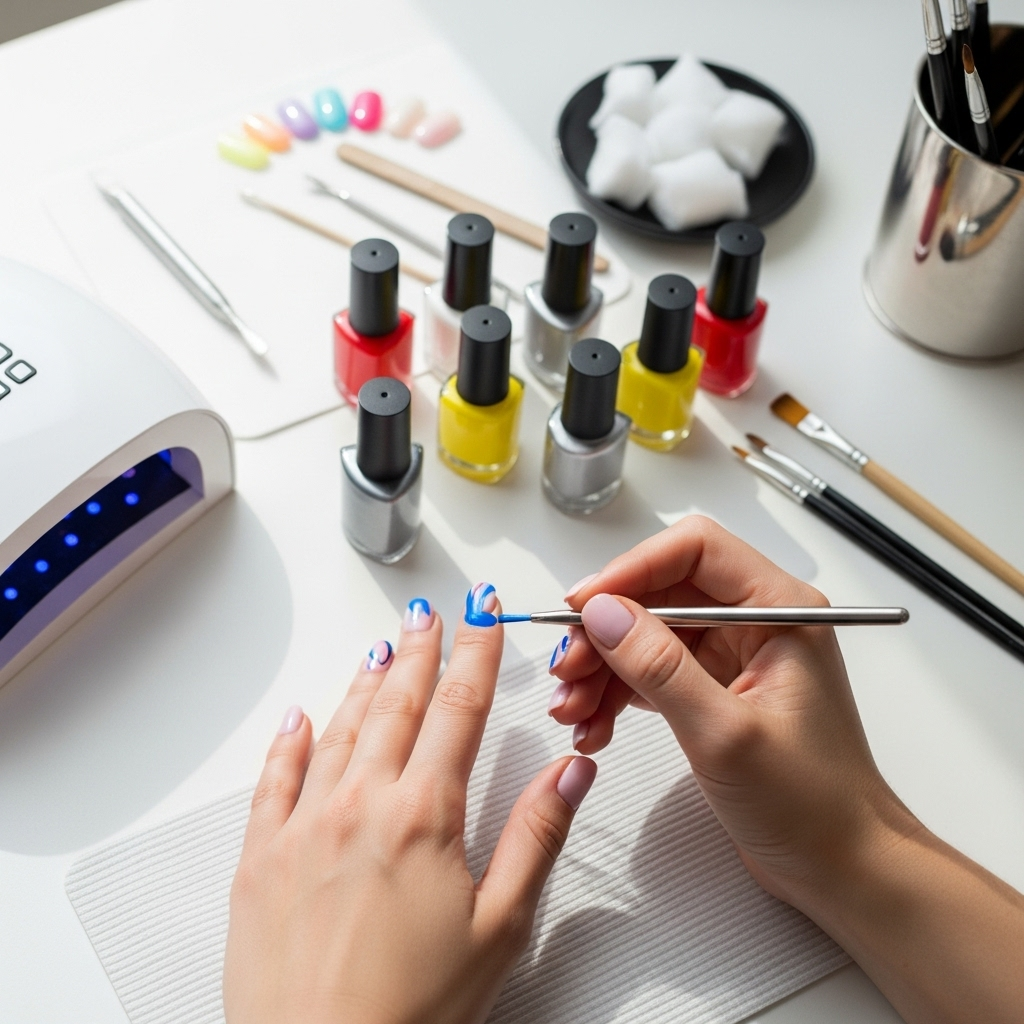
Essential Tools & Materials for Stained Glass Nails
To bring your stained glass nail vision to life, you’ll need a few key items. Don’t worry if you don’t have them all; many are standard nail art supplies you might already own!
Must-Have Supplies:
- Base Coat: Protects your natural nails and ensures a smooth canvas.
- Top Coat: Seals your design and adds a glossy finish.
- Translucent Gel Polishes or Highly Pigmented Nail Polishes: These are the stars of the show! Look for colors that are not fully opaque. Brands like Gelly Drops or sheer gel polishes work wonderfully. You can also layer regular polish thinly.
- Black Gel Polish or Acrylic Paint: For creating the defining lines. Gel often provides a cleaner, more durable line.
- Detail Nail Art Brushes: A fine-tip brush is essential for drawing those precise black lines. A fine-liner nail art brush will give you the most control.
- UV/LED Nail Lamp (if using gel polish): Essential for curing gel products.
- Nail Polish Remover and Cotton Pads: For any clean-up.
- Cuticle Pusher and Nail File: For proper nail prep.
- Orange Wood Stick or Cuticle Pusher: For cleaning up edges.
Step-by-Step Guide: Creating Stained Glass Effect Nails with a Black Outline
Ready to get started? Follow these simple steps to achieve your stunning stained glass nails. We’ll focus on using gel polishes as they tend to give the best translucent effect and clean lines, but you can adapt this for regular polish with a bit more patience!
Step 1: Prepare Your Nails
Clean nails are the foundation of any great manicure. Start by removing any old polish. Gently push back your cuticles using an orange wood stick or cuticle pusher. Shape your nails with a nail file to your desired length and form. Lightly buff the surface of your nails to remove any shine and create a smooth surface for the polish to adhere to. Wipe away any dust with a lint-free cloth or alcohol wipe.
Step 2: Apply a Base Coat
Apply a thin, even layer of your base coat. This protects your nails from staining and helps your polish last longer. Cure it under your UV/LED lamp according to the product instructions (usually 30-60 seconds for LED, 2 minutes for UV). Don’t skip this step!
Step 3: Apply Your Translucent Colors
This is where the magic begins! Choose your first translucent color. Apply a thin coat. The key here is thinness; you want a stained glass effect, not opaque coverage. If you want a deeper color, you can apply a second thin coat. Cure each layer thoroughly under your UV/LED lamp.
Pro Tip: You can create a “mosaic” effect by dividing your nail into sections. For different color blocks, apply one translucent color to a section, cure, then apply the next color to another section, cure, and so on. Or, for a more blended look, apply colors next to each other and gently swirl them before curing the final color layer of each section.
Step 4: Create the “Lead” Lines
Now, take your black gel polish or acrylic paint and your fine-tip detail brush. Dip the brush into the polish or paint. Start by drawing the outline of your nail, then create lines within the colored sections. Think about how lead lines look in real stained glass – they form geometric shapes and connect different color pieces. Start with simpler designs if you’re a beginner. Draw slowly and deliberately to create clean lines.
Beginner Approach: For your first try, consider outlining the entire nail edge and then just drawing a few simple vertical or horizontal lines through your colored sections. You can also outline each color block individually. The goal is defining and separating the colors.
Where to Get Inspiration: Look up images of actual stained glass windows online. Notice the patterns and how the lead lines create structure. A great resource for design inspiration can be found on sites like The Metropolitan Museum of Art’s collection, where you can find historical examples.
Step 5: Cure the Lines
Once you’re happy with your black lines, carefully cure the entire nail under your UV/LED lamp. This is crucial for sealing the design.
Step 6: Apply a Top Coat
Apply a generous, even layer of your top coat over the entire nail. This will seal in the design, protect the colors from chipping, and give your nails that beautiful, glossy shine that amplifies the stained glass effect. Ensure you cap the free edge of the nail to prevent lifting. Cure the top coat under your lamp as directed.
Step 7: Final Touches & Clean-Up
If you’ve used a gel top coat that requires wiping, use a lint-free wipe with a bit of isopropyl alcohol to remove the sticky residue. If you used a no-wipe top coat, you’re done! If there are any smudges or polish on your skin around the nails, use a small brush dipped in nail polish remover to clean them up precisely.
Customization Ideas for Your Stained Glass Nails
The beauty of stained glass nails is how adaptable they are. Here are a few ideas to get your creative juices flowing:
Color Palettes:
- Jewel Tones: Deep ruby red, sapphire blue, emerald green, amethyst purple. Perfect for a luxurious, sophisticated look.
- Pastel Hues: Soft pinks, lavenders, baby blues, mint greens. For a delicate, dreamy aesthetic.
- Sunset Vibes: Oranges, yellows, pinks, and reds blended together.
- Primary Colors: Bold and playful with red, yellow, and blue.
- Monochromatic: Use different shades of the same color (e.g., light blue, teal, navy) for a subtle yet striking effect.
Design Variations:
- Geometric Patterns: Use straight lines to create sharp, modern designs.
- Organic Shapes: Think more abstract or free-flowing lines for a softer feel.
- Floral Motifs: Create petal shapes with translucent colors and outline them in black.
- Abstract Art: Swirl colors together before applying lines for a unique, marbled effect.
- Ombre Stained Glass: Blend translucent colors from one shade to another within your outlined sections.
Troubleshooting Common Stained Glass Nail Issues
Even with the best intentions, you might run into a snag. Here are some common problems and how to fix them:
Problem 1: Lines are too thick or shaky.
Solution: Use a thinner brush and less product on the brush. Practice drawing lines on a piece of paper or a nail tip before attempting it on your actual nails. Always start with the outline and then fill in. Ensure the surface you’re working on is stable.
Problem 2: Colors look muddy or mixed.
Solution: This often happens if colors bleed together before curing or if the translucent polishes are too opaque. Apply thinner coats of your translucent colors. Ensure you are curing each section or color layer completely before moving to the next, especially if you are doing separate color blocks. If trying to blend, do so very quickly before curing. For cleaner lines, consider using a stamping plate with a stained glass design – this offers a more controlled application.
Problem 3: Polish is chipping or peeling.
Solution: This is usually due to improper nail prep or inadequate curing. Ensure your nails are clean, dry, and free from oils. Buffing the nail surface is key! Also, make sure you’re properly curing each gel layer under the lamp and capping the free edge with your base, color, and top coats. A good quality top coat is essential for longevity.
Problem 4: The black outline is smudging into the color.
Solution: Ensure your translucent colored layers are fully cured before you start drawing the black lines. If you are working with regular nail polish, allow each layer to dry completely. For gel, patience with the curing step is vital. Also, be mindful of how much polish you have on your brush when applying the lines.
Stained Glass Effect Nails vs. Other Translucent Nail Trends
You might have seen other translucent nail trends like “jelly nails” or “glass nails.” How do stained glass nails differ?
Jelly Nails: These use highly translucent, vibrant polishes (often called “jelly” polishes) on their own, without the defining black lines. The effect is uniformly colored, like a piece of colored candy or jelly. Stained glass nails use similar translucent polishes but add the structured, intricate black “leading” to create a mosaic-like appearance.
Glass Nails (or Shattered Glass Nails): This trend involves applying small pieces of iridescent foil or cellophane to the nail to create a fragmented, reflective “shattered glass” effect. It’s all about light reflection and shimmer, not translucent color blocks separated by lines. While they both play with light, the visual outcome is quite different.
Stained glass nails give you a more defined, artistic structure compared to the seamless jelly effect or the scattered shimmer of glass nails.
Maintaining Your Stained Glass Nails
Once your beautiful stained glass nails are complete, a little care will keep them looking fabulous for as long as possible:
- Wear Gloves: When doing household chores, gardening, or washing dishes, wear rubber gloves to protect your nails from harsh chemicals and prolonged water exposure, which can weaken polish.
- Avoid Harsh Chemicals: Even without gloves, try to minimize contact with cleaning products, hairspray, and other chemicals that can dull or lift the polish.
- Moisturize: Keep your hands and cuticles hydrated with a good cuticle oil and hand lotion. Healthy cuticles and skin make your entire manicure look better.
- Be Gentle: Avoid using your nails as tools (like to scrape or pry). This is a surefire way to chip or break them, no matter how well they’re done.
- Reapplying Top Coat: If you notice your top coat starting to lose its shine after a week or two, you can gently buff them and apply another layer of top coat (and cure) to refresh the gloss.
Stained Glass Nails FAQ
Q1: Can I do stained glass effect nails with regular nail polish?
A: Yes, you can! It might be a bit trickier to get super clean, thin lines with regular polish compared to gel or acrylic paint. You’ll need to let each layer dry completely before applying the next to prevent smudging. Think of applying translucent colors in thin coats and then using a very fine detailing brush with black polish for the lines. A quick-dry top coat can be your best friend here.
Q2: What’s the best way to get clean black lines?
A: The key to clean black lines is a good quality, fine-tip detail brush and a steady hand. For gel, a black gel polish that has a good consistency (not too thick, not too watery) is ideal. Practice makes perfect! Drawing on a smooth surface first can help you get a feel for the brush. Don’t overload your brush with polish. For gel, ensure your colored layers are fully cured and hardened before drawing lines.
Q3: How long do stained glass effect nails last?
A: If done with gel polish and proper technique, they can last 2-3 weeks. Using regular polish will likely be shorter, perhaps 5-7 days, depending on your nail care habits and the quality of the polish. Following the maintenance tips above will help extend their life.
Q4: Do I need a special kind of polish for the translucent colors?
A: You don’t strictly need “special” polish, but translucent or sheer polishes work best. Many gel brands offer “jelly” or sheer formulas perfect for this. If using regular polish, you can achieve a similar effect by applying very thin coats of your favorite colors until they reach your desired translucency. You can also mix a bit of clear polish with a regular polish to sheer it out. However, some highly pigmented polishes might be too opaque for the true stained glass look.
Q5: How do I create different shapes within the stained glass design?
A: Before you start drawing the black lines, you can use your translucent polishes to paint different shapes or sections on your nail. For example, paint a triangle of red in one corner, cure it, then paint a square of blue next to it, cure it, and so on. Then, use the black lines to connect and define these pre-painted sections. You can also paint the entire nail a translucent color and then draw geometric designs over it.
Q6: Can I do this over artificial nails like acrylics or gel extensions?
A: Absolutely! Stained glass effect nails look fantastic over artificial nails. Just ensure the artificial nail surface is properly prepped (buffed and cleaned) before you start applying your colored and black gel polish layers. The process remains largely the same.
Conclusion
Stained glass effect nails are a captivating way to express your creativity and add a unique artistic flair to your manicure. With their vibrant, translucent colors and striking black outlines, they’re sure to make a statement. We’ve walked through the essential tools, a simple step-by-step process, and even shared some ideas for customization and troubleshooting. Remember, nail art is all about self-expression and having fun. Don’t be afraid to experiment with different color combinations and designs. Whether you’re a seasoned nail art enthusiast or a curious beginner, these tips should empower you to create your own stunning stained glass nails with confidence. So grab your polishes, your finest brush, and get ready to transform your nails into dazzling works of art!