Squoval nail art is the perfect blend of classic elegance and modern style, offering a versatile shape for stunning DIY designs. This tutorial breaks down how to achieve beautiful squoval nails and explore easy, eye-catching nail art, perfect for beginners looking to elevate their manicure game. Get ready to create salon-worthy looks at home!
Nails can sometimes feel like a puzzle, especially when you’re just starting with nail art. You might love the chic look of certain nail shapes but aren’t sure how to achieve them or what designs work best. The “squoval” shape—a delightful mix of square and oval—is incredibly popular for a reason! It’s flattering on almost everyone, less prone to snagging than a sharp square, and provides a beautiful canvas for any art you can dream up. If you’ve ever admired perfectly shaped nails and wished you could replicate that magic at home, you’re in the right place. We’re going to walk through everything, step-by-step, so you can confidently rock gorgeous squoval nails and even dress them up with simple, stunning nail art.
What Exactly is a Squoval Nail Shape?
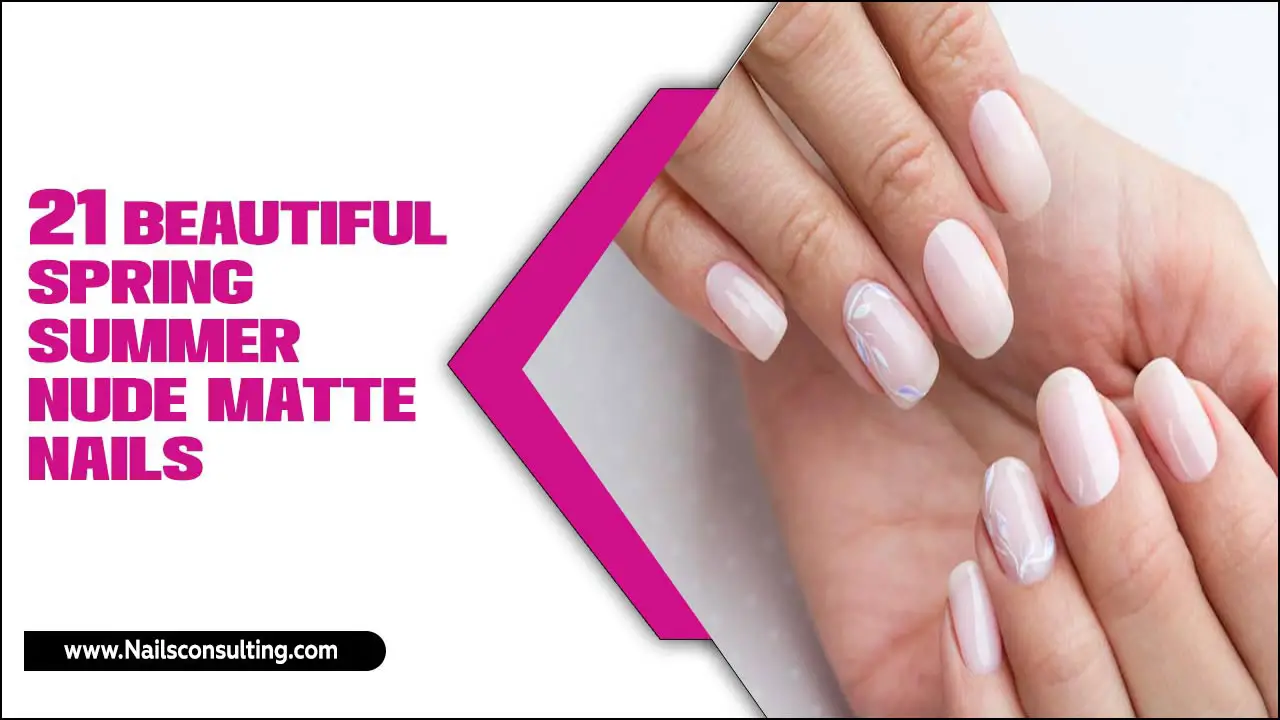
The squoval nail shape is exactly what it sounds like: a fusion of a square and an oval. Imagine a square nail that has its corners gently rounded off. This creates a soft, elegant look that’s both modern and timeless. It avoids the sharp edges that can sometimes catch or break on traditional square nails, while still offering the clean, structured appearance of a square. This shape is incredibly versatile and looks fantastic on most finger types, making it a go-to for many!
Why Choose the Squoval Shape?
The squoval shape isn’t just a trendy term; it has real benefits that make it a fantastic choice for your nails.
- Universally Flattering: This shape tends to elongate the fingers and looks great on a wide variety of hand shapes and nail bed sizes.
- Durability: By softening the sharp corners of a square shape, squoval nails are less likely to chip, snag, or break, making them more practical for everyday life.
- Chic Aesthetic: It offers a sophisticated and polished look that’s always in style, straddling the line between classic elegance and contemporary chic.
- Perfect Canvas: The stable, gently rounded edges provide an ideal surface for almost any kind of nail art, from minimalist designs to intricate patterns.
Getting Started: Essential Tools for Squoval Nails
Before we dive into shaping and art, let’s make sure you have the right tools. Having these handy will make the whole process smoother and give you the best results. You don’t need a professional salon’s worth of equipment to achieve stunning nails at home!
Here’s a quick rundown of what you’ll need:
- Nail File: A good quality emery board or a glass nail file is essential. Glass files are great because they’re gentle and help prevent splitting.
- Nail Buffer: A multi-sided buffer can help smooth ridges after filing and add a natural shine.
- Cuticle Pusher or Orange Stick: To gently push back your cuticles before shaping and polishing.
- Nail Polish Remover: Acetone-free is best to avoid drying out your nails.
- Base Coat: Crucial for protecting your natural nail and helping polish adhere.
- Top Coat: To seal your design and add shine and longevity.
- Your Chosen Nail Polish Colors: For the art and base color.
- Dotting Tools or Toothpick: For creating simple dots and small designs.
- Thin Nail Art Brush: For drawing lines and more detailed work.
Step-by-Step: How to Shape Your Nails into Squoval
Achieving the perfect squoval shape is simpler than you might think. It’s mostly about careful filing. Take your time, and don’t rush the process. Remember, it’s better to file a little less and refine than to over-file!
- Prepare Your Nails: Start by removing any old polish. Wash your hands to remove any oils or debris. Gently push back your cuticles using a cuticle pusher or an orange stick. You want to reveal the entire nail plate without cutting your cuticles, as this helps prevent infection. For professional tips on cuticle care, the American Academy of Dermatology Association offers great guidance.
- Trim if Necessary: If your nails are very long, you might want to trim them down to your desired length first using nail clippers or sharp scissors. This makes filing much easier.
- File to Create the ‘Square’ Edge: Using your nail file, start by filing across the tip of your nail in one direction. Imagine you’re trying to create a straight, clean edge like a square. Use firm, consistent strokes. Do this for all nails, aiming for a straight tip.
- Round the Corners: Now, take your file and gently angle it to file the sharp corners you’ve just created. Make small, curved strokes, gradually rounding off each corner. The goal is to create a soft curve, not a full oval. You want enough curve to avoid snagging, but still maintain a generally straight free edge when viewed from the front.
- Refine the Shape: Look at your nail from the front and from the side. Does it look balanced? Are the corners smoothly rounded? Continue to gently file and refine until you achieve the desired squoval look. The key is symmetry and a smooth transition from the side walls to the free edge.
- Smooth and Shine: Once you’re happy with the shape, use the finer grit side of your nail file or a buffer to smooth out any rough edges. Then, use the buffer to gently smooth the surface of your nail. This removes any fine dust and prepares your nail for polish.
- Clean Up: Wipe your nails with a damp cloth or a lint-free wipe to remove any filing dust.
Essential Squoval Nail Art Tutorials for Beginners
Now for the fun part! The squoval shape is a fantastic base for nail art. Here are some easy yet stunning designs perfect for beginners. These ideas focus on simplicity, visual impact, and achievable techniques.
1. The Chic Single Stripe
A simple stripe can add a modern, sophisticated touch to your squoval nails. It’s clean, minimalist, and incredibly easy to do.
Materials Needed:
- Base coat
- Your favorite polish color
- A contrasting nail polish color (or metallic/glitter polish)
- Thin nail art brush or a striper tool
- Top coat
Steps:
- Apply your base coat and let it dry completely.
- Paint all your nails with your chosen base color. Apply two thin coats for opaque coverage and let them dry thoroughly.
- Once the base color is dry, take your thin nail art brush or striper tool dipped in the contrasting polish.
- Carefully draw a single straight line down the center of the nail, from cuticle to free edge. Alternatively, you can place the stripe diagonally across a corner or horizontally near the tip.
- Let the stripe dry completely.
- Apply a generous layer of top coat to seal the design and add shine.
2. Dainty Dots Delight
Dots are a classic for a reason! They’re playful, easy to control, and can be arranged in countless patterns.
Materials Needed:
- Base coat
- Your favorite polish color
- A contrasting polish color
- Dotting tool (or the rounded end of a toothpick/pen)
- Top coat
Steps:
- Apply base coat, then your main polish color on all nails. Allow to dry completely.
- Dip the tip of your dotting tool into the contrasting polish.
- Start creating dots on your nails. For a simple look, place a single dot near the base of the nail or in a corner.
- For a more patterned look, create a line of dots, a cluster, or even a simple smiley face shape. Experiment with different sizes by using different sized dotting tools or the rounded end of a toothpick.
- Let the dots dry thoroughly.
- Seal everything with a top coat.
3. The Elegant Half-Moon Mani
This retro-inspired look is super chic on squoval nails. It creates a beautiful contrast and is surprisingly easy to achieve.
Materials Needed:
- Base coat
- Two complementary polish colors
- Small circular stickers or nail art guides (optional, but helpful)
- Top coat
Steps:
- Apply base coat and let it dry.
- Paint your nails with your first color. Let it dry completely. For a flawless finish, use two thin coats.
- If using stickers or guides, apply one over the nail, positioned where you want the “moon” of your accent nail to be (usually near the cuticle).
- Paint the exposed part of the nail with your second polish color.
- Carefully remove the sticker or guide while the polish is still slightly wet to get a crisp line.
- Repeat on any accent nails you desire, or try doing simple freehand half-moons with a thin brush for a more advanced approach.
- Let the polish dry completely.
- Apply top coat to seal the design.
Pro Tips for Flawless Squoval Nails
Even with simple designs, a few pro tips can make a big difference in the final look of your squoval nails. These little tricks are what elevate a DIY manicure from good to great!
- Work in Thin Coats: Thick layers of polish take longer to dry and are more prone to smudging or chipping. Two thin coats are almost always better than one thick one.
- Let Each Layer Dry: Patience is key! Make sure your base coat is dry before applying color, your color coats are dry before adding art, and your art is dry before the top coat. This prevents all sorts of application mishaps.
- Clean Up Polish Mistakes: Keep an orangewood stick or a small brush dipped in nail polish remover handy. Use it to carefully clean up any polish that gets on your skin or cuticles for a super neat finish.
- Invest in a Good Top Coat: A quality top coat not only adds shine but also protects your nail art from wear and tear. Look for one that dries quickly and provides a glossy finish.
- Consider a Nail Strengthener: If your natural nails are prone to breaking, using a nail strengthener as part of your base coat routine can help build resilience. According to Harvard Health Publishing, maintaining nail health contributes to their strength and appearance.
Squoval Nail Art Ideas at a Glance
To give you even more inspiration, here’s a quick table of squoval nail art ideas suitable for beginners. These are designed to be simple, stylish, and achievable for anyone looking to try something new.
| Nail Art Idea | Description | Difficulty Level | Key Tools |
|---|---|---|---|
| Single Stripe | A clean, straight line across the nail. | Easy | Thin brush, striper tool |
| Dotted Accent | A few strategically placed dots. | Easy | Dotting tool, toothpick |
| Half-Moon Manicure | Color blocking at the cuticle, creating a crescent shape. | Easy-Medium | Stickers, nail guides (or steady hand) |
| Glitter Ombre | A gradient effect using glitter polish. | Easy | Sponge, glitter polish |
| Minimalist French Tip | A thin, colored line instead of a white tip. | Easy-Medium | Thin brush, steady hand |
The Importance of Nail Health for Squoval Art
While we’re focusing on art and shape, never forget the foundation: healthy nails! Beautiful nail art looks even better on healthy, well-cared-for nails. Keeping your nails hydrated and strong is crucial, especially when you’re frequently applying and removing polish.
Here are a few tips for maintaining nail health:
- Moisturize: Regularly apply cuticle oil and hand lotion. This keeps the skin around your nails soft and prevents hangnails, while also hydrating the nail plate itself.
- Protect Your Hands: Wear gloves when doing household chores involving water or harsh chemicals. This protects both your skin and your manicure!
- Gentle Polish Removal: Always use an acetone-free remover if possible, as acetone can be very drying.
- Take Breaks: Give your nails a break from polish every so often. Let them breathe and recover.
Beyond the Basics: Next Steps for Your Squoval Art Journey
Once you’ve mastered these beginner-friendly techniques, don’t be afraid to experiment! The squoval shape lends itself beautifully to more complex designs. You might want to try:
- Geometric Patterns: Use tape to create sharp lines and shapes like triangles or chevrons.
- Floral Accents: Use a fine nail art brush and dotting tools to create simple flowers or leaves.
- Marble Effect: This looks stunning on a squoval canvas, offering an elegant, intricate look that’s surprisingly achievable with practice.
- Textured Polishes: Experiment with sand, glitter, or chrome powders for added dimension.
The beauty of nail art is endless creativity. Your squoval nails are a miniature canvas, and there’s a whole world of designs waiting for you to explore.
Frequently Asked Questions about Squoval Nails and Art
What is the best nail file for shaping squoval nails?
A medium-grit emery board is a great starting point for shaping. For refining and smoothing, a fine-grit buffer or a glass nail file is ideal. Glass files are very gentle and help prevent nail splitting.
How often should I reshape my nails to keep the squoval shape?
This depends on how quickly your nails grow. Typically, you’ll want to touch up the shape every 1-2 weeks, coinciding with your regular manicure or when you notice the shape becoming less defined.
Can I achieve the squoval shape with acrylic or gel nails?
Absolutely! A nail technician can easily sculpt acrylic or gel nails into a squoval shape. If you’re applying these at home, you can file them into the squoval shape once they’ve cured, similar to natural nails.
What colors look best on squoval nails?
Squoval nails are incredibly versatile! Virtually any color looks good. Classic reds, nudes, and deep berries are always elegant, while pastels and neons can be fun and trendy. For nail art, contrasting colors often make designs pop beautifully.
How do I prevent my nail art from smudging after I apply it?
The key is patience! Make sure each layer of polish, including your nail art, is completely dry before applying the next or your top coat. Also, a good quality, quick-drying top coat is essential for sealing the design and preventing smudges.
My squoval nails look a bit too angular. How can I soften them?
If your shape is too sharp, gently use your nail file in curved strokes along the sides and corners to create a softer, more rounded edge. You can also use a fine-grit buffer to smooth out any harsh lines until you achieve your desired look.
Conclusion
There you have it—your complete guide to achieving gorgeous squoval nail art! The squoval shape offers the perfect balance of style and practicality, making it an ideal choice for anyone looking to enhance their natural beauty. By following these simple shaping techniques and beginner-friendly art tutorials, you can confidently create stunning manicures that express your personal style. Remember, nail art is all about creativity and having fun. Don’t be afraid to experiment with colors, tools, and designs. With a little practice and the right approach, you’ll be showcasing salon-worthy squoval nails in no time. So grab your tools, pick your colors, and get ready to let your creativity shine!

