Square red nails are a timeless and stylish choice, offering versatility from classic elegance to bold statements. This guide breaks down the best square red nail styles for beginners, including simple application tips and design ideas to help you achieve a stunning look effortlessly.
Thinking about a nail color that’s always in style? Red is a winner! But what about the shape? Square red nails are a fantastic modern choice. They look chic and polished on almost everyone. Many people think getting great nails means spending lots of money. But you can have gorgeous square red nails right at home! This guide will show you how to pick the best red shades and styles for your square tips. Get ready to fall in love with your nails even more!
Why Square Red Nails Are a Must-Try
Square nails are incredibly popular for a good reason. They offer a clean, modern look that’s universally flattering. When you combine this classic shape with the power of red, you get a manicure that’s both bold and sophisticated. Red is a color that exudes confidence and passion, making it a perfect choice for expressing your personality. Whether you’re heading to an important meeting or a fun night out, square red nails are sure to make a statement.
The beauty of square nails lies in their simplicity. They tend to be less prone to breaking or snagging compared to more pointed styles, making them a practical choice for everyday wear. And red? Well, red is a color that never goes out of fashion. It’s versatile, powerful, and can be adapted to countless shades and finishes. Together, they create a winning combination that’s always chic.
The Versatility of Red Shades
Red isn’t just one color; it’s a whole spectrum! From deep, mysterious burgundies to bright, playful cherries, there’s a red hue for every mood and occasion. For square nails, you can lean into:
- Classic Cherry Red: The quintessential red that’s always a good idea.
- Deep Burgundy/Wine: Perfect for a more sophisticated, autumnal vibe.
- Bright Coral Red: Ideal for a summery, energetic look.
- Nude-Reds: Subtler shades that offer a hint of color with a polished finish.
- Dark Reds (like Oxblood): For a dramatic and edgy feel.
Choosing the right shade of red can completely change the feel of your square nails. Experiment to find the reds that make you feel amazing!
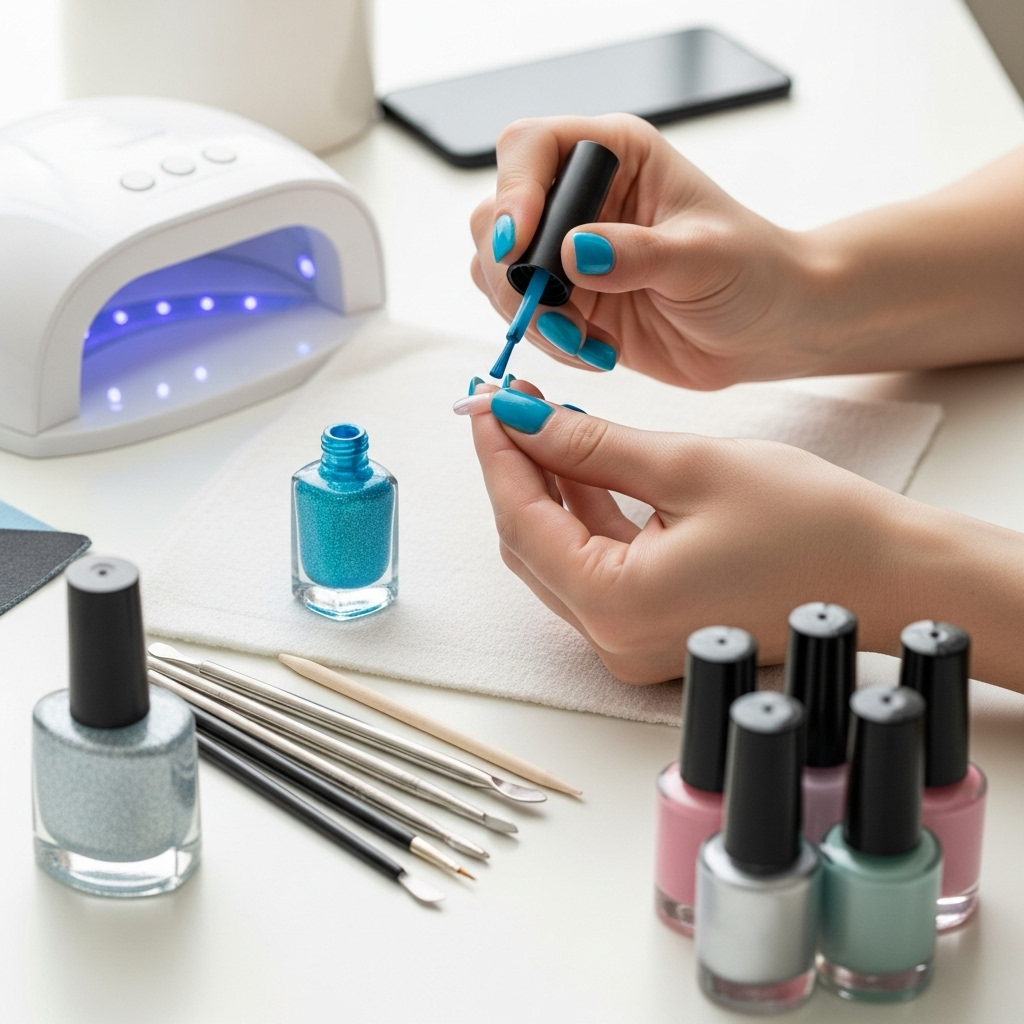
Essential Tools for Perfect Square Red Nails
Before we dive into the styles, let’s gather our tools! Having the right supplies makes the process smoother and the results so much better. Don’t worry if you don’t have everything; many basic tools are affordable and readily available.
- Nail File: A good quality file (glass or emery board) is essential for shaping and refining the edges of your square nails. Look for medium grit for shaping and fine grit for smoothing.
- Nail Clippers: To trim your nails to the desired length before filing.
- Buffer Block: This helps smooth out ridges and prepares your nail surface for polish.
- Base Coat: Crucial for protecting your natural nails from staining and helping polish adhere better.
- Top Coat: To seal in your color, add shine, and prevent chips. A quick-dry top coat is a lifesaver!
- Your Chosen Red Nail Polish: Of course!
- Orange Stick or Cuticle Pusher: For gently pushing back your cuticles.
- Nail Polish Remover & Cotton Pads: For clean-up and mistakes.
- Optional: Cuticle Oil: To keep your cuticles hydrated and looking neat.
Having these on hand will set you up for success, whether you’re aiming for a simple solid color or a more elaborate design.
How to Achieve the Perfect Square Shape
Getting that perfect square shape is key to stunning square red nails. It’s simpler than you might think! Follow these steps for salon-worthy results at home:
- Prep Your Nails: Start with clean, dry nails. Remove any old polish. Gently push back your cuticles using an orange stick or cuticle pusher.
- Trim to Length: If your nails are too long, trim them with clippers to your desired length. Leave a little extra room for filing.
- Shape the Sidewalls: Hold your nail file at a 90-degree angle to the side of your nail. File straight up from the cuticle to the free edge. Do this on both sides to create straight sidewalls.
- Create the Straight Tip: Now, take your file and position it horizontally across the tip of your nail. File in one direction (from side to side) to create a perfectly straight edge. Avoid sawing back and forth, as this can weaken the nail.
- Soften Corners (Optional): For a softer square, or “squoval” shape, gently round the very corners with a few light strokes of your file. This can help prevent snagging.
- Smooth and Buff: Use a buffer block to gently smooth the surface of your nails and refine the edges.
- Clean Up: Wipe any nail dust away with a damp cotton pad.
Practice makes perfect! The more you shape your nails, the quicker and easier it will become.
Stunning Square Red Nail Styles for Every Occasion
Now for the fun part – the styles! Square red nails are incredibly versatile. Here are some essential looks that are easy to achieve and always look fabulous.
1. The Classic Solid Red
This is the ultimate timeless look. A perfectly applied solid red polish on square nails is sophisticated, powerful, and always in vogue. It’s the perfect entry point for anyone new to red nails.
How to get the look:
- Apply one coat of your chosen base coat. Let it dry completely.
- Choose your favorite red polish. Apply a thin, even coat.
- Wait a minute or two for the first coat to set, then apply a second thin coat for full opacity.
- Let the polish dry for at least 5-10 minutes before applying a top coat.
- Seal it all in with a good quality top coat. A quick-dry formula is great for busy bees!
Tips for a flawless finish:
- Thin Coats are Key: Avoid thick, gloopy coats of polish. Multiple thin coats are much easier to control and dry faster.
- Clean Up Edges: Dip an old small brush (like a clean eyeliner brush) or an orange stick wrapped with a tiny bit of cotton into nail polish remover. Carefully trace around your nail to remove any polish that got on your skin. This makes a huge difference!
- Don’t Rush Drying: Give your nails ample time to dry. Heat or cold can affect drying time.
2. The Chic French Manicure (with a Red Twist)
Take the classic French manicure and give it a fiery upgrade! This style is elegant and surprisingly easy to adapt.
How to get the look:
- Start with a sheer nude or pink base coat on your square nails.
- Once dry, use a fine-tipped brush or a French tip stencil to paint a crisp red line along the free edge of your nails.
- For a super modern take, try a “reverse French” where the red is at the base of the nail, or a “half-moon” red at the cuticle.
- Apply a clear or glossy top coat.
Variations:
- Red French Tips: Classic white tips replaced with bright red.
- Burgundy with Nude Base: A deeper, more muted version of the red French.
- Glitter Red Tip: Add a strip of red glitter polish over your red tip for some sparkle.
3. The Bold Red Ombre
Ombre nails create a beautiful gradient effect. On square nails, this transition looks incredibly smooth and stylish.
How to get the look (using a sponge):
- Apply a base coat and let it dry.
- Paint your nails with your lighter red shade or a nude/pink. Let it dry.
- On a makeup sponge, apply stripes of your darker red polish next to your lighter shade (or nude).
- Gently dab the sponge onto your nail, starting from the cuticle and moving upwards towards the tip. You may need to dab a few times to build up the color.
- Repeat the sponge application if needed for desired intensity.
- Apply a top coat. Don’t forget to clean up any color that got on your skin around the nail.
Tips for Ombre:
- Use a makeup sponge with a fine texture for a smoother blend.
- Experiment with different red color combinations for unique gradients.
4. Accent Nail Magic
Don’t want to go full red on all nails? An accent nail is a fantastic way to incorporate bold color without being overpowering. This is perfect for beginners!
How to get the look:
- Paint all your nails except one (usually the ring finger) with a neutral color like nude, beige, or even a classic French base.
- On your accent nail, apply your chosen red polish using the steps for a classic solid red.
- Alternatively, use the accent nail for a simple design.
Design Ideas for Accent Nails:
- A single red nail.
- A red nail with simple white dots.
- A red nail with a thin gold or silver stripe.
- A gradient red on just the accent nail.
The contrast makes the red pop beautifully!
5. Geometric Red Designs
Geometric patterns are trending, and they look super sharp on square nails. Think clean lines and simple shapes.
How to get the look (simple lines):
- Paint your base color (could be nude, black, white, or even a lighter red).
- Once dry, use a fine-tipped nail art brush or striping tape to create geometric patterns in your chosen red polish.
- Common designs include simple stripes (horizontal, vertical, diagonal), chevrons, or blocks of color.
- Apply a top coat to seal everything in.
Tips for Geometric Designs:
- Use Stencils: For perfect lines and shapes, consider using nail art striping tape or pre-cut stencils. Apply the tape to your dry polish, paint over it, then carefully peel the tape away while the polish is still slightly wet.
- Let Layers Dry: It’s crucial to let each layer of polish dry completely before adding the next, especially when using tape.
- Precision is Key: Take your time and work slowly for the cleanest results.
6. The Glitter Red Accent
Add a touch of sparkle to your square red nails with glitter! It’s festive, fun, and oh-so-glamorous.
How to get the look:
- Apply your base coat and your chosen red polish on all nails.
- On your accent nail(s), apply a layer of glitter polish. You can apply it all over, or just focus it on the tips or cuticle area.
- Alternatively, use a fine brush to “paint” with the glitter for more control.
- Finish with a top coat. Chunky glitters might require a thicker top coat or a couple of layers to make them smooth.
Glitter Placement Ideas:
- Full glitter accent nail.
- Glitter tips (like a glitter French).
- Glitter gradient fading from the tip.
- A single bold stripe of glitter.
Table: Comparing Red Nail Polish Finishes on Square Nails
The finish of your red nail polish can significantly impact the overall look of your square nails. Here’s a quick guide:
| Finish | Description | Best For | Ease of Application |
|---|---|---|---|
| Glossy/Cream | Smooth, opaque color with a shiny finish. | Classic solid red, French tips, everyday wear. | Easy |
| Matte | Satin-like finish with no shine. Gives a sophisticated, velvety look. | Modern, edgy styles, geometric designs. | Medium (can be tricky not to get streaky) |
| Metallic/Chrome | High-shine, reflective finish that mimics metal. | Bold statements, futuristic looks. | Medium to Difficult (requires careful application and often a special base/top coat) |
| Glitter | Contains small reflective particles for sparkle. | Accent nails, holidays, parties. | Easy to Medium (can be clumpy depending on glitter size) |
| Jelly | Translucent, buildable color that looks like candy or stained glass. | Ombre effects, layered looks, delicate red tones. | Easy |
Caring for Your Square Red Nails
Once you’ve achieved your beautiful square red nails, keeping them looking great is important! Simple care routines make a big difference.
- Moisturize: Apply cuticle oil daily to keep your cuticles soft and prevent hangnails. This also makes your manicure look fresher. A simple almond oil or even olive oil can work wonders.
- Protect Your Nails: Wear gloves when doing household chores, especially washing dishes or using cleaning products. These can strip polish and dry out your nails.
- Refresh Your Top Coat: Apply an extra layer of top coat every 2-3 days to maintain shine and help prevent chips.
- Avoid Using Nails as Tools: Don’t use your nails to open cans, scratch things, or pry items. This is a sure way to cause chips and breaks.
- Touch-Ups: If you notice a small chip, you can often repair it by carefully filing the chipped area smooth and applying a thin coat of your red polish followed by a top coat.
Proper care ensures your gorgeous square red nails last longer and continue to look their best.
Frequently Asked Questions About Square Red Nails
Here are some common questions beginners might have about rocking square red nails:
Q1: Are square nails good for short nails?
A1: Yes, absolutely! Square shapes, especially with slightly rounded corners (squoval), look fantastic on short nails. They create a neat, polished appearance without needing much length.
Q2: How do I prevent red nail polish from staining my nails?
A2: Always start with a good quality base coat! A thicker base coat acts as a barrier. For very bold or dark reds, consider using a dark-specific base coat or applying an extra layer or two of a regular base coat. Removing polish promptly also helps.
Q3: My red polish looks streaky. What can I do?
A3: Streaky polish is usually a sign of thin coats and insufficient drying time between them, or the polish itself might be old or thick. Ensure you’re applying thin, even coats and letting each one dry for at least a minute before applying the next. If the polish is old and thick, you can try adding a drop or two of nail polish thinner (not remover!) to revive it.
Q4: What square nail shape is best for my finger shape?
A4: Square nails are quite versatile! Rounded square (or squoval) is flattering for almost everyone as it mimics the natural shape of the nail bed and is less prone to breaking. If you have wider nail beds, a slightly softer square can make your fingers appear more slender.
Q5: Can I use nail polish strips or press-on nails for a square red look?
A5: Definitely! Nail polish strips and high-quality press-on nails are excellent for beginners. They come pre-shaped and often pre-designed, offering a quick way to achieve a perfect square red manicure without the fuss of application and drying time. Many brands offer a wide variety of red shades and finishes.
Q6: How often should I change my red nail polish?
A6: Typically, a well-applied manicure with a good top coat can last 7-14 days. You can refresh your top coat every few days to extend its life. Change your polish when it starts to chip significantly, or if you simply want to try a new color or design!
Conclusion
Square red nails are a powerful choice that blends classic style with modern flair. From the timeless elegance of a solid cherry red to the playful sophistication