Quick Summary:
Square nail design ideas for beginners are all about clean lines, simple shapes, and accessible techniques. Think minimalist dots, easy stripes, and subtle color blocking. Mastering these basic square nail looks will boost your confidence and help you explore more intricate nail art fun!
Are you ready to transform your nails into mini masterpieces? If you’re new to the world of nail art, the thought of creating intricate designs can feel a bit overwhelming. But don’t worry! Square nail shapes provide a fantastic canvas for easy and chic nail designs that anyone can do. We’re going to break down simple techniques and share some super cute square nail design ideas that will make you feel like a pro in no time. Get ready to unleash your creativity and give your nails the stylish upgrade they deserve!
Why Square Nails Are Perfect for Beginners
Square nails offer a wonderfully flat and defined surface, making them an ideal shape for practicing nail art. Their sharp corners and straight edges provide a clear boundary, which helps in creating neat lines and applying polish precisely. Unlike more curved shapes, the simplicity of a square nail allows basic design elements to shine, giving you a polished look without complex techniques. They are also a very popular and versatile nail shape, so mastering designs on them means you’ll be on-trend!
Essential Tools for Your Square Nail Art Journey
Before we dive into the fun designs, let’s gather your toolkit. You don’t need a whole salon’s worth of equipment to get started. Here are some fundamental tools that will make your nail art adventures much smoother:
- Base Coat: This protects your natural nails from staining and helps your polish last longer.
- Top Coat: Seals your design, adds shine, and prevents chipping.
- Nail Polish in Various Colors: Start with a few of your favorite shades.
- Thin Nail Art Brush or Dotting Tool: These are game-changers for creating fine lines, dots, and small details. You can find affordable sets online or at drugstores.
- Toothpicks or Orange Stick: Surprisingly useful for tiny details or cleaning up edges.
- Nail Polish Remover and Cotton Swabs/Pads: For quick fixes and cleaning up mistakes.
- Clear Tape or Washi Tape: Perfect for creating crisp lines and geometric shapes.
- Files and Buffers: For shaping and smoothing your square nails.
Having these basics on hand will ensure you’re well-prepared to tackle any of the designs we’ll discuss. Remember, practice makes perfect, so don’t be afraid to experiment!
Getting Your Square Nails Ready
A great nail design starts with a great base. Before you even pick up a colored polish, ensure your square nails are prepped and ready. This step might seem boring, but it’s crucial for a professional-looking finish and long-lasting wear. A well-prepped nail is the foundation of any stunning manicure.
Step 1: Shape Your Nails
If you’re starting with longer nails, use a nail file to create the classic square shape. File in one direction to avoid weakening the nail. Aim for straight side walls and a straight tip. You can gently round the corners if you prefer a “squoval” (square-oval) look, which can be a bit more beginner-friendly as it’s less prone to snagging.
For maintaining the shape:
- File regularly to keep corners crisp.
- Avoid cutting your cuticles harshly; gently push them back with an orange stick.
Step 2: Clean and Buff
Wipe your nails with nail polish remover to get rid of any oils or residue. This helps the polish adhere better. Lightly buff the surface of your nails with a buffer to create a smooth canvas. This isn’t about filing down your nail, just creating a slightly more receptive surface for polish. A healthy nail surface also benefits from proper nutrition and hydration, so consider incorporating vitamins and minerals into your diet to support nail health from within.
Step 3: Apply Base Coat
Apply a thin, even layer of your favorite base coat. Let it dry completely. This is especially important for darker polishes, preventing that dreaded yellowing of the natural nail.
Easy Square Nail Design Ideas for Absolute Beginners
Now for the fun part! These designs are specifically chosen for their simplicity and high impact. They require minimal techniques and tools, perfect for getting your nail art confidence soaring.
1. The Classic French Tip Reimagined
The French manicure is a timeless classic, and it looks particularly sharp on square nails. But let’s give it a beginner-friendly twist!
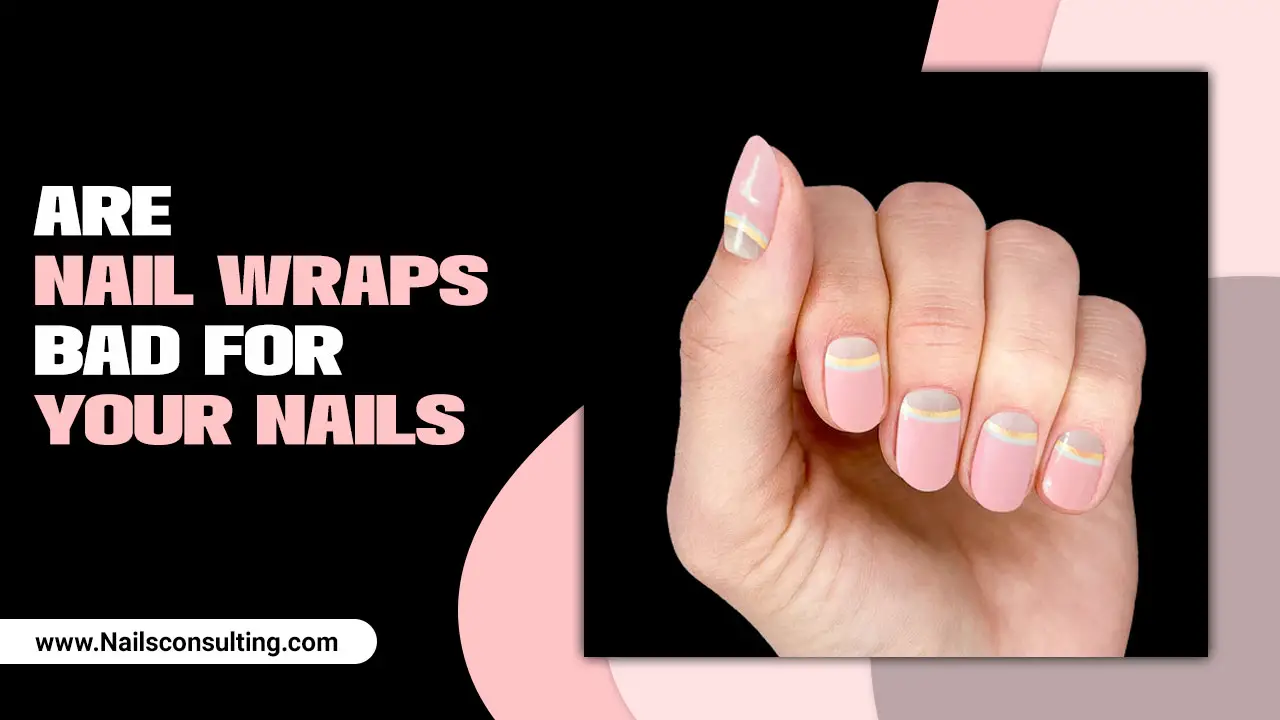
- The Basic: Apply a sheer nude or pink base polish. Once dry, use a fine-tip brush or a white polish pen to draw a crisp white line across the tip of each nail.
- The Colored Tip: Swap the white for any color you love! A metallic gold or a matte black can be very chic.
- The Double Tip: After applying your base color, add a thin second line of a contrasting color just below the first colored tip.
Pro Tip: For a cleaner line, you can use guide strips meant for French manicures or even carefully placed tape, though freehand is a great skill to practice!
2. Minimalist Dots
Dots are incredibly versatile and easy to achieve. They add a touch of personality without being overwhelming.
- Single Dot Accent: Paint all your nails in a solid color. Once completely dry, use a dotting tool (or the rounded end of a toothpick) to place a single dot on the cuticle area or towards the tip of one or two accent nails.
- Scattered Dots: Paint your base color, let it dry, then randomly place dots of varying sizes (using different sized dotting tools or the tip of a brush) across one or more nails.
- Color-Blocked Dots: Use a strip of tape to divide a nail into sections (e.g., diagonally). Paint one section, let it dry, remove the tape, and then paint the other section. Once both are dry, add a few strategically placed dots in a contrasting color.
External Resource: Learn more about the science of color theory to pick complementary colors for your dots from The Getty Museum’s educational resources.
3. Simple Stripes
Stripes are another design that looks sophisticated but is surprisingly easy to do on square nails.
- Horizontal or Vertical Stripes: Paint your base color. Once dry, use a fine-tip nail art brush to draw clean lines across or down your nails. Keep them thin for an elegant look.
- Taped Stripes: Paint your base color and let it dry completely. Carefully apply strips of nail tape or thin washi tape across the nail. Paint over the tape with a contrasting color. Once the new color is dry but not fully cured (slightly tacky), gently peel off the tape to reveal crisp lines.
- Uneven Stripes: This is a fun, forgiving technique. Paint two or three different colors in uneven, parallel lines across your nail without perfectly connecting them.
4. Negative Space Designs
Negative space is a modern trend that’s very beginner-friendly because you’re intentionally leaving parts of your natural nail visible. It looks chic and requires less precision.
- Half-Moon Mani: Apply a base coat. Use a small circular sticker or carefully trace a semi-circle at the base of your nail (near the cuticle) with tape. Paint the rest of the nail. Once dry, remove the sticker/tape to reveal the unpainted half-moon shape.
- Geometric Cut-Outs: Similar to the half-moon, use tape to create simple geometric shapes (like squares or triangles) on your nail. Paint around the taped area. Remove tape to show unpainted sections.
5. Glitter Gradient
This is an effortless way to add sparkle. It’s forgiving and always looks festive.
- Apply a base color. While the polish is still wet, use a sponge or the tip of your brush to dab glitter polish onto the tips of your nails, blending it downwards slightly.
- Alternatively, paint your entire nail with a gradient of glitter by starting with more glitter at the tip and fading it towards the cuticle.
6. Color Blocking
Color blocking on square nails couldn’t be simpler. It involves using distinct blocks of color next to each other.
- Diagonal Blocks: Use tape to create a diagonal line across your nail. Paint one side. Let it dry completely, then tape the newly painted side and paint the other side with a contrasting color.
- Horizontal Blocks: Divide your nail into two or three horizontal sections with tape. Paint each section a different color, using tape to keep the lines clean between applications.
7. Simple Animal Print Accents
Don’t let “animal print” scare you! For beginners, we’re talking about the simplest forms, like leopard spots.
- Paint your nails a base color (like a sandy beige, pale pink, or even a bold color).
- Once dry, use a fine dotting tool or the tip of a thin brush to create irregular, oval-ish brown or black spots.
- Then, with an even finer dotting tool and a darker shade of brown or black, add a tiny speck or outline to a few of the spots. It’s about the suggestion of a print, not perfection!
Comparison of Easy Square Nail Design Techniques
To help you choose your first design, here’s a quick look at some popular beginner-friendly techniques:
| Design Technique | Difficulty Level (Beginner) | Required Tools | Best For | Potential Pitfalls |
|---|---|---|---|---|
| Minimalist Dots | Very Easy | Dotting tool, toothpick | Adding subtle accents, creating patterns | Uneven dot size, smudging if not dry |
| Simple Stripes (Freehand) | Easy | Fine-tip brush | Clean, modern looks, French tips | Wavy lines, inconsistent thickness |
| Taped Designs (Stripes, Blocks) | Easy to Moderate | Nail tape, washi tape | Perfect geometric shapes, clean lines | Polish bleeding under tape, tape leaving residue |
| Glitter Gradient | Very Easy | Sponge or brush | Adding sparkle and dimension without fuss | Uneven glitter distribution, glitter not blending well |
| Negative Space | Easy | Tape, stickers | Chic, modern, and forgiving designs | Peeling tape too soon, imprecise tape application |
Step-by-Step: Creating a Simple Two-Color Stripe Design
Let’s walk through one of the most straightforward yet impactful designs: a clean, two-color stripe. This is perfect for practicing precision.
- Prep: Ensure your square nails are prepped, filed, and have a base coat applied and dried.
- Apply First Color: Paint all your nails with your chosen base color (e.g., a soft grey). Apply two thin coats for full opacity, allowing each to dry completely.
- Apply Second Color: Once the base color is fully dry, take a fine-tip nail art brush. Dip it into your contrasting polish color (e.g., metallic silver).
- Draw the Stripe: Carefully draw a thin, straight line across the top half of your nail, close to the free edge, mimicking a simplified French tip. Or, for a different look, draw a vertical stripe down one side of the nail. Aim for a steady hand.
- Refine (If Needed): If your line isn’t perfectly straight, you can carefully use a clean-up brush dipped in nail polish remover to gently neaten the edges.
- Apply Top Coat: Once the stripe color is completely dry, apply a generous, even layer of top coat. This will seal your design and give it a beautiful shine. Be sure to cap the free edge of your nail by sweeping the brush across the tip.
Tips for Making Your Square Nail Designs Last
You’ve put in the effort to create a beautiful design—now you want it to last! Here are some expert tips:
- Always Use a Base Coat: We can’t stress this enough. It prevents staining and creates a smooth surface for polish.
- Apply Thin Coats: Thick layers of polish take longer to dry and are more prone to chipping. Two thin coats are better than one thick one.
- Let Each Layer Dry: Impatience is the enemy of a good manicure! Ensure each coat, including the base color and any design elements, is fully dry before applying the next or the top coat.
- Seal with a Quality Top Coat: A good top coat is your best friend. It adds durability, prevents chipping, and gives that professional glossy finish. Consider a gel-like top coat for extra longevity.
- Cap the Free Edge: When applying your base color and top coat, lightly sweep your brush across the very tip of your nail. This “seals” the edge and helps prevent tip wear and chipping.
- Moisturize: Keep your hands and cuticles moisturized. Dry, brittle nails are more likely to break and chip, taking your lovely design with them. Using a good cuticle oil daily can make a big difference.
- Use Your Nails Gently: Try to avoid using your nails as tools (e.g., for scraping or prying). This puts unnecessary stress on them and your polish.
Beyond the Basics: Next Steps for Your Nail Art Journey
Once you’ve mastered these beginner-friendly square nail designs, you might feel ready to explore a little further. Here are some ideas for what to try next:
- Marble Effect: With a bit of practice using a needle or toothpick, you can create beautiful marble patterns.
- Ombre/Gradient: Blending colors from one shade to another is a fantastic skill to develop. A sponge is usually your best friend here.
- Stamping: Nail stamping plates offer an incredible variety of detailed designs that can be applied quickly and precisely.
- Abstract Art: Embrace free-flowing lines and shapes. This is where you can really let your creativity loose without the pressure of perfect symmetry.
Remember, every nail artist, no matter how skilled, started right where you are. The key is consistent practice and a willingness to try new things. Don’t be afraid to make mistakes; they are excellent learning opportunities!
FAQ: Your Beginner Square Nail Design Questions Answered
Q1: How do I get my square nails to stop chipping so quickly?
A: Ensure your nails are clean and dry before polish. Always use a base coat and a high-quality top coat, and remember to cap the free edge of your nails with the top coat. Applying thin coats of polish also helps. Moisturizing regularly keeps nails healthy and less brittle.
Q2: What’s the easiest way to paint a straight line on my nail?
A: For the easiest straight lines, use nail tape or washi tape. Apply it firmly to your dry polish, paint over it, and peel it off while the paint is still slightly tacky. If freehanding, use a very fine brush and steady your hand by resting your pinky finger on a flat surface.
Q3: Can I do nail art without special nail art brushes?
A: Absolutely! You can use toothpicks for dots, the edge of a business card or plastic wrap for clean lines with tape, and even the tip of a fine-tip pen (make sure it’s completely dry before use). However, investing in a basic set of nail art brushes and dotting tools can make many designs much easier and more precise.
Q4: My polish is smudging even when I think it’s dry. What am I doing wrong?
A: Polish, especially darker or glitter shades, can take longer to dry than you think. It might feel dry to the touch but still be soft underneath. Avoid touching anything for at least 20-30 minutes after polishing, and ideally longer. Using a quick-dry top coat can also help seal the polish faster.
Q5: How do I clean up polish that got on my skin?
A: The easiest way is to use a small, angled brush or a clean-up brush dipped in nail polish remover. Gently trace around the edge of your nail to remove excess polish from your skin. Cotton swabs can also work, but they can sometimes leave fibers behind.</


