Square nail art offers a chic and versatile canvas for stunning designs. Master simple geometric patterns, bold color blocks, and elegant minimalist looks with easy-to-follow steps and insider tips. Elevate your manicure game with fun, achievable square nail art ideas perfect for beginners!
Nail lovers, rejoice! Have you ever found yourself staring at your square-shaped nails, wondering how to make them truly pop? It can feel a bit tricky to find inspiration that works perfectly with that clean, straight edge. But don’t worry, those elegant lines are actually a secret superpower for nail art! We’re about to unlock a world of creative possibilities, turning your square nails into tiny masterpieces. Get ready to explore super fun and totally achievable designs that will have everyone asking, “Where did you get your nails done?”
There’s something so clean and modern about a square nail shape, and it’s a fantastic base for all sorts of nail art. Whether you prefer a minimalist vibe or something a bit more dazzling, square nails can handle it all. We’ll break down everything you need to know, from basic techniques to dazzling designs. Let’s get started on making your nails the star of the show!
Why Square Nails Are Perfect for Nail Art
Square nails have a few unique qualities that make them a fantastic “canvas” for nail art, especially for beginners. The straight edges and flat free edge provide a clean, defined area to work on. This makes geometric patterns, clean lines, and color blocking incredibly easy to execute cleanly, giving your designs a polished look right from the start. Unlike some other shapes where the curves might make precise lines a bit more challenging, squares offer a straightforward structure.
Think of it like drawing on a blank piece of paper versus a canvas with a lot of texture. The straight lines help guide your hand and make it easier to achieve symmetry and sharp details. This is why many professional nail artists often recommend square shapes for intricate patterns – they offer a steadier foundation.
Advantages of Square Nail Art
- Clean Lines: The straight sidewalls and free edge make it easier to paint crisp, clean lines, which is essential for many trendy designs.
- Versatile Canvas: Square nails can accommodate a wide range of designs, from minimalist dots and stripes to intricate geometric patterns.
- Modern Aesthetic: This shape naturally lends itself to a chic, modern, and sophisticated look.
- Beginner Friendly: For those new to nail art, the structure of square nails simplifies the application of many popular design elements.
- Durability: While not directly related to art, properly cared-for square nails (especially when filed with slightly rounded corners, often called “squoval”) tend to be less prone to chipping or snagging compared to very sharp or pointed shapes.
Essential Tools for Square Nail Art
Before we dive into designs, let’s make sure you have the right tools! Having a few key items on hand will make your creative process much smoother and more enjoyable. You don’t need a professional kit to start; a few basics will get you far.
Must-Have Nail Art Supplies
- Nail Polish: A good base coat, your favorite colors, and a top coat are essential.
- Thin Nail Art Brushes: These are crucial for drawing fine lines, dots, and intricate details. Look for brushes with fine tips.
- Dotting Tools: These come with a small ball at the end and are perfect for creating uniform dots of various sizes. An old ballpoint pen can even work in a pinch!
- Striping Tape: For creating super sharp, straight lines.
- Stencils or Stickers: Peel-off stencils and nail art stickers are a fantastic shortcut for complex designs.
- Cuticle Pusher and Cleaner: To prep your nails and clean up any stray polish.
- Nail Polish Remover and Cotton Swabs: For mistakes and cleanup.
- Top Coat Sealer: This is vital to protect your design and add shine.
Optional But Helpful Tools
- UV/LED Lamp and Gel Polish: If you want your designs to be super durable and glossy, gel polish is the way to go.
- Clear Acrylic or 3D Gel: For adding texture and dimension to your designs.
- Tweezers: For precise placement of rhinestones or decals.
- Foam Sponge: For creating gradient or ombre effects.
Preparing Your Nails for Art: The Foundation
Great nail art starts with great nails! Taking a few minutes to prep properly will make a huge difference in how your designs look and last. Think of it as prepping a canvas before you paint – it ensures a smooth, even surface and helps your artwork stick!
Step-by-Step Nail Prep
- Cleanse: Start by removing any old nail polish. Use a good quality acetone-free nail polish remover to avoid drying out your nails.
- Shape: File your nails into a clean square shape. For a slightly softer look and to reduce snagging, you can round the corners just a touch – this is often called a “squoval” shape and is super popular. Always file in one direction to prevent weakening the nail. You can find excellent guides on shaping nails from resources like the NHS, which also offers tips on nail health.
- Cuticle Care: Gently push back your cuticles with a cuticle pusher. You can also apply a tiny bit of cuticle oil to soften them. Avoid cutting cuticles unless absolutely necessary, as they protect your nail bed.
- Buff: Lightly buff the surface of your nails. This helps remove any shine and creates a smooth surface for the polish to adhere to. Don’t over-buff, as this can thin your nails.
- Cleanse Again: Wipe your nails with nail polish remover or rubbing alcohol to remove any dust or oils left from buffing. This is a crucial step for polish longevity!
- Base Coat: Apply a thin, even layer of base coat. This protects your natural nails from staining and provides a smooth surface for your color. Let it dry completely.
Genius Square Nail Art Designs for Beginners
Now for the fun part! These designs are chosen specifically because they work beautifully with the square shape and are achievable even if you’re just starting out with nail art. We’ll cover a variety of styles, so there’s something for everyone.
1. The Chic Color Block
This is a fantastic way to play with contrasting colors and uses the straight lines of square nails to your advantage. You can go bold with brights or sophisticated with neutrals.
How to Achieve It:
- Apply your base coat and let it dry.
- Paint two-thirds of your nail with your first color. Let it dry completely.
- Use a fine-tip brush or a striping tape to create a clean line where the first color ends.
- Paint the remaining one-third of the nail with a contrasting second color. Let it dry.
- Seal with a glossy top coat.
Tip:
For ultra-sharp lines, use striping tape. Apply the tape after the first color is fully dry, paint the second color over it, and then carefully peel the tape off while the second color is still slightly wet.
2. Minimalist Dots and Lines
Simplicity is key with this design. It’s elegant, modern, and incredibly easy to do. Dots and lines can be placed in endless variations.
How to Achieve It (Dots):
- After applying your base color and letting it dry, use a dotting tool (or the tip of a toothpick) dipped in a contrasting polish.
- Gently press the dotting tool onto your nail to create a perfect circle.
- You can create a single dot near the cuticle, a line of dots, or a pattern across the nail.
How to Achieve It (Lines):
- After your base color is dry, use a very fine nail art brush dipped in a contrasting color.
- Draw a freehand line from one side of the nail to the other – you can do this horizontally, vertically, or diagonally.
- Alternatively, use striping tape for perfect straight lines.
Tip:
Experiment with different sizes of dotting tools or brush thicknesses for varied effects. A single, small dot on a nude base can be incredibly chic.
3. The Modern French Tip
Forget the classic white tip! Update the French manicure for square nails with bold colors, glitter, or even metallic finishes. The straight edge of a square nail is perfect for a crisp, clean French tip.
How to Achieve It:
- Apply your chosen nude or light pink base color and let it dry.
- Use a fine-tip brush or a silicone stamper brush to carefully paint a straight line across the free edge of your nail with your accent color.
- Alternatively, you can use striping tape placed just above where you want the color to start for a super clean edge.
- Clean up any mistakes with a small brush dipped in nail polish remover.
- Finish with a top coat.
Variation:
Try painting the colored tip on the underside of your nail (the part you see when looking at your palm) for a playful peek-a-boo effect, or try a double French tip with two different colors.
4. Geometric Marvels
Square nails are practically begging for geometric patterns! Triangles, squares, and abstract lines look incredibly sharp and intentional on this shape.
How to Achieve It:
- Start with a solid base color.
- Once dry, use striping tape to create geometric shapes. For example, place two pieces of tape diagonally to form an ‘X’, or create a triangle shape by placing three pieces.
- Paint within the taped-off sections with a contrasting color.
- Carefully remove the tape while the polish is still wet.
- Let dry completely and seal with a top coat.
Resources for Geometric Shapes:
For inspiration on geometric designs, sites like Instagram offer a vast gallery of user-created art. When planning your shapes, consider how they will interact with the square edges. For instance, a triangle that fits perfectly into a corner or a series of parallel lines across the nail can be very effective.
5. Negative Space Designs
Negative space nail art is super trendy and surprisingly easy for beginners. It involves leaving parts of your natural nail or clear polish exposed, creating a really modern and chic look.
How to Achieve It:
- Apply a clear base coat to your entire nail.
- Let it dry completely.
- Use striping tape to section off parts of your nail.
- Fill in the un-taped sections with your chosen polish color.
- Carefully remove the tape while the polish is still wet.
- Apply a top coat over the entire nail, ensuring it also coats the exposed negative space for a smooth finish that seals everything.
Tip:
You can also achieve negative space by using stencils or by painting designs directly onto a clear base coat, leaving intentional gaps.
6. Glitter and Chrome Accents
Sometimes, all you need is a little sparkle! Square nails are perfect for showcasing glitter or the futuristic shine of chrome powder.
How to Achieve It (Glitter Focus):
- Apply your base color or a sheer nude.
- Once dry, use a fine brush to apply glitter polish strategically. Think a glitter fading from the tip down, a glitter accent stripe, or glitter covering just the center of the nail.
- For a full glitter nail, apply a layer of glitter polish and then a top coat to smooth it out.
How to Achieve It (Chrome Accents):
- Apply a dark, solid base color (black or navy works great) and cure under a UV/LED lamp if using gel, or let regular polish dry completely.
- Apply a no-wipe gel top coat (or a sticky regular top coat if you’re careful) and cure/dry.
- Rub chrome powder over the sticky surface with a silicone tool or your fingertip.
- Gently brush away excess powder.
- Apply a clear gel top coat or a strong regular top coat to seal.
Tip:
Chrome powder can be messy! Use a tray or a piece of paper underneath your finger to catch any excess powder. For regular polish, a strategically placed glitter stripe can add a lot of impact without the complexity of chrome.
7. Nail Stamping Made Easy
Nail stamping is a game-changer for intricate designs. Square nails offer a great surface to properly position and display stamped images.
How to Achieve It:
- Apply your base nail polish and let it dry completely.
- Apply a thick layer of specialized nail stamping polish onto your chosen design plate.
- Quickly scrape off the excess polish with a stamper scraper.
- Immediately roll the stamper over the scraped plate to pick up the design.
- Carefully roll the stamper onto your nail, transferring the design.
- Let it dry for a moment, then seal with a top coat.
Resources for Nail Stamping:
Brands like Born Pretty and Pueen offer a wide variety of stamping plates with geometric patterns, floral designs, and more. Websites like Nail Polish Canada have beginner guides to get you started with the technique. For your square nails, look for designs that don’t have extreme curves, as these translate best.
Advanced Techniques for the Adventurous
Once you’ve mastered the basics, you might want to try adding a little more flair. These techniques build on the foundational skills and can elevate your square nail art even further.
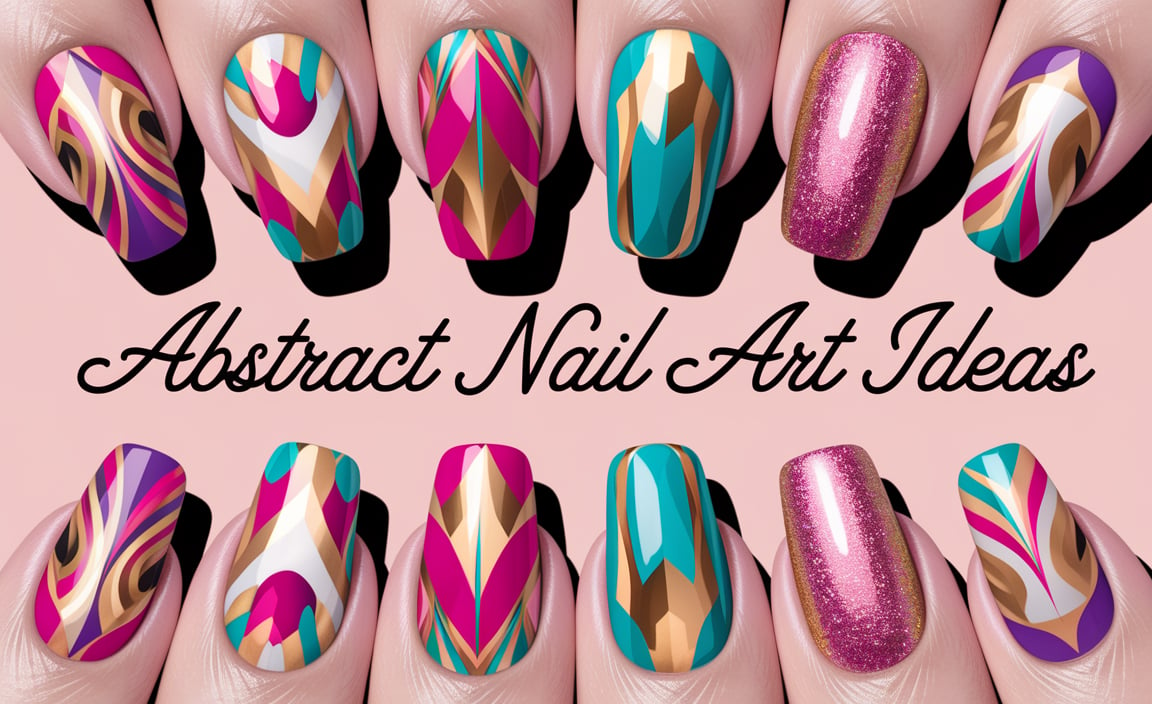
Abstract Swirls and Waves
While curves can be tricky, square nails can beautifully frame abstract, flowing designs. The key is to keep the movement within the boundaries of your nail.
- Start with a solid base.
- Using a fine art brush, pick up a small amount of contrasting polish.
- Gently paint fluid, abstract lines or “waves” across the nail. Don’t aim for perfection; embrace the artistic flow.
- Varying the thickness of the lines can add depth.
- Layering colors thoughtfully can create a beautiful marbled effect.
- Seal with a good top coat.
Rhinestones and Studs Placement
Adding embellishments can give your square nails instant glam. The flat surface of a square nail is ideal for keeping these elements secure.
- Apply your base color and

