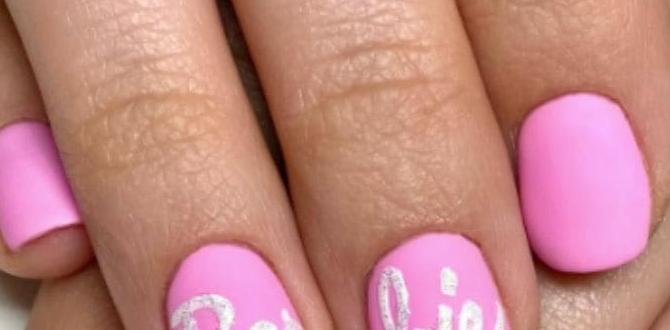
Square leopard print nails offer a chic and playful twist on a classic pattern, perfect for adding a touch of wild sophistication to your manicure. This guide breaks down how to achieve this trendy look with easy steps and design ideas for beginners and seasoned nail art lovers alike.
Hello, gorgeous! Lisa Drew here from Nailerguy, and today we’re diving into a trend that’s roaring with style: square leopard print nails! If you’ve ever admired that fierce, fabulous leopard spot pattern but thought it was too complicated to try at home, you’re in for a delightful surprise. We’re going to make achieving this fun and fashionable look super simple. Whether you’re new to nail art or just looking for some fresh inspiration, this guide is tailored just for you. Get ready to unleash your inner fashionista and create some seriously stunning square leopard nails that will turn heads!
—
Why Square Leopard Print Nails Are a Must-Try
Leopard print has been a fashion staple for decades, celebrated for its bold, empowering, and undeniably chic vibe. When this iconic pattern meets the clean, modern lines of a square nail shape, it’s a match made in nail heaven! Square nails have a timeless appeal, offering a sophisticated canvas that’s both practical and stylish. They’re perfect for showing off intricate designs, and leopard print is no exception.
This trend is fantastic because:
It’s Versatile: Leopard print can be a subtle accent or a full-on statement. It works for casual outings, special events, or just brightening your everyday mood.
It’s Adaptable: You can play with different color combinations beyond the traditional warm tones. Think pink and black, blue and gold, or even pastel hues for a softer take.
It’s Empowering: There’s something undeniably confident about leopard print. It makes you feel ready to conquer the world, one fabulous nail at a time!
Especially with the square shape, the pattern can feel fresh and structured, moving away from a conventionally “wild” look to something more polished and avant-garde.
—
Getting Started: Essential Tools You’ll Need
Don’t let the idea of nail art intimidate you! For beautiful square leopard print nails, you really only need a few key items. We’ll walk through what’s essential to get you started.
Base Coat and Top Coat
Base Coat: This is your nail’s best friend! It protects your natural nail from staining, helps your polish adhere better, and creates a smooth surface for your design. Look for one that also strengthens your nails if that’s a concern.
Top Coat: This seals your design, adds shine, and helps your manicure last longer. A good top coat is crucial for that salon-fresh finish.
Nail Polish Colors
Base Color(s): This is the main color of your nail. For classic leopard, think beige, tan, or a light brown. For a twist, try black, white, pink, or even a deep jewel tone.
Leopard Spot Colors: You’ll need a dark color for the spots (usually black or a dark brown) and sometimes a lighter accent color for the “halo” effect around the spots.
Application Tools
Fine-Tipped Nail Art Brush: This is essential for drawing those signature leopard spots and outlines. A brush with a very fine, precise tip will give you the most control.
Dotting Tools: These come in various sizes and are perfect for creating smaller spots or adding other decorative elements. You can alternately use the tip of a toothpick or the end of a bobby pin for a DIY approach.
Nail Polish Remover & Cotton Swabs: For cleaning up any mistakes – and trust me, everyone makes them! Cotton swabs are your little magic wands for tidying up edges.
Nail Prep Supplies
Nail File: To shape your nails into that perfect square.
Cuticle Pusher: To gently push back your cuticles for a clean look.
Nail Buffer: To smooth out any ridges on your nail surface before applying polish.
—
How to Achieve Perfect Square Leopard Print Nails: A Step-by-Step Guide
Ready to get creative? Follow these simple steps to bring your square leopard print nail dreams to life. Taking your time and practicing will help you get the hang of it.
Step 1: Prep Your Nails
Clean: Start with clean, dry nails. Remove any old polish.
Shape: Use a nail file to shape your nails into a perfect square. For a classic square, file straight across the tip and then keep the sides straight. You can slightly round the corners if you prefer a softer square shape. Here’s a great guide from Self.com on proper nail filing techniques.
Smooth: Gently buff the surface of your nails to create an even base.
Cuticles: Push back your cuticles.
Apply Base Coat: Apply one layer of base coat and let it dry completely. This is super important for a long-lasting manicure.
Step 2: Apply Your Base Color
Apply 1-2 thin coats of your chosen base color (e.g., beige, tan, white, pink).
Make sure each coat is completely dry before applying the next. Patience here is key! A quick-drying polish can be a lifesaver.
Step 3: Create the Leopard Spots
This is where the fun begins! There are a few ways to do this, and practice makes progress.
Method 1: Classic Spots with Outline
1. Using your fine-tipped nail art brush or a dotting tool, randomly place irregular oval or comma-shaped blobs of your dark spot color (e.g., black) onto your dried base color. Don’t worry about making them perfect; animal prints are naturally irregular!
2. While the dark color is still wet (or after it dries, depending on your preferred technique), use a very small amount of the same dark color on your brush to create tiny C-shaped or curved lines around some of the blobs. This gives the spots dimension.
3. For an even more realistic look, you can add an even smaller, lighter “halo” with a different brush and a lighter shade of brown or even a skin-toned polish around some of the dark spots. This really makes them pop!
Method 2: Simple Spots (Easier for Beginners)
1. Using your fine-tipped brush or a dotting tool, simply place irregular blobs of the dark color onto your base. Don’t overthink it! The less symmetrical, the better.
2. You can add a few tiny dots of the dark color near some of the larger blobs to give the appearance of depth, but skip the full outline if you’re looking for a quicker method.
Tip: Start with just a few spots on an accent nail first to get the feel for it. You can always add more!
Step 4: Add Accent Colors (Optional)
If you’re feeling adventurous, you can introduce a second accent color.
After your first set of spots is dry, use a different colored polish (like a metallic gold or a contrasting pastel) to add a few more irregular blobs or small dots among the first ones.
You can also use a lighter shade of brown or even a cream color to create subtle “halos” around some of your black spots for added depth.
Step 5: Clean Up Edges
Dip a fine-tipped brush or a cotton swab into nail polish remover.
Carefully trace around your cuticle line and the sides of your nail to wipe away any polish that went astray. This makes a huge difference in achieving a professional finish.
Step 6: Apply Top Coat
Once all your leopard spots are completely dry, apply a generous layer of your clear top coat.
Make sure to cap the free edge of your nail (swipe the brush along the tip) to help seal the polish and prevent chipping.
Let it dry thoroughly.
—
Chic Square Leopard Print Nail Design Ideas
The beauty of square leopard print nails is their adaptability. Let’s explore some ways to make them uniquely yours!
1. Classic & Elegant Leopard
Base Color: Creamy beige or soft tan.
Spots: Black and a touch of warm brown for outline/depth.
Vibe: Sophisticated, timeless, and perfect for any occasion. This is your go-to if you want a classic look.
2. Bold & Modern Leopard
Base Color: Crisp white or deep black.
Spots: Hot pink, electric blue, or emerald green. Think vibrant, unexpected colors.
Vibe: Edgy, playful, and fashion-forward. This is for when you want to make a statement.
3. Pastel Leopard
Base Color: Pastel pink, mint green, or lavender.
Spots: White or a slightly darker pastel shade of the base color for the spots, with light grey or a soft brown for outlines.
Vibe: Dreamy, soft, and feminine. A fantastic way to embrace the trend in a more subdued way.
4. Matte Leopard
Base Color: Nude, taupe, or even a deep burgundy.
Spots: Black or dark chocolate.
Finish: Use a matte top coat instead of a glossy one.
Vibe: Chic, understated, and effortlessly cool. Matte finishes always add a touch of luxury.
5. Accent Nail Leopard
Concept: Keep most of your nails a solid color (like a chic nude, black, or a metallic shade) and reserve the leopard print design for one or two accent nails.
Vibe: Subtle yet stylish. This is perfect if you love leopard print but want a more minimalist approach.
6. Glitter Leopard
Concept: Combine leopard spots with glitter! You can have glitter as your base color, or use a glitter top coat over your leopard design.
Vibe: Glamorous, festive, and eye-catching. Ideal for holidays or a night out.
—
Nail Shape Considerations: Why Square Works So Well
The square nail shape is fantastic for leopard print for several reasons:
Clean Canvas: The straight edges and flat tips create a defined area, making it easier to place spots and outlines evenly.
Modern Aesthetic: The sharp lines of a square nail complement the bold geometric nature of leopard spots, resulting in a contemporary and polished look.
Durability: Square nails, especially when slightly “squoval” (softened corners), can be less prone to snagging or breaking compared to pointed shapes, making them practical for everyday wear.
While square nails are our focus, remember that leopard print can also look fabulous on other shapes like squoval, almond, or even short, rounded nails. The key is to adapt the size and spacing of the spots to suit the nail’s dimensions.
—
Caring for Your Square Leopard Print Nails
To keep your gorgeous leopard nails looking their best for as long as possible, a little TLC goes a long way.
Moisturize: Apply cuticle oil daily and hand cream frequently, especially after washing your hands. Well-moisturized cuticles and skin make your manicure look cleaner and more professional.
Protect: Wear gloves when doing household chores, gardening, or anything involving harsh chemicals. This protects your nails from damage and prevents the polish from dulling.
Avoid Harsh Actions: Try not to use your nails as tools (e.g., picking at labels, scraping surfaces).
Refresh: If your top coat starts to lose its shine after a few days, you can carefully apply another thin layer to revive the gloss.
—
Table: Color Palette Inspiration for Square Leopard Print Nails
Here’s a quick reference table to spark your creativity with color combinations.
| Style | Base Color(s) | Spot Color(s) | Accent/Outline Colors | Vibe |
| :——————– | :—————————– | :—————————— | :———————— | :———————– |
| Classic Chic | Beige, Cream, Tan | Black, Dark Brown | Warm Brown, Gold | Sophisticated, Timeless |
| Bold & Bright | White, Black, Bright Pink | Teal, Magenta, Orange | Neon Yellow | Edgy, Playful, Modern |
| Pastel Dream | Baby Pink, Mint Green, Lavender | White, Light Grey | Soft Lilac, Peach | Feminine, Ethereal |
| Monochrome Magic | Black, White, Grey | Black, White | Silver | Sleek, Graphic, Chic |
| Jewel Tone Glam | Deep Emerald, Sapphire Blue | Black, Dark Burgundy | Gold, Bronze | Luxurious, Rich, Festive |
| Nude Elegance | Various Nude Shades | Chocolate Brown, Taupe | Cream | Subtle, Understated |
—
The Psychology of Leopard Print
It’s fascinating how patterns can affect our mood and perception! Leopard print is often associated with confidence, power, and a touch of wildness. Wearing it can actually boost your self-esteem. According to some fashion psychologists, animal prints tap into our primal instincts, making us feel more assertive and in control. Combined with the structured, clean look of square nails, it’s a powerful yet polished combination that says, “I’m here, I’m confident, and I’ve got style.” It’s a subtle psychological boost that can make your day a little brighter and bolder.
—
Troubleshooting Common Leopard Print Nail Issues
Even with the best intentions, sometimes nail art throws us a curveball! Here are a couple of common issues and how to fix them.
Spots look messy:
Solution: Clean up with a fine-tipped brush dipped in polish remover. For future attempts, try using a toothpick or a very fine nail art brush for more precision. Don’t aim for perfect circles; irregular shapes are key!
Colors bleeding:
Solution: Ensure your base color is completely dry before adding spots. If you’re adding outlines, let your spots dry for a few minutes first, or work swiftly with a very thin layer of polish.
Not enough contrast:
* Solution: Use a darker spot color against a lighter base, or vice-versa. For a subtle look, consider a lighter outline or halo around the darker spots to make them stand out more.
—
FAQ Section
Q1: Can I do leopard print nails if I’m a complete beginner?
A1: Absolutely! Start with simple designs. Use a dotting tool or toothpick for irregular spots, and don’t worry about perfection. Focus on cleaning up the edges with polish remover and a cotton swab for a neat finish.
Q2: What’s the easiest way to create leopard spots?
A2: The easiest method for beginners is often to use a dotting tool or the tip of a toothpick. Dip it in your dark polish color and make irregular “blob” shapes with a slight curve. Don’t make perfect circles!
Q3: How long do square leopard print nails typically last?
A3: With a good base coat, careful application, and a quality top coat, your leopard print manicure can last anywhere from 7 to 14 days. Proper nail care, like avoiding harsh chemicals and moisturizing, will help extend its life.
Q4: Can I use regular nail polish for leopard print, or do I need special tools?
A4: You can definitely use regular nail polish! While specialized nail art brushes and dotting tools make it easier, you can achieve a great look with a fine-tipped polish brush, a toothpick, or even the end of a bobby pin.
Q5: What if I don’t have a clear top coat?
A5: A clear top coat is really important for sealing your design and adding shine, which helps your manicure last longer. If you don’t have one, your polish will be more prone to chipping and dulling quickly. Consider picking one up for the best results!
Q6: How do I make my leopard print look less like polka dots and more like actual leopard spots?
A6: The key is irregularity! Leopard spots are not perfect circles. They are often described as irregular blobs, commas, or even question marks. Vary the size and shape of your “spots” and add a little curved outline with a fine brush to break up the uniform look.
Q7: Are there any risks associated with doing nail art at home?
A7: The main risks are minor, like smudging your design while it’s wet, or potential staining from vibrant polishes if you skip the base coat. Always ensure good ventilation when using nail polish and remover. For any more advanced techniques or if you have sensitivities, it’s always good to research specific products. Here’s some general information on chemical hazard safety from OSHA, which can be helpful for understanding product handling.
—
Conclusion
And there you have it! Square leopard print nails are a fantastic way to express your style, add a pop of fun to your look, and feel incredibly chic. We’ve covered everything from the essential tools to step-by-step instructions and a variety of design ideas to get you started. Remember, nail art is all about creativity and having fun, so don’t be afraid to experiment with colors and techniques.
Whether you go for a classic neutral palette or a bold, modern twist, square leopard print nails are sure to make a statement. Embrace the pattern, enjoy the process, and wear your fabulous nails with confidence! Happy painting!

