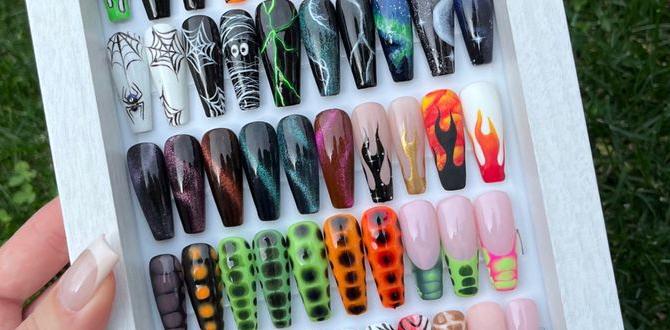
Square fruit nails are a fun, fresh way to add a pop of personality to your manicure. They’re surprisingly easy to create, even for beginners, and offer endless design possibilities. Get ready to embrace vibrant colors and playful fruit motifs for a truly sweet look!
Are you dreaming of a manicure that’s as delightful as a summer fruit bowl? Square fruit nails are the perfect way to express your playful side and brighten up any day. Forget boring colors; let’s dive into the juicy world of fruit-themed nails that are easy to achieve and totally on-trend. If you thought nail art was complicated, think again! We’re breaking down everything you need to know, from essential tools to stunning designs that anyone can recreate. Get ready to bring the garden to your fingertips!
Unlocking the Magic: Why Square Fruit Nails Are a Must-Try
Square fruit nails are more than just a trend; they’re a celebration of color, creativity, and fresh style. The square nail shape is a timeless classic, offering a clean, chic canvas that’s universally flattering. When you pair this shape with vibrant fruit designs, you get a manicure that’s both stylish and incredibly fun. They’re perfect for spring and summer, but honestly, who says you can’t enjoy a little fruity cheer any time of year?
This style is fantastic for:
- Adding a playful pop to your everyday look.
- Expressing your personality and love for all things colorful.
- Creating a unique manicure for special occasions like parties or picnics.
- Practicing your nail art skills in a fun, forgiving way.
Getting Started: Your Essential Square Fruit Nail Toolkit
Before we jump into the fruity designs, let’s gather your nail art essentials. Don’t worry if you’re new to this; you don’t need a professional salon setup. Most of these items are readily available and will serve you well for many manicures to come.
The Must-Have Tools:
- Nail Polish Remover: Essential for a clean slate and fixing any mistakes.
- Cotton Pads/Balls: For applying the remover.
- Nail File: To shape your nails into that perfect square. Aim for a file with a grit around 180-240 for natural nails.
- Cuticle Pusher/Orange Stick: To gently push back your cuticles for a neat base.
- Base Coat: Protects your natural nails from staining and helps polish adhere better.
- Top Coat: Seals your design, adds shine, and makes your manicure last longer.
- Nail Polish in Various Colors: Think bright reds, yellows, oranges, greens, blues, pinks, and whites, plus a good base white or clear for your fruit designs.
- Fine-Tipped Nail Art Brushes or Dotting Tools: These are crucial for drawing small details like seeds, stems, or outlines. You can find great starter kits online.
- Optional: Nail Art Stickers or Decals: For an even quicker and easier fruit accent.
Shaping Your Square Nails: A Quick Guide
Achieving the perfect square shape is simpler than you think. Follow these steps:
- Start with dry nails.
- Use your nail file at a 90-degree angle to your nail.
- File in one direction from the side to the tip, creating a straight edge.
- Gently file the tip straight across to create a flat surface.
- Smooth any rough edges with a lighter touch.
- Repeat for all nails, aiming for uniformity. Remember, a little practice goes a long way!
Essential Square Fruit Nail Designs for Beginners
Ready to get creative? We’ve picked out some user-friendly fruit designs that will make your square nails pop. These are perfect for practicing your technique and showing off your fun side.
1. The Classic Strawberry Square
Strawberries are universally loved and look stunning on square nails. They’re relatively simple to paint and incredibly recognizable.
What You’ll Need:
- Red nail polish
- White or yellow nail polish (for seeds)
- Green nail polish (for the leaves/stem)
- A fine-tipped brush or dotting tool
- White base coat (optional, for brighter red)
Step-by-Step:
- Start with a base coat and apply one or two coats of red nail polish. If your red isn’t opaque, apply a thin layer of white polish first and let it dry completely before adding the red.
- Once the red is dry, use your fine-tipped brush and white or yellow polish to create tiny dots scattered across the nail. These are your strawberry seeds!
- For the stem and leaves, use your green polish and brush to paint a small V-shape or a little cluster of leaves at the tip of the nail, near the cuticle.
- Seal everything with a shiny top coat.
2. Sunshine Citrus Slices (Lemon & Lime)
Bright and zesty, lemon and lime slices add a vibrant splash of color. These are great for accent nails or all-over patterns.
What You’ll Need:
- Yellow nail polish
- Lime green nail polish
- White nail polish
- A fine-tipped brush or detailer tool
Step-by-Step:
- Paint your nails with a solid yellow for lemon nails or lime green for lime nails.
- Once dry, use your brush and white polish to carefully paint thin, slightly curved lines across the nail, mimicking the segments of a citrus slice. You can also create small white dots for seeds.
- Alternatively, you can paint a simple circle or oval with white outlines and fill it with your chosen fruit color, then add white dots.
- Seal with a top coat.
3. Sweet Cherry Accents
Cherries are small, bold, and instantly recognizable. They work wonderfully as accent designs on a few nails.
What You’ll Need:
- Bright red nail polish
- Black or dark brown nail polish (for details)
- Green nail polish (for stem)
- A fine-tipped brush or dotting tool
Step-by-Step:
- Apply a vibrant red polish to your nails. Let it dry thoroughly.
- Using your fine brush and black polish, add a tiny dot or a very thin line near the top edge of the nail to create the illusion of a shadowy crevice, giving the cherry dimension.
- Paint a thin, curved stem extending from the top of the cherry using green polish.
- Seal with your top coat.
4. Watermelon Wedge Wonders
The iconic pink, green, and black pattern of watermelon is always a hit! This design is surprisingly achievable.
What You’ll Need:
- Pink or red nail polish
- Green nail polish
- Black nail polish
- White nail polish (optional, for the rind layer)
- A fine-tipped brush or dotting tool
Step-by-Step:
- Paint the majority of your nail tip (about two-thirds) with pink or red polish.
- Once dry, paint a thin stripe of white polish just above the pink layer (this mimics the white part of the rind). Let this dry.
- Apply a thicker stripe of green polish above the white stripe to represent the outer rind.
- With your fine brush and black polish, carefully create small, irregular dots or tiny “seeds” scattered across the pink/red section.
- Finish with a generous top coat.
5. Tropical Pineapple Pop
Pineapples bring a touch of the tropics. This design focuses on texture and color.
What You’ll Need:
- Yellow or golden yellow nail polish
- Green nail polish
- Brown or black nail polish (for accents)
- A fine-tipped brush or dotting tool
Step-by-Step:
- Paint your nails with a solid yellow or golden yellow color.
- Once dry, use your fine brush and brown or black polish to paint diagonal criss-cross lines all over the nail, creating a diamond or textured pattern that resembles pineapple skin.
- At the cuticle end of the nail, use green polish and your brush to paint a spiky, leafy crown. You can create short, sharp lines pointing upwards.
- Seal with a top coat.
Elevating Your Fruit Nails: Tips for Stunning Results
Want to take your fruit nail game to the next level? Here are some pro tips to make your designs even more eye-catching and durable.
Achieving a Flawless Base
A smooth, clean base is key. Always start with a good base coat. Ensure each layer of polish is completely dry before applying the next, especially when dealing with intricate designs. Patience here prevents smudges and ensures cleaner lines.
The Power of Negative Space
Don’t feel like you have to cover the entire nail. Sometimes, a simple fruit accent on a clear or nude base looks incredibly chic and modern. Try a single strawberry or a few tiny berries on a sheer polish for a minimalist take.
Playing with Textures
Consider using different finishes. A matte top coat can give your fruit designs a unique velvety look, especially for berries. Contrast this with a glossy top coat on other nails for added interest.
Adding Dimension with Details
Don’t shy away from adding tiny details. Small white dots for highlights on cherries, subtle shading with darker tones, or a fine black outline can make your fruit designs look more realistic and polished.
Durability and Shine
Always finish with a high-quality top coat. This not only adds a beautiful shine but also protects your artwork from chipping and wear. Reapply every few days if needed to extend the life of your manicure.
Pros and Cons of Square Fruit Nails
Like any nail style, square fruit nails have their advantages and disadvantages. Understanding these can help you decide if they’re the right fit for you.
| Pros | Cons |
|---|---|
| Vibrant and Fun: Instantly adds a playful, cheerful vibe. | Can Chip Easily: Intricate designs may be more prone to chipping if not sealed properly. |
| Creative Expression: Offers endless opportunities for personalization. | Time-Consuming: Detailed designs require patience and steady hands. |
| Beginner-Friendly Designs: Many fruit motifs are simple enough for novices. | Potential for Staining: Bright colors, especially reds and oranges, can sometimes stain natural nails if a base coat isn’t used. |
| Seasonal Appeal: Particularly popular and fitting for spring and summer. | May Not Suit All Occasions: Might be perceived as too casual for very formal events depending on the design. |
| Boosts Mood: Bright, fruity colors are known to lift spirits! | Requires Maintenance: Like any polish, touch-ups may be needed to keep them looking fresh. |
Frequently Asked Questions About Square Fruit Nails
Q1: What’s the best nail shape for fruit designs?
Square nails are fantastic because their straight edges provide a clean canvas. However, fruit designs can look great on other shapes too, like squoval (a softer square) or even coffin nails for a bolder statement.
Q2: Do I need special tools for fruit nail art?
While you can use regular polish bottles and toothpicks for very basic designs, fine-tipped nail art brushes or dotting tools make creating details like seeds, outlines, and stems much easier and more precise. You can find affordable sets online or at beauty supply stores.
Q3: How do I prevent nail polish from staining my nails?
Always apply a good quality base coat before your colored polish. This creates a protective barrier. Also, make sure to use a good nail polish remover to thoroughly clean your nails after removing polish, and consider using a nail strengthener or treatment between manicures.
Q4: My fruit designs look messy. How can I improve?
Patience is key! Let each layer dry completely before adding the next. Using a steady hand is also important. You can rest your wrist on a stable surface and use your non-dominant hand to steady the brush or tool. Don’t be afraid to use nail polish remover on a clean-up brush (a small, angled brush dipped in remover) to neaten edges.
Q5: How long do square fruit nails typically last?
With proper application, including a base and top coat, and careful maintenance, your fruit nail art can last anywhere from 5 to 10 days. Avoid harsh chemicals or prolonged exposure to water, and consider wearing gloves when doing chores to protect your manicure.
Q6: Can I use nail stickers or decals for fruit designs?
Absolutely! Nail stickers and decals are a fantastic shortcut for beginners or anyone short on time. They come in countless fruit designs and can be applied directly to a dry polish coat and sealed with a top coat for a quick and easy fruit-themed manicure.
Conclusion: Fruity Fun at Your Fingertips!
There you have it – your guide to creating adorable and stylish square fruit nails! We’ve covered the essential tools, broken down some simple yet stunning designs, and shared tips to help your fruity creations shine. Whether you’re painting tiny strawberries, zesty citrus slices, or cheerful watermelons, the most important ingredient is your own creativity and willingness to have fun. Don’t be afraid to mix and match designs, experiment with colors, and make these fruity looks uniquely yours. So grab your polishes, unleash your inner artist, and get ready to flaunt a manicure that’s sure to bring a smile to your face and everyone who sees it!

