Create stunning square floral nails with simple, step-by-step designs perfect for spring. Learn easy techniques and find inspiration to elevate your manicure game.
Spring is here, and with it comes a desire for fresh, vibrant beauty! If you’re looking to refresh your look, your nails are a fantastic place to start. Tired of plain nails and want something a bit more cheerful? Maybe you’ve seen gorgeous floral nail art online but thought it looked too complicated to do yourself. Don’t worry, I’ve got your back! This guide will show you how to create beautiful square floral nails that are totally achievable, even if you’re just starting out. We’ll break down everything you need, from simple tools to easy design ideas, making your spring manicure a breeze. Get ready to bloom with confidence!
What You’ll Need to Get Started
Before we dive into the fun designs, let’s gather our supplies. Having the right tools makes all the difference in creating polished-looking nails at home. Don’t feel overwhelmed; many of these are items you might already have, or they are easy to find at your local drugstore or online beauty supply stores.
Essential Nail Care Items
- Nail Polish Remover: To start with a clean canvas.
- Cotton Pads or Balls: For applying remover.
- Nail File: To shape your nails. Medium-grit files are great for home use.
- Cuticle Pusher or Orange Stick: To gently push back cuticles.
- Base Coat: Protects your natural nails and helps polish adhere.
- Top Coat: Seals your design and adds shine, making your manicure last longer.
Nail Art Essentials for Floral Designs
- Polishes in Spring Colors: Think pastels, brights, or even classic white and soft greens.
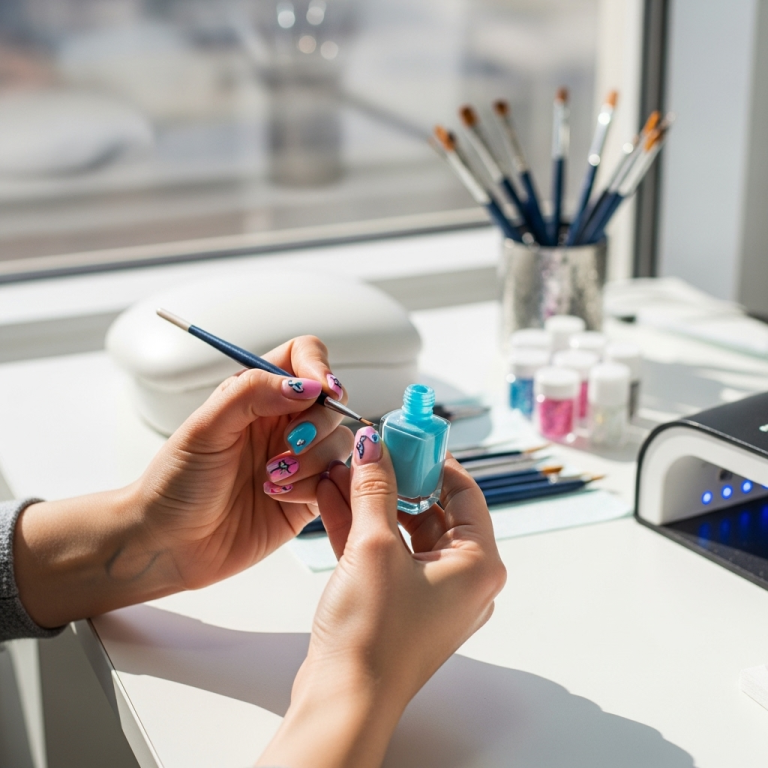
- Dotting Tools: These have small metal balls on the end and are perfect for creating dots that form petals and centers. You can find sets with various sizes.
- Thin Nail Art Brushes: For drawing finer lines, stems, and leaves. A detail brush or a striper brush works wonders.
- Toothpicks: A handy alternative if you don’t have dotting tools for creating small dots.
- Optional: Stencils or Nail Stickers: For a super quick and easy floral look if freehand isn’t your thing yet.
Shaping Your Square Nails for Perfection
The “square” in square floral nails refers to the nail shape. While you can achieve this look on any nail length, a defined square shape really makes the designs pop. Here’s how to get that perfect French square look:
1. Trim: If your nails are long, gently trim them to your desired length using nail clippers.
2. File: Use your nail file to shape one side of your nail straight up towards the tip. Then, gently file the other side straight up.
3. Straighten: Now, hold the file perpendicular to the tip and file in one direction to create a perfectly straight edge across the tip. Avoid a sawing motion, as this can weaken the nail.
4. Softened Edges (Optional): For a “squoval” (square-oval) look, you can slightly round the sharp corners with a few gentle passes of the file. This can be more comfortable and less prone to snagging.
A good resource for understanding different nail shapes and filing techniques can be found on reputable beauty sites. Check out guides on proper nail filing techniques for healthy, strong nails.
Easy Square Floral Nail Designs for Beginners
Ready to get creative? These designs are simple, effective, and perfect for welcoming spring. We’ll start with the easiest and build up a little.
Design 1: Simple Dot Flowers
This is the quickest way to get a floral feel.
- Prep: Start with clean, shaped nails. Apply a thin layer of base coat and let it dry completely.
- Base Color: Apply your chosen spring-colored polish. A pale pink, sky blue, or soft lavender works beautifully as a base. Apply two coats for an opaque finish, allowing each to dry.
- Create Petals: Use a dotting tool (or the rounded end of a toothpick) dipped in a contrasting color (like white or a lighter shade of your base color) to create small dots in a circular pattern. Think of arranging them like flower petals. You can make a ring of 4-6 dots.
- Add a Center: Use a smaller dotting tool or the tip of a toothpick dipped in a bright color (like yellow or a darker contrasting hue) to place a single dot in the center of your petal arrangement.
- Repeat: Do this on one or two accent nails, or scatter small floral clusters across all your nails.
- Seal: Once completely dry, apply a layer of top coat and let it cure.
Design 2: Minimalist Floral Accents
This design uses simple lines and dots for a chic, understated floral look.
- Prep: Start with base coat and your chosen light-colored polish (e.g., white, cream, pale yellow). Ensure it’s fully dry.
- Draw Stems: Using a thin nail art brush or a toothpick dipped in green polish, draw a few delicate vertical or slightly curved lines on one or two accent nails. These are your stems.
- Add Leaves: With the same green polish and brush, add small, pointed leaf shapes off the stems. A simple comma shape works well.
- Create Tiny Flowers: Dip a fine-tip dotting tool or toothpick into a contrasting color like pink, purple, or coral. Place a few tiny dots at the end of some stems to represent small flowers. You can make a cluster of 3-5 tiny dots.
- Optional Detail: For a touch more detail, you can add a single tiny dot of yellow or gold in the center of your tiny flowers.
- Seal: Apply a clear top coat to protect your work.
Design 3: French Tip Floral Twist
Combine a classic French manicure with a floral touch.
- Prep: Apply your base coat and let it dry.
- Base Color: Apply a sheer nude or pale pink polish to your entire nail and let it dry.
- Create the French Tip: Using a white polish and a thin brush or a French tip guide sticker, carefully paint a straight line across the free edge of your nails. Let this dry completely.
- Add a Floral Element: On one or two accent nails, use a small dotting tool or thin brush to add a tiny floral design just at the edge of the white tip or slightly peeking over it. For example, place a few small dots in a flower shape on the corner of the smile line.
- Details: You can add a tiny green stem or leaf nearby if you like.
- Seal: Once all elements are dry, finish with a top coat.
Design 4: Delicate Floral Sprays
This looks intricate but is surprisingly simple.
- Prep: Base coat and your chosen base color (e.g., light greys, soft blues, lilacs). Dry thoroughly.
- Outline Petals: Use a very fine-tip nail art brush dipped in white or a light pastel polish. Gently freehand a few curved, slightly overlapping strokes to create petal shapes. Think of abstract flower forms rather than perfect circles.
- Add Centers: Use a tiny dotting tool in a contrasting color (e.g., yellow, metallic gold, or a deeper shade of the petal color) to add a small dot in the center of your outlined petals.
- Add Stems/Leaves: With a fine green brush, add thin, wispy stems and small leaf shapes extending from your flowers. Don’t overdo it – a few delicate lines are best.
- Placement: Position these delicate sprays on the lower half of your nail or softly trailing from a corner.
- Seal: Apply a glossy top coat to seal the design.
Tips for Longer-Lasting Square Floral Nails
Creating beautiful floral nails is half the battle; making them last is the other! Here are some tips to ensure your floral masterpieces stay pristine:
- Always Use a Base Coat: This is non-negotiable! It prevents staining and creates a smooth surface for your polish and art.
- Apply Thin Coats of Polish: Thick coats take longer to dry and are more prone to chipping. Two thin coats are always better than one thick one.
- Let Each Layer Dry: Patience is key! Rushing the drying process between your base color, art, and top coat is a common cause of smudging and dents. A quick-dry spray can be a lifesaver.
- Cap Your Free Edge: When applying your top coat, run the brush horizontally along the very tip of your nail. This seals the polish and art, preventing chips from the edge.
- Be Gentle: Avoid using your nails as tools for scraping or prying.
- Moisturize is Key: Keep your cuticles and hands hydrated with cuticle oil and hand lotion. Healthy nails are less likely to break and look better with any polish.
Troubleshooting Common Nail Art Issues
Even the best of us run into little hiccups when doing nail art. Here are some common problems and how to fix them:
| Problem | Solution |
|---|---|
| Smudged Polish/Design | If it’s fresh, gently try to smooth it with a clean brush dipped in polish remover, or carefully reapply the color/design. If it’s partially dry, it’s often best to gently remove and start that nail again. For the future, ensure adequate drying time between layers. |
| Uneven Dots | Dip your dotting tool straight into the polish and wipe off any excess on a piece of paper before applying to the nail. Use consistent pressure. If they’re slightly off, you can often very gently nudge them into place with a clean, dry dotting tool or toothpick before the polish dries. |
| Brush Strokes Showing | Apply polish in thin, even strokes. If using a thicker polish, try adding a drop of nail polish thinner (not remover!) to loosen it up. Ensure your base color is fully dry before applying art. |
| Polish Not Drying Properly | Ensure you’re using good quality polish. Apply thin coats. Use a quick-dry top coat or drops. Avoid touching surfaces immediately after painting. You can also try putting your hands in cold water (not ice water) for a minute after polish has set for about 5 minutes; this can help harden the polish faster. |
| Lines Too Thick/Blobby | This often means too much polish on the brush. Wipe off excess polish on the side of the bottle neck. For fine lines, a very thin brush held at an angle can help. If you make a mistake, a clean-up brush (a small, flat brush dipped in polish remover) is your best friend for precise edge tidying. |
Tools Comparison: Dotting Tools vs. Toothpicks
Both dotting tools and toothpicks can be effective for creating floral nail art, especially for beginners. Here’s a quick comparison to help you choose.
| Feature | Dotting Tools | Toothpicks |
|---|---|---|
| Consistency of Dots | Excellent. Different ball sizes create uniform dots. | Variable. Can create small dots, but size depends on how much polish is picked up. Can chip wood. |
| Ease of Use for Beginners | Generally easy. Smooth rolling action. | Easy to find and use, but requires a bit more practice for consistent results. |
| Durability | Long-lasting if cared for. | Single-use, or can be washed and reused a few times, but the wood can fray. |
| Availability | Found in nail art kits or single. | Readily available in any household. |
| Best For | Creating precise patterns, uniform petals, and small flower centers. | Quick, simple dots, small details, or when you need a tool in a pinch. |
Expert Tips for Elevating Your Floral Designs
Once you’re comfortable with the basics, here are some ways to add a little extra flair to your square floral nails:
- Color Combinations: Don’t be afraid to experiment! Try neons with pastels, or metallics with mattes. Look up color theory basics for inspiration. Understanding complementary colors can make your designs pop.
- Layering Colors: For more depth, try layering colors. For instance, add a lighter shade of your base color over a darker one on a nail for a subtle ombre effect before adding flowers.
- Matte Top Coat: A matte finish can give your floral designs a delicate, almost painted-on look, which is very chic.
- Glitter Accents: A tiny dusting of fine glitter on the flower centers or a hint of shimmer on the petals can add a magical touch for special occasions.
- Negative Space: Instead of a full base color, try leaving some parts of your nail blank “negative space.” A delicate floral spray on a sheer nude or even bare nail can be incredibly elegant.
- 3D Elements: For the more adventurous, try adding small 3D elements like tiny acrylic flowers or rhinestones to the center of a particularly bold floral design. Ensure these are securely attached with strong nail glue or builder gel.
Frequently Asked Questions About Square Floral Nails
Q1: How do I make my floral nail art look less “flat”?
A1: You can add depth by using slightly different shades for petals or centers, or by adding a tiny darker shade in the middle of a petal. A touch of shimmer or glitter can also add dimension.
Q2: My dotting tool is leaving weird marks instead of dots. What am I doing wrong?
A2: Ensure you’re dipping your tool cleanly into the polish and wiping off excess. Practice on paper first. If the tool itself is damaged, it might be time for a new one. Also, make sure your nail polish isn’t too thick or goopy.
Q3: Can I do floral nails on short nails?
A3: Absolutely! Floral designs can look adorable on short nails. Opt for smaller flowers and fewer elements so they don’t look cluttered. Minimalist accents are perfect for shorter lengths.
Q4: How long does DIY floral nail art usually last?
A4: With proper application, a good base and top coat, and careful wear, your designs can last anywhere from 5-10 days. Regular moisturizing also helps keep the polish from drying out and chipping.
Q5: What’s the best way to clean up tiny mistakes in my nail art?
A5: A small, flat, synthetic brush (like a concealer brush or a dedicated clean-up brush) dipped lightly in nail polish remover is your best friend. You can use it to carefully erase small errors or tidy up edges around your designs.
Q6: Do I need special polish for nail art?
A6: Not necessarily! You can use regular nail polish. However, polishes specifically labeled for nail art often have finer brushes or are formulated for precision. Acrylic paints (which need to be sealed with a top coat) are also a popular option for detailed work because they dry matte and are easy to re-work.
Conclusion: Embrace Your Spring Mani
There you have it – your beginner-friendly guide to creating beautiful square floral nails that scream spring! From simple dot flowers to delicate sprays, there are so many ways to bring a touch of nature’s beauty to your fingertips. Remember, nail art is all about creativity and self-expression. Don’t be afraid to play with colors, try different designs, and most importantly, have fun with it! With a few basic tools and a little practice,


