Want square cherry nails? It’s easier than you think! Get the perfect cherry red polish, a clean square shape, and a glossy finish with these pro secrets. Elevate your manicure game with simple, achievable steps for a stunning look at home.
Dreaming of chic cherry nails? That vibrant red hue on a perfectly shaped square nail is a timeless look that’s surprisingly easy to achieve yourself. But sometimes, replicating that salon-smooth finish at home can feel a little tricky. Don’t worry, fellow nail lovers! We’re diving into the secrets to getting gorgeous square cherry nails that will turn heads. Get ready to feel like a nail pro!
This guide is designed to make everyone feel confident, whether you’re a total beginner or just looking to level up your nail game. We’ll cover everything from picking the perfect shade to achieving that flawless, glossy topcoat. Let’s get those nails looking absolutely divine!
What Exactly Are Square Cherry Nails?
Square cherry nails are a manicure style featuring a vibrant, deep red polish (reminiscent of ripe cherries) applied to nails that are filed into a distinct square shape. This means the sides of the nail are straight and the tip is a sharp, 90-degree angle. It’s a classic yet trendy look that offers a clean, modern aesthetic with a pop of bold color. This combination is universally flattering and suits many occasions, from everyday chic to special events.
Why Choose Square Cherry Nails?
There are so many reasons why this nail style has captured our hearts:
- Timeless Elegance: The combination of a rich red and a clean square shape is a classic for a reason. It never goes out of style.
- Bold Yet Sophisticated: Cherry red is a confident color that’s both eye-catching and sophisticated, making a statement without being over the top.
- Versatile: This look transitions beautifully from day to night, casual hangouts to formal events.
- Flattering Shape: The square shape can make fingers appear longer and more elegant, especially when the length is well-maintained.
- Easy DIY: With the right tools and a few simple techniques, you can achieve professional-looking results right at your kitchen table.
Pro Secrets for the Perfect Square Cherry Nail Base
Before we even think about color, a little prep work goes a long way. Think of it like preparing a canvas! This is where the magic really begins, setting the stage for that flawless cherry finish.
Nail Prep Essentials
Getting your nails ready is crucial for a long-lasting and beautiful manicure. Here’s what you’ll need and why:
- Nail File: A medium-grit file (around 180-240 grit) is perfect for shaping natural nails without causing damage.
- Cuticle Pusher/Orange Stick: To gently push back your cuticles.
- Cuticle Remover (Optional): Helps soften cuticles for easier removal.
- Nail Buffer: A multi-sided buffer can smooth ridges and create a slight sheen before polish.
- Nail Polish Remover: For cleaning up any mistakes and removing old polish.
- Lint-Free Wipes: To ensure no fuzzy bits are left behind.
Step-by-Step Nail Shaping
Achieving that perfect square shape is all about precision and patience. Remember, it’s better to file a little at a time!
- Remove Old Polish: Start by ensuring all previous nail polish is completely removed using nail polish remover and a lint-free wipe.
- Trim Nails (If Needed): If your nails are too long, trim them first to a manageable length.
- Shape the Sides: Gently file one side of your nail from the cuticle towards the tip in one direction. Repeat on the other side. Avoid sawing back and forth, as this can weaken the nail.
- Create the Straight Tip: Now, carefully file the tip of your nail straight across. Imagine you’re drawing a straight line. Keep the file perpendicular to your nail edge.
- Soften Edges (Optional but Recommended): For a softer, yet still square, look that’s less prone to chipping, lightly round the very corners with your file. This is often called a “squoval” shape, which is a popular variation for square nails.
- Buff Gently: Use the smoothing side of your nail buffer to gently buff the surface of your nails. This removes any oils and creates a smooth base for polish to adhere to.
- Clean Up Cuticles: Apply a tiny bit of cuticle remover, let it sit for a minute, then gently push back your cuticles with a cuticle pusher or orange stick. Trim any excess dead skin, but be careful not to cut into live skin.
- Wipe Down: Finish by wiping each nail with a clean, damp cloth or a lint-free wipe to remove any dust or oil.
A well-prepped nail is the foundation for a professional-looking manicure. Taking these steps ensures your polish will adhere better and last longer!
Choosing Your Perfect Cherry Red Polish
The “cherry” in square cherry nails is key! The right shade can make all the difference. There are many variations of cherry red, and finding the one that speaks to you is part of the fun.
Understanding Cherry Red Shades
Cherry red isn’t just one color. It can range from:
- True Cherry Red: A balanced red with no strong orange or blue undertones.
- Blue-Toned Cherry Red: These have a cooler, almost vampy feel, often leaning towards a deep raspberry or wine. They can make nail beds appear brighter.
- Orange-Toned Cherry Red: These are warmer and brighter, with a vibrant, almost firetruck red feel.
What to Look For in a Good Polish
Beyond the shade, consider these factors when selecting your polish:
- Pigmentation: Look for a polish that offers good color payoff in one or two coats.
- Formula: A good formula will be smooth, non-streaky, and self-leveling for an even application.
- Finish: Most cherry reds look stunning in a classic cream or high-gloss finish.
- Brand Reputation: Consider brands known for their durable and vibrant polishes.
Pro Tip: If you’re unsure about an undertone, hold the bottle next to a white piece of paper. This can help you see if there are more blue or orange hints in the shade.
Applying Your Cherry Red Polish Like a Pro
This is where your square cherry nails truly come to life! The application is simple but requires a steady hand and a few key techniques.
Essential Tools for Application
You don’t need much, but the right tools make it so much smoother:
- Your chosen cherry red nail polish.
- A good quality base coat.
- A high-shine top coat.
- Clean-up brushes (a fine-tipped brush or an old, clean eyeliner brush works well).
- Nail polish remover.
The Step-by-Step Application Process
- Apply Base Coat: Swipe one thin layer of base coat over each nail. This protects your natural nail from staining (especially important with vibrant reds!) and helps your polish adhere better. Let it dry completely, usually 1-2 minutes.
- First Coat of Color:
- Wipe excess polish off one side of the brush, then press the brush against the neck of the bottle to get a perfect bead of polish.
- Start “about a millimeter from the cuticle” by placing the bead of polish.
- Gently push the brush back towards the cuticle, forming a semi-circle around it.
- Then, pull the brush straight down to the tip of the nail in one smooth stroke.
- Repeat this process for the other side of the nail, meeting in the middle.
- Finally, do a swipe down the center to ensure full coverage.
- This “three-stroke” method helps achieve an even coat close to the cuticle without flooding it.
Let this coat dry for about 2-3 minutes. It might look a little streaky, and that’s okay!
- Second Coat of Color: Apply a second coat using the same three-stroke method. This coat should provide opaque, streak-free coverage. Let it dry for at least 5 minutes. Rushing this step is a common mistake!
- Clean Up Edges: Dip your fine-tipped cleanup brush into nail polish remover. Carefully trace along the edges of your nails to remove any polish that got onto your skin. This makes a huge difference in the final look!
- Apply Top Coat:
- Ensure your colored polish is completely dry. Waiting 5-10 minutes is ideal.
- Apply a generous layer of your top coat. Make sure to cap the free edge of your nail by sweeping the brush horizontally across the tip. This is a crucial step for preventing chips and extending the life of your manicure.
- Let the top coat dry completely. This usually takes at least 10-15 minutes for it to be fully hardened.
Pro Tip: If you’re finding the polish thickness varies, try placing the bottle in a bowl of warm water for a few minutes to thin it out slightly. However, be careful not to get water inside the bottle!
Maintaining Your Square Cherry Nails
Keeping your cherry red square nails looking fabulous is all about a little bit of care.
Tips for Longevity
- Avoid Harsh Activities: Try not to use your nails as tools. For example, don’t use them to scrape or open things.
- Moisturize: Use cuticle oil daily to keep your cuticles and nails hydrated. This prevents nhydration that can lead to chipping or lifting.
- Wear Gloves: When doing chores like washing dishes or cleaning, wear rubber gloves to protect your manicure from water and harsh chemicals.
- Reapply Top Coat: Every 2-3 days, apply an extra thin layer of top coat to refresh the shine and add an extra protective layer.
Dealing with Chipping
If you notice a small chip:
- Option 1 (Quick Fix): Gently buff down the chipped area with a fine-grit file. Apply a tiny bit of red polish just to the chipped spot, then reapply top coat over the entire nail.
- Option 2 (If it’s bad): Sometimes, it’s best to remove the polish from that nail and reapply the color and top coat just to that one nail. Match the polish as closely as possible.
Square Cherry Nail Variations to Try
Once you’ve mastered the classic, why not play around? Square nails are a fantastic canvas for many nail art ideas.
Minimalist Cherry Accents
Not ready for a full cherry red cover? Try these:
- Cherry Dot: Paint your nails a nude or clear shade and add a small, perfect cherry-red dot near the cuticle.
- Half-Moon Cherry: Use a stencil or a fine brush to create a cherry-red half-moon at the base of a clear or nude nail.
- Cherry French Tips: Replace the classic white tip with a thin line of cherry red.
Adding a Glitter or Chrome Touch
A little sparkle can elevate your cherry nails:
- Glitter Accent Nail: Paint all nails cherry red, but make one nail a full glitter nail in a matching red or rose gold shade.
- Subtle Shimmer Top Coat: Apply a sheer glitter or pearl top coat over your finished cherry red for a subtle shimmer.
- Chrome Accents: Use a chrome powder to create a reverse French tip or geometric design over the red.
Matte vs. Glossy
Have fun experimenting with finishes! While glossy is classic, a matte cherry red can give a velvety, sophisticated look. Simply swap your glossy top coat for a matte one.
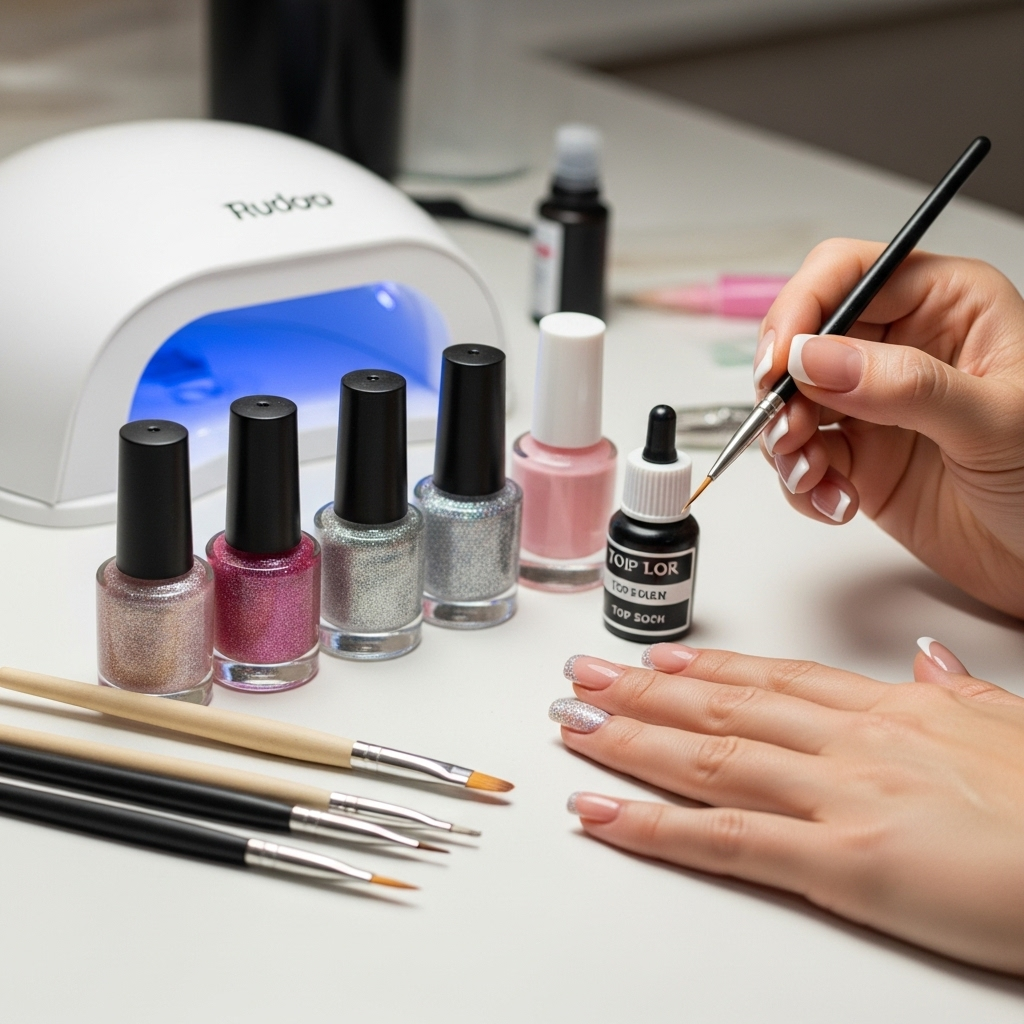
Tools of the Trade: A Quick Comparison
When it comes to shaping and application, having the right tools can boost your confidence and the quality of your manicure.
| Tool | Purpose | Beginner Friendliness | Pro Tip |
|---|---|---|---|
| Emery Board (Fine Grit) | Shaping and smoothing nail edges. | Very High | Always file in one direction to prevent splitting. |
| Glass Nail File | Precise shaping and sealing nail edges. | High | Durable and gentle; great for preventing snags. For more on nail care, see resources from the Centers for Disease Control and Prevention on personal hygiene best practices. |
| Cuticle Pusher (Metal or Orange Stick) | Gently pushing back and tidying cuticles. | High | Push gently; avoid forcing or cutting live cuticle. |
| Cleanup Brush (Fine Tip) | Removing excess polish from skin with remover. | Medium | A clean, small old eyeliner brush works wonders! |
| Nail Buffer (4-way) | Smoothing ridges, adding shine, preparing nail surface. | High | Use each side gently on natural nails. |
Frequently Asked Questions About Square Cherry Nails
Q1: Will square nails fit my nail shape?
Absolutely! Square nails can be very flattering on most nail bed shapes. If natural nails tend to break or snag at the corners, you might prefer a “squoval” shape, which is a square with slightly rounded or softened corners. This offers the look of a square with added durability.
Q2: Can I use gel polish for my square cherry nails?
Yes, you can! Gel polish offers incredible durability and a super high-gloss finish that’s perfect for cherry nails. The application process is similar, but you’ll need an LED or UV lamp to cure each layer. If you’re new to gel, follow the specific instructions for your gel polish kit carefully.
Q3: My red polish always stains my nails. How can I prevent this?
This is super common with vibrant shades! The absolute best defense is a good quality base coat. Apply at least two thin layers of base coat before your red polish and let them dry completely. Some people also swear by using a dark purple or even black polish as the first color layer, as this can help block the red pigment.
Q4: How do I get my square nails looking sharp and not chipped?
For sharp, chip-free square nails: ensure you file them straight across to create the square tip. Crucially, always “cap” the free edge of your nail with your top coat. This means sweeping the brush along the very tip of your nail horizontally after you’ve painted the top. This seals the edge and prevents lifting or chipping.
Q5: My cherry red polish is streaky. What am I doing wrong?
Streaky polish is usually a sign of one of two things: the polish formula itself, or not enough coats. Ensure you’re using a good quality, opaque polish. Let each coat dry sufficiently before applying the next. The “three-stroke” application method mentioned earlier also helps create a smoother, more even finish.
Q6: How long should my square cherry nails be?
The length is entirely up to your personal preference! Square nails can look stunning at any length, from short and practical to long and dramatic. For beginners, starting with a shorter length is often easier to manage and less prone to breaking. If you opt for longer nails, consider the squoval shape for added strength.
Conclusion
There you have it – all the pro secrets to achieving stunning square cherry nails right at home! From perfecting that crisp square shape to choosing the most luscious cherry red and applying it flawlessly, you’re now equipped to create a manicure that looks like it came straight from a salon. Remember, consistency is key. The more you practice these techniques, the more confident and skilled you’ll become.
Don’t be afraid to experiment with different shades of cherry red or add your own personal flair with simple accent designs. Most importantly, have fun with it! Your nails are a fantastic way to express yourself and add a touch of confidence to your day. So go ahead, paint those nails