Square black nails are a timeless, sophisticated choice that adds an instant touch of edgy elegance to any look. This versatile style offers a clean silhouette perfect for both minimalist and bold aesthetics, making it a must-have manicure for anyone seeking chic simplicity.
Ever scrolled through nail inspiration and found yourself drawn to that perfectly polished, undeniably chic look? The kind that whispers confidence and elevates your entire style? If you’re nodding along, you’ve likely encountered the magic of square black nails. They’re more than just a color and shape; they’re a statement. But maybe you’re wondering if this sophisticated style is achievable for you. Perhaps you’re a beginner looking for a simple yet stunning manicure, or maybe you’re just curious about making black nails feel fresh and fabulous. Don’t worry, I’ve got you covered! We’re going to dive deep into the world of square black nails, transforming them from a simple idea into your go-to essential. Get ready to master this must-have look!
Why Square Black Nails Are the Ultimate Chic Accessory
Let’s talk about why black is always a good idea, especially when it comes to your nails. Black is the little black dress of the manicure world – it goes with absolutely everything. It’s sleek, it’s mysterious, and it undeniably adds an air of sophistication. Now, pair that with the clean, structured elegance of a square shape, and you’ve got a winning combination. Square nails offer a modern and polished look that’s universally flattering and incredibly versatile.
This combination is fantastic because:
- Timeless Appeal: Black is a classic color that never goes out of style.
- Versatile Elegance: It suits almost any outfit and occasion, from casual days to formal nights.
- Chic Simplicity: The square shape provides a clean, modern canvas that looks effortlessly put-together.
- Confidence Booster: There’s something powerfully confident about a well-maintained black manicure.
The Anatomy of a Perfect Square Black Nail
Before we get into the how-to, let’s break down what makes a square black nail so special. It’s all about the details! A true square nail has straight sidewalls and a straight, 90-degree free edge. This shape is fantastic for both short and long nails, though it tends to look particularly striking on medium to longer lengths where the clean lines can really shine.
Understanding Nail Shapes
While we’re focusing on the square, it’s good to know there are other popular shapes:
- Round: Follows the natural curve of the fingertip, good for short nails.
- Oval: Elongates the fingers, creating a graceful look.
- Square: Straight sidewalls and a straight tip.
- Squoval: A softened square with rounded corners.
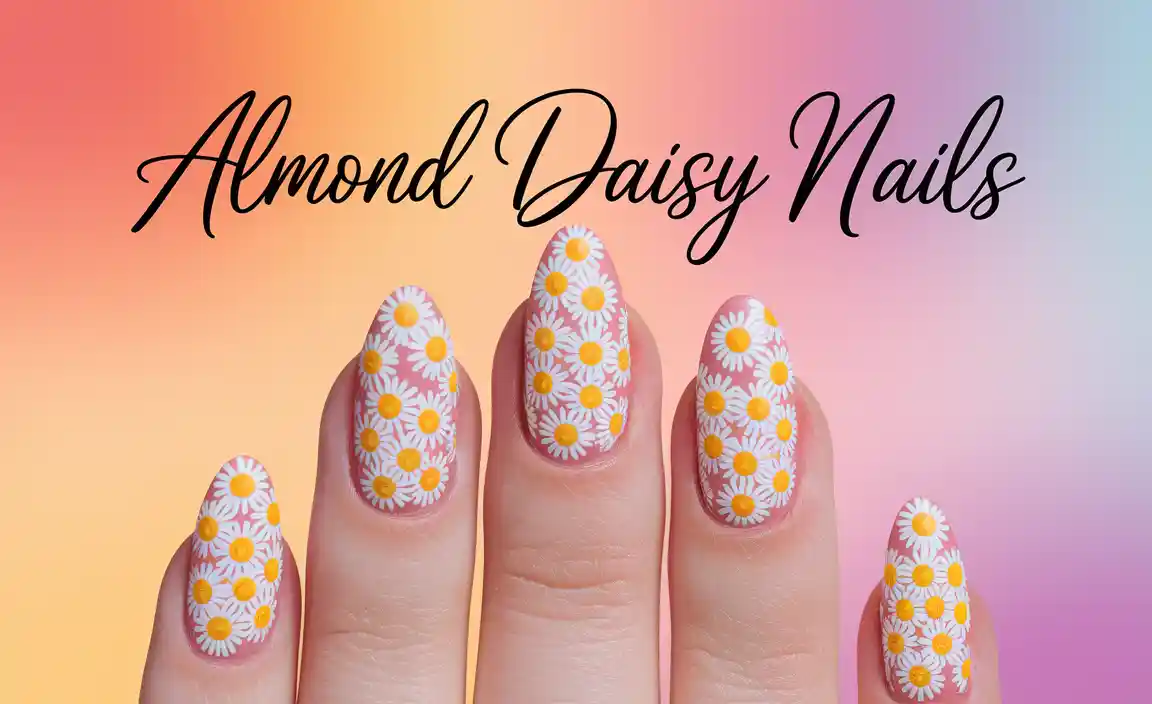
- Almond: Tapered like an almond, with a rounded point.
- Stiletto: Long and pointed to a sharp peak.
- Coffin/Ballerina: Tapered with a flat, squared-off tip.
The square shape offers a bold, structured look that’s a perfect foundation for black polish. It’s a shape that means business, in the chicest way possible!
The Power of Black Polish
Black nail polish isn’t just “black.” There’s a range of finishes and undertones:
- Glossy: The classic, high-shine finish that looks incredibly sophisticated.
- Matte: A velvety, non-shiny finish offering a modern, edgy vibe.
- Satin: A subtle sheen, somewhere between glossy and matte.
- Glitter/Shimmer: Black polishes with flecks of glitter or micro-shimmer for added sparkle.
For that essential chic look, a classic glossy black is often the go-to, but don’t be afraid to experiment with matte or subtle shimmer for a unique twist!
DIY Square Black Nails: Your Step-by-Step Guide
Ready to achieve those salon-worthy square black nails right at home? It’s easier than you think! With a few essential tools and a little patience, you’ll have a flawless manicure that turns heads. This guide is perfect for beginners, breaking down each step so you feel confident and excited about your nail journey.
Essential Tools You’ll Need:
Gathering the right supplies is key to a great at-home manicure. Here’s what you’ll want in your nail toolkit:
- Nail Clippers: For trimming nails to your desired length.
- Nail File: A medium-grit file (around 180 grit) is great for shaping, and a fine-grit file (220+ grit) for smoothing. You can also use a glass file for gentleness.
- Nail Buffer: A multi-sided buffer can smooth out ridges, buff the nail surface, and add shine.
- Cuticle Pusher or Orange Stick: To gently push back your cuticles.
- Cuticle Oil: To nourish and soften your cuticles.
- Base Coat: Essential for protecting your natural nails and helping polish adhere.
- Black Nail Polish: Choose your favorite finish!
- Top Coat: To seal your color, add shine, and prevent chipping.
- Cotton Pads/Lint-Free Wipes: For cleaning nails and removing excess polish.
- Nail Polish Remover: Acetone-based or non-acetone, depending on your preference.
Step 1: Prep Your Nails
This is the most crucial step for a long-lasting manicure. Start with bare nails, free of any old polish. Remove all traces of old polish using a good nail polish remover and lint-free wipes.
Next, work on your cuticles. Apply a small amount of cuticle oil around your nail beds. Let it sit for a minute or two to soften them, then gently push back your cuticles using a cuticle pusher or an orange stick. Avoid cutting your cuticles, as this can lead to infection. If you have hangnails, carefully trim them with clean cuticle nippers.
Step 2: Shape Your Nails into a Perfect Square
This is where we create the signature square shape. Ensure your nails are dry and free of oils.
Start by clipping your nails to your desired length. Remember, square nails look best with a bit of length to showcase the straight edges. Don’t make them too short initially; you can always file more off.
Now, grab your medium-grit nail file. Hold the file perpendicular to your nail. File in one direction across the free edge of your nail, aiming to create a straight line. Avoid sawing back and forth, as this can weaken the nail.
Use the file to gently create sharp, 90-degree corners. For a squoval shape (a softer square), gently round the very tips of the corners. Once you have the desired square shape on all nails, use a fine-grit buffer to smooth down any rough edges on the nail surface. Don’t over-buff; you just want a smooth canvas.
Step 3: Apply Your Base Coat
Apply one thin, even layer of your base coat. This step is vital for several reasons:
- Prevents Staining: Dark colors like black can sometimes stain the natural nail. A base coat acts as a protective barrier.
- Smooths the Nail Surface: It fills in minor imperfections, creating a smoother surface for polish application.
- Increases Polish Adhesion: It helps your polish stick better, leading to a longer-lasting manicure.
Let the base coat dry completely. This usually takes about 60 seconds.
Step 4: Apply the Black Nail Polish
Now for the star of the show! Shake your black nail polish gently to mix. Starting with a thin coat is key to avoiding clumps and streaks. Apply the polish in three strokes: one down the center, then one down each side. Cap the free edge of your nail by running the brush lightly along the tip – this helps prevent chipping.
Allow the first coat to dry for at least 2-3 minutes before applying the second coat. A second coat will provide opaque, even coverage. Apply it using the same three-stroke method.
If you notice any streaks or unevenness, don’t worry! A third thin coat might be needed for perfect opacity, but try to achieve full coverage with two.
Step 5: Apply Your Top Coat
Once the black polish is completely dry (wait at least 5 minutes after the last coat), it’s time for the top coat. Apply one generous, even layer of your favorite glossy or matte top coat. Again, cap the free edge of your nails. This step is crucial for:
- Protection: It shields your black polish from chips, scratches, and fading.
- Shine (or Matte Finish): It provides that beautiful glass-like shine or a sophisticated matte look.
- Longevity: A good top coat significantly extends the life of your manicure.
For extra durability, consider using a quick-dry top coat. These often contain ingredients that speed up the drying process.
Step 6: Clean Up and Finishing Touches
Dip a small, angled brush or an orangewood stick with a cotton tip into nail polish remover. Carefully trace around your nail beds and cuticles to clean up any mistakes and create a crisp edge. This step makes all the difference in giving your manicure a professional finish.
Once your polish is fully dry (give it at least 15-20 minutes for non-quick-dry formulas), apply a drop of cuticle oil to each nail. Gently massage it into your cuticles and the surrounding skin. This keeps them hydrated and prevents them from looking dry and flaky, maintaining the overall chic appearance of your nails.
Elevating Your Square Black Nails: Design Ideas
While simple glossy or matte square black nails are inherently chic, there are so many ways to add your personal flair. Here are some ideas to take your essential black manicure from classic to extraordinary:
Minimalist Touches
- A Single Accent Nail: Paint one nail on each hand a different color (like a deep red, metallic silver, or even a contrasting white) or add a subtle design.
- Geometric Lines: Use a fine brush or striping tape to add a thin silver, gold, or white line along the cuticle or at the tip.
- Subtle Glitter: A very light dusting of fine holographic or silver glitter on just one or two nails can add a touch of magic.
- Negative Space: Leave a small section of the nail bare (no polish) while the rest is black. This creates a modern, edgy look.
Bold & Glamorous
- Metallic Accents: Pair your black nails with metallic tips (chrome, gold, silver) for a striking contrast.
- Studs or Gems: Add a few small metallic studs or rhinestones to an accent nail for a touch of sparkle and dimension.
- Marble Effect: Incorporate a black and white or black and gold marble design on an accent nail.
- All-Over Glitter: For a truly dramatic look, go for a full glitter accent nail in a complementary color or a black glitter.
Seasonal & Themed
- Winter Sparkle: Add snowflake decals or fine white lines for a frosty look.
- Halloween Hues: Combine black with deep purples, oranges, or add spooky decals.
- Edgy Grunge: Think distressed finishes, chains, or dark chrome.
Remember, less is often more with black. Even a tiny detail can make a big statement!
Caring for Your Square Black Nails
To keep your essential chic square black nails looking fabulous for as long as possible, a little bit of care goes a long way. Treat them well, and they’ll reward you with durability and beauty.
Daily Habits for Longevity
- Wear Gloves: When doing chores like washing dishes, cleaning, or gardening, wear rubber gloves. Harsh chemicals and excessive water can weaken polish and the nail itself.
- Moisturize: Apply hand lotion frequently throughout the day, especially after washing your hands. This keeps your skin and cuticles hydrated, preventing dryness.
- Use Cuticle Oil: Apply cuticle oil daily, particularly before bed. This nourishes the nail matrix (where the nail grows from) and keeps cuticles looking neat and healthy.
- Avoid Using Nails as Tools: Don’t use your nails to pry open cans, scrape stickers, or as tools for other tasks. This is a surefire way to chip or break them.
Touching Up and Maintenance
Sometimes, even with the best care, a tiny chip might appear. Don’t despair!
- Minor Chips: You can often file a tiny chip smooth if it’s on the edge. Then, carefully apply a thin layer of your black polish just to the affected area, wait for it to dry, and add a touch of top coat.
- Reapplication: For a refresh after about a week, you can sometimes get away with just applying another layer of just your clear top coat. This revitalizes the shine and adds a protective layer. If color has faded or chipped significantly, it’s best to remove and reapply.
- Rebalancing: As your nails grow, you might notice your natural nail peeking through at the base. You can carefully fill this in with a thin layer of base coat, then black polish, and a final top coat to extend wear.
Proper care ensures your square black nails remain a polished statement, not a fleeting trend.
Troubleshooting Common Black Nail Polish Issues
Even the most seasoned nail enthusiasts can run into a few snags with black polish. Here’s how to tackle common problems to ensure your manicure stays flawlessly chic:
Streaky Application
Problem: Your black polish looks uneven and streaky, even after two coats.
Solution: This often happens when the polish is too thick or you’re trying to spread it too thinly. Ensure your coats are thin and even. If the polish is old and has thickened, consider adding a nail polish thinner (not activator) to revive it. If streaks persist, try a slightly different application technique: load your brush a bit more and use fewer strokes, letting the polish self-level.
Bubbles
Problem: Small air bubbles have appeared on your nail surface.
Solution: Bubbles usually form when polish is applied too thickly, or if you apply a new coat before the previous one is dry. You might also get bubbles if you shake your polish bottle vigorously (roll it between your hands instead). Ensure each coat is dry before applying the next, and keep coats thin. If bubbles appear, letting the polish cure fully under a good top coat can sometimes minimize their visibility.
Chipping at the Tips
Problem: The tips of your black nails are chipping faster than the rest.
Solution: This is often due to improper “capping” of the free edge. When applying your base coat, color, and top coat, always run the brush lightly across the very tip (the edge) of your nail. This seals the polish and prevents it from lifting.
Difficulty Removing Black Polish
Problem: Black polish is staining your nails and cuticles, and it’s hard to remove.
Solution: Always use a base coat specifically designed for dark polishes, or a thicker, high-quality base coat. For removal, soak a cotton ball or pad in nail polish remover (acetone-based remover is generally more effective for dark colors) and press it onto the nail for about 30 seconds to a minute before wiping. This allows the remover to break down the polish, making it easier to wipe away with less scrubbing and less staining.
Matte Polish Not Staying Matte
Problem: Your beautiful matte black nails lost their velvety finish and turned shiny.
Solution: This usually happens when a glossy top coat is applied over a matte polish, or if oil and moisture get onto the nail surface. If you want to maintain the matte finish, ensure your top coat is also matte. If your matte polish has become shiny from wear, you can sometimes revive it by gently buffing the surface with a very fine-grit buffer or applying another thin layer of matte top coat.
Square Black Nails vs. Other Shapes
Choosing the right nail shape can significantly impact the overall look of your manicure, especially with a bold color like black. Let’s compare square black nails to a few other popular shapes:
| Shape | Aesthetic | Best For | Pros with Black Polish | Cons with Black Polish |
|---|---|---|---|---|
| Square | Chic, modern, structured, clean | Most nail lengths, strong natural nails | Emphasizes boldness of black, creates a graphic look, good canvas for designs. [<a href="https://www.realsimple.com/beauty-fashion
|

