Ready to bloom with beautiful nails this spring? This guide reveals genius spring floral nail design ideas and the essential tools you need to create them easily at home. Get ready for fresh, vibrant manicures that are simple enough for beginners and stunning enough for anyone!
Spring is finally here! The world bursts into color with blooming flowers, and your nails can totally join the party. Are you looking to refresh your manicure with something cheerful and on-trend? Creating beautiful floral nail art might seem tricky, but it’s actually super achievable and so much fun! We’ll show you simple techniques and essential tools to get gorgeous spring floral nail designs that will make your hands look like they just stepped out of a garden. Get ready to express your creativity and put a spring in your step, one nail at a time!
Why Spring Floral Nail Designs Are a Must-Have
Spring is all about renewal, freshness, and vibrant colors. What better way to embrace this season than by adorning your nails with delicate floral patterns? They instantly lift your mood and complement any spring outfit, from a breezy sundress to your favorite casual jeans. Think of it as wearing a mini bouquet right at your fingertips!
Floral nail designs are incredibly versatile. Whether you prefer tiny, minimalist buds or bold, intricate blooms, there’s a style for everyone. They’re perfect for weddings, Easter celebrations, spring brunches, or simply to bring a touch of nature’s beauty into your everyday life. Plus, attempting them yourself can be a wonderfully relaxing and rewarding activity!
Your Essential Toolkit for Spring Floral Nail Art
Don’t let the thought of painting tiny flowers intimidate you! With the right tools and a little practice, you’ll be creating stunning designs in no time. Here’s a breakdown of the genius essentials every beginner needs:
Must-Have Nail Polish Colors
The foundation of any great floral design starts with your polishes. For spring, think bright, soft, and nature-inspired hues:
Pastels: Think baby pink, lilac, mint green, sky blue, and soft yellow. These are perfect for creating ethereal blooms and delicate petals.
Vibrant Brights: Don’t shy away from cheerful pops of coral, fuchsia, sunny yellow, and turquoise. These make your floral designs stand out!
Whites and Creams: Essential for creating dimension, highlighting petals, and painting delicate details like stamen or leaf outlines.
Greens: A variety of greens, from deep forest to light sage, are crucial for leaves and stems.
Neutrals: A good nude, beige, or soft grey can act as a beautiful canvas for bolder floral elements.
Essential Nail Art Tools
These tools are your best friends when it comes to precision and ease:
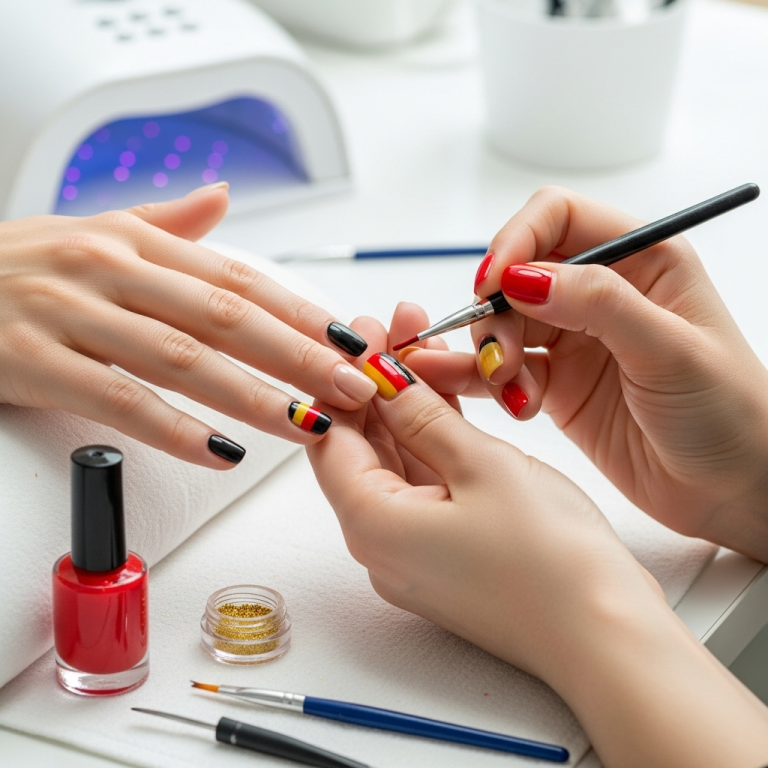
Detail Brushes: These are game-changers! Look for fine-tip brushes with thin bristles. Different sizes are great for varying petal thickness and stem details. You can find these at most beauty supply stores or online.
Dotting Tools: These come with different-sized ball tips at each end. They are perfect for creating small dots that can be clustered to form flowers, or used for French tips with a twist.
Toothpicks or Thin Craft Sticks: For quick fixes, blending, or creating very fine lines if brushes aren’t available.
Fine-Tip Nail Art Pens: These are often the easiest for beginners. They work like markers but with specialized nail polish ink for precise lines and dots.
Clear Top Coat: Non-negotiable! This seals your design, adds shine, and makes your manicure last longer.
Nail Polish Remover and Cotton Swabs/Pads: For cleaning up mistakes. Using a precision cotton swab (like those made by pharmacy brands for cosmetic use) dipped in remover is perfect for small errors.
Optional (But Helpful!) Tools
Stamping Plates and Stamper: If you want perfect, repetitive designs without freehand painting, nail stamping is brilliant! You simply stamp the design onto your nail.
Rhinestones or Glitter: For adding a touch of sparkle or dimension to your floral designs.
UV/LED Nail Lamp and Gel Polish: If you want a longer-lasting, salon-quality finish, gel polish and a lamp are a great investment.
Getting Ready: Prep Your Nails for Success
Before you even think about painting, proper nail preparation is key to a beautiful and long-lasting manicure.
1. Clean Your Nails: Start with clean, dry nails. Remove any old polish. Wash your hands thoroughly and ensure there’s no lotion residue on your nail beds.
2. Shape Your Nails: File your nails to your desired shape. A clean edge helps polish adhere better.
3. Push Back Cuticles: Gently push back your cuticles using an orange stick or cuticle pusher. This creates a clean canvas and prevents polish from lifting. Avoid cutting them unless you’re experienced, as this can lead to infection.
4. Buff (Lightly!): A very gentle buffing of the nail surface can help polish grip. Just a few strokes are needed; don’t overdo it.
5. Apply a Base Coat: This is crucial! A good base coat protects your natural nail from staining and provides a smooth surface for your color polish to adhere to. Let it dry completely.
Beginner-Friendly Spring Floral Nail Design Ideas
Let’s dive into some easy and gorgeous spring floral nail designs that you can master!
1. The Dot Flower Delight
This is one of the easiest ways to create a floral look. It’s perfect for beginners and looks super cute!
What you’ll need:
Base color polish (a light pastel or nude works well)
A contrasting color for petals (e.g., pink, white, coral)
A dotting tool or a toothpick
A small dot of yellow or a brighter contrasting color for the center
How to do it:
1. Apply Base Color: Paint all your nails with your chosen base color and let it dry completely.
2. Create Petals: Dip your dotting tool (or toothpick) into the petal color. Make a small cluster of dots in a circular pattern on your nail. You can make them touch or leave slight gaps. For a flower, aim for 4-6 dots.
3. Add the Center: Dip a smaller dotting tool (or the tip of a toothpick) into the center color. Place a single dot right in the middle of your petal cluster.
4. Repeat: Create these little flowers on one or a few accent nails, or dot them sparingly across all your nails.
5. Top Coat: Once dry, seal with a clear top coat.
Pro Tip: Experiment with different numbers of dots and sizes to create varied flower shapes.
2. The Simple Swirl Petal Flower
This design uses simple strokes to create delicate petals.
What you’ll need:
Base color polish
Petal color polish
A fine-tip detail brush or a toothpick
How to do it:
1. Apply Base Color: Paint your nails and let them dry.
2. Start the Center: Place a tiny dot of your petal color where you want the center of your flower.
3. Create Petals: Dip your brush or toothpick in the petal color. Starting from the center dot, gently pull the polish outwards in a curved stroke to create a petal shape. Repeat this, making strokes that connect back to the center, to form a flower. Aim for 3-5 petals.
4. Add Leaves (Optional): Use a green polish and a fine brush or toothpick to add small leaf shapes around the base of your flower.
5. Top Coat: Seal with a clear top coat.
Tip: Light pressure with the brush creates thinner petals; more pressure makes them wider.
3. The Layered French Bloom
A fun twist on the classic French manicure!
What you’ll need:
Sheer nude or milky pink polish for the base
White or pastel polish for the flower
A fine detail brush
Optional: Green polish for leaves
How to do it:
1. Apply Sheer Base: Paint your nails with the sheer nude or milky pink polish. Let it dry.
2. Paint the White Tip: Instead of a straight French tip, use your white or pastel polish and a fine brush to paint a soft, curved smile line, slightly thicker than a traditional French tip.
3. Create Blooms: On the white tip, use a dotting tool or fine brush to add small dots or simple petal shapes in your chosen flower color – think tiny pink or yellow blooms.
4. Add Greenery: Use a fine brush and green polish to add tiny leaves peeking out from the flowers or along the tip.
5. Top Coat: Finish with a clear top coat.
Variation: You can also do a full nail of the sheer color and then paint the floral elements on top.
4. The Minimalist Single Stem/Bud
For a sophisticated and understated look, focus on simplicity.
What you’ll need:
Base color (nudes, whites, or light greys work great)
A fine detail brush
A contrasting color for the flower/bud (e.g., a pop of coral or lavender)
Green polish for the stem and leaf
How to do it:
1. Apply Base Color: Paint your nails with your chosen base color. Let dry.
2. Draw the Stem: Using a fine detail brush and green polish, paint a thin, slightly curved line on one side of your nail.
3. Add a Leaf: From the stem, paint a single, small leaf shape.
4. Draw the Bud/Flower: At the top of the stem, paint a small dot or a few simple petal strokes to create a tiny bloom or bud.
5. Top Coat: Seal your minimalist masterpiece!
Why it works: This design is elegant, chic, and incredibly easy to execute. It’s perfect for when you want a subtle hint of spring.
5. The Painted Daisy/Sunflower Effect
A bit more involved, but still beginner-friendly, this gives a recognizable flower.
What you’ll need:
Base color (yellow for sunflower, white/light pink for daisy)
A contrasting color for the center (brown/darker yellow for sunflower, yellow for daisy)
A fine detail brush
A dotting tool
How to do it (Daisy example):
1. Apply Base Color: Paint nails with white or light pink. Let dry.
2. Create Petals: Dip your fine brush into white polish. Starting from the point you want the center, create small, elongated petal shapes radiating outwards. You can make them slightly curved. Overlap them slightly for a fuller look.
3. Add the Center: Use a dotting tool and yellow polish to create a circular center over the base of the petals.
4. Add Leaves (Optional): Use green polish and a fine brush for delicate leaves.
5. Top Coat: Seal with a top coat.
Tips for Sunflower: Use yellow as the base. Draw petal shapes radiating outwards in a slightly darker yellow or brown. Add a dark brown center with a dotting tool.
Mastering the Techniques: Tips for Flawless Application
Even with the easiest designs, a few insider tips can elevate your nail art game.
Thin Coats are Best: Apply polish in thin, even layers. This prevents clumping and ensures faster drying times between steps.
Clean Your Brush: After each use, wipe your detail brush clean with nail polish remover and a lint-free cloth. This prevents old polish from interfering with your next stroke.
Less is More with Product: Don’t overload your brush or dotting tool. A small amount of polish allows for more control and finer details.
Steady Your Hand: Rest your wrist or elbow on a stable surface to keep your hand steady while you paint intricate details. You can even prop your phone or a book to rest your working hand on.
Practice on Paper: Before you paint on your nails, practice your designs on a piece of paper or plastic wrap coated with petroleum jelly. This helps you get a feel for the tools and polish consistency.
Don’t Rush Drying: Ensure each layer of polish is dry before adding the next. This is key to preventing smudging. For quick drying, you can use a quick-dry spray or dip your fingers in ice-cold water (after polish has set for a minute).
Cleanup is Key: Keep cotton swabs or pointed applicators dipped in nail polish remover handy for immediate cleanup of any stray marks. A clean edge makes a huge difference!
Beyond the Basics: Taking Your Designs Further
Once you’re comfortable with the beginner designs, you can start to explore more advanced techniques or add extra flair.
Using Stencils and Decals
If freehand painting isn’t your jam, stencils and water decals are your best friends!
Nail Stencils: These adhesive stickers come in various floral shapes. Apply a stencil to your base-colored nail, paint over it, and peel off carefully while the polish is still slightly wet for a clean outline.
Water Decals: Tiny pictures of flowers that you soak in water, slide off the backing, and place onto your nail. Seal with a top coat. They offer incredibly detailed designs with minimal effort.
Adding Texture and Sparkle
Glitter Gradient: Apply a glitter polish to the tips of your nails, fading it down towards the cuticle.
Rhinestones: Place tiny rhinestones at the center of your painted flowers or along your smile line for a glamorous touch. Use a dot of top coat or nail glue to secure them.
3D Flowers: For the ambitious, there are acrylic or gel products that allow you to sculpt 3D floral elements. This is a more advanced technique but creates stunning, dimensional effects.
Spring Floral Nail Design Inspiration Table
To help you visualize, here’s a table of popular spring floral themes and color palettes:
| Flower Style | Typical Colors | Beginner-Friendly Elements | Overall Vibe |
|---|---|---|---|
| Ditsy Daisies | White petals, yellow centers. Base colors: pastel blue, pink, mint green. | Small, simple dot flowers or 5-petal shapes. | Whimsical, classic, cheerful. |
| Rose Bouquets | Pinks, reds, corals for petals; green for leaves. | Curled petal strokes with a fine brush, layered gently. | Romantic, elegant, bold. |
| Wildflowers | Mixed brights: purple, yellow, pink, orange. | Clusters of small dots, random petal strokes. | Bohemian, vibrant, free-spirited. |
| Cherry Blossoms | Soft pinks, white petals; delicate green stems. | Tiny dots of pink/white clustered together, thin stems. | Delicate, serene, poetic. |
| Sunflowers | Yellow/orange petals, brown/dark centers. Base: cream, light brown. | Simple petal shapes radiating from a dotted center. | Sunny, bold, optimistic. |
Frequently Asked Questions (FAQ)
Q1: What’s the easiest way to paint flowers on nails if I have zero art skills?
A1: The easiest method is using a dotting tool! Create a small cluster of dots for petals and then add a single center dot. You can also use nail art pens for simple outlines or polka-dot flowers.
Q2: How long do DIY spring floral nail designs usually last?
A2: With proper preparation, a good base coat, thin layers of polish, and a quality top coat, your floral designs can last anywhere from 5-7 days. Using gel polish and a UV lamp will extend this significantly, often up to 2-3 weeks.
Q3: Can I use regular nail polish for intricate floral designs?
A3: Yes, absolutely! Regular nail polish works perfectly fine. For intricate details, investing in a few inexpensive fine-tip nail art brushes or nail art pens will make a huge difference compared to using just the polish brush.
Q4: My fine detail brush keeps getting clumpy with polish. What am I doing wrong?
A4: You might be picking up too much polish. Try wiping off most of the excess onto the neck of the polish bottle before painting. Also, ensure your brush is clean and conditioned (using a tiny drop of top coat or cuticle oil on the bristles after cleaning can help prevent drying out).
Q5: How do I prevent smudging when applying floral designs?
A5: Patience is key! Ensure each color layer is completely dry before adding the next detail. When applying the top coat, use a “one-stroke” method: load your brush, apply in one fluid motion, and don’t go back over it until it starts to set. Don’t saturate the brush too much when going over your design.
Q6: What color base should I use for my spring floral nails?
A6: Pastels (like baby blue, mint green, soft pink, lilac), creamy whites, light nudes, or even sheer polishes make excellent bases. They allow the floral colors to pop without looking too jarring. A light, neutral base is always a safe and stylish bet.
Q7: Where can I find good quality, affordable nail art tools?
A7: Many online retailers like Amazon, Etsy, and dedicated beauty supply websites offer excellent and budget-friendly nail art kits perfect for beginners. Drugstores and larger beauty chains also carry basic dotting tools and brushes.
Maintaining Your Masterpiece
To keep your lovely floral nails looking fresh:
**Wear Gloves


