Split color nail designs offer a vibrant, modern twist on manicures, splitting a single nail into two distinct colors. This genius technique is essential for adding a bold, customizable, and eye-catching element to your nail art, perfect for expressing personal style and making a statement with ease.
Are you ready to level up your nail game? Dreaming of vibrant, unique nails that turn heads? Sometimes, a single color just doesn’t feel like enough, and you want something with a bit more pizzazz. That’s where split color nail designs come in! They’re incredibly fun, surprisingly easy to create, and offer endless possibilities for showcasing your personal style. Let’s dive into how you can achieve these stunning looks right at home. Get ready to become a split color nail pro!
What Exactly Are Split Color Nail Designs?
Split color nail designs are a trendy and visually striking nail art technique where a single nail is divided into two (or sometimes more!) distinct color sections. Think of it as a modern, artistic take on the French manicure, but instead of just the tip, the entire nail surface is used as a canvas for contrasting or complementary hues. This isn’t about abstract patterns; it’s about a clean, deliberate division of color, often down the center or diagonally, creating a bold, graphic look. It’s a fantastic way to experiment with color combinations and add a sophisticated yet playful edge to your manicure.
Why Are Split Color Nail Designs So Genius and Essential?
The appeal of split color nail designs lies in their sheer versatility and impact. They’re a game-changer for several reasons:
- Endless Customization: The possibilities are literally as vast as your imagination. You can pair bold neons with soft pastels, metallics with mattes, or classic chic black and white.
- Instant Statement: They instantly elevate any outfit. A well-executed split nail is a conversation starter and a clear expression of personal style.
- Beginner-Friendly Potential: While they look complex, the foundational techniques are achievable for beginners with a little patience and the right tools.
- Modern & Trendy: This design is perpetually fresh and in vogue, appearing on runways, in celebrity styles, and across social media.
- Color Play: It’s a perfect way to try out two colors you love that might not typically “go together” in a traditional single-color manicure.
- Optical Illusions: Strategic color placement can even create fascinating optical effects, making nails appear longer or slimmer.
Essential Tools for Your Split Color Masterpiece
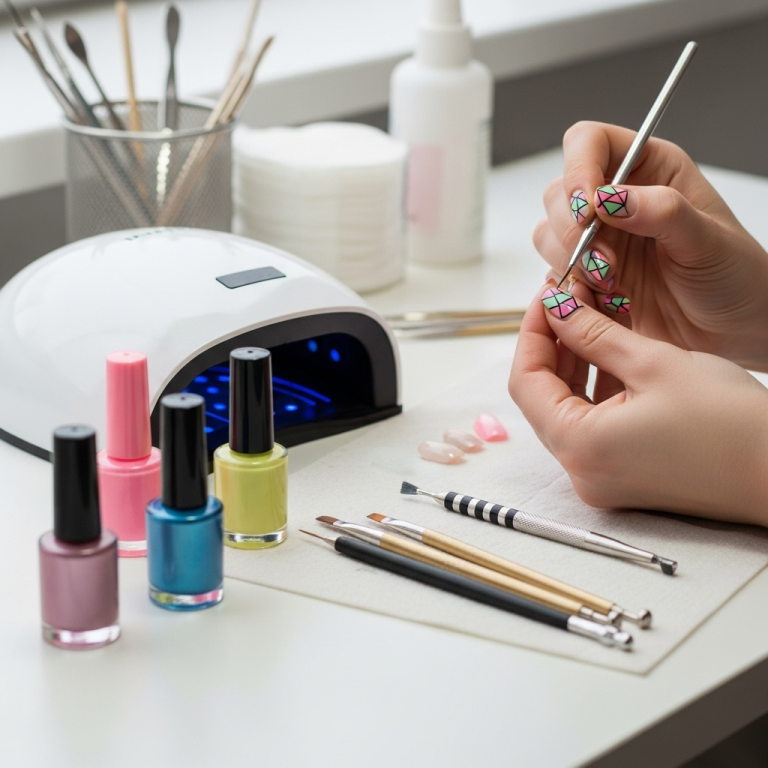
Before we get our hands messy, let’s gather our supplies! Having the right tools makes all the difference between a frustration-filled attempt and a salon-worthy result. Here’s what you’ll need:
For the Base & Color:
- Nail Polish in Your Chosen Colors: Select at least two colors you love! Consider finish too – matte, glossy, shimmer, glitter.
- Base Coat: To protect your natural nails and help polish adhere better.
- Top Coat: To seal your design, add shine, and prevent chipping.
For Precision & Application:
- Fine-Tipped Nail Art Brushes or Detail Brushes: These are crucial for clean lines. You can find these at most beauty supply stores or online. Look for synthetic bristles for easy cleaning.
- Striping Tape or Nail Art Tape: This is your secret weapon for super sharp, straight lines. Different widths are available, so a variety pack can be useful.
- Small Palette or Piece of Foil: To hold and mix your polishes if needed.
- Cuticle Pusher or Orangewood Stick: For tidying up edges.
- Nail Polish Remover: For immediate cleanup of any mistakes.
- Cotton Swabs or Lint-Free Wipes: For precise cleanup around the cuticle and sidewalls.
Optional but Helpful:
- Nail Stamping Plates or Stencils: For more intricate split designs.
- Dotting Tools: To add small accents or create a gradient effect where the colors meet.
- UV/LED Lamp & Gel Polish: If you prefer long-lasting gel manicures, you’ll need a lamp for curing.
Remember, you don’t need the most expensive tools to get started. Affordable options from brands like Amazon or your local drugstore can work wonders!
Step-by-Step: Creating Basic Split Color Nail Designs
Let’s break down how to create a classic split color design. We’ll focus on a simple vertical split down the middle, which is a fantastic starting point for beginners. Precision is key here, so take your time and enjoy the process!
Method 1: Using Striping Tape (The Easiest for Sharp Lines!)
This method is perfect for achieving razor-sharp edges. It’s like using a stencil for your polish!
- Prep Your Nails: Start with clean, dry nails. File them to your desired shape and gently push back your cuticles. Apply a thin layer of base coat and let it dry completely.
- Apply Your First Color: Paint your entire nail with your first chosen polish color. Let it dry thoroughly. This is crucial! If the first coat isn’t completely dry, the tape will lift the polish. Patience is a virtue here.
- Apply Striping Tape: Carefully place a strip of nail art tape vertically down the center of your nail. Press it down firmly to ensure there are no air bubbles or lifting edges. Make sure the tape is centered or positioned exactly where you want your color split to be. If you trimmed the tape to fit the nail, ensure the edges of the tape align perfectly with your nail’s free edge and cuticle.
- Apply Your Second Color: Paint the section of the nail on one side of the tape with your second chosen polish color. Ensure you paint right up to the edge of the tape but try not to get too much polish on the tape itself.
- Remove the Tape (The Magic Moment!): While the second color is still slightly wet (this helps “seal” the line slightly and prevents tugging), carefully and slowly peel off the striping tape. Peel it away at an angle, away from the painted section.
- Clean Up Edges: If there are any tiny smudges or uneven lines, use a fine-tipped brush dipped in nail polish remover to carefully clean up the edges around your cuticle and sidewalls.
- Let it Dry: Allow the second color to dry completely.
- Apply Top Coat: Once everything is bone dry, apply a generous layer of top coat to seal the design, add shine, and protect your beautiful split color nails.
Method 2: Freehand with a Detail Brush (For the Daring!)
This method requires a steadier hand but gives you ultimate freedom. It’s great for slightly softer lines or if you don’t have striping tape handy.
- Prep is Key: Just like Method 1, prep your nails with base coat and let it dry.
- Apply Your First Color: Paint your entire nail with your first color and let it dry completely.
- Outline Your Split: Using a fine-tipped nail art brush and a contrasting color (or the same color if you’re creating a split within one hue, like matte vs. shimmer), carefully draw a line down the center of your nail. This line acts as your guide. Don’t worry about making it perfectly opaque yet.
- Fill In One Side: With your second chosen color and a slightly thicker brush (or even the polish applicator if you’re confident), fill in one half of the nail, painting up to the line you drew.
- Fill In the Other Side: Once the first half is dry, carefully fill in the second half with your initial color, meeting the line. You might need to use your detail brush to refine the dividing line and ensure the colors meet cleanly.
- Refine the Line: If your dividing line isn’t perfectly sharp, use your detail brush with a tiny bit of polish remover to clean it up, or use a fine brush with one of your colors to sharpen the edge where they meet.
- Dry & Top Coat: Allow your nails to dry thoroughly, then apply your top coat to seal and add shine.
Split Color Nail Design Inspiration & Variations
Once you’ve mastered the basic split, it’s time to get creative! The beauty of this design is how easily it adapts. Here are some popular variations and ideas:
The Diagonal Split
Instead of a vertical line down the middle, angle your tape or freehand line from corner to corner. This can give a dynamic, modern feel.
The Horizontal Split
Divide your nail across the middle. This is a less common but equally striking variation.
The Wavy Split
Use a flexible striping tape or a steady hand with a detail brush to create a gentle wave dividing the colors. This adds a softer, more fluid look.
The “Color Block” Split
Instead of a precise line, create slightly offset blocks of color that don’t quite meet, leaving a tiny gap. This is a more abstract take.
Ombré Split
This is more advanced but breathtaking! After applying your first color and tape, apply your second color, then use a sponge or brush to blend the two colors where they meet before removing the tape. This creates a gradient effect within your split design.
Matte & Glossy Contrast
Use the same color but one matte finish and one high-gloss finish. The textural difference creates a sophisticated split effect without needing contrasting colors.
Metallic/Glitter Accents
Use a metallic or glitter polish for one of the split sections for an instant pop of glamour.
Nail Shape Considerations
Different nail shapes can enhance split color designs:
- Square/Squoval: Excellent for clean, graphic vertical or horizontal splits.
- Almond/Oval: Great for diagonal splits that follow the natural curve of the nail.
- Stiletto/Coffin: Long nails provide more canvas, making intricate or multiple-color splits look incredibly dramatic.
Tips for Achieving Perfect Split Lines
No one likes a messy split! Here’s how to keep those lines super crisp:
- Absolutely Dry Polish is Key: I can’t stress this enough! Rushing the drying time is the number one cause of lifted polish and smudged lines when removing tape.
- Firmly Adhering Tape: Press down your striping tape with a tool (like tweezers or the end of a cuticle pusher) to ensure it seals against the nail.
- Thin Coats of Polish: Thick coats of polish take longer to dry and are more prone to smudging or lifting. Apply thin, even layers.
- Peel Tape at the Right Time: For striping tape, peel while the second applied color is slightly wet. For more robust tapes, some artists prefer to peel after it’s fully dry. Experiment to see what works best for your polish and tape combination. Watch out for tugging!
- Clean Up Immediately: Have your nail polish remover and fine brush ready for immediate clean-up of any stray marks.
- Practice Makes Perfect: Don’t get discouraged if your first attempt isn’t flawless. The more you practice, the steadier your hand and eye will become.
Common Mistakes to Avoid
Even seasoned nail artists can run into a few snags. Here are some common pitfalls with split color designs and how to steer clear of them:
Mistake 1: Not Letting Polish Dry Completely
Problem: You apply tape or paint the second color over wet polish, leading to smudging, lifting, or colors bleeding under the tape.
Solution: Patience! Allow each layer of polish to dry thoroughly. Invest in a quick-dry top coat if drying time is a major issue for you. You can even use a fan or nail drying spray to speed things up.
Mistake 2: Poorly Applied Tape
Problem: Air bubbles or lifting edges in the striping tape allow polish to seep underneath, creating a messy, feathered line.
Solution: Apply tape with care, pressing down firmly from the center outwards. Ensure the tape completely adheres to the nail surface.
Mistake 3: Applying Polish Too Thickly
Problem: Thick coats of polish don’t dry evenly, can pool around the tape, and are more likely to smudge when the tape is removed.
Solution: Opt for two thin coats of polish rather than one thick one. This allows for a smoother, faster drying finish.
Mistake 4: Aggressively Removing Tape
Problem: Yanking the tape off too quickly or at the wrong angle can lift the underlying polish or drag color.
Solution: Peel the tape slowly and deliberately, ideally at an angle that pulls away from the freshly painted section. If using gel polish, you might need to carefully cut the tape with a fine brush and remover before curing.
Mistake 5: Not Cleaning Up Edges
Problem: Small polish mistakes around the cuticle or sidewalls can make an otherwise perfect design look unfinished.
Solution: Keep your cleanup brush and remover handy. A quick dab can fix minor errors and make your manicure look professionally done.
Maintaining Your Split Color Nails
Once you’ve achieved your masterpiece, you’ll want it to last! Good care practices apply, but here are a few split-design-specific tips:
- Guard Your Lines: Be mindful of the dividing line. Avoid scraping anything against it, as this is the most vulnerable part of the design.
- Regular Top Coats: Apply a fresh layer of quick-dry top coat every 2-3 days to refresh the shine and reinforce the design against wear and tear.
- Moisturize: Keeping your nails and cuticles hydrated helps prevent chipping and breakage, which can ruin the aesthetic of your split design. Use cuticle oil daily!
- Wear Gloves: When doing household chores, especially washing dishes or cleaning with harsh chemicals, wear rubber gloves to protect your manicure.
- Gentle Removal: When it’s time for a new design, remove polish gently with an acetone-free remover if possible, especially if you have dryer cuticles, to avoid weakening your nails.
Split Color Nail Designs vs. Other Nail Art
How do split color designs stack up against other popular nail art trends? Let’s compare!
| Design Type | Ease for Beginners | Customization Potential | Visual Impact | Maintenance Focus |
|---|---|---|---|---|
| Split Color Nails | Medium (Tape method is easy) | Very High (Color combos, placement) | High (Bold, graphic) | Edges and line precision |
| French Manicure | Medium | Medium (Color of tip/base) | Classic/Subtle | Tip wear |
| Ombre/Gradient | Harder (Requires blending) | High (Infinite color blends) | Soft, blended, artistic | Smoothness of blend |
| Nail Art (Freehand Drawing) | Difficult (Requires skill) | Very High (Any image/pattern) | Varies; can be intricate | Detail preservation |
| Stamping | Medium (Requires practice) | High (Plate combinations) | Varies; often intricate designs | Sharpness of stamped image |
As you can see, split color nails hit a sweet spot! They offer a significant visual impact and customization potential that’s more accessible to beginners than complex freehand art or delicate ombré blending, while still being more modern than a classic French tip. The key is precise lines, which the striping tape method helps achieve wonderfully.
The Future of Split Color Nails
Split color nails are more than just a trend; they’re a canvas for self-expression. We’re seeing them evolve with:
- Multi-Color Splits: Dividing nails into three or more sections.
- Textural Play: Combining matte, glossy, glitter, and even textured polishes within the split.
- Asymmetrical Designs: Splits that aren’t perfectly centered or straight, adding an avant-garde feel.
- 3D Elements: Incorporating small charms or sculpted elements along the dividing line.
The beauty of split color is its


