Learn how to create soft lavender nails with delicate white florals for a chic, effortless manicure. This beginner-friendly guide breaks down the essential steps and tools for stunning floral nail art.
Dreaming of a manicure that’s both elegant and enchanting? Soft lavender nails adorned with dainty white florals are the perfect way to add a touch of springtime charm and sophisticated style to your look. They’re surprisingly easy to achieve, even for beginners! Forget complicated techniques; we’ll make creating these beautiful designs fun and simple.
This guide is your go-to for mastering the “soft lavender nails with white florals” trend. We’ll cover everything from choosing the right polish to painting those delicate blooms. Get ready to elevate your nail game and express your unique style with this timeless design. Let’s dive into creating your own stunning floral manicure!
Frequently Asked Questions About Lavender Floral Nails
Got questions about achieving that perfect soft lavender and white floral look? Here are some common queries answered to help you on your nail art journey!
1. What shade of lavender is best for soft lavender nails?
For a truly “soft” look, opt for pastel or muted lavender shades. Think of colors like lilac, periwinkle, or a light lavender with grey undertones. Avoid very bright or deep purples for the base; the goal is a gentle, airy feel.
2. Can I do white floral nail art if I’m a beginner?
Absolutely! This design is very beginner-friendly. We’ll focus on simple dotting and small brush strokes, which are much easier than intricate freehand drawing. Patience and a steady hand are key, and practice makes perfect!
3. What tools do I need for white floral nail art?
You’ll need a soft lavender nail polish, a good quality white polish, a fine-tipped nail art brush, and a dotting tool. A base coat and top coat are also essential for longevity and shine. You can find these items at most beauty supply stores or even your local drugstore.
4. How can I make my floral nail art last longer?
Start with clean, dry nails. Apply a good base coat to prevent staining and help polish adhere better. After your design is complete and dry, seal it with at least two coats of a high-quality, chip-resistant top coat. Reapply the top coat every few days to maintain shine and prevent chipping.
5. Can I use gel polish for this design?
Yes, gel polish works beautifully for this design and offers superior durability. The process is similar, but you’ll need a UV or LED nail lamp to cure each layer of gel polish. Gel polish cures instantly, reducing the risk of smudging your delicate floral art.
6. What if my white floral lines aren’t perfect?
Don’t worry about perfection! Slight imperfections can actually give your floral design a more natural, hand-painted charm. If a line is a bit wobbly, you can gently refine it with a clean, damp brush or a tiny bit of cotton swab soaked in nail polish remover. For larger mistakes, simply wipe it off with remover and try again before the polish fully dries.
7. Are there any alternatives to painting white flowers?
If painting feels daunting, you can use white nail art stickers or decals shaped like flowers. Apply them over your dried lavender base coat and seal with a top coat. This offers a quick and foolproof way to get the floral effect!
Why Soft Lavender Nails With White Florals Are Essential
This nail trend is more than just pretty polish; it’s a statement of subtle elegance and a nod to nature’s beauty. The gentle blend of soft lavender and crisp white creates a look that’s both calming and captivating. It’s versatile enough for everyday wear, special occasions, and even as a bridal manicure. Plus, it’s a fantastic way to experiment with nail art without a steep learning curve. It whispers sophistication rather than shouting, making it a universally flattering choice.
The appeal of “soft lavender nails with white florals” lies in its delicate balance. Lavender, often associated with calmness and creativity, provides a soothing yet stylish backdrop. White florals, on the other hand, add a touch of purity, brightness, and a classic touch of nature’s artistry. Together, they create a harmonious look that’s both on-trend and timeless.
This design taps into the growing popularity of nature-inspired nail art, which brings a sense of serenity and organic beauty to our fingertips. It’s a choice for those who appreciate understated glamour and thoughtful details. Whether you’re heading to the office, a brunch, or a formal event, these nails will seamlessly complement your style. They offer a refreshing alternative to bold colors or complex patterns, proving that sometimes, less is truly more.
Getting Started: Your Essential Tool Kit
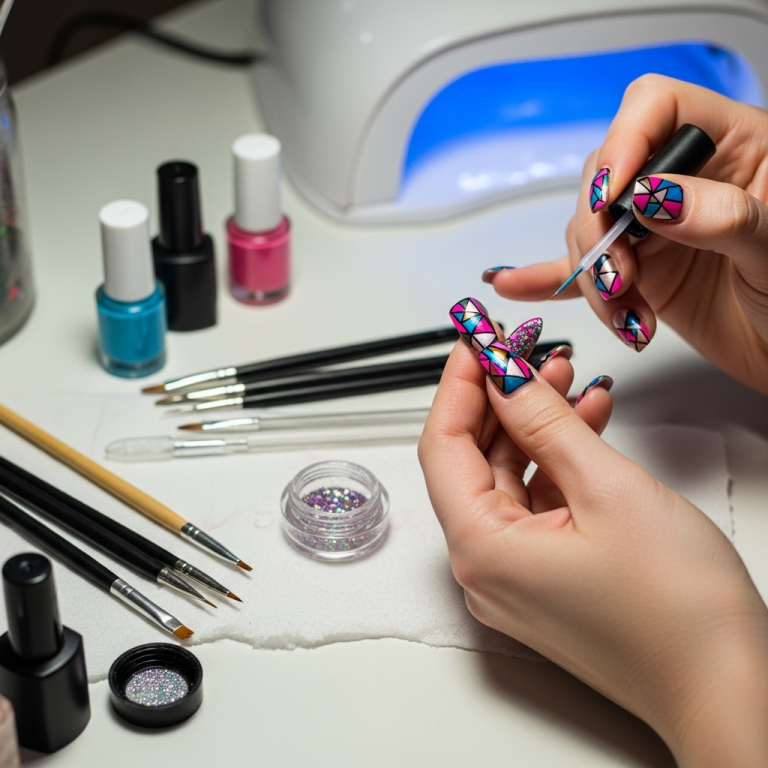
Before we get our hands (and nails!) dirty, let’s gather the necessary supplies. Having the right tools makes the process so much smoother. Don’t worry if you don’t have everything; I’ll guide you on what to look for. You might be surprised at how many of these you already own!
For this specific “soft lavender nails with white florals” design, here’s what you’ll need:
- Base Coat: Protects your natural nails from staining and helps polish adhere better. A good quality base coat is crucial for a long-lasting manicure.
- Soft Lavender Nail Polish: Choose a shade that speaks to you – think lilac, periwinkle, or a muted pastel lavender.
- White Nail Polish: A opaque, bright white polish is best for making your florals pop against the lavender.
- Fine-Tipped Nail Art Brush: This is your magic wand for painting those delicate petals and stems. Look for brushes specifically designed for nail art, often found in sets. A brush with synthetic bristles around 3-5mm is ideal for beginners. Check out resources like ArtSupply.com’s nail art brush guide for types and uses.
- Dotting Tool: Perfect for creating small, uniform dots that can form the center of your flowers or the base of larger petals. They come in various tip sizes.
- Toothpick or Orange Stick (Optional): Can be used for gathering small amounts of polish or for minor cleanup.
- Nail Polish Remover: For tidying up mistakes.
- Cotton Swabs/Pads: To apply the nail polish remover precisely.
- Top Coat: To seal your design, add shine, and protect against chipping. A quick-dry top coat can be a lifesaver!
For those looking for more advanced options or product recommendations, professional nail technicians often rely on brands known for their pigmentation and longevity. However, for this beginner-friendly guide, accessible drugstore brands will work just fine! The key is the application and attention to detail.
Step 1: Nail Preparation – The Foundation of Great Nails
Just like any great artwork, a flawless manicure starts with a perfect canvas. Proper nail preparation ensures your polish adheres well, stays chip-free longer, and your nail bed is healthy. We want those soft lavender hues and delicate white florals to look their absolute best!
Here’s how to prep your nails:
-
Cleanse: Start by removing any old nail polish. Use a non-acetone remover if you have dry nails, as acetone can be drying. Ensure your nails are completely free of residue.
-
Shape: Gently file your nails into your desired shape. Whether you prefer square, round, or almond, file in one direction to avoid weakening the nail. Aim for consistency across all nails.
-
Cuticle Care: Gently push back your cuticles using an orange stick or a cuticle pusher. Avoid cutting cuticles unless absolutely necessary, as they protect your nail matrix. Hydrating your cuticles with a cuticle oil after this step can be beneficial.
-
Buff (Optional but Recommended): Lightly buff the surface of your nails with a fine-grit nail file or buffer block. This smooths out ridges and creates a slightly textured surface for the polish to grip onto, increasing longevity. Be gentle – you’re not trying to thin your nail!
-
Clean Again: Wipe your nails with nail polish remover or isopropyl alcohol using a lint-free pad. This removes any dust or oils, ensuring optimal polish adhesion. For a deeper dive into nail bed health, consult resources like the American Academy of Dermatology’s guide on nail problems.
Taking these few extra minutes for preparation will make a significant difference in the final look and wear-time of your soft lavender nails with white florals. A smooth, clean nail is the perfect base for beautiful art!
Step 2: The Lavender Base – Setting the Serene Scene
This is where your manicure starts to take shape! The soft lavender base is crucial for the overall aesthetic of your “soft lavender nails with white florals.” We want a smooth, even application that looks professional and chic.
Here’s how to apply your lavender base coat:
-
Apply Base Coat: Start with a thin, even layer of your base coat. Let it dry completely. This step is non-negotiable for healthy nails and a lasting manicure.
-
First Coat of Lavender: Apply a thin layer of your chosen soft lavender nail polish. Start from the cuticle area and brush upwards towards the tip. Avoid flooding the cuticle. Work quickly but smoothly.
-
Allow to Dry: Let the first coat dry for 1-2 minutes. It doesn’t need to be fully hardened, just dry enough so the second coat doesn’t create streaks or lift the first layer.
-
Second Coat for Opacity: Apply a second thin layer of lavender polish. This coat will likely provide full opacity and a richer color. Again, aim for even strokes and coverage. This is where that beautiful, soft lavender hue really starts to shine.
-
Cure (If Using Gel): If you’re using gel polish, cure each layer under your UV/LED lamp according to the manufacturer’s instructions before applying the next.
-
Let it Dry Fully: Allow the final coat of lavender polish to dry thoroughly. This might take 5-10 minutes for regular polish. Patience here prevents smudges when you start adding your florals!
A perfect lavender base means no streaks and even color. If you have any polish on your skin, use a clean-up brush dipped in nail polish remover to carefully neaten the edges around your nails. This detail makes a huge difference in the final polished look.
Step 3: Painting Delicate White Florals – Your Artistic Touch
Now for the most exciting part: bringing your “soft lavender nails with white florals” to life! This step is all about creating those beautiful, delicate flower designs. We’ll start with simple techniques that are easy for beginners.
Let’s get creative:
Method 1: Simple Dot Flowers
This is the easiest way to create a floral effect.
-
Get Your White Polish Ready: Open your white nail polish and place a small amount on a lint-free paper or a palette. Dip the tip of your dotting tool into the polish. You only need a small amount – too much will create large blobs.
-
Create the Flower Center: On your lavender base, create a small, distinct dot with your dotting tool. This will be the center of your flower.
-
Add the Petals: Dip your dotting tool back into the white polish. Carefully place smaller dots around the central dot to form petals. You can make 3-5 petals for a simple daisy-like look, or create a cluster of dots for a more abstract floral feel. For a softer look, don’t make the dots perfectly uniform.
-
Repeat: Create a few of these dot flowers on each nail, or place a larger one on an accent nail like your ring finger. Vary the size and placement slightly for a natural look.
Method 2: Basic Brushstroke Petals
This method uses a fine brush for a more drawn floral look.
-
Prepare Your Brush: Dip your fine-tipped nail art brush into your white polish. Wipe off any excess on the side of the polish bottle or a paper towel so you have a controlled amount of polish on the tip.
-
Draw a Center Dot (Optional): You can start by placing a small white dot as the center of your flower, similar to the dotting tool method.
-
Create Petals: Gently touch the tip of your brush to the nail near the center dot and draw a curved stroke outwards, then back to the center. This forms one petal. Repeat this motion around the center dot to create your flower. Think of creating small arcs or teardrop shapes.
-
Add Stems and Leaves (Optional): For a fuller design, you can use a slightly thinner brush or the tip of your fine brush to draw delicate green stems or simple leaf shapes. You can also add tiny white dots for floral accents.
-
Clean Your Brush: After each flower or a few strokes, clean your brush with nail polish remover and a paper towel to keep your lines crisp and prevent color mixing.
Tips for Success:
- Thin Coats: Always work with thin layers of white polish. It’s better to build up color and details gradually than to apply one thick, clumpy layer.
- Steady Hand: Rest your wrists on a stable surface while painting. You can also steady your painting hand by lightly touching its pinky finger to the nail you’re working on.
- Practice: Don’t be afraid to practice on paper or a nail tip first. This helps you get a feel for the polish consistency and brush control.
- Wipe and Redip: Regularly wipe your brush clean and redip for fresh polish to maintain control and prevent muddying your design.
Remember, the beauty of “soft lavender nails with white florals” is in its delicate, often imperfect, hand-painted charm. Don’t strive for machine-like precision. Embrace the artistry!
Step 4: The Top Coat – Protecting Your Art
You’ve created a beautiful soft lavender base and added stunning white florals. Now comes the crucial step to make sure your masterpiece lasts: the top coat! This is your final layer of protection and shine.
Here’s how to apply your top coat like a pro:
-
Ensure Dryness: Make sure your white floral designs are completely dry. If the polish is still wet even slightly, the top coat can smudge your delicate art. For regular polish, this might take 10-15 minutes after finishing the art. For gel, it’s instantly cured and ready.
-
Apply Generously: Apply a generous, but not overly thick, layer of top coat. Start from the cuticle area and do one smooth sweep to the free edge of the nail. This ensures complete coverage.
-
Cap the Free Edge: This is a key step for preventing chips! Gently run the brush along the very tip (the free edge) of your nail. This seals the polish and design underneath, creating a strong barrier.
-
Avoid Cuticles and Sidewalls: Be careful not to let the top coat flood your cuticles or the sides of your nails. If it does, gently use a clean-up brush dipped in remover to tidy it up

