As the winter season approaches, nothing brings more cheer to your nails than adorable snowman nail designs! Whether you’re a seasoned nail artist or a beginner looking for a fun nail art tutorial, creating snowman nails is a delightful way to celebrate the holiday season and embrace the magic of a winter wonderland.
From delicate snowflakes to charming snowman designs, you can easily transform your nails into a festive masterpiece with just a few simple steps.
In this nail art tutorial, we’ll guide you through creating the perfect snowman nail art using a variety of nail art tools like dotting tools, nail art stickers, and of course, the perfect shades of white polish, black polish, and orange polish. Whether you’re going for a French manicure style or a bold, festive design, snowman nail art is sure to make your Christmas nails shine!
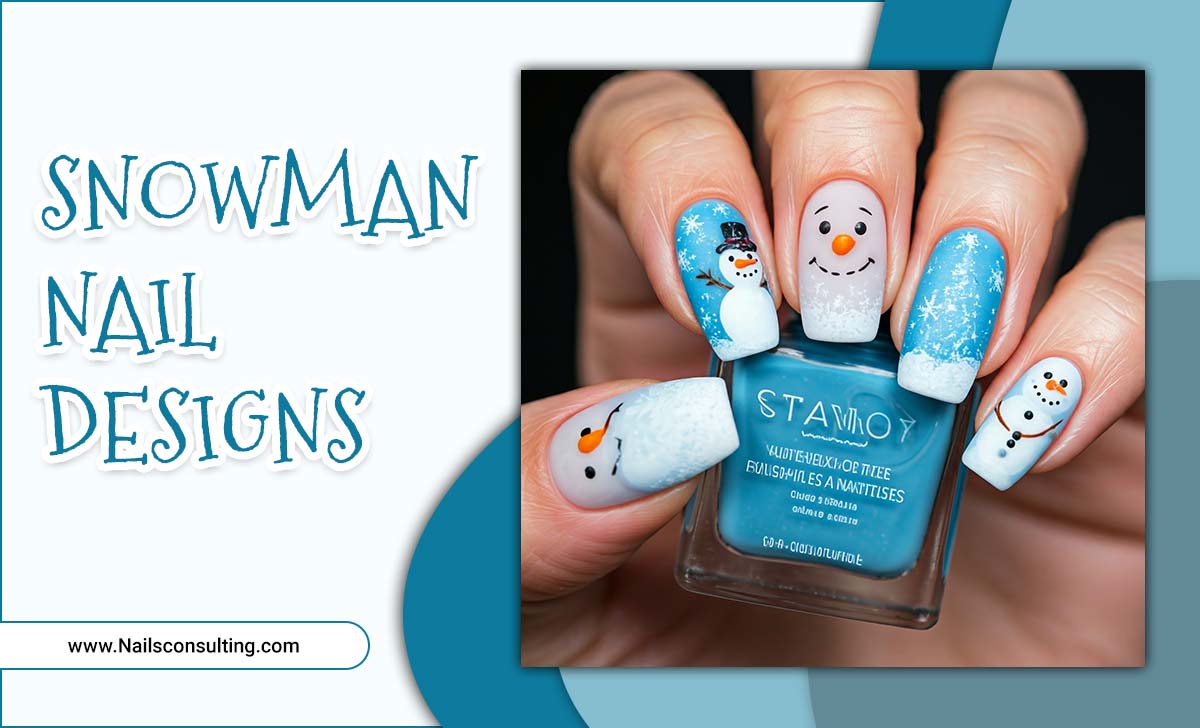
Materials Needed:
- Base coat
- White nail polish (We recommend OPI Alpine Snow)
- Black polish
- Orange polish
- Red polish
- Dotting tool
- Nail stickers (optional)
- Nail art design accessories like snowflakes or Santa hats
- Top coat
Step 1: Prepare Your Nails

Start by applying a base coat to your nails. This will help protect your natural nails from staining, especially when using white polish like OPI Alpine Snow, which is perfect for creating a snowy day effect. Allow the base coat to dry completely before proceeding.
Step 2: Apply The Base Color
Once your base coat is dry, paint your nails with two coats of white polish (or your favorite white nail polish) to create the backdrop for your snowman design. For snowman nails, we recommend using OPI Alpine Snow, as it provides a smooth and opaque finish. If you’re doing an accent nail (such as on your ring finger), you can apply the same white polish here too.
Step 3: Create The Snowman Body

Using your dotting tool, create the snowman’s body by dotting two or three white circles on your nails. Start with a small circle at the top of the nail, and then add larger circles below it. These will form the classic snowman’s body. For a cute snowman effect, you can also add a little snowman design on your accent nail.
Step 4: Add The Details
Now, it’s time to bring your snowman nails to life! With your black polish, use the dotting tool to add two tiny dots for the snowman’s eyes and several dots down the body for buttons. Next, create a little carrot nose using orange polish. Use a small dotting tool to make a tiny triangle shape at the top of the snowman’s face.
Step 5: Add A Hat And Scarf (Optional)

For an extra festive touch, add a Santa hat or a scarf to your snowman! Use red polish to paint a Santa hat on top of your snowman’s head. You can also add a cute scarf using the same red polish and a dotting tool to create small details.
Step 6: Add Snowflakes And Falling Snow
To create the perfect winter nail art, use your white polish and dotting tool to add delicate snowflakes and tiny dots to simulate falling snow around the snowman. You can also use nail art stickers featuring snowflakes or other winter-themed designs for a quicker look.
Step 7: Final Touches

Once your design is complete, seal it with a top coat to give your nails a glossy finish and protect your nail art design. For a matte nail effect, you can use a matte top coat for a chic, wintery vibe. If you’re working with acrylic nails, this design works wonderfully and gives you a long-lasting festive look.
Step 8: Show Off Your Snowman Nails
Now that your snowman nail art is complete, it’s time to admire your festive nails! Whether you’re rocking these nails for a holiday manicure, a Christmas party, or just to enjoy a snowy day, your nails are sure to bring a smile to everyone around you.
Conclusion
Creating snowman nail designs is a fun and festive way to embrace the winter season and spread some holiday cheer. Whether you’re a beginner or an experienced nail artist, this nail art tutorial shows you how easy it is to design a cute snowman using nail polish, dotting tools, and nail art stickers.
With a few simple steps, you can turn your short nails or acrylic nails into a winter wonderland complete with snowflakes, snowman designs, and festive nails. Whether you’re celebrating the holiday season or just enjoying a snowy day, these snowman nails will add a touch of whimsy and warmth to your look. Happy nail painting!
FAQs
1.How Do I Create The Snowman’s Face On My Nails?
To create the snowman’s face, use black polish for the eyes and buttons. Then, use orange polish for the carrot nose. For added charm, add a tiny Santa hat or a scarf with red polish.
2.Can I Use Nail Stickers For Snowman Designs?
Yes! Nail stickers are a quick and easy way to add snowman details like snowflakes, Santa hats, and more. Simply apply them to your nails after painting your base color.
3.What If I Don’t Have A Dotting Tool?
If you don’t have a dotting tool, you can use a toothpick, a bobby pin, or the tip of a pencil to create the dots for your snowman nail art.
4.How Do I Make My Snowman Nails Last Longer?
To make your snowman nails last longer, always start with a base coat, apply 2 coats of your nail polish, and finish with a top coat for extra protection and shine.
5.Can I Do Snowman Nail Designs On Short Nails?
Absolutely! Snowman nail art works perfectly on short nails. Keep the design simple with small dots for the snowman’s body and a cute little face.

