Want skull French nails? This guide breaks down how to create this edgy, stylish manicure. We’ll cover the easy steps, essential tools, and tips for making these unique nails pop, perfect for beginners wanting to try a new trending design.
Hello, lovely nail enthusiasts! Lisa Drew here from Nailerguy, ready to dive into a super fun and trendy nail design that’s been catching everyone’s eye: Skull French Nails! You’ve seen them on social media, and maybe you’ve been a little intimidated to try them yourself. Don’t worry, I get it! Trying a new nail art design can feel like a big leap, especially when it involves intricate details. But here’s the secret: Skull French nails are totally achievable, even for beginners. We’re going to break down the process into simple, manageable steps. Get ready to transform your nails into a spooky-chic masterpiece that’s sure to turn heads. Let’s get those Halloween vibes or everyday edge on!
What Are Skull French Nails?
Skull French nails are a creative twist on the classic French manicure. Instead of the traditional white tips, they feature a small, stylized skull design at the edge of each nail tip. This design blends the clean, defined look of a French tip with the bold statement of skull imagery, making for a unique and eye-catching manicure. They’re a fantastic way to add a touch of personality, a bit of edge, or to celebrate spooky seasons like Halloween.
Why You’ll Love Skull French Nails
This design offers a perfect balance of sophisticated and spooky. It’s versatile enough for everyday wear if you choose subtler colors, or you can go all out with vibrant hues and intricate details for a statement look. Plus, it’s a fantastic way to express your personal style and embrace a bit of fun with your nails!
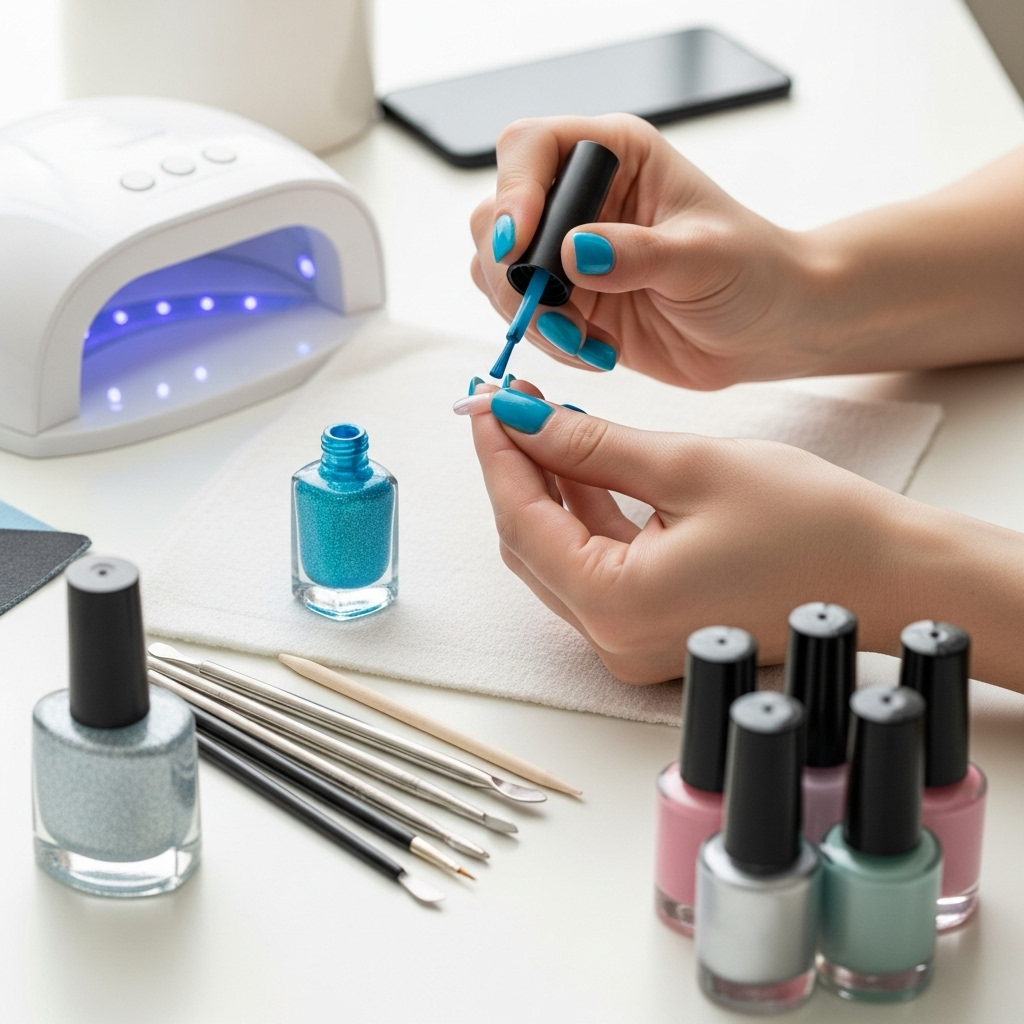
Essential Tools You’ll Need
Gathering the right tools makes all the difference when creating Skull French nails. You don’t need a whole professional kit to start; a few key items will set you up for success.
For the Base and French Tip
- Base Coat: To protect your natural nails and help polish adhere better. Think of it as the primer for your nail art!
- Your Favorite Base Polish Color: This could be a nude, pink, or even a deep shade depending on your desired look.
- White Polish: For creating the classic French tip line.
- Top Coat: To seal your design, add shine, and make your manicure last longer.
For the Skull Design
- Fine-Tipped Detail Brush or Dotting Tool: Essential for drawing the small skull shapes and their features. A very thin brush is key!
- Black Polish: Usually the color of choice for skull details and outlines, offering a stark contrast.
- Optional: Small rhinestones, glitter, or other nail art embellishments if you want to add extra sparkle or detail.
Step-by-Step: Creating Your Skull French Nails
Let’s get to the fun part! Follow these simple steps to create your own amazing Skull French nails. Remember, practice makes perfect, so don’t be discouraged if your first attempt isn’t flawless.
Step 1: Prep Your Nails
Start with clean, dry nails. Push back your cuticles gently and file your nails into your desired shape. This step is crucial for a smooth, polished finish. A well-prepped nail bed is the foundation for any beautiful manicure.
Step 2: Apply Base Coat and Color
Apply a thin layer of your base coat and let it dry completely. Then, apply one or two coats of your chosen base polish color. Allow each coat to dry thoroughly before moving on.
Step 3: Create the French Tip
This is where the French manicure magic begins. You have a couple of options here:
- Freehand: For this, you’ll use your fine-tipped brush and white polish to draw a curved line across the tip of your nail. Aim for a consistent smile line.
- Using a Guide: You can use French tip guide stickers or even a silicone stamper to help create a clean, straight line. Apply the white polish over the guide and carefully remove it before it dries completely.
Let this white tip dry completely. Patience here prevents smudging later!
Step 4: Draw Your Skulls
Now for the skull! This is the most creative part. Using your fine-tipped brush and black polish:
- Outline the Shape: On each nail tip, draw a small, simple skull shape. Think of a rounded top for the cranium and a slightly almond or rounded shape for the eye sockets. You don’t need to be a master artist; a stylized, minimalist skull works beautifully.
- Add Details: Once the outline is dry, carefully paint in the eye sockets. You can add a small triangular nose cavity and a simple line or a few small dots for teeth. Keep the skulls relatively small so they fit well within the French tip area.
Tip: If you’re finding freehand drawing tricky, you can also use a dotting tool to create the eye sockets and nose, then connect them with your brush.
Step 5: Add Embellishments (Optional)
Want to add some extra flair? You can use a tiny dot of polish to secure a small rhinestone in one of the eye sockets or add a sprinkle of fine glitter to the skull’s “forehead.” This is where you can really personalize your look!
Step 6: Apply Top Coat
Once all your skull details are completely dry, apply a generous layer of your favorite top coat. This seals everything in, adds a beautiful shine, and helps protect your artwork from chipping. Be sure to cap the free edge of your nails by running the brush along the tip of your nail to prevent premature lifting.
Step 7: Final Dry Time
Allow your nails to dry completely. Resist the urge to touch anything! A good 10-15 minutes of careful drying time is recommended.
Skull French Nail Variations for Every Style
The beauty of Skull French nails is their adaptability! You can play with colors, placement, and themes to make them uniquely yours.
Color Play
While black and white is classic, don’t be afraid to experiment!
- Gothic Glam: Use a deep burgundy or deep purple base with black or silver skulls.
- Pastel Spooky: Try a light pink, baby blue, or mint green base with white or pastel-colored skulls.
- Metallic Edge: Opt for a metallic gold or silver polish as your base, and use black or white for the skulls.
- Halloween Hues: Embrace orange and black, or green and purple for a festive Halloween look.
Placement Options
You don’t have to put a skull on every single nail tip, or even on all of them!
- Accent Nail: Apply the Skull French design to just one or two accent nails (like your ring fingers) and keep the rest of your nails a solid color or a classic French tip.
- Mini Skulls: Instead of a full skull, try just drawing two dots for eyes and a small nose on the tip.
- Full Tip Skull: For a bolder look, cover the entire tip with a larger skull design.
Adding Texture and Depth
Beyond color, consider adding texture:
- Matte Finish: Use a matte top coat instead of a glossy one for a sophisticated, velvety look.
- Glitter Accents: Add a touch of glitter to the “forehead” of the skull or along the smile line of the French tip.
- 3D Elements: For the truly adventurous, consider using 3D nail art products or small charms to create a raised skull effect.
Tips for Long-Lasting Skull French Nails
Want your hard work to last? Here are some pro tips to keep your Skull French nails looking fabulous:
- Moisturize: Keep your hands and cuticles hydrated with cuticle oil and hand cream. Dry skin can make even the best manicures look dull.
- Wear Gloves: Protect your nails when doing chores like washing dishes or cleaning. Harsh chemicals can degrade your polish and weaken your nails.
- Avoid Smudging: Be extra careful during the drying process. If a nail smudges, you can sometimes carefully mend it with a bit of polish and a fine brush.
- Touch-Ups: If you notice a small chip or wear on the edges, a strategically placed tiny dot of polish or a small embellishment can often hide it.
- Proper Removal: When it’s time to remove your polish, use an acetone-based remover and soak gently to avoid damaging your natural nails.
Common Issues and How to Fix Them
Even with the best intentions, hiccups can happen! Here’s how to troubleshoot common problems:
Smudged Polish
Problem: You’ve accidentally smudged a line or a skull detail.
Solution: Don’t panic! If the polish is still wet, you might be able to gently nudge it back into place with an orangewood stick. If it’s partially dry, dip a clean, fine-tipped brush in a tiny bit of nail polish remover (or even just water if it’s water-based polish) and carefully reshape the affected area. Let it dry and reapply the detail if needed. For French tips, you might need to clean up the edge with a brush dipped in remover and then reapply the white tip carefully.
Uneven Lines
Problem: Your French tip or skull outline isn’t smooth and even.
Solution: This is where patience and steady hands come in! If it’s a French tip, a guide sticker or stamper can help immensely. For skull outlines, practice makes permanent! If it’s slightly imperfect, you can sometimes “clean up” the edge by using a fine brush dipped in nail polish remover to refine the shape. A thicker top coat can also help disguise minor imperfections.
Skulls Too Big or Too Small
Problem: Your skull design is either overwhelming the nail tip or so small it’s barely visible.
Solution: It’s all about proportion! For French tips, aim for a skull that takes up about one-third to one-half of the tip’s width. If yours is off, try to remove it gently with a brush and remover and start again, or resize it slightly with a fine brush. For future attempts, draw a tiny guide dot where you want the top of the skull to be and work from there.
For more tips on nail care and improving your technique, resources like the Allure Guide to Manicures can offer great general advice.
Frequently Asked Questions About Skull French Nails
Q: How long do Skull French nails typically last?
A: With proper application, a good top coat, and careful maintenance (like wearing gloves for chores), Skull French nails can last anywhere from 7 to 14 days, much like a regular gel or regular polish manicure. Longevity also depends on your nail health and daily activities.
Q: Can I do Skull French nails with gel polish?
A: Absolutely! Gel polish is an excellent choice for nail art like Skull French nails. It requires a UV/LED lamp to cure, but it offers incredible durability and a high-gloss finish. The process is similar, but each layer (base, color, design, top coat) will need to be cured under the lamp.
Q: Do I need special skills for drawing skulls?
A: No, not at all! The beauty of Skull French nails is that the skulls are often stylized and simplified. You don’t need to be a portrait artist. Simple shapes like circles for eyes and lines for a nose and mouth are all you need. Practice on a piece of paper first if you’re nervous!
Q: What if my hands shake when I try to do the details?
A: This is a common challenge! Try anchoring your hands by resting your wrists or forearms on a stable surface, like your desk or a towel. You can also work with your smallest finger (pinky) extended and resting on the table for added stability. Take deep breaths to help calm any tremors.
Q: Can I combine Skull French nails with other nail art elements?
A: Yes! Skull French nails are a great canvas for creativity. You can add glitter accents, small rhinestones, dots, or even combine them with different color palettes or ombré effects. Just remember to keep the overall look cohesive.
Q: Is there a specific nail shape that works best for this design?
A: Skull French nails look fantastic on most nail shapes, including squoval, almond, coffin, and stiletto. Oval and squoval shapes naturally lend themselves well to the French tip style, but don’t let anything stop you from trying it on your favorite shape!
Q: Should the skull be black? Or are other colors okay?
A: Black is the most popular choice for skulls because it provides a strong, graphic contrast against lighter French tips. However, feel free to use any color you like for your skulls! White skulls on a dark base, metallic skulls, or even neon skulls can create unique and vibrant looks. The key is creating enough contrast to make the skull design visible.
Conclusion
And there you have it! A complete guide to creating stunning Skull French nails. We’ve walked through the essential tools, broken down each step for a flawless application, explored fun variations, and tackled common troubleshooting tips. Remember, nail art is all about self-expression and having fun. Don’t be afraid to experiment with colors, shapes, and embellishments to make these Skull French nails uniquely yours. Whether you’re rocking them for Halloween, a concert, or just because you love the edgy vibe, you’ve got this! Keep practicing, stay inspired, and enjoy the process of transforming your fingertips into miniature works of art. Happy polishing!