Skinny French nails offer a chic, modern twist on a classic look, giving you elegant, sophisticated nails with a minimalist vibe. They’re surprisingly easy to achieve at home, perfect for anyone wanting a polished manicure without fuss. Learn the simple steps to get this effortless beauty.
Ever look at those perfectly manicured hands with the delicate white tips and wish you could get that look without a salon trip? French manicures are timeless, but sometimes the traditional thick white tip can feel a bit dated. If you’re aiming for something sleeker, more modern, and undeniably chic, then skinny French nails are your new best friend! They’re the subtle elegance that elevates any outfit. But maybe you’ve tried them before and the lines weren’t quite straight, or the white was too bold. Don’t worry, creating this refined look is totally achievable right at your fingertips. We’ll walk through it step-by-step, making it super simple.
What Exactly Are Skinny French Nails?
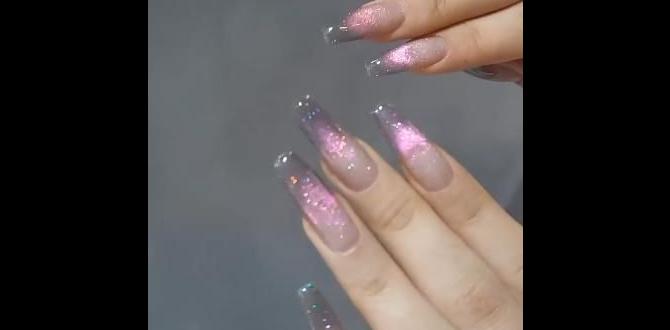
Skinny French nails, also known as micro French tips or thin French tips, are a modern take on the classic French manicure. Instead of a wide, solid white tip, these nails feature a very thin, delicate band of color – usually white – lining the very edge of the nail. It’s all about subtlety and precision. This minimalist approach makes the style incredibly versatile, suitable for both professional settings and casual outings. Think of it as a whisper of elegance rather than a shout.
Why You’ll Love Skinny French Nails
There are so many reasons why this trend has captured hearts everywhere. They’re not just pretty; they’re practical too! Let’s break down the appeal:
- Chic & Sophisticated: The thin line adds a refined, polished look that’s perpetually stylish.
- Versatile: They complement any outfit and occasion, from a power suit to your favorite jeans.
- Nail-Lengthening Effect: The precise lines can visually elongate your nail bed, creating an illusion of longer, more slender fingers.
- Easy Maintenance: Because the tips are subtle, growth is less noticeable than with traditional French manicures.
- DIY Friendly: With a few simple tools and techniques, you can achieve salon-worthy results at home.
Key Tools for Your Skinny French Mani
Gathering the right tools is the first step to a flawless skinny French manicure. You don’t need a professional kit, just a few essentials!
Here’s what you’ll want to have on hand:
- Base Coat: To protect your natural nails and help polish adhere.
- Nude or Pale Pink Polish: This will be your main nail color. Choose a shade that complements your skin tone.
- White or Color Polish: For the thin French tip.
- Thin Nail Art Brush or Striping Tool: This is crucial for accuracy. A fine-tipped brush or a special striping pen works best.
- Nail Polish Remover: For any little mistakes.
- Cotton Swabs or Lint-Free Wipes: To help with clean-up.
- Top Coat: To seal in your design and add shine.
Step-by-Step Guide to Skinny French Nails
Ready to get those gorgeous, skinny tips? Follow these simple steps for a flawless finish. We’ll focus on precision and ease!
Step 1: Prep Your Nails
Proper nail prep is the foundation of any great manicure. It ensures your polish lasts longer and looks smoother. Start by cleaning your nails thoroughly to remove any old polish or oils. Gently push back your cuticles using an orange stick or cuticle pusher. If you have any rough edges, lightly buff your nails with a fine-grit file to create a smooth surface and shape them to your desired length and form.
Step 2: Apply the Base Coat
Apply one thin layer of your chosen base coat. This step is vital for protecting your natural nails from staining and providing a smooth canvas for your polish. Let it dry completely. This usually takes about 60 seconds.
Step 3: Paint Your Main Color
Apply one or two thin coats of your nude or pale pink polish. These light, neutral shades allow the delicate white tip to really stand out, creating that sophisticated look. Ensure each coat is completely dry before applying the next. Thin coats dry faster and look smoother than thick ones.
Step 4: Create the Thin French Tip – The Precision Part!
This is where the magic happens! You have a few options for achieving that super-fine line:
Option A: Using a Thin Nail Art Brush
- Dip your fine-tipped nail art brush into your white polish. Wipe off any excess polish on the edge of the bottle or a piece of paper to avoid globs.
- Gently touch the brush to the very edge of your nail, where the free edge meets the nail bed.
- Slowly and steadily draw a thin line across the tip of your nail. Aim for a curve that follows the natural shape of your nail.
- Repeat for all nails. Take your time – if you go a little wobbly, don’t fret!
Option B: Using a Striping Polish
- Many brands offer polishes with built-in fine brushes, perfect for striping.
- Simply use the applicator brush to draw a thin line along the tip of your nail, just like you would with the art brush.
- Again, aim for a delicate, even stroke.
Option C: Template Method (for a perfect curve)
- You can use very small, circular hole reinforcer stickers or specialized French tip guides.
- Place the sticker on your nail so that the edge of the sticker creates the line where you want your white tip to end.
- Carefully paint the very tip of your nail white.
- Once the white polish is completely dry (wait at least a minute!), gently peel off the sticker. The result is a clean, crisp line.
Remember, the key is thin. Less is more with this style. If you make a mistake, don’t panic! Use a cotton swab dipped in nail polish remover to carefully clean up the line before the polish dries.
Step 5: Clean Up Edges
Once your tips are dry, use a fine-tipped brush or cotton swab dipped in nail polish remover to tidy up any polish that may have gotten onto your skin or cuticles. This makes the manicure look incredibly sharp and professional.
Step 6: Apply Top Coat
Once everything is perfectly in place and dry, apply a generous layer of top coat. This not only adds a beautiful shine but also protects your delicate skinny French tips from chipping and fading. Make sure to cap the free edge by running the brush along the very tip of your nail. Let your manicure dry completely, which might take a few minutes.
Variations to Explore
The skinny French nail is a fantastic canvas for creativity! Once you’ve mastered the basic technique, consider these fun variations:
- Colored Skinny Tips: Instead of white, try a pastel shade, a soft metallic, or even a bold pop of color for your thin line.
- Glitter Skinny Tips: A fine line of glitter polish can add a touch of sparkle without overpowering the look.
- Double Skinny French: Create two super-thin lines on top of each other for a unique effect.
- Reverse Skinny French: Apply the color line at the cuticle area instead of the tip.
A Quick Look at Skinny French vs. Traditional French
It’s helpful to see how the skinny French manicure stacks up against its classic counterpart. This table highlights the key differences:
| Feature | Skinny French Nails | Traditional French Nails |
|---|---|---|
| Tip Width | Very thin, delicate line (1-2mm) | Wider, more prominent band (3-5mm) |
| Overall Look | Modern, minimalist, subtle | Classic, bold, traditional |
| Precision Required | High precision for thin lines | Moderate precision for wider tips |
| Modernity | Trendy, current | Timeless, classic |
| Elongation Effect | More pronounced visually | Noticeable, but less dramatic |
| DIY Difficulty | Slightly more challenging due to precision needs, but very doable. | Generally easier due to thicker lines. |
Tips for Longevity and Perfect Application
Want your skinny French manicure to look amazing for as long as possible? Here are some pro tips:
- Work in Thin Coats: This applies to your base color and your tip color. Thin coats dry faster and are less prone to smudging.
- Let Each Layer Dry: Patience is a virtue, especially with nail art. Allow each coat of polish to dry fully before applying the next.
- Invest in a Good Top Coat: A high-quality top coat is your best defense against chips and dullness.
- Avoid Harsh Chemicals: Wear gloves when doing chores like washing dishes to protect your manicure. For more on protecting your hands and nails, the American Academy of Dermatology Association offers excellent advice.
- Clean Your Brush: After using your nail art brush, clean it immediately with nail polish remover to keep it in good condition for future manicures.
- Practice Makes Perfect: Don’t get discouraged if your first attempt isn’t flawless. The more you practice, the steadier your hand will become.
Troubleshooting Common Issues
Even with the best intentions, problems can arise. Here’s how to tackle them:
- Wobbly Lines: Don’t worry! Use a cleanup brush dipped in remover to refine the line. A steady hand comes with practice.
- Polish Smudging: This usually means a layer wasn’t fully dry. Let them air dry for a few extra minutes, or try using a fast-drying top coat.
- Tip Polish Transferring: If you’re resting your nails on something while they’re still a bit tacky, the polish can smudge or transfer. Be mindful of your hands.
- Base Color Streaky: Ensure you’re applying thin, even coats. A good base coat also helps smooth this out.
FAQ
Q1: How thin is a “skinny” French tip?
A1: A skinny French tip is typically about 1 to 2 millimeters wide. It’s a very fine, delicate line that grazes the very edge of your nail.
Q2: Can I do skinny French nails on short nails?
A2: Absolutely! Skinny French nails are fantastic for short nails. The thin tip can actually make short nails appear longer and more elegant.
Q3: My white tip looks streaky. How can I fix this?
A3: Try applying your white polish in two super-thin coats rather than one thick one. Ensure each coat dries before applying the next for a smooth finish.
Q4: What’s the best way to clean up mistakes with skinny French tips?
A4: Use a fine-tipped brush or a pointed cotton swab dipped in nail polish remover. Gently trace along the edge of your tip to wipe away any stray polish.
Q5: How long do skinny French nails typically last?
A5: With a good base coat, careful application, and a protective top coat, skinny French nails can last anywhere from 5 to 10 days, depending on your daily activities and nail care habits.
Q6: Can I use any color for the skinny tip?
A6: Yes! While white is classic, you can experiment with any color you like. Pastels, metallics, or even black can create stunning, modern skinny French manicures.
Conclusion
There you have it – the effortless guide to mastering the skinny French nail! By following these simple steps and using the right tools, you can achieve a sophisticated, chic manicure that looks like it came straight from a salon. This modern twist on a classic offers subtle elegance, a visually lengthening effect, and incredible versatility for any style or occasion. Don’t be afraid to experiment with different colors and practice makes perfect. So, grab your polishes and your fine brush, and get ready to embrace the beauty of skinny French nails. Your hands will thank you for it!


