Skinny French nails offer a chic, modern twist on a classic look, delivering a sophisticated and understated elegance that’s surprisingly easy to achieve at home. This guide breaks down how to get these delicate, stylish manicures perfectly, even if you’re a complete beginner.
Are you dreaming of that effortlessly chic French manicure, but find the classic white line a bit too bold or tricky to perfect? You’re not alone! Many of us love the polished look of French tips but struggle with achieving a crisp, clean line, especially on shorter or naturally shaped nails. The good news is there’s a subtler, stylish alternative: skinny French nails. These delicate, fine-lined versions are incredibly flattering and surprisingly easy to master. Get ready to elevate your nail game with these simple steps that promise stunning results you can do yourself!
What Exactly Are Skinny French Nails?
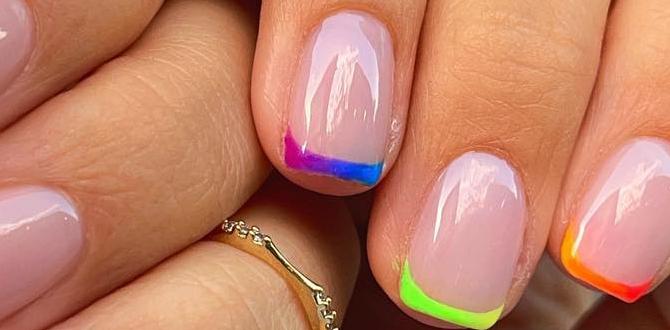
Skinny French nails, also known as micro French nails or thin French tips, are a contemporary take on the traditional French manicure. Instead of a thick, opaque white strip across the tip, skinny French nails feature a very fine, subtle line of color – usually white, but other shades like nude, pastels, or even metallics work beautifully too – along the very edge of your natural nail or a slightly extended tip. This minimalist approach creates an incredibly elegant and refined appearance.
They are perfect for:
- Adding a touch of polish without being over the top.
- Those who prefer a more natural-looking manicure.
- Anyone with shorter nails who still wants the French tip effect.
- Achieving a clean, sophisticated look for professional settings or everyday wear.
Why Skinny French Nails Are a Game-Changer
The beauty of skinny French nails lies in their versatility and subtle sophistication. They offer all the polish of a traditional French mani but with a modern, understated edge. This delicate style is incredibly flattering on almost any nail shape and length, making it a universally appealing choice. Plus, they’re surprisingly forgiving and easier to execute at home than you might think, even for manicure novices!
Here’s why they’re a must-try:
- Chic & Modern: They update the classic French tip for today’s trends.
- Understated Elegance: Perfect for a polished look that isn’t too flashy.
- Universally Flattering: Works beautifully on all nail shapes and lengths.
- Easy to Achieve: Simpler to get a clean line than chunky tips.
- Versatile: Pairs well with any outfit and occasion.
Essential Tools You’ll Need
To create those perfect skinny French tips at home, you don’t need a whole salon’s worth of equipment. Here are the key items that will make your DIY manicure a breeze:
| Tool | Purpose | Lisa’s Tip |
|---|---|---|
| Nail File | To shape your nails to your desired form. | Opt for a fine-grit file for a smooth finish and to avoid damaging your nails. |
| Nail Buffer | To smooth ridges and add a natural shine. | Buff gently; too much can thin your nails. A four-way buffer is super handy! |
| Base Coat | Protects your natural nails and helps polish adhere better. | A good quality base coat prevents staining and extends your manicure’s life. |
| Your Polish Colors | The base color (optional) and your tip color (usually white or a neutral). | For skinny tips, consider polishes with finer brushes or use tools to create the line. |
| A Fine-Tip Brush or Dotting Tool | For precise application of the tip color. | A clean art brush or the tip of a toothpick can work in a pinch! |
| Top Coat | Seals your polish and adds a high-gloss finish for durability. | A quick-dry top coat is a lifesaver when you’re in a hurry. |
| Clean-up Brush or Cotton Swab | To tidy up any mistakes around the cuticles. | Dampen a small brush with nail polish remover for super precise clean-up. |
Step-by-Step Guide to Skinny French Nails
Ready to get those fabulous skinny French tips? Follow these simple steps for a salon-worthy manicure right at your kitchen table!
Step 1: Prep Your Nails
This is the foundation for any great manicure. Start by removing any old polish. Then, gently push back your cuticles. You can use an orange stick or a specialized cuticle pusher. Avoid cutting cuticles if you’re new to this, as they protect your nail bed. Next, shape your nails. For skinny French tips, a square, squoval, or soft almond shape works beautifully. File in one direction to prevent weakening your nails. Finish by buffing your nails to create a smooth surface and remove any natural oils. A quick wipe with nail polish remover after buffing ensures a clean canvas.
Learn more about effective nail preparation from experts at the American Academy of Dermatology for healthy nail practices.
Step 2: Apply the Base Coat
A good base coat is crucial. It acts as a protective layer between your natural nail and the polish, preventing staining and improving adhesion. Apply one thin layer and let it dry completely. This might take a minute or two, but patience here prevents smudges later!
Step 3: Add Your Base Color (Optional)
If you’re using a base color (like a sheer pink, nude, or milky white), apply one or two thin coats now. Let each coat dry thoroughly before applying the next. A sheer base color can enhance the natural look and make the transition to the tip color smooth.
Step 4: The Art of the Skinny Tip
This is where the magic happens! There are a few ways to achieve that delicate line, so choose the method that feels most comfortable for you.
Method 1: Freehand with a Fine Brush
This method requires a steady hand, but it offers the most control.
- Dip a fine-tipped nail art brush into your tip color (e.g., white polish).
- Lightly wipe off excess polish from the brush onto the bottle’s edge.
- Starting from one side of the nail’s edge, gently draw a thin line across the very tip.
- Connect the line smoothly on the other side. Think of it as drawing a very thin smile line.
- If you’re not quite ready for freehand, you can practice by placing tiny dots along the edge and then connecting them.
Method 2: Using a Detailer Brush or Toothpick
If you don’t have a dedicated nail art brush, a clean detailer brush or even the tip of a toothpick can work wonders.
- Load your brush or toothpick with a small amount of tip polish.
- Carefully trace the very edge of your nail, creating a super fine stripe.
- Work in small sections if needed, ensuring each application is barely there.
Method 3: The Stamper Method (for ultimate precision!)
This is a fantastic trick if freehand feels daunting. You’ll need a stamper and a scraper, often found in stamping plate kits.
- Apply your tip color polish to a stamping plate.
- Use the scraper to remove excess polish, leaving some in the etched design.
- Gently press the stamper onto the plate to pick up the polish.
- Carefully “roll” or stamp the polish onto the very tip of your nail. Practice on a nail art mat first to get the angle just right!
Method 4: Using a Nail Art Pen
Nail art pens offer a pen-like application that can be easier for beginners.
- Ensure the pen tip is clean and saturated with polish.
- Hold the pen at a slight angle and gently draw a thin line along the edge of your nail.
- Apply light pressure for a delicate line.
Step 5: Clean Up Any Mistakes
Don’t worry if your lines aren’t perfectly straight or if you get a little polish where you don’t want it. Grab your clean-up brush. Dip it lightly in nail polish remover (not soaking wet!) and gently trace around your cuticle and the edge of your nail to wipe away any stray polish. Precision is key here, so a small brush is your best friend!
Step 6: Apply the Top Coat
Once your tips are dry and any mistakes are cleaned up, it’s time for the final touch! Apply a generous layer of top coat. This seals in your design, adds incredible shine, and protects your manicure from chipping. Be sure to cap the free edge of your nails (brushing the top coat along the very tip) to prevent lifting and extend wear. Let it dry completely.
Popular Skinny French Nail Variations
The beauty of skinny French nails is their adaptability. While the classic white is always chic, experimenting with different colors and finishes can lead to stunning, personalized looks!
Classic White on Nude
This is the quintessential skinny French nail. A sheer nude or pink base with a paper-thin white line at the tip. It’s timeless, elegant, and perfect for any occasion.
Milky White Base with White Tips
A softer, slightly opaque milky white base color paired with a nearly invisible thin white line creates a subtle, sophisticated “clean girl” aesthetic. It looks incredibly polished and natural.
Color-Pop Skinny Tips
Why stick to white? Try a blush pink, a soft baby blue, a muted coral, or a delicate lavender for the thin line. It’s a fun way to add a hint of color without overwhelming the nail.
Metallic Accents
A fine line of gold, silver, or rose gold polish at the tip adds a touch of glamour. This looks especially stunning on a bare nail or a sheer nude base.
Double or Triple Lines
For those feeling a bit more adventurous, consider adding a second, even thinner line just below the first, or stacking two very fine lines of slightly different colors. This adds visual interest and a modern edge.
Color Blocking
Apply a sheer base color, then add a skinny tip in a contrasting but complementary color. For example, a sheer pink base with a thin sage green line.
Tips for Long-Lasting Skinny French Nails
You’ve perfected your skinny Frenchies; now let’s make them last!
- Always Use a Base and Top Coat: We can’t stress this enough! They are your manicure’s best friends for longevity.
- Cap the Edges: When applying your top coat, swipe it across the exposed tip of your nail (called “capping”) to seal the polish and prevent chips.
- Avoid Harsh Chemicals: When doing chores, wear gloves to protect your nails from water and cleaning products, which can break down polish.
- Reapply Top Coat: Every 2-3 days, apply a fresh layer of top coat to refresh the shine and add another layer of protection.
- Moisturize: Keep your hands and cuticles hydrated with cuticle oil and hand cream. Healthy cuticles and skin make your manicure look even better and help prevent snags.
Troubleshooting Common Skinny French Nail Issues
Even with the best intentions, sometimes things don’t go perfectly the first time. Here’s how to handle common hiccups:
- Wobbly Lines: If your lines aren’t crisp, don’t despair! Let the polish dry, then use your clean-up brush dipped in remover to carefully shave off the uneven parts and refine the line. Alternatively, apply a tiny bit more base color over the mistake and try again once dry.
- Polish Streaking: This often happens with thinner polishes. Apply your color in thin coats and allow each to dry. If it’s a streaky formula, try adding an extra layer of top coat to even it out once dry, or try a different polish.
- Tips Too Thick: If your “skinny” tips accidentally became chunky, the best solution is to let them dry completely. Then, use a fine-grit file to carefully file down the thickness of the white tip. You can then re-apply a very fine line of polish over the corrected tip if needed.
- Base Color Smudged: Be patient! Ensure each layer is completely dry before moving to the next. If you smudge, use your clean-up brush and remover to gently correct the area.
FAQs about Skinny French Nails
Q1: Are skinny French nails harder to do than regular French tips?
Surprisingly, no! While achieving a perfectly thin line can take practice, it’s often easier than creating a thick, solid white tip without blobs or unevenness. The delicate nature of the line is more forgiving.
Q2: What nail shapes are best for skinny French nails?
Skinny French nails are incredibly versatile and look fantastic on almost any nail shape! They are particularly flattering on short to medium-length nails and complement shapes like square, squoval, almond, and even round. The thin line doesn’t overpower shorter nails like a thicker tip might.
Q3: Can I do skinny French nails without a special art brush?
Absolutely! While an art brush is helpful, you can achieve great results with a toothpick, the edge of a fine-grit file (for shaping the design after application), or even a clean-up brush dipped in polish remover to refine lines. Some nail polish bottles have very fine detailed brushes that can also work.
Q4: How do I get the line super thin and straight?
The key is minimal polish on your brush and a steady hand. Load your brush with just a tiny bit of polish, wipe off the excess, and draw the line in one smooth motion. If you struggle with freehand, try the stamper method or practice by creating tiny dots and connecting them. You can always refine the line with a clean-up brush after it dries.
Q5: Can I use gel polish for skinny French nails?
Yes, you can! Gel polish offers excellent durability and a high-gloss finish. The application process is similar, but you’ll need a UV/LED lamp to cure each layer. For the skinny line, you can use a thin gel art brush or gel polish pens designed for precision.
Q6: What colors work best for skinny French tips?
While classic white is incredibly popular, you can use almost any color! Neutrals like nude, beige, pale pink, and milky white are always elegant. For a playful touch, try pastels, muted brights, or even a fine metallic line in gold or silver. The choice depends on your personal style and the look you want to achieve.
Q7: My skinny tips keep chipping. What can I do?
Chipping is often due to inadequate prep, a weak top coat, or not capping the edges. Ensure your nails are clean and dry before applying polish, use a good quality base and top coat, and always aim to “cap” the free edge of your nail with your top coat. Reapplying top coat every few days can also help protect your manicure.
Conclusion
Skinny French nails are a beautifully understated and modern way to elevate your manicure. They offer the polish of a classic French tip with a delicate, refined touch that’s perfect for any occasion. Whether you opt for a classic crisp white line or experiment with pops of color and metallic accents, the process is achievable and rewarding, even for beginners. With the right tools and a little practice, you can effortlessly create these stunning looks at home, giving you that put-together, chic vibe any day of the week. So go ahead, grab your polishes, and embrace the elegant simplicity of skinny French nails – your nails will thank you!


