Single stripe nail designs are a fantastic way for beginners and busy bees to add a touch of chic elegance to their nails. These simple yet striking designs are super easy to achieve, instantly elevating your manicure with minimal effort, proving that bold style doesn’t need to be complicated!
Ready to give your nails a stylish upgrade without spending hours at a salon or struggling with intricate art brushes? You’ve landed in the perfect spot! Sometimes, all it takes is one perfect line to transform a plain manicure into something truly special. Single stripe nail designs are not just incredibly chic; they’re also surprisingly simple to create. If you’ve ever felt intimidated by nail art because it looks too complicated, get ready to be inspired. We’re diving into the world of single stripe designs that are both genius in their simplicity and effortless to achieve. Let’s get your nails looking fab without the fuss!
What Exactly Are Single Stripe Nail Designs?
At their core, single stripe nail designs are exactly what they sound like: manicures that feature one prominent stripe as their main design element. This stripe can be placed anywhere on the nail and come in countless variations – think thin and delicate, bold and chunky, horizontal, vertical, diagonal, or even a subtle curve. The beauty lies in its versatility and straightforwardness. It’s the minimalist’s dream and a beginner’s best friend in the nail art world because it focuses on clean lines and impactful simplicity. These designs prove that you don’t need a complex pattern to make a statement.
Why Single Stripe Designs Are Genius for Beginners
If you’re new to DIY nail art, the world of intricate designs can seem a little daunting. But single stripe designs? They’re your gateway to fabulous nails! Here’s why they’re so perfect for beginners:
- Effortless Execution: All you really need is a steady hand and a bit of patience. Even if your line isn’t perfectly straight, it often adds to the charm!
- Minimal Tools Required: You probably already have most of what you need right at home. Forget about fancy brushes and dotting tools for now.
- Quick to Create: Unlike elaborate freehand designs, a single stripe can be added to your manicure in just a few minutes, perfect for when you’re short on time.
- Versatile & Chic: A simple stripe can be incredibly sophisticated and works with almost any outfit or occasion. It’s that little touch of polish that makes a big difference.
- High Impact, Low Effort: You get a professionally looking manicure without the professional price tag or the steep learning curve.
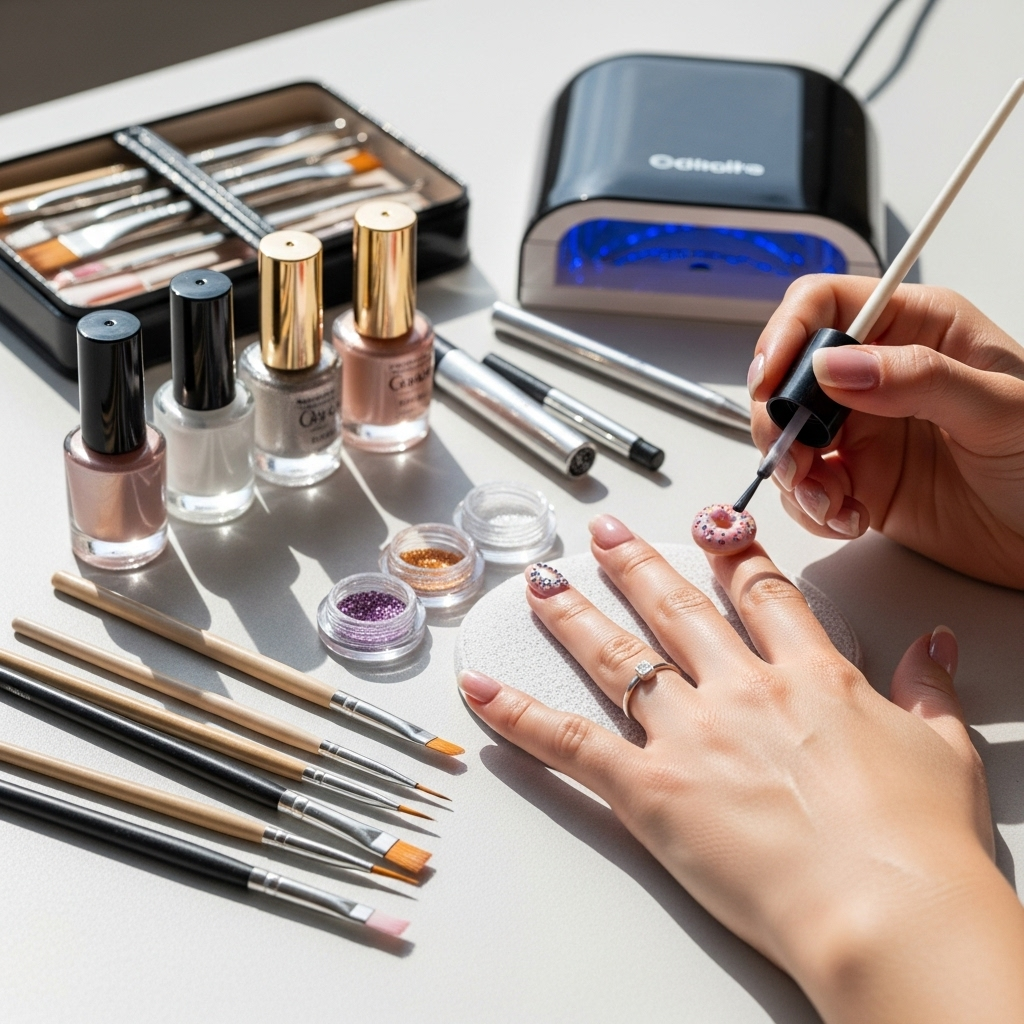
Essential Tools for Your Stripe Art
Before you start painting, let’s gather your toolkit. The great news is, you likely have most of these items already! For single stripe nail designs, simplicity is key:
- Nail Polish in Your Chosen Colors: Grab your base color and the color for your stripe.
- A Good Quality Top Coat: This seals your design and adds shine.
- Optional: A Fine-Tipped Brush or Nail Art Pen: While not strictly necessary, these can offer more precision if you prefer.
- Nail Polish Remover and Cotton Swabs/Pads: For cleaning up any mistakes.
- A Steady Surface: Make sure you’re sitting comfortably with your hands supported.
For those looking to invest in tools that make line work easier, consider a striping brush. These brushes have long, fine bristles that are designed to hold a lot of polish and allow you to create smooth, unbroken lines. Companies like Beyond Polish offer a variety of quality nail art brushes that can significantly help with precision, should you decide to explore more detailed stripe designs in the future.
Step-by-Step Guide: Mastering the Single Stripe
Let’s get those nails looking runway-ready! This guide is broken down into simple steps, perfect for your first attempt at stripe nail designs.
Step 1: Prep Your Nails
This is the foundation for any great manicure. Start by cleaning your nails to remove any old polish or oils. Gently push back your cuticles using an orange stick or cuticle pusher. If your nails are uneven, file them into your desired shape. For a smooth canvas, apply a clear base coat and let it dry completely. This protects your nails and helps the polish adhere better.
Step 2: Apply Your Base Color
Choose your main nail polish color for the nail. Apply one or two thin coats, allowing each coat to dry partially before applying the next. The key here is thin coats—they dry faster and look smoother. Ensure you get even coverage across the entire nail. Let this base color dry thoroughly. Patience is crucial; applying the stripe over wet polish will only lead to smudging!
Step 3: Applying the Stripe
Now for the star of the show! Here are a few ways to achieve your perfect stripe:
- Using Your Polish Brush:
- Dip the tip of your polish brush into the stripe color and wipe off any excess on the bottle’s opening. You want just enough polish for one clean line.
- Start at one edge of your nail (e.g., the cuticle or the side) and, with a steady hand, gently pull the brush across the nail to create your stripe.
- Tip: Some people find it easier to rest their pinky finger on the table for stability.
- Placement: You can place the stripe horizontally across the middle, vertically from cuticle to tip, diagonally across a corner, or even right at the tip like a French manicure variation.
- Using a Fine-Tipped Brush (Optional):
- Load your fine-tipped brush with polish.
- Follow the same method as above, guiding the brush to create your desired stripe. This offers more control for thinner or more intricate placements.
- Using a Nail Art Pen (Optional):
- Shake the pen well before use.
- Gently draw your stripe onto the dried base color. Nail art pens are very easy to control and are excellent for beginners.
Step 4: Clean Up Any Mistakes
Don’t panic if your stripe isn’t perfect! Grab a small brush (an old, clean makeup brush works!) or a cotton swab dipped in nail polish remover. Carefully trace around your stripe to clean up any smudges or wobbly bits. This cleanup step makes a huge difference in achieving a polished look.
Step 5: Apply Top Coat
Once your stripe is dry and any cleanup is done, it’s time for the final sealing touch. Apply a generous layer of your favorite top coat over the entire nail, making sure to cap the free edge (paint a little over the very tip of your nail). This will protect your design, add a beautiful glossy finish, and help your manicure last longer. Let it dry completely.
Creative Ways to Wear the Single Stripe
The beauty of the single stripe is its adaptability. It’s not just one look; it’s a canvas for endless creativity! Here are some inspiring ways to incorporate this simple-yet-stylish element into your manicures:
The Classic Horizontal Stripe
Description: A single stripe runs horizontally across the nail, usually placed around the center or slightly above.
Why it works: This is perhaps the most common and universally flattering stripe placement. It visually elongates the nail and adds a sophisticated touch.
Pairing ideas: Works wonderfully on nude, pastel, or even a deep jewel-toned base. A metallic stripe (gold, silver, rose gold) on a matte base is particularly chic.
The Chic Vertical Stripe
Description: A fine or medium stripe runs from the cuticle straight up to the tip of the nail.
Why it works: Vertical lines tend to make fingers look longer and more slender. It’s subtle yet impactful.
Pairing ideas: Try a thin black stripe on a white or cream base, or a bright pop of color on a neutral. This placement mimics the look of a fine pinstripe.
The Edgy Diagonal Stripe
Description: The stripe runs from one corner of the nail to the opposite, creating a dynamic, angled look.
Why it works: Adds an unexpected twist. It breaks up the typical nail shape and feels modern and a little daring.
Pairing ideas: Perfect for color-blocking effects, where the stripe divides two contrasting colors on the nail. Or, a thin diagonal stripe can add a subtle accent over a solid color.
The Modern French Tip Stripe
Description: Instead of a solid white or color tip, a single stripe sits right at the free edge of the nail.
Why it works: A minimalist update to the classic French manicure. It’s clean, refined, and very on-trend.
Pairing ideas: A thin metallic stripe at the tip of a sheer nude or milky pink nail is incredibly elegant. You can even opt for a contrasting color stripe.
The Minimalist Accent Stripe
Description: A single, often very thin, stripe placed strategically – perhaps just off-center, or curving subtly along the sidewall.
Why it works: This is pure understated elegance. It’s the perfect detail for those who prefer a very subtle nail art element.
Pairing ideas: Works best with very neutral or sheer base colors. A fine silver or gold line can feel like a piece of jewelry for your nails.
The Double-Up Stripe (Still Simple!)
Description: Two parallel single stripes very close together, or a slightly thicker stripe that looks like two lines.
Why it works: Offers a bit more presence than a single thin line but remains incredibly easy to execute. It has a graphic quality.
Pairing ideas: Great for adding a bit more contrast. Think two thin black lines on white, or two gold lines on a deep red.
Choosing Your Color Palette
The colors you choose can dramatically change the feel of your single stripe design. Here are some ideas to get you started:
| Base Color Ideas | Stripe Color Ideas | Vibe/Occasion |
|---|---|---|
| Nude/Beige/Cream | Gold, Silver, Rose Gold, Black, White | Chic, Elegant, Everyday Sophistication |
| Sheer Pink/Milky White | Thin Black, Navy Blue, Burgundy, Metallic | Clean, Modern, Polished Professional |
| Matte Black | Glossy Black, Deep Red, Metallic Silver, Glitter | Edgy, Bold, Evening Glamour |
| Pastels (Baby Blue, Mint, Lavender) | White, Silver, Gold, Contrasting Bright (e.g., Coral on Blue) | Sweet, Fresh, Spring/Summer Fun |
| Deep Jewel Tones (Emerald, Sapphire, Ruby) | Gold, Bronze, Black, Cream | Luxurious, Rich, Sophisticated |
Don’t be afraid to experiment! Metallics are always a safe bet for adding instant glam. For a bolder statement, try contrasting colors. For instance, a vibrant neon stripe on a stark white base can be surprisingly eye-catching.
Quick Tip for Steady Hands
Achieving a straight line is often the biggest hurdle for beginners. Here’s a pro tip:
- Stabilize Your Hand: Rest your wrist and the side of your pinky finger firmly on your work surface. Imagine your hand as an anchored base.
- Use Your Whole Arm: Instead of just moving your wrist, try using your whole arm to guide the brush in one smooth motion. This takes practice but leads to much straighter lines.
- Don’t Press Too Hard: Let the polish and the brush do the work. Applying too much pressure can cause the line to wiggle.
- Breathe: Seriously! Take a deep breath and exhale slowly as you paint the line.
If you’re really struggling, consider using striping tape. You can find tutorials for this technique on reputable beauty sites, but essentially, you’d paint your base, let it dry, place the tape where you want your stripe, paint over it, and then peel the tape away while the polish is still slightly wet. For more on nail prep and techniques, resources like the NHS website offer general advice on nail care and hygiene, which is always a good foundation for any nail art endeavor.
Common Mistakes and How to Fix Them
Even with simple designs, few initial attempts might not be flawless. That’s totally okay! Here are common slip-ups and how to rescue your mani:
- The Wobbly Line:
- Fix: If it’s just a little shaky, a top coat can sometimes smooth it out. For more significant wobbles, use a precision brush (or an unfolded paperclip/toothpick) dipped in nail polish remover to gently neaten the edges. If it’s really bad, you might need to carefully wipe it off with remover (don’t let it soak too long or it will affect the base coat) and try again once the base is dry.
- Smudged Stripe:
- Fix: This usually happens if the base color or the stripe itself wasn’t fully dry. If it’s a minor smudge, try to gently smooth it with a clean brush. If it’s a big smudge, a careful wipe with remover and a re-do of the stripe is your best bet. Always let layers dry!
- Uneven Stripe Thickness:
- Fix: This is hard to fix perfectly once applied with a polish brush. If you want a more uniform look next time, consider using nail art pens or striping tape. For minor variations, sometimes a carefully placed second thin stripe can help even it out.
- Too Much Polish on the Brush:
- Fix: This often leads to blobs or thick, messy lines. Always wipe excess polish off your brush before applying. If you’ve got a blob, try to gently spread it with your brush while it’s still wet, or carefully clean the edges with a remover-dipped brush.
- Stripe Too Close to Cuticle/Sidewall:
- Fix: Use a fine brush with nail polish remover to carefully clean up the excess polish around the stripe. Precision matters here!
Remember, nail art is a practice! Every time you do your nails, you learn something new. Don’t get discouraged by imperfections; they’re part of your unique DIY journey. The goal is to have fun and express yourself!
FAQ: Single Stripe Nail Designs
Q1: Do I need special nail polish for stripes?
A1: Not at all! You can use any regular nail polish. If you want super fine lines, opt for polishes with a thinner consistency, or use them with a fine-tipped brush. Nail art pens are also designed specifically for drawing lines and designs.
<h3 id="