Single Dot Nail Designs: Effortless Beauty
Single dot nail designs offer a minimalist, chic, and incredibly easy way to elevate your manicure. Perfect for beginners and busy individuals, a single dot is a versatile adornment that adds a touch of polish to any nail color. This guide will walk you through creating flawless dot designs with simple tools and techniques.
Tired of complicated nail art? Wish you could add a little something extra to your nails without spending ages in front of the mirror? You’re not alone! Many of us want beautiful, stylish nails but don’t have the time or the steady hand for elaborate designs. That’s where the magic of single dot nail designs comes in. These little dots are surprisingly impactful, adding a touch of sophistication and personality to your look. They’re super easy to create, which means you can achieve a salon-worthy finish right at home, even if you’re a total beginner. Get ready to discover how effortlessly chic your nails can be!
What Exactly Are Single Dot Nail Designs?
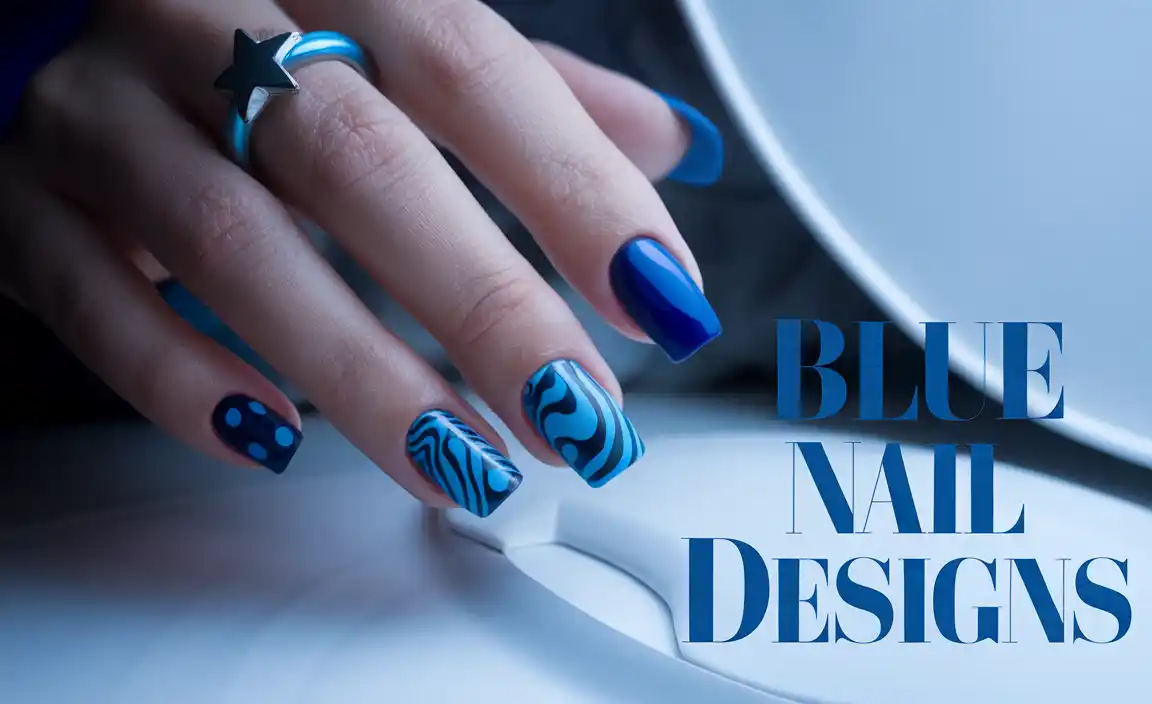
Single dot nail designs, at their core, are exactly what they sound like: manicures featuring one solitary, perfectly placed dot. This dot can be a contrasting color against your base polish, a metallic shimmer on a matte finish, or even a tiny gemstone for a bit of sparkle. The beauty of this design lies in its simplicity and versatility. It’s a minimalist approach that speaks volumes, offering a subtle yet impactful statement.
Think of it as the elegant punctuation mark for your fingertips. It’s a trend that has gained popularity for its ability to look polished and intentional without requiring advanced artistic skills. Whether you use a contrasting color to make it pop, a metallic hue for subtle glamour, or a tiny embellishment, the single dot adds a unique flair to any nail.
Why Choose the Single Dot Nail Design?
The appeal of the single dot nail design is multifaceted. It’s minimalist, chic, and incredibly forgiving for beginners. Let’s dive into why this simple design is a winner:
- Effortless Chic: A single dot adds a sophisticated touch that can elevate any outfit. It’s understated yet undeniably stylish.
- Beginner-Friendly: No advanced skills required! This is one of the easiest nail art designs to master.
- Time-Saving: You can achieve a polished look in minutes, perfect for busy schedules.
- Versatile: Works with virtually any nail polish color, shape, and length.
- Cost-Effective: Requires minimal tools and polish, making it an affordable way to experiment with nail art.
- Customizable: You can play with dot size, placement, and color to create your unique look.
Essential Tools for Your Dotting Journey
While you can get creative with household items, having a few dedicated tools will make creating perfect single dot nail designs a breeze. Here’s what you’ll need:
The Basics:
- Base Coat: Protects your natural nails and provides a smooth canvas.
- Top Coat: Seals your design and adds shine and longevity.
- Nail Polish: Your chosen base color and the color for your dot.
Dotting Tools:
These are your best friends for creating perfect circles. You don’t need to break the bank; even a basic set offers great results.
- Dotting Tools: These usually come in a set with various tip sizes. They have a metal ball at the end, perfect for picking up and placing polish. You can find affordable sets online or at beauty supply stores. Check out reputable retailers like Ulta for a good selection.
- Toothpicks: A fantastic, readily available alternative. They are great for smaller dots. Just be gentle!
- Ballpoint Pen (Empty): The metal tip of an empty ballpoint pen can also work wonders for creating dots.
- Bobby Pins: Unbend one end slightly, and the rounded tip can create a small, consistent dot.
- Fingernail (for the very first practice): You can even use the rounded tip of your own fingernail to dab polish for a slightly less uniform, more organic dot.
Optional Enhancements:
- Tweezers: For placing tiny rhinestones or glitter if you opt for a more embellished dot.
- Small Dish or Palette: To place a small amount of polish for your dotting tool to pick up from.
Step-by-Step Guide: Creating Perfect Single Dot Nail Designs
Ready to get started? Follow these simple steps to achieve a flawless single dot manicure that looks like you just stepped out of a salon.
Step 1: Prep Your Nails
A good manicure starts with proper preparation. This ensures your polish adheres well and your design lasts.
- Clean: Ensure your nails are clean, dry, and free from any old polish or oils.
- Shape: File your nails to your desired shape.
- Cuticle Care (Optional): Gently push back your cuticles.
- Apply Base Coat: Apply one or two thin coats of your favorite base coat. Let it dry completely. This step is crucial for preventing staining and making your polish last longer.
Step 2: Apply Your Base Color
This is the foundation of your entire design, so take your time to get it right.
- Apply your chosen base polish color.
- For opaque coverage, apply two thin coats rather than one thick one.
- Allow each coat to dry partially before applying the next.
- Let the final coat dry thoroughly. This is essential! If the base color isn’t completely dry, your dotting tool might drag the polish, creating an unwanted mess.
Step 3: Prepare Your Dotting Polish
Get your dotting color ready for action.
- Pour a small amount of your dotting polish onto a clean, flat surface like a piece of foil, a tile, or a dedicated nail art palette. You only need a tiny bit!
- Alternatively, if using a polish bottle, you can dip your tool directly into the bottle, but be careful not to get too much on the tip.
Step 4: Create Your Dot
This is the fun part! Choose your tool and your placement.
- Pick up Polish: Dip the tip of your chosen dotting tool (dotting tool, toothpick, etc.) into the polish on your palette. You want a nice, round bead of polish on the tip, not a blob.
- Place the Dot: Gently touch the tip of the tool to your nail where you want the dot to be.
- Roll and Lift: Lightly roll or twist the tool as you lift it away from the nail. This helps to leave a clean, perfect dot without “pulling” the polish.
- Placement Options:
- Center: A classic look, placing the dot right in the middle of your nail.
- Base of the Nail: Near the cuticle for a subtle, elegant touch.
- Tip of the Nail: Near the free edge for a modern twist.
- Asymmetrical: Off-center for a more artistic feel.
- Accent Nail: Consider doing the dot on just one or two nails for a minimalist statement.
- Clean Your Tool: After each dot, wipe your tool clean with a cotton pad soaked in nail polish remover to ensure your next dot is as perfect as the first.
Step 5: Perfecting Your Dots
Don’t worry if your first dot isn’t magazine-perfect. Here are some tips:
- Size Matters: If your dot is too big, wait for it to dry slightly and use a clean dotting tool (or even a toothpick) to gently nudge it smaller or shape it. If it’s too small, you can carefully add another tiny bit of polish.
- Mistake Happens: If you smudge your dot or make a mistake, don’t panic! You can carefully use a small cleanup brush dipped in nail polish remover to fix the area. Or, if all else fails, gently wipe the nail clean and start again.
- Consistency: Use the same amount of polish on your tool for each dot if you’re doing multiple nails.
Step 6: Apply Top Coat
The final step to seal your masterpiece.
- Once your dots are completely dry (give them at least 5-10 minutes), apply a thin, even layer of your favorite top coat over the entire nail.
- Be sure to cap the free edge of your nail by swiping the brush along the tip. This helps prevent chipping and seals in your design.
- Let your top coat dry completely.
Creative Variations of Single Dot Nail Designs
The humble dot can be transformed in so many ways! Get ready to be inspired with these beautiful variations:
Color Combinations to Try
The interplay of colors can make a huge difference. Here are some popular and stylish combinations:
| Base Color | Dot Color | Vibe |
|---|---|---|
| Classic Red | Black or White | Bold, timeless, sophisticated |
| Nude/Beige | Gold or Rose Gold | Elegant, subtle glamour |
| Black | Silver or Iridescent | Edgy, chic, mysterious |
| White | Navy or Pastel Blue | Clean, fresh, summery |
| Deep Green or Burgundy | Cream or Beige | Rich, earthy, autumnal |
| Sheer Pink | Glitter Polish | Romantic, delicate, whimsical |
Placement Play
Where you put the dot changes the entire feel of the manicure:
- The ‘Half-Moon’ Dot: Place the dot right at the base of the nail, following the curve of your cuticle. This mimics a reverse French manicure and looks super chic.
- The ‘Accent’ Dot: Position the dot slightly off-center on one nail, usually the ring finger, for a focal point.
- The ‘Floating’ Dot: Place the dot in the middle of the nail, not touching any edge, for a minimalist and modern look.
- The ‘Corner’ Dot: Place a single dot in one of the top corners of the nail.
Textural Twists
Add dimension with different finishes:
- Metallic Dot: Use a metallic polish (gold, silver, rose gold, bronze) for a touch of luxury.
- Glitter Dot: A tiny dot of glitter polish can add sparkle without being overwhelming.
- Matte & Shine: Apply a matte top coat over a shiny dot, or vice versa, for a subtle contrast.
- Rhinestone Dot: For extra bling, carefully place a tiny rhinestone or bead with tweezers. You might need a strong top coat or nail glue to secure it.
Playing with Dot Size
A larger dot makes a bolder statement, while a smaller one is more delicate. Experiment with different dotting tool sizes to find your favorite effect.
Maintenance and Longevity Tips
To keep your single dot nail designs looking fresh for as long as possible, follow these simple care tips:
- Avoid Harsh Chemicals: Wear gloves when doing household chores, especially when cleaning with harsh chemicals, as these can dull the polish and weaken the design.
- Reapply Top Coat: If you notice your top coat losing its shine after a few days, you can carefully apply another thin layer to refresh it.
- Moisturize: Keep your hands and cuticles moisturized with cuticle oil and hand cream. Healthy nails and skin look their best!
- Gentle Filing: If a nail edge snags, use a fine-grit file to gently smooth it without disturbing the polish too much.
- Touch-Ups: For any minor chips or wear at the tips, a careful touch-up with your base color and top coat can extend the life of your manicure.
Troubleshooting Common Dotting Issues
Even with simple designs, hiccups can occur. Here’s how to fix them:
- Smudged Dot: If the dot smudges while wet, gently use a cleanup brush dipped in nail polish remover to carefully correct the area. If it’s dry and smudged, it might be best to remove and start that nail again.
- Uneven Dot Size: For dots that are too large, try to carefully shape them while wet or gently press a clean tool into them to absorb excess polish. For dots that are too small, carefully add a minuscule amount of polish with your tool.
- Tool Dragging Polish: This usually happens when the base polish isn’t fully dry, or you’re using too much pressure. Ensure your base coat is completely dry and use a light touch.
- Holes in the Dot: This can happen if your tool doesn’t have enough polish, or you lift it too quickly. Dip your tool generously and roll or twist it as you lift.
- Blobs of Polish: If you have too much polish on your tool, gently wipe off the excess on the lip of the polish bottle before applying it to your nail.
Frequently Asked Questions (FAQ)
Q1: Can I really create single dot nail designs with just a toothpick?
Absolutely! A toothpick is a fantastic tool for beginners. The fine tip allows for precise application of polish, creating smaller, delicate dots. Just be sure to dip the very tip into the polish and use a light touch.
Q2: How do I prevent my dot from looking like a blob or a smear?
The key is in the technique! Make sure your base polish is completely dry. Dip your dotting tool into a small amount of polish, get a nice bead, touch it gently to the nail, and then twist or roll slightly as you lift. This smooth lift helps create a clean, round dot.
Q3: What if I don’t have fancy dotting tools? What else can I use?
You’re in luck! Many everyday items can work: an empty ballpoint pen tip, the rounded end of a bobby pin, even the tip of your own nail can create a dot. For smaller dots, toothpicks are excellent. Experiment to see what works best for you!
Q4: How long does a single dot nail design typically last?
With proper application and a good quality top coat, a single dot design can last anywhere from 5 to 10 days, similar to a regular manicure. Protecting your nails with gloves during chores and keeping them moisturized will also help extend its life.
Q5: Can I put a single dot on top of a gel manicure?
Yes! You can create single dot designs on gel manicures. Use regular nail polish for the dot and a good top coat designed for gel polish. Ensure the gel polish is fully cured before starting. You’ll be able to remove the regular polish dot design with non-acetone remover later, without affecting the gel underneath.
Q6: Is there a best nail shape for single dot nail designs?
Not at all! Single dot nail designs are incredibly versatile and look great on any nail shape, whether you prefer square, round, oval, almond, or stiletto. The dot simply adds a touch of flair regardless of your nail’s form.
Q7: How do I make my dots look intentional and not accidental?
Precision and placement are key. Choose a color that either contrasts nicely or complements your base. Then, decide on a deliberate placement – such as centered, at the base cuticle, or off to one side. A clean, well-formed dot, even tiny, looks intentional. Always clean your tool between dots for consistency, and finish with a flawless top coat!
Conclusion: Effortless Beauty at Your Fingertips
There you have it – the simple yet impactful world of single dot nail designs! We’ve explored how this minimalist trend can elevate your look with minimal effort, showcased the essential tools and techniques, and even shared some fun variations to spark your creativity. Whether you’re after a sophisticated touch for a special occasion or a subtle hint of style for your everyday wear, the single dot is your go-to design.
Remember, nail art is all about self-expression and having fun. Don’t be afraid to experiment with colors, placements, and even add a tiny embellishment if you’re feeling bold. With these easy steps, you’re well on your way to mastering the art of the single dot and adding that perfect, effortless touch of beauty to your nails. So grab your polish and your dotting tool – your chic new manicure awaits!</p


