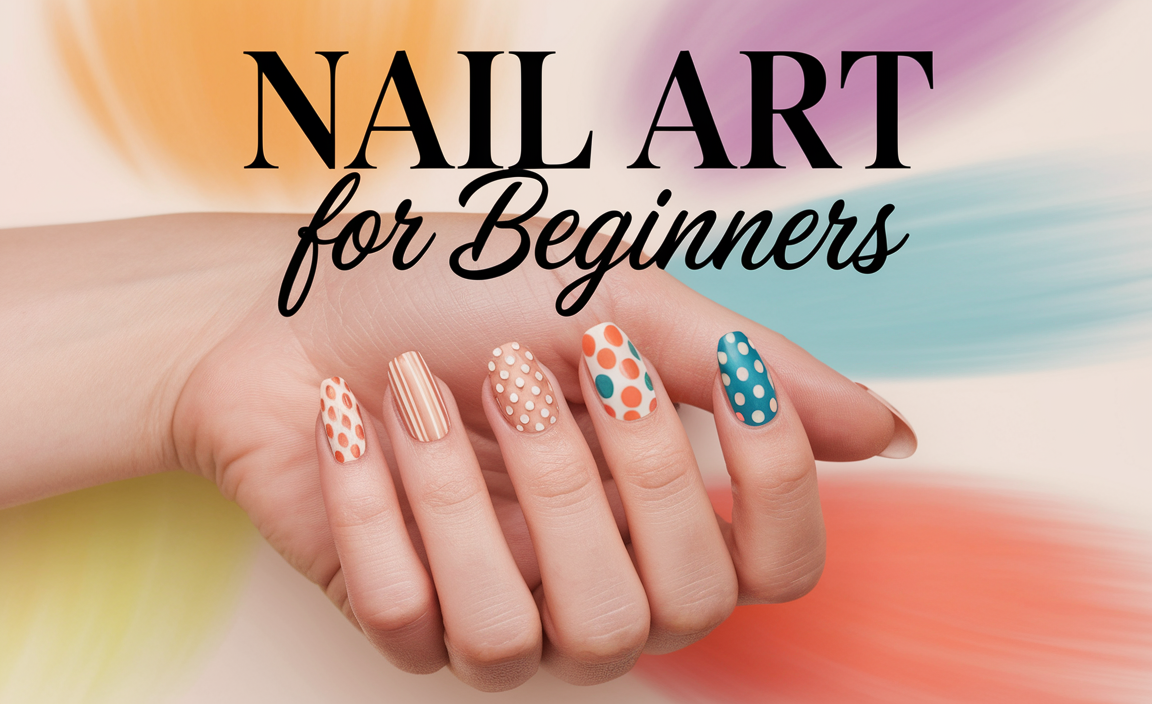
Master simple nail designs, step by step! This guide breaks down easy, chic nail art for beginners, transforming your nails with fun, achievable techniques and common tools.
Ever looked at perfectly painted nails and thought, “Wow, that’s beautiful, but there’s NO way I can do that”? You’re not alone! Many of us admire creative nail art but feel intimidated. The good news is, you don’t need a degree in artistry to achieve gorgeous results. Simple nail designs are totally within reach, and with a few easy steps, you can upgrade your manicure game. We’re going to walk through some super straightforward techniques that look impressive but are surprisingly simple to execute. Get ready to discover how fun and easy it can be to express yourself with beautiful nails!
Frequently Asked Questions
What are the easiest nail designs for beginners?
The easiest nail designs for beginners often involve minimal tools and simple techniques like single accent nails, dotting with a toothpick, tape manicures, or simply using contrasting polish colors. Think clean lines, solid colors, or a playful accent!
What essential tools do I need for simple nail art?
For basic simple nail designs, you’ll likely need nail polish remover, cotton balls/pads, a base coat, your favorite nail polish colors, a top coat, and a few optional but helpful items like a dotting tool (or toothpick/pen tip), striping tape, and cleanup brushes.
How long should nail polish dry between coats for designs?
It’s crucial to let each layer of polish dry almost completely before adding the next, especially for designs. Aim for at least 2-5 minutes between coats, and longer if you’re using thicker polishes or doing detailed work. A quick-dry top coat can help speed things up. If polish feels tacky, it’s not dry enough!
Can I do nail art with just regular nail polish?
Absolutely! While gel polish offers durability, regular nail polish is perfect for practicing simple nail designs. It’s more forgiving, easier to correct mistakes, and widely accessible. Just be sure to use a good base and top coat for longevity.
How do I prevent smudging my nail art?
The key to preventing smudges is patience! Ensure each layer of polish is dry enough before proceeding. Avoid touching your nails for at least 15-30 minutes after your final top coat. A quick-dry top coat can also help harden the polish surface faster.
What’s the best way to clean up nail polish mistakes?
A small, angled brush (like an eyeliner or nail art brush) dipped in nail polish remover is your best friend for cleanup. You can also use a cotton swab or orangewood stick carefully dipped in remover to tidy up edges and cuticles. Work slowly and precisely!
How can I make my simple nail designs last longer?
Start with clean, dry, and prepped nails. A good base coat is essential to prevent staining and provide a smooth surface. Apply thin, even coats of polish. Always finish with a high-quality top coat, and reapply it every few days to refresh the color and protect your design.
Simple Nail Designs: Step-by-Step Genius
Nail art doesn’t have to be complicated. You can create stunning looks with just a few basic techniques and the nail polish you already own. This guide is designed to make nail art accessible for everyone, no matter your skill level. We’ll walk through easy designs, explain the tools you might need, and share pro tips to help you achieve salon-worthy results right at home. Let’s dive into the fun world of simple nail designs!
Getting Started: Your Nail Art Toolkit
Before we jump into the actual designs, let’s gather our supplies. The good news is, you probably have most of these already! Having the right (but simple!) tools makes the process much smoother and more enjoyable.
Essential Polishes & Base Coats
These are the building blocks of any manicure, including nail art:
- Base Coat: This is a must-have! It protects your natural nails from staining and helps your polish adhere better, making your manicure last longer. Many base coats also smooth out any ridges on your nail surface.
- Nail Polish Colors: Choose a few colors you love! For beginners, start with 2-3 colors that complement each other. Think neutrals, pastels, or classic pairings like black and white.
- Top Coat: Your final step! A good top coat seals your design, adds shine, and prevents chipping and smudging. Look for one labeled “quick-dry” if you’re short on patience!
- Nail Polish Remover: For cleaning up mistakes and removing old polish.
- Cotton Balls or Pads: To apply remover.
Helpful (But Not Always Necessary!) Tools
These can elevate your designs from simple to stunning:
- Dotting Tools: These come in various sizes and are perfect for creating dots, swirls, and patterns. If you don’t have one, the tip of a toothpick, a ballpoint pen, or even a bobby pin can work in a pinch!
- Striping Tape: Thin, flexible tape that you can use to create crisp, clean lines and geometric patterns. Check out guides on using striping tape for nail art for more inspiration.
- Fine-Tipped Nail Art Brushes: Great for drawing thin lines, small details, or even tiny flowers.
- Cleanup Brush: A small, flat brush (an old, clean eyeliner brush works well) dipped in nail polish remover is invaluable for cleaning up polish that gets on your skin around the nails.
Prep Your Nails for Success
A flawless design starts with well-prepped nails. This step ensures your polish adheres properly and your manicure lasts longer. It only takes a few minutes!
- Clean Your Nails: Make sure your nails are free from old polish, oils, and lotions. Use nail polish remover and a cotton pad.
- Shape Your Nails: File your nails into your desired shape. Always file in one direction to prevent splitting or peeling.
- Push Back Cuticles: Gently push back your cuticles with an orangewood stick or a cuticle pusher. Avoid cutting them unless absolutely necessary, as this can lead to infection. Healthy cuticles make for a more polished look. You can learn more about proper cuticle care at the American Academy of Dermatology’s site.
- Buff (Optional): Lightly buff the surface of your nails to create a smooth canvas and remove any natural shine, which helps polish adhere better. Be gentle!
- Wipe Down: Give your nails a final wipe with nail polish remover to remove any dust or oils from filing and buffing.
Step-by-Step Simple Nail Designs
Now for the fun part! These designs are perfect for beginners and can be adapted with your favorite colors.
Design 1: The Fabulous Accent Nail
This is the easiest way to add a touch of nail art. You paint one or two nails on each hand differently than the rest. It’s chic, simple, and requires minimal effort.
What You’ll Need: Base coat, 2 nail polish colors (Color A and Color B), top coat.
- Apply Base Coat: Apply one coat of base coat to all your nails and let it dry.
- Apply Color A: Paint 3-4 of your nails with Color A. Apply two thin coats for full opacity, letting each coat dry for a couple of minutes.
- Apply Color B to Accent Nail: Paint your ring finger (or another chosen nail) with Color B. Again, apply two thin coats and let them dry.
- Add a Touch of Flair (Optional): Once Color B is dry, you can add a tiny dot of Color A in the corner of the accent nail, or a single stripe. Or, simply leave it as is!
- Apply Top Coat: Once all polish is dry, apply a generous coat of top coat over all your nails to seal the deal.
Design 2: The Dotty Delight
Create simple, playful patterns using dots. This design is forgiving and can be as sparse or dense as you like!
What You’ll Need: Base coat, 2-3 nail polish colors (Color A as base, Color B & C for dots), dotting tool (or toothpick/pen tip), top coat.
- Apply Base and Color A: Apply base coat. Then, paint all your nails with Color A. Apply two coats for good coverage and ensure they are completely dry. This is important so your dots don’t smudge into the base color. A good rule of thumb is to wait until it’s not tacky to the touch.
- Create Your Dots: Dip your dotting tool (or toothpick!) into Color B. Start placing dots on your accent nail. You can make a single row down the center, a cluster in the corner, or scattered all over.
- Mix It Up: Use Color C to add more dots, perhaps in between the Color B dots, or on other nails in a simpler pattern (e.g., one big dot in the center).
- Clean Up: Use your cleanup brush dipped in remover to tidy any stray dots on your skin.
- Apply Top Coat: Once all dots are dry, carefully apply a top coat. Avoid dragging the brush too much on the dots to prevent smearing.
Design 3: The Chic Stripe (Tape Manicure)
Achieve crisp, clean lines like a pro with striping tape. This geometric look is incredibly stylish and easier than you think!
What You’ll Need: Base coat, 2 nail polish colors (Color A for base, Color B for stripes), striping tape, scissors or a small blade, top coat.
- Apply Base and Color A: Apply base coat. Paint all your nails with Color A. Apply two coats for full opacity and let them dry completely. This is crucial for the tape to peel off cleanly without lifting the base color. Patience here is key!
- Apply Striping Tape: Carefully lay a piece of striping tape across your nail. You can go straight across, diagonally, or even create an ‘X’ shape. Press the tape down firmly to seal the edges.
- Paint Over the Tape: Paint your nail with Color B, ensuring you cover the tape completely. You can do one coat if B is opaque or two if needed.
- Remove the Tape: While Color B is still wet (or just barely set, not fully dry), carefully peel off the striping tape using tweezers or your fingernail. If you wait too long, the polish can “set” and the tape might pull off color with it.
- Repeat (Optional): Add more tape and stripes in different colors or patterns if desired, allowing each color to dry slightly before adding the next layer of tape.
- Clean Up and Top Coat: Once your design is dry to the touch, use your cleanup brush to neaten any edges. Apply a generous top coat over everything to seal and protect the design.
Design 4: The French Tip Twist
A classic for a reason! Elevate the traditional French manicure with a pop of color or a subtle change.
What You’ll Need: Base coat, nude or creamy polish (Color A), colored polish (Color B), fine-tipped brush or French tip guide stickers, top coat.
- Apply Base and Color A: Apply base coat. Paint all your nails with Color A. Let it dry thoroughly.
- Create the Tip:
- With a Brush: Dip a very fine nail art brush into Color B. Holding your hand steady, draw a curved line along the top edge of your nail to create the tip. Start from one side and work your way across, aiming for a C-shaped curve. Clean your brush often.
- With Guide Stickers: Apply French tip guide stickers just below where you want your colored tip to be. Carefully paint Color B over the exposed tip of your nail. Let it dry for a minute, then gently peel off the sticker.
- Refine and Perfect: If your lines aren’t perfect, use your cleanup brush dipped in remover to gently refine the edges.
- Apply Top Coat: Once the color tips are dry, apply a clear top coat over all your nails for shine and protection.
Design 5: The Gradient or Ombre Effect
This look blends two or more colors seamlessly for a soft, beautiful effect. It appears complex but is surprisingly achievable!
What You’ll Need: Base coat, 2-3 nail polish colors that blend well (e.g., light pink to peach, blue to purple), a makeup sponge (a clean, dry kitchen sponge cut into small pieces works!), top coat, and maybe some petroleum jelly or latex tape for cleanup.
- Prep and Base: Apply base coat. Paint all your nails with your lightest color (Color A). Let it dry completely.
- Create a Barrier (Optional but Recommended): Apply a thin layer of petroleum jelly or latex tape around your cuticles and sidewalls. This will catch any excess polish from the sponge and make cleanup a breeze.
- Apply Colors to Sponge: On your makeup sponge, paint 2-3 stripes parallel to each other using your chosen colors. For example, a stripe of Color A, then Color B, then Color C. Work quickly!
- Sponge Onto Nail: Gently dab the sponge onto your nail, pressing lightly. You’ll see the colors begin to blend. Roll or pick up and put down the sponge a few times to build up the color and blend.
- Repeat for Intensity: Reapply colors to the sponge and repeat the dabbing process on your nail until you achieve your desired depth of color and blend.
- Clean Up: Carefully remove the barrier (petroleum jelly or latex tape). Use your cleanup brush dipped in remover to tidy up any stray polish on your skin.
- Top Coat: Once the gradient is dry, apply a thick layer of top coat. This will help smooth out any texture from the sponge and seal the design. You might want to use a thicker, glossy top coat for this.
Pro Tips for Nail Art Success
Even simple designs can be perfected with a few insider tricks. Lisa Drew’s secrets to make your DIY manicures shine:
- Thin Coats are Key: Always apply thin layers of polish. Two thin coats will give you better coverage and dry much faster than one thick, gloopy coat.
- Patience is a Virtue: Rushing is the enemy of good nail art. Let each layer dry to at least a tacky-to-the-touch stage before applying the next.
- Don’t Fear the Cleanup: Mistakes happen! Having a cleanup brush with nail polish remover handy makes all the difference. It’s like an eraser for your nails.
- Shake, Don’t Stir: When mixing polish colors or preparing a polish for a design, gently roll the bottle between your palms instead of shaking it. Shaking can create air bubbles that transfer to your nails.
- Store Polish Properly: Keep your nail polishes upright and away from heat and light to prolong their life and keep them from getting thick and unusable.
- Invest in a Good Top Coat: A high-quality top coat is the unsung hero of any manicure. It adds protection, shine, and makes your designs pop.
- Practice Makes Perfect: The more you practice these simple techniques, the better and faster you’ll become. Don’t be discouraged if your first few attempts aren’t flawless!
Maintaining Your Masterpiece
You’ve created a beautiful simple nail design – now, let’s make it last!
- Reapply Top Coat: Every 2-3 days, apply a fresh layer of top coat. This is the single best thing you can do to prevent chipping and keep your manicure looking fresh.


