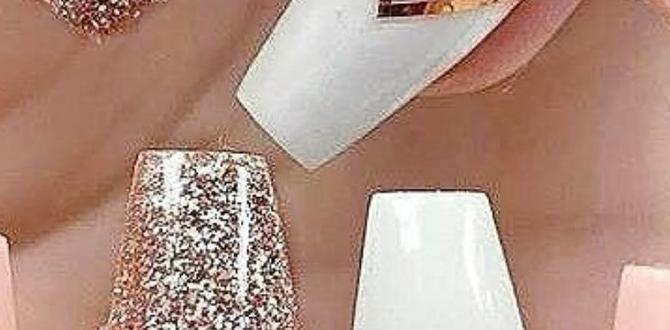
Silver nail designs offer a chic and versatile way to elevate your manicure. From subtle shimmer to bold metallic statements, these designs are surprisingly easy to achieve at home, proving that stunning nail art is accessible to everyone.
Ever looked at your nails and thought, “I need something… more”? You’re not alone! For many of us, the idea of intricate nail art seems complicated and maybe even a little intimidating. But what if I told you that dazzling silver nail designs are totally achievable, even for beginners? Silver is a color that’s both elegant and modern, working with almost any outfit and occasion. It can add a touch of sparkle, a pop of glam, or a sleek, futuristic vibe. Ready to discover how you can create stunning silver looks right at your fingertips? Let’s dive in!
Why Silver Nail Designs Are a Must-Try
Silver is an incredibly versatile color. It’s not as stark as white, not as warm as gold, and offers a cooler, more sophisticated shimmer. It can be subtle or bold, making it adaptable to any personal style. Plus, silver nail polish is readily available, and there are tons of easy techniques to incorporate it into your manicure.
The Allure of Metallic Sheen
The shine of silver can instantly make your nails look polished and put-together. It’s a neutral that still has personality. Think of it as the little black dress of the nail world – always in style, always impactful.
Versatility for Every Occasion
Whether you have a formal event, a casual get-together, or just want to brighten your everyday look, silver nails fit the bill. They can be dressed up with glitter or kept minimalist with clean lines.
Beginner-Friendly Techniques
The best part? You don’t need to be a pro to master many silver nail designs. Simple applications of polish, foils, or even stickers can yield incredibly sophisticated results.
Essential Tools & Materials for Silver Nails
Before we get our hands dirty (in a good, sparkly way!), let’s gather our supplies. Having the right tools makes any DIY nail art project so much smoother and more enjoyable.
The Must-Haves
- Base Coat: This protects your natural nails from staining and helps your polish adhere better.
- Top Coat: Seals your design, adds shine, and prevents chipping.
- Silver Nail Polish: Choose your finish – metallic, glitter, chrome powder, or even a fine shimmer.
- Nail Polish Remover & Cotton Pads: For clean-up and making changes.
- Orange Stick or Cuticle Pusher: To clean up edges and prepare the nail.
Optional, But Useful Additions
- Nail Art Brushes: Fine-tipped brushes are great for details.
- Dotting Tools: Perfect for creating dots of varying sizes.
- Nail Foils & Foil Glue: For an instant, high-shine metallic effect.
- Nail Stickers or Decals: An easy shortcut for intricate designs.
- Tweezers: Helpful for placing small embellishments like rhinestones.
- Nail File & Buffer: For shaping and smoothing your nails.
Step-by-Step: Easy Silver Nail Design Tutorials
Let’s get creative! Here are a few simple silver nail designs that anyone can do. We’ll start with the basics and move to slightly more detailed looks.
1. The Classic Silver Accent Nail
This is the easiest way to incorporate silver and is perfect for beginners. You choose one nail (usually the ring finger) to make stand out.
- Prep Your Nails: Start with clean, filed, and buffed nails. Apply a base coat and let it dry completely.
- Paint Your Nails: Apply your chosen base color (e.g., nude, black, white, or even a soft pastel) to all nails except your accent nail. Apply two thin coats for even coverage.
- Apply Silver to the Accent Nail: On your designated accent nail, apply one or two thin coats of your silver nail polish. Let it dry thoroughly.
- Seal the Deal: Once all polish is dry, apply a top coat to all your nails to protect the design and add shine.
2. Simple Silver French Tips
A metallic twist on a timeless classic. This adds a subtle sparkle without being overwhelming.
- Prep and Base Coat: As always, start with a clean nail and a base coat. Apply your sheer nude or pink polish to all nails and let dry.
- Create the Tip: You have a few options here:
- Freehand: Carefully paint a silver line across the tip of each nail using your silver polish.
- Using a Thin Brush: Dip a fine nail art brush into your silver polish and draw a crisp line along the tip.
- Using Stencils (Optional): You can buy French tip stencils to guide your application.
- Refine and Seal: Clean up any stray lines with an orange stick dipped in nail polish remover. Once dry, apply a thin layer of top coat over all nails.
3. Dotted Silver Fun
Dots are super easy to create and add a playful touch. They look great in silver against a contrasting background.
- Base Color: Apply your base color polish to all nails and let it dry completely.
- Dotting Time: Dip a dotting tool (or the tip of a toothpick/pen) into your silver polish.
- Create Your Pattern: Gently dot the silver polish onto your nails. You can:
- Make a single, bold dot on the cuticle or tip.
- Create a line of dots.
- Make a random pattern of dots all over the nail.
- Use different sizes of dotting tools for variation.
- Dry and Seal: Let the dots dry fully before applying a top coat to lock them in.
4. Glamorous Silver Foil Accents
Nail foils give an instant, high-impact metallic shine that’s hard to replicate with regular polish. It looks super professional but is surprisingly easy!
- Base Color: Apply a dark base color (black or deep navy works beautifully) or a sheer nude. Let it dry until it’s slightly tacky – not fully cured. This is crucial for the foil to adhere.
- Apply Foil Glue (if needed): Some foils work best with a special foil glue. Apply a thin layer of foil glue where you want the foil to stick. Let it dry until it becomes clear or slightly tacky. Many modern foils adhere directly to cured polish.
- Transfer the Foil: Place the shiny side of the foil down onto the tacky polish or glue. Press firmly with your fingertip or an orange stick.
- Peel Away: Gently peel off the foil. The metallic design will transfer to your nail.
- Finish: Apply a top coat carefully over the foiled areas. You might need a thicker top coat layer or a special top coat designed for foils to prevent smudging the design.
You can apply foil to the whole nail for a full metallic look, or just to the tips, cuticles, or create patterns. For a deep dive into foil application, check out resources from nail experts like Nail Superstore for detailed tips.
5. Chic Silver Chrome Powder Nails
Chrome powder gives a mirror-like, futuristic finish that’s incredibly striking. It requires a specific technique but is totally doable!
- Base: Apply a black or dark colored gel polish and cure it under a UV/LED lamp. Regular polish won’t work for this technique.
- No-Wipe Top Coat: Apply a gel top coat that says “no-wipe” and cure it. This is essential.
- Apply Chrome Powder: Dip an applicator (often a silicone brush or eyeshadow applicator) into your silver chrome powder. Gently rub the powder all over the cured no-wipe top coat. You’ll see the mirror effect appear as you rub.
- Buffing: Continue buffing until the entire nail is covered with a consistent chrome shine.
- Clean Up & Seal: Brush away any loose powder. Apply another layer of no-wipe gel top coat to seal the chrome and cure it under the lamp.
This technique provides a seamless, high-shine finish. For more on gel polish application, you can find helpful guides from reputable beauty suppliers. Understanding the basics of gel polish application is key to mastering chrome.
Popular Silver Nail Design Ideas
Ready for some inspiration? Silver is so versatile, it pairs well with so many colors and styles. Here are some trending and timeless ideas:
Subtle Shimmer & Glitter
- Silver Glitter Gradient: Start with a sheer nude or pink base, then blend silver glitter polish from the tips down towards the cuticle.
- Sparkling French Tips: Replace white tips with a fine silver glitter or metallic silver polish.
- All-Over Subtle Shimmer: A delicate silver polish with a fine shimmer can be worn on all nails for an elegant look.
Geometric & Minimalist
- Silver Lines: Use a fine brush or striping tape to create geometric lines on a nude or dark background.
- Silver Cuticle Accents: Paint a thin silver line or a series of dots right at the base of your nail, near the cuticle.
- Half-Moon Silver: Paint the bottom half of your nail in silver and the top half in a contrasting color or nude.
Bold & Glamorous
- Full Chrome Nails: As mentioned above, go for the full mirror-effect chrome!
- Silver Star Details: Add small silver star studs or decals to a darker polish.
- Silver Foil Accents: Use irregular pieces of silver foil for a shattered glass effect.
Color Combinations We Love
Silver is a chameleon! Here are some combinations that always look stunning:
| Base Color | Silver Design/Application | Vibe |
|---|---|---|
| Black | Chrome, Glitter Tips, Geometric Lines | Edgy, Glamorous, Sophisticated |
| Nude/Beige | Accent Nail, Subtle Shimmer, Dots | Elegant, Understated, Chic |
| Deep Blue/Navy | Stars, Glitter Gradient, Foil Accents | Mysterious, Celestial, Luxurious |
| White/Pastel Pink | French Tips, Delicate Lines, Small Studs | Feminine, Clean, Bridal/Wedding |
| Burgundy/Deep Red | Half-Moon, Glitter Accent, Geometric Break | Bold, Rich, Festive |
Maintaining Your Silver Masterpiece
Once your stunning silver nails are complete, a little care goes a long way to keep them looking fresh and fabulous.
Use a Top Coat Regularly: Reapply your favorite shiny top coat every 2-3 days. This is the best way to prevent chips and keep the shine intact.
Wear Gloves: When doing chores, especially washing dishes or cleaning with chemicals, wear rubber gloves. This protects your nails from damage and harsh substances.
Moisturize: Keep your hands and cuticles hydrated with a good cuticle oil or hand cream. Healthy cuticles make your whole manicure look better.
Be Gentle: Avoid using your nails as tools to pry or scrape. This can cause chips and breaks.
Frequently Asked Questions about Silver Nail Designs
Q1: Can I create silver nail designs with regular nail polish?
Yes! While chrome powder requires gel polish, most other silver designs, like glitter polish, metallic polish, foil accents with foil glue, and simple painted designs, can be achieved with traditional nail polish. Just ensure you allow adequate drying time between coats and for the final design.
Q2: How do I get a smooth, non-streaky silver polish application?
The key is thin coats! Apply 2-3 thin layers of silver polish rather than one thick one. Ensure each coat is mostly dry before applying the next. For metallic polishes, try to paint in one smooth direction to minimize brush strokes. A good quality top coat can also help smooth out minor imperfections.
Q3: What’s the best way to clean up messy silver nail polish application?
Dip a small, clean makeup brush or an orange stick into nail polish remover. Then, carefully trace around your cuticle and the sides of your nails to remove any excess polish for a crisp edge. Doing this while the polish is still wet can sometimes smudge, so a slightly dried polish is often easier for clean-up.
Q4: Are silver nails suitable for all skin tones?
Absolutely! Silver is a cool-toned metallic that generally complements all skin tones beautifully. Depending on your undertone, you might prefer a brighter, cooler silver or a slightly warmer, more muted silver. Experiment to see what you love most!
Q5: How long do DIY silver nail designs typically last?
With a good base and top coat, simple silver polish manicures can last 5-7 days before significant chipping occurs. Nail foils and chrome powder, when applied correctly over gel polish, can last even longer, similar to a gel manicure, typically 2-3 weeks.
Q6: Is chrome powder difficult to use?
It has a learning curve, especially ensuring the base gel and top coat are suitable (“no-wipe” is crucial). However, with practice, it becomes quite manageable. Watching video tutorials can be extremely helpful for this technique.
Conclusion: Shine On with Silver!
See? Creating beautiful silver nail designs doesn’t have to be daunting. Whether you’re aiming for a subtle shimmer on an accent nail, a bold chrome statement, or elegant glitter tips, there’s a silver design out there that’s perfect for you. By gathering a few simple tools and following these easy steps, you can transform your nails into mini works of art. Don’t be afraid to experiment and let your creativity shine. Your nails are a fantastic way to express yourself, so have fun with it and enjoy your dazzling new look!


