Silver nail designs are a versatile and chic choice for any occasion, offering a touch of glamour without being overly flashy. From minimalist accents to full metallic manicures, silver adds a sophisticated shimmer that complements any outfit. Learn easy ways to rock this stunning trend!
Hey nail lovers! Lisa Drew here, your go-to for all things nails. Are you looking for a nail style that’s both elegant and easy to achieve? Silver nail designs are incredibly popular, and for good reason! They’re dazzling, chic, and surprisingly simple to pull off, even if you’re just starting out. But sometimes, finding the perfect silver look or figuring out how to create it can feel a bit tricky, right? Don’t worry! We’re going to dive into the wonderful world of silver manicures, breaking down everything from the tools you’ll need to super cute design ideas. Get ready to make your nails shine!
Why Silver Nail Designs Are a Must-Have
Silver is a true chameleon in the nail world. It’s not just for holidays; it’s a year-round staple that can be as subtle or as bold as you like. Think of it as a neutral with a pop of personality. It’s universally flattering and adds an instant upgrade to any look. Plus, silver pairs beautifully with almost every color imaginable, making it incredibly versatile.
When you think “silver nails,” you might picture a full metallic polish. And that’s a fantastic option! But silver can also be used for delicate details, geometric patterns, or as a highlight. This means you can tailor your silver nail design to your personal style, whether you prefer minimalist elegance or a more statement-making vibe.
The best part? You don’t need to be a pro artist to achieve stunning silver looks. Many simple techniques with basic tools can give you salon-worthy results at home. We’ll guide you through it all, making sure you feel confident and creative every step of the way.
Essential Tools for Your Silver Nail Design Toolkit
Before we jump into the fun designs, let’s gather our supplies. You don’t need a whole professional kit to create amazing silver nail art. Here are a few essentials that will make your DIY manicures a breeze:
- Base Coat: This protects your natural nails and helps your polish last longer. A good quality base coat is key for a smooth canvas.
- Top Coat: Seals your design, adds shine, and prevents chips. Always finish with a great top coat!
- Silver Nail Polish: You’ll want at least one shade of silver. Consider a classic metallic, a glitter silver, or even a holographic silver for extra sparkle.
- Dotting Tools: These have a metal ball at the end and are perfect for creating dots, French tips, and small details. You can find them in various sizes.
- Thin Nail Art Brush: A fine-tipped brush is great for drawing lines, swirls, and other delicate designs.
- Striping Tape: Thin, adhesive tape that helps you create sharp, clean lines and geometric patterns.
- Nail Art Stickers or Decals: For a super quick and easy way to add silver elements. Look for metallic foils, geometric shapes, or star decals.
- Tweezers: Small tweezers are helpful for placing stickers or rhinestones precisely.
- Nail Polish Remover and Cotton Pads: For cleaning up mistakes and removing polish.
- Nail File and Buffer: To shape your nails and create a smooth surface.
Getting Started: Prep Work for Perfect Polish
Just like any great design, success starts with a solid foundation. Proper nail prep is super important for a long-lasting and beautiful manicure. It ensures your polish adheres well and looks its best.
Here’s a simple prep routine:
- Clean Your Nails: Remove any old polish with nail polish remover and cotton pads. Wash your hands thoroughly with soap and water.
- Shape Your Nails: Use a nail file to gently shape your nails to your desired length and shape. File in one direction to avoid weakening the nail.
- Buff the Surface: Lightly buff the surface of your nails with a nail buffer. This removes any natural oils and creates a slightly rough texture for the polish to grip onto. Don’t over-buff!
- Cuticle Care: Gently push back your cuticles with an orange stick or cuticle pusher. Avoid cutting them unless you are experienced, as it can lead to damage.
- Apply Base Coat: Apply a thin, even layer of your base coat. Let it dry completely. This step is crucial!
Beginner-Friendly Silver Nail Designs: Step-by-Step
Ready to get creative? These designs are perfect for beginners and use simple techniques to give you maximum impact.
1. Simple Silver Tips (French Manicure Twist)
This is a classic for a reason! It’s elegant, chic, and incredibly easy to achieve with a little precision.
- Step 1: Polish Your Base. Apply two coats of your favorite nude, white, or even a sheer pink polish. Let it dry completely.
- Step 2: Time for Silver. Carefully use a thin nail art brush or a dotting tool to paint a silver line along the tips of your nails. You can go for a classic curved line or a straight one for a modern look.
- Step 3: Clean Up. Use a small brush dipped in nail polish remover to neaten up any wobbly lines.
- Step 4: Seal the Deal. Apply a generous layer of top coat to lock everything in and add a brilliant shine.
2. Dotted Delight with Silver
Dots are fun, easy, and can be as minimalist or as dense as you like.
- Step 1: Two-Tone Base. Paint your nails with your chosen base color (a pale pink, gray, or even black looks great with silver). Make sure the polish is fully dry.
- Step 2: Dotting Time. Dip a dotting tool into your silver polish. Gently press the tool onto your nail to create dots. You can place them randomly, in rows, or even create a gradient effect by using different amounts of pressure.
- Step 3: Add Sparkle (Optional). For extra shine, use a smaller dotting tool to add tiny silver dots in between the larger ones.
- Step 4: Top Coat! Finish with a clear top coat.
3. Geometric Silver Lines
Striping tape is your best friend for sharp, clean lines!
- Step 1: Paint and Dry. Apply your base color (a deep blue, a soft gray, or even a classic black). Let it dry completely until it’s no longer tacky.
- Step 2: Apply Striping Tape. Carefully place strips of nail striping tape onto your nail. You can create chevrons, triangles, or just simple straight lines. Press the tape down firmly to prevent polish from seeping underneath.
- Step 3: Paint Silver. Smoothly paint over the tape with your silver polish. Apply one or two coats for full opacity.
- Step 4: Remove Tape. While the silver polish is still a little wet (but not smudgy), very carefully peel off the striping tape using tweezers. This gives you super crisp lines.
- Step 5: Seal it Up. Once the silver polish is dry, cap it all off with a good top coat.
4. Glitter Silver Accent Nail
This is a super easy way to add some dazzle without a full glitter application.
- Step 1: Base Color. Paint all your nails with your chosen color. A nude, black, or deep jewel tone works wonderfully.
- Step 2: Glitter Bomb! On one accent nail (usually the ring finger), apply a coat of silver glitter polish. You can do a full glitter coat or tap the glitter onto the tips for a “glitter fade” effect.
- Step 3: Add Depth (Optional). For a more intense glitter look, apply a second coat of glitter polish.
- Step 4: Top It Off. Apply a top coat over all your nails, including the glitter accent nail, to smooth out the texture and add shine.
5. Silver Leaf or Foil Accents
This adds a touch of ethereal shimmer and looks incredibly chic.
- Step 1: Base Polish. Apply your base color. A muted tone like cream, nude, or a soft pastel is ideal. Let it dry.
- Step 2: Apply Foil Glue or Top Coat. Paint a small section of your nail with special foil glue, or use a layer of slightly tacky top coat. Wait for it to become tacky (check the product instructions).
- Step 3: Transfer the Foil. Place a piece of silver transfer foil (shiny side up) over the tacky area and press down firmly. Swiftly peel off the foil to reveal the metallic imprint. You can use small pieces for delicate accents or larger pieces for a more dramatic effect.
- Step 4: Seal. Gently apply a top coat over the design. Be careful not to drag the polish over the foil and lift it.
Intermediate Silver Nail Design Ideas
Feeling a little more adventurous? These designs build on the basics for even more stunning results.
1. Ombre Silver Fade
Create a beautiful gradient effect with silver.
What you’ll need: Your base color, silver polish, a makeup sponge (a clean cosmetic sponge or a piece of a regular kitchen sponge cut to size works!), and a top coat.
- Base Color: Paint your nails with your chosen base color and let it dry thoroughly.
- Sponge Prep: Put a small amount of your base color and silver polish side-by-side on a piece of foil or a palette.
- Dab and Blend: Dip a makeup sponge into both colors. Lightly dab the sponge onto scrap paper a couple of times to blend the colors on the sponge and remove excess.
- Apply the Ombre: Gently dab the sponge onto the tip of your nail, working your way down. The color will transfer in a gradient. Repeat, focusing more on the tips with the silver for a concentrated fade, or blend higher for a more diffused look. The key is light dabbing motions.
- Clean Up: Use a small brush with nail polish remover to clean up any excess color on your skin.
- Seal: Apply a thick layer of top coat to smooth out the sponge texture and add shine. You might need two coats of top coat for a totally smooth finish.
2. Silver Moon Manicure
A stylish take on the classic half-moon manicure.
- Step 1: Base for the Moon. Paint your entire nail with your chosen base color (think deep red, navy, or a soft nude). Let it dry completely.
- Step 2: Create the Curve. Use a small, round sticker or a French tip guide. Place it at the base of your nail, curving with your cuticle line. Press it down firmly.
- Step 3: Apply Silver. Carefully apply silver polish only to the exposed moon-shaped section at the base of your nail.
- Step 4: Remove Guide. While the silver polish is still wet, gently peel off the sticker or guide.
- Step 5: Top Coat. Apply a top coat to seal the design.
3. Abstract Silver Swirls
Embrace imperfect, artistic lines!
What you’ll need: Base color, silver polish, a thin nail art brush.
- Base Polish: Apply your base color polish. Let it dry completely until it’s not sticky at all.
- Abstract Swirls: Dip your thin nail art brush into the silver polish. Start creating freeform swirls, lines, and abstract shapes across your nail. Don’t overthink it! The beauty is in the spontaneity. You can make them delicate or bold.
- Add Dimension: For a more complex look, you can overlap lines or add small dots within the swirls using a dotting tool.
- Seal: Once you’re happy with your design, apply a clear top coat.
Top Silver Nail Design Trends
Silver isn’t just a color; it’s a statement! Here are some of the hottest trends dominating the nail scene:
1. Chrome and Mirror Finish
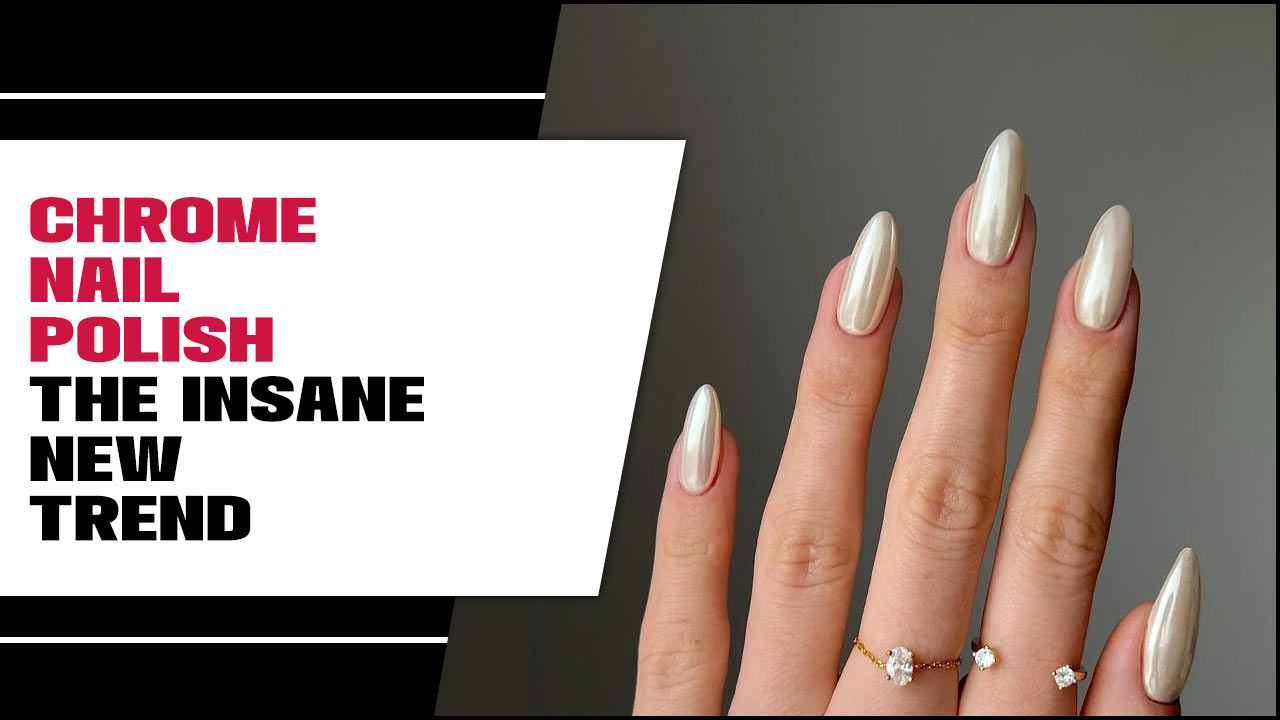
This is pure futuristic glamour! Achieving a true chrome or mirror finish usually requires a special chrome powder applied over a gel polish base and sealed with a gel top coat. Home kits are available, but they can have a learning curve. The result is an intensely reflective, metallic surface that’s simply breathtaking.
2. Holographic Silver
Holographic polish contains pigments that reflect a rainbow of colors when they catch the light. Silver holographic polishes offer a dazzling, multi-dimensional shimmer that’s captivating and looks amazing in both natural and artificial light.
3. Glitter Ombre
This is a softer, more subtle version of the full glitter bomb. It’s achieved by concentrating glitter at the tips of the nails and gradually fading it towards the cuticle. It’s elegant and adds just the right amount of sparkle.
4. Minimalist Silver Accents
Less is more! Think delicate silver lines, tiny dots, negative space designs with a hint of silver, or a single silver detail on an otherwise bare nail. These are perfect for those who want a touch of elegance without being too bold.
5. Silver with Negative Space
This trend plays with the idea of leaving parts of the natural nail visible while incorporating silver elements. You might have a silver geometric shape on a clear nail, or a silver outline around a bare section. It’s modern and sophisticated.
Tip: For a truly professional chrome effect at home, consider using gel polish and a UV/LED lamp. The curing process helps to create that super smooth, high-shine surface. You can find many tutorials online for using chrome powders safely and effectively. Reputable sources like Nailympics’ chrome tutorial can provide excellent guidance.
Silver Nail Designs for Different Occasions
Silver nails are incredibly versatile and can adapt to virtually any event or mood.
Everyday Elegance
For a touch of subtle shine during your daily routine, opt for minimalist designs: a single silver stripe, tiny silver dots on a nude base, or a delicate silver French tip. These add a polished feel without being distracting.
Workplace Chic
Keep it professional yet stylish. A clean manicure with one accent nail featuring a subtle silver design, or a muted base color with a thin silver outline along the nail edge, can be perfect for the office. Silver chrome on short, well-maintained nails also looks very sophisticated.
Date Night Drama
Time to amp up the glam! Consider a full silver metallic manicure, a dramatic silver glitter ombre on all nails, or intricate silver patterns over a dark base color like black or deep burgundy. Metallic foils can also add a touch of luxury.
Party Ready Sparkle
Go all out! Think all-over silver glitter, bold abstract silver designs with splashes of shimmer, or intricate nail art incorporating silver rhinestones or charms. Holographic silver polishes are also fantastic for adding that extra festive sparkle.
Bridal Bliss
Silver can be a beautiful bridal choice, offering a luminous elegance. Delicate silver designs, subtle shimmer on a sheer base, tiny silver accents like stars or small dots, or even a soft silver chrome can perfectly complement a wedding gown.
Tips for Application that Lasts
Want your stunning silver designs to stay looking fabulous? A few key techniques can make all the difference in longevity.
- Thin Layers are Key: Whether it’s your base coat, color, or top coat, applying thin, even layers is better than one thick, gloopy one. Thicker layers are more prone to chipping and smudging.
- Cap Your Free Edge: When applying your top coat, run the brush along the very tip of your nail. This seals the polish and prevents it from lifting or chipping easily.
- Allow Drying Time: Patience is a virtue! Make sure each layer of polish (base, color, design layers, top coat) is sufficiently dry before applying the next. Rushing this step is a common cause of smudges and dents.
- The Power of a Good Top Coat: Invest in a high-quality quick-dry or gel-finish top coat. These are formulated to provide a hard, protective shield that extends the life of your manicure.
- Avoid Harsh Chemicals: When cleaning, wear gloves! Exposure to strong cleaning products, hot water, and excessive moisture can break down nail polish.
- Regular Maintenance: If you notice a tiny chip, try to fix

