Side French tips offer a chic, modern twist on a classic manicure, adding subtle elegance without overwhelming your look. This guide shows beginners how to achieve this versatile style easily at home for a polished, effortless vibe.
Dreaming of nails that look polished but aren’t fussy? You’ve probably seen them – those gorgeous fingertips with a delicate, defined edge. The classic French manicure is a timeless favorite, but what if you’re looking for something a little different, a bit more… you? Enter the side French tip. It’s a subtle yet striking variation that can elevate your entire look. It can feel a bit intimidating to try new nail art at home, especially if you’re just starting out. But don’t worry! I’m here to show you exactly how to create beautiful side French tips that look professional but are totally doable. We’ll break down everything you need, from the tools to the step-by-step process, so you can rock this elegant style with confidence.
What Are Side French Tips?
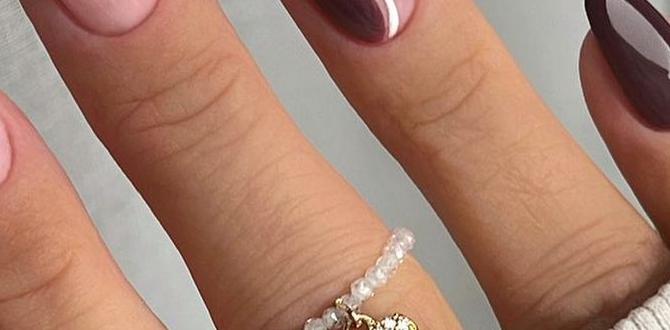
The traditional French manicure features a white (or colored) tip across the entire free edge of the nail. Side French tips, on the other hand, play with placement. Instead of spanning the whole tip, the colored line or shape is strategically placed along one side of the nail, often following the natural curvature of your nail bed or the smile line. It’s a minimalist take that’s incredibly chic and modern. Think of it as a carefully placed accent, drawing the eye in a sophisticated way. This design can be adapted in countless ways, from a thin, crisp line to a bolder curve, and in any color imaginable. It’s a fantastic way to add a personalized touch to your manicure without being overly complicated.
Why Choose Side French Tips?
There are so many reasons why this nail art trend has become a go-to for beauty lovers everywhere. Let’s dive into what makes them so special:
- Subtle Elegance: They offer a sophisticated touch without being loud. Perfect for any occasion, from a business meeting to a casual brunch.
- Versatile Style: Side French tips can be adapted to suit your personal taste. Thin lines, thicker curves, vibrant colors, or classic neutrals – the possibilities are endless!
- Beginner-Friendly: While they look intricate, they are surprisingly easy to create at home, even with minimal nail art experience.
- Flattering on All Nail Shapes: Whether you have short, round nails or long, almond-shaped ones, side French tips tend to look fantastic.
- Modern Twist: They offer a fresh, contemporary update to the classic French manicure, keeping your nails on-trend.
- Can Enhance Nail Shape: Strategic placement can even make your nails appear longer or more perfectly shaped.
Essential Tools You’ll Need
Gathering the right supplies is key to a smooth and successful manicure. Here’s a list of what you’ll want to have on hand:
- Base Coat: Prepares your nails and helps polish adhere better. It’s like a primer for your nails!
- Your Choice of Polish Colors: You’ll need a base color (usually a nude, sheer pink, or milky white) and your color for the French tip.
- Top Coat: Seals your design, adds shine, and protects your manicure from chipping.
- Detail Nail Art Brush or Fine-Liner Brush: This is crucial for creating that precise line. Look for brushes with very fine, sharp bristles. You can find excellent ones at most beauty supply stores or online.
- Nail Polish Remover: For cleaning up any mistakes.
- Cotton Swabs or Orangewood Stick: To help with precise cleanup around your cuticles.
- Cuticle Pusher (Optional but Recommended): To gently push back your cuticles for a cleaner canvas.
- Nail File & Buffer: For shaping your nails perfectly before you begin.
Having these items ready will make the process much easier and more enjoyable. Don’t worry if you don’t have a fancy nail art brush right away; a toothpick can work in a pinch for your first try, though it might require a bit more patience!
Step-by-Step Guide to Creating Side French Tips
Let’s get painting! Follow these simple steps to achieve salon-worthy side French tips at home.
- Prep Your Nails:
- Start by removing any old polish with nail polish remover.
- Gently push back your cuticles using a cuticle pusher. This gives you more nail surface to work with and a cleaner finish.
- Shape your nails with a nail file. Decide on your preferred shape – square, round, or almond – and file accordingly.
- Lightly buff your nail surface to remove any shine. This helps the polish adhere better, making your manicure last longer. Don’t over-buff! Just a few gentle strokes will do.
- Wipe your nails with a lint-free cloth or a bit of nail polish remover to ensure they are clean and free of dust or oils.
- Apply Base Coat:
Apply one thin layer of your chosen base coat. Let it dry completely. This step protects your natural nails from staining and creates a smooth surface for your colors.
- Apply Your Base Color:
Apply one or two thin coats of your base color polish. This is typically a nude, sheer pink, or milky white, but you can experiment! Ensure each coat is completely dry before applying the next. Patience here is rewarded with a flawless finish.
- Create the Side French Tip:
This is where the magic happens! Now, take your detail nail art brush and dip it into your chosen French tip color. Wipe off any excess polish on the rim of the bottle so you have a controlled amount on your brush.
- Option 1: The Classic Side Line
Start at one side of your nail, near the cuticle area. Gently draw a thin, curved line that follows the natural smile line of your nail, extending across to the other side. You can make the line as thin or as thick as you like. The key is to be steady. Don’t worry if it’s not perfect on the first try; you can likely clean it up later. Focus on making a smooth, curved stroke.
- Option 2: The Geometric Side Accent
For a more modern look, you can create a straight diagonal line from one edge of the nail tip towards the center, or a sharp angle. This requires a very steady hand but offers a bold, graphic statement.
- Option 3: The Double Line
Try two parallel lines along one side of the nail for a unique effect. You can even use two different colors!
If you’re having trouble, consider using nail vinyls or stencils designed for French tips, though freehanding offers a more organic and often more achievable result for this specific style. For a cleaner line, you can also place a tiny piece of tape or a sticker on your nail to act as a guide, though this is trickier with curves. A steady hand and practice are your best friends!
- Option 1: The Classic Side Line
- Clean Up Mistakes:
Dip a cotton swab or the tip of an orangewood stick into nail polish remover. Carefully trace around the edge of your side French tips to clean up any polish that got onto your skin or cuticle. This step makes a HUGE difference in the final look, making it appear polished and professional.
- Apply Top Coat:
Once your side French tips are completely dry, apply a generous layer of top coat. Make sure to cap the tips of your nails by running the brush along the free edge – this helps prevent chipping. Let it dry thoroughly.
Variations and Creative Ideas for Side French Tips
The beauty of side French tips lies in their adaptability. Once you master the basic technique, you can start playing with different looks!
Color Play
Don’t feel limited to white or nude. Experimenting with colors can transform the vibe of your manicure:
- Pastel Perfection: Soft pastels are beautiful against a nude base for a subtle, dreamy look.
- Bold & Bright: Neon or vibrant jewel tones can make a real statement. Try a hot pink or electric blue on one side.
- Metallic Shine: Gold, silver, or rose gold lines add instant glamour and sophistication.
- Monochromatic Magic: Use different shades of the same color family for a subtle ombre effect along the side.
Shape and Placement
Think beyond just a simple curve:
- Half-Moon Side Tip: Instead of a defined line, create a half-moon shape on one side of the nail tip.
- Angled Tip: A sharp diagonal line from the side edge can create a very modern, edgy look.
- V-Shape Accent: Draw a small ‘V’ shape at the very tip along one side.
- Double Lines: As mentioned, two parallel lines can look super chic. Try one thin and one slightly thicker line.
- Minimalist Dot: For an ultra-subtle take, place a single dot of color on one side of the nail tip.
Finishing Touches
Consider adding a matte top coat for a sophisticated, velvety finish instead of a high gloss. Or, for extra bling, a tiny rhinestone can be placed at the base of the side tip.
Tips for Longevity and Maintenance
Want your beautiful side French tips to last as long as possible? Here are a few Pro tips:
- Always Cap Your Nails: When applying your base coat and top coat, sweep the brush across the very edge of your nail tip. This seals the polish and prevents it from lifting or chipping.
- Moisturize Regularly: Keep your hands and nails hydrated! Dry cuticles and nails are more prone to damage and can make your manicure look less polished. A good cuticle oil is a lifesaver.
- Wear Gloves for Chores: When washing dishes, cleaning, or doing anything that involves prolonged exposure to water or harsh chemicals, wear rubber gloves. Water can seep under the polish and cause it to lift, and chemicals can break down the polish.
- Avoid Using Your Nails as Tools: Resist the urge to use your nails to scrape, pry, or open things. This is a sure way to chip or break your polish (and potentially your nail!).
- Touch-Up as Needed: If you notice a tiny chip or a lift on an edge, don’t despair! You can often touch it up with a bit of your base color or top coat to extend its life until your next manicure.
Proper care after application is just as important as the application itself!
Side French Tips vs. Classic French Tips
It’s helpful to see how these two popular styles compare, especially for beginners deciding which to try first.
| Feature | Classic French Tip | Side French Tip |
|---|---|---|
| Tip Placement | Full width across the free edge of the nail. | Strategically placed along one side of the nail tip. |
| Visual Effect | Creates a distinct break, elongates the nail, classic and clean. | Subtle accent, modern, chic, adds a touch of asymmetry. |
| Difficulty for Beginners | Can be challenging to get a perfectlyEven, curved line across the entire nail. | Often easier to control a line on one side; fewer chances for severe asymmetry. |
| Versatility | Timeless, works for almost any occasion. | Modern, trendy, can range from subtle to bold depending on color and thickness. |
| Maintenance | Chips are noticeable across the full tip. | Minor chips on the side might be less obvious or easier to touch up. |
Troubleshooting Common Issues
Even with the best intentions, you might run into a few snags. Here’s how to fix them:
- Wobbly Lines: This is the most common issue! If your line isn’t perfectly smooth, grab your cleanup brush dipped in remover and gently refine the edge. You can also layer a bit more polish over the wobbly part to smooth it out if it’s just a minor imperfection. For more serious wobbles, you might need to carefully paint over the whole side tip and start again once dry.
- Polish is Streaky: This usually means your polish isn’t opaque enough or you’re applying it too thinly without enough coats. Ensure your base color is completely opaque and apply 1-2 thin coats. For the tip color, use a good quality polish that applies smoothly.
- Tip Color Bleeds Underneath: This happens if the base color isn’t fully dry when you apply the tip color, or if you’re applying too much pressure with your brush. Let each layer dry completely and be gentle with your detail brush.
- Design Smudges: This is a sign that your polish or top coat wasn’t fully dry when you touched it. Always give your nails ample drying time. You can try a quick-dry top coat or use a fast-drying spray to help speed things up.
Remember, nail art is a skill that improves with practice! Don’t get discouraged if your first attempt isn’t perfect. The goal is to have fun and express yourself.
Frequently Asked Questions (FAQ)
Q1: Can I do side French tips on very short nails?
Absolutely! Side French tips are fantastic for short nails. A thin, well-placed line along the side can actually make short nails look longer and more elegant.
Q2: What’s the best brush for creating side French tips?
A fine-detail brush or a striping brush with very thin, sharp bristles is ideal. These brushes allow for precision and control, making it easier to create a clean line. You can find these at most beauty supply stores or online retailers specializing in nail art supplies.
Q3: How long do side French tips usually last?
With proper application and care, side French tips can last anywhere from 7 to 14 days. Using a good base coat and top coat, capping the edges, and avoiding harsh activities will significantly extend their wear time.
Q4: Can I use regular nail polish or do I need gel polish?
You can definitely use regular nail polish! Many people prefer it for at-home manicures because it’s easy to use and remove. Gel polish offers longer wear and a harder finish, but it requires a UV/LED lamp and can be more challenging for beginners to work with at home.
Q5: My lines are uneven. What can I do?
Don’t worry, this is super common! Keep a clean-up brush handy (a lint-free cotton swab or an orangewood stick dipped in nail polish remover works wonders). Gently trace the edges of your lines to perfect them. For a true beginner’s “cheat,” you can even apply a tiny bit of your base color polish over any mistakes once they’re dry.
Q6: Can I do side French tips on toenails?
Yes, you certainly can! Side French tips look just as chic on toenails as they do on fingernails, offering a stylish touch for pedicures.
Q7: What’s the difference between a side French tip and a modern French tip?
A “modern French tip” is a broad term that can encompass any deviation from the classic white tip, like colored tips, glitter tips, or different shapes. A “side French tip” is a specific type of modern French tip where the design is focused on one side of the nail rather than spanning the entire width.
Conclusion
And there you have it! Side French tips are a beautiful, versatile, and surprisingly achievable nail art design for everyone. Whether you’re aiming for a subtle everyday elegance or a chic modern statement, this trend offers a fantastic way to express your style right at your fingertips. You’ve learned the essential tools, the step-by-step process, and even some fun variations and tips for making your manicure last. Remember, the most important part is to enjoy the process! Experiment with colors, play with placement, and don’t be afraid to make mistakes – they’re just opportunities to learn and refine your technique. So grab your polishes, take a deep breath, and happy painting! You’ve got this, and your nails will look absolutely stunning.


