Side French nail designs offer a chic, modern twist on a classic look, perfect for adding a subtle yet stylish flair to your manicure. These designs feature the iconic French tip, but instead of straddling the entire tip of the nail, the accent line is strategically placed along one side, creating an asymmetric and unique aesthetic. They are surprisingly easy to achieve, even for beginners, and can elevate any outfit.
Nail art can feel a little intimidating, right? You see those Pinterest-perfect manis and think, “No way can I do that!” But what if I told you there’s a trend that’s super stylish, incredibly versatile, and surprisingly simple to master? Enter side French nail designs! This clever update to the classic French manicure is all about that subtle, edgy detail that makes a big statement. It’s the perfect way to feel polished and put-together without a lot of fuss. Ready to rock this cool look? Let’s dive into some of the best ways to do it!
Your Quick Guide to Side French Nail Designs
Think of these side French nail designs as your secret weapon for an effortlessly chic manicure. They’re a modern, playful spin on the classic French tip, highlighting one side of your nail with a sleek line. Perfect for beginners and busy bees alike, these designs are easy to achieve at home and add a sophisticated touch to any style. Get ready to elevate your nail game with these essential, must-try looks!
—
Why Side French Nail Designs Are a Must-Try
The traditional French manicure has been a staple for ages, but sometimes we crave something a little more… unique. Side French nail designs answer that call perfectly. They bring a fresh, contemporary vibe to a beloved classic, offering a subtle yet impactful way to express your personal style.
Modern Edge: They provide a contemporary twist on a timeless look, feeling both current and sophisticated.
Versatility: Whether your nails are short or long, natural or acrylic, these designs adapt beautifully.
Beginner-Friendly: Many variations are surprisingly easy to execute, making them perfect for DIY manicures.
Subtle Statement: They add a pop of detail without being overly flashy, making them suitable for any occasion.
—
Essential Side French Nail Design Looks
Ready to get inspired? We’ve handpicked some of the most popular and achievable side French nail designs that you can rock no matter your skill level.
1. The Classic Side French
This is where it all began! It’s the most straightforward interpretation and a fantastic starting point for anyone new to the side French trend. It mimics the traditional French tip but shifts the accent to the side.
How to Achieve It:
1. Prep Your Nails: Start with clean, dry nails. Shape them to your liking and push back your cuticles.
2. Base Coat: Apply a thin layer of your favorite nude or sheer pink base polish. Let it dry completely.
3. The Line: Using a thin nail art brush or a striping tool, carefully paint a curved line along one side of the nail, starting from the cuticle area and extending towards the tip. Traditionally, this is done in white, but feel free to experiment with other colors!
4. Top Coat: Seal your design with a glossy top coat to protect it and add shine.
Pro Tip: For clean lines, practice on a piece of paper first. You can also use nail guides or tape to help create a crisp edge. However, for the side French, freehand often gives the most natural and organic look.
2. The Double Side French
This design takes the side French concept and doubles the fun! It involves two parallel lines along one side of the nail, creating a bolder, more graphic statement.
How to Achieve It:
1. Prep & Base: Follow steps 1 and 2 from “The Classic Side French.”
2. First Line: Paint the first side French line as described above. Let it dry completely.
3. Second Line: Carefully paint a second, parallel line alongside the first, creating a “channel” of negative space or the base color between them.
4. Top Coat: Apply a top coat once everything is dry.
Why it Works: The parallel lines add visual interest and a modern, almost architectural feel to the nail. It’s a step up from the single line but still very manageable.
3. The Angled Side French
This variation plays with geometry. Instead of a curved line, you create a more angular, sharp line that slants across the nail.
How to Achieve It:
1. Prep & Base: Standard nail prep and application of a base color.
2. The Angle: Using a fine-tip brush, draw a straight line that starts near one side of the cuticle and angles sharply towards the opposite side of the nail tip.
3. Top Coat: Seal with top coat.
Variations: You can make this line thick or thin, and experiment with different color combinations. A bold black angled line over a nude base is incredibly chic!
4. The Floating Side French
This is a more artistic and intricate take. It involves creating a “floating” effect where the colored line appears to hover above the nail bed, often with a gap between the line and the free edge.
How to Achieve It:
1. Prep & Base: Apply your base color. You might opt for a clear or sheer base to enhance the floating illusion.
2. The Hover Line: Using a very fine brush, paint a delicate line along one side of the nail. The key here is to place the line strategically – it doesn’t necessarily touch the tip or the cuticle. It floats mid-nail.
3. Top Coat: Apply top coat carefully.
Expert Tip: This design pairs well with minimalist nail art or negative space manicures. It requires a steady hand and a good quality fine-tipped brush.
5. Color Play Side French
Don’t limit yourself to white or black! The beauty of side French designs is their adaptability to color.
How to Achieve It:
1. Choose Your Colors: Select a base color and an accent color for your side French line. Contrasting colors (like navy and gold) or complementary hues (like blush pink and rose gold) work wonderfully.
2. Apply: Follow the steps for your chosen side French style (Classic, Angled, etc.), using your selected colors.
Trend Alert: Jewel tones, pastels, neons, and metallics all look fantastic as side French accents.
6. The Side French with a Twist (Glitter/Chrome)
Elevate any of the above designs by incorporating glitter or a chrome powder.
How to Achieve It:
Glitter Line: Apply your chosen side French line polish. While it’s still wet, carefully apply fine glitter onto the line using a small brush. Tap off any excess. Seal with a top coat.
Chrome Accent: After applying your base coat, paint your side French line with a gel polish (this is often easier with gel for chrome). Cure it. Apply a “no-wipe” top coat, cure it, then rub your chrome powder onto a specific section or the entire side French line. Cap with another layer of top coat.
DIY Hack: For a simpler glitter application on non-gel polish, apply your glitter top coat strategically along the side French line after the polish has dried.
—
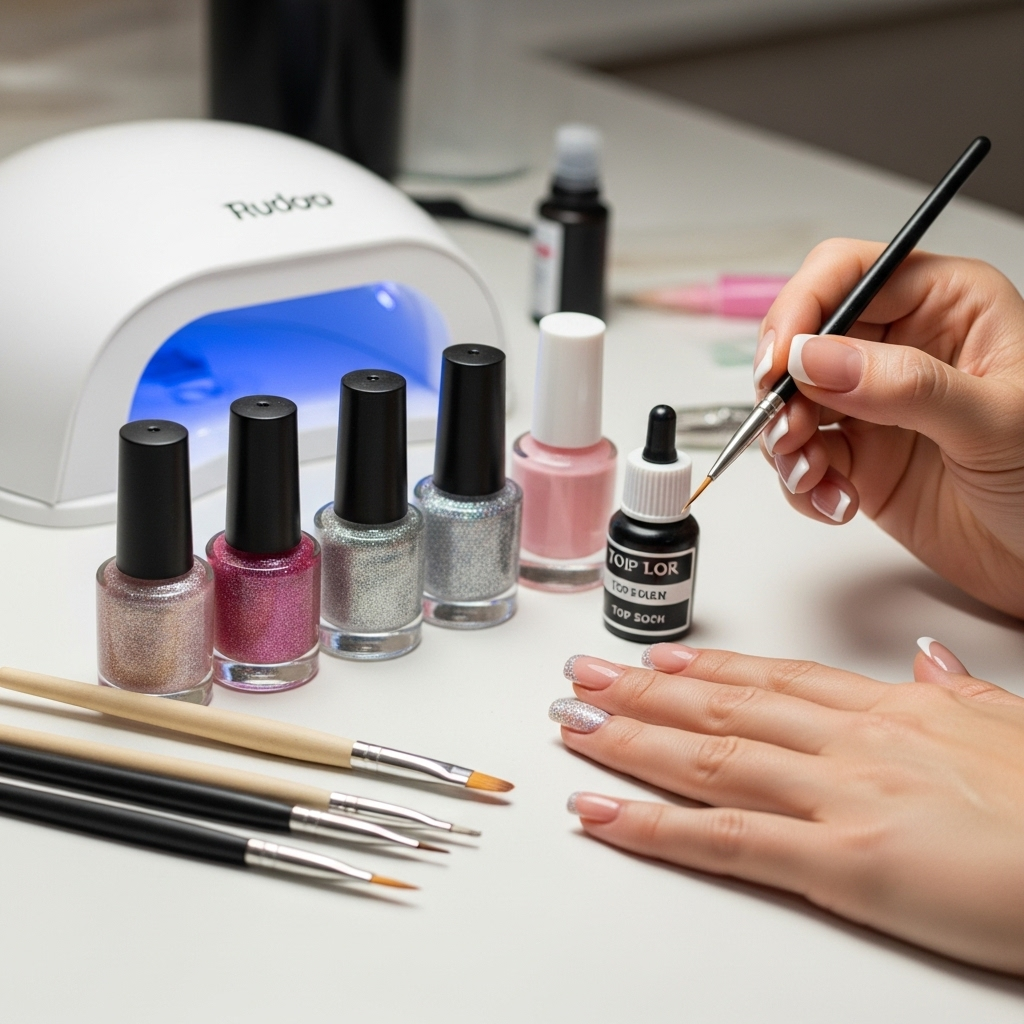
Tools You’ll Need for Perfect Side French Nails
You don’t need a nail salon to create stunning side French designs. A few simple tools and good quality polishes can make all the difference.
Nail Polish: Your choice of base color and accent color(s).
Base Coat: Essential for protecting your natural nails and helping polish adhere better.
Top Coat: Seals the design, adds shine, and extends the life of your manicure.
Fine-Tipped Nail Art Brush: Crucial for painting crisp, precise lines. Look for brushes with synthetic bristles for easy cleaning.
Dotting Tool (Optional): Can be used to create small dots as an added embellishment or to help fine-tune lines.
Nail Polish Remover: For cleaning up any mistakes.
Cotton Swabs or Orangewood Sticks: For precise cleanup around the cuticle and side of the nail.
Nail Files and Buffer: To shape nails and smooth the surface.
—
Step-by-Step: Achieving a Flawless Classic Side French
Let’s walk through creating the most basic yet iconic side French design.
Step 1: Prepare Your Canvas
Start with clean, dry nails. Gently push back your cuticles using an orangewood stick. If needed, lightly buff your nail surface for a smoother finish and to remove any natural oils, which can prevent polish from adhering properly. Shape your nails with a file to your desired length and shape.
Step 2: Apply Base Coat
Apply one or two thin coats of your chosen base color. This could be a sheer nude, a milky white, a soft pink, or even a clear polish. The key here is to let each coat dry completely before moving on to prevent smudging. A good base coat also helps your polish last longer.
Step 3: Create the Side French Line
Now for the fun part! Dip your fine-tipped nail art brush into your accent polish (traditionally white, but feel free to play!). Start at one edge of the nail, close to the cuticle, and carefully draw a curved or angled line tracing the side of your nail. Aim for a consistent width. Don’t worry if it’s not perfect on the first try; this is where practice comes in! You can let the line extend almost to the tip of the nail. Clean up any mistakes by dipping a cotton swab or orangewood stick in nail polish remover and gently wiping away the excess.
Step 4: Add a Top Coat
Once your side French line is completely dry, carefully apply a generous layer of top coat. This seals your design, adds a beautiful glossy finish, and prevents chipping. Make sure to cap the free edge of your nail with the top coat as well. Let it dry thoroughly.
Recommended Products:
| Product Type | Example/Description | Purpose |
| :—————- | :————————————————————————————————————– | :——————————————————————– |
| Nail Polish Base | OPI Natural Nail Base Coat | Protects nails, improves polish adhesion and wear. |
| Accent Color | Essie Expressie FX Nail Polish, “Iced Out” | The color for your defining side French line. |
| Nail Art Brush | Set of Various Nail Art Brushes | For precise application of the side French line. |
| Top Coat | Seche Vite Dry Fast Top Coat | Seals the design, provides shine, and protects against chipping. |
| Cleanup Tool | Orangewood Sticks | For precise cleanup of polish mistakes around the cuticle and sides. |
—
Tips for Nail Health and Longevity
To keep your nails looking their best, especially when experimenting with new designs, remember that nail health is key.
Hydration is Key: Keep your hands and cuticles moisturized with cuticle oil or hand cream. Proper hydration prevents hangnails and keeps your natural nail flexible. According to the American Academy of Dermatology Association, moisturizing regularly helps to keep nails healthy and strong.
Give Them a Break: If you notice your nails becoming brittle or weak, give them a break from polish for a week or two.
Gentle Removal: Always use a good quality nail polish remover and avoid peeling or scraping off old polish, as this can damage the nail plate.
Protect Your Nails: Wear gloves when doing household chores, especially those involving water or harsh chemicals.
—
Mastering the Art: Pro Secrets for Beginners
Getting that perfect side French can be tricky at first! Here are some insider tips to help you achieve salon-worthy results at home.
Steady Your Hand: Rest your wrists on a stable surface to minimize any shakiness. You can even rest your pinky finger on your other hand for extra stability.
Consistency is Key: Once you start drawing the line, try to do it in one smooth, continuous stroke. If you need to lift your brush, try to do so without leaving a noticeable gap or bump.
Clean Up Smart: Don’t be afraid to use your cleanup tools! A small brush dipped in remover is your best friend for fixing wobbly lines or smudges.
Less is More: Start with a thin coat of polish on your brush. You can always add more if needed, but it’s harder to fix too much polish.
Practice on Paper (or press-ons!): Before touching your nails, grab a piece of paper or even some fake nails and practice drawing the lines. This helps you get a feel for the brush and the polish flow.
Consider Stencils (for some designs): While freehand is often best for the organic side French look, for very geometric or intricate patterns, high-quality nail stencils or guides can be a lifesaver.
—
Frequently Asked Questions About Side French Nail Designs
Here are some common questions beginners have about tackling side French nail designs.
Q1: Are side French nail designs hard to do for beginners?
A1: Not at all! The classic side French is very beginner-friendly. It just requires a steady hand and a fine brush. Many variations are surprisingly easy to master with a little practice.
Q2: What colors work best for side French nail designs?
A2: The beauty is in the versatility! Classic white or black is always chic. However, you can use any color that complements your base polish. Metallics, pastels, neons, and jewel tones all look fantastic as accent lines.
Q3: How do I get a clean, crisp line?
A3: Use a fine-tipped nail art brush and a good quality polish. A steady hand is crucial. Resting your wrists on a surface helps a lot. Don’t hesitate to use nail polish remover on a cotton swab or orangewood stick for precise cleanups.
Q4: Can I do side French designs on short nails?
A4: Absolutely! Side French designs can actually make short nails look elegant and elongated. The key is to adjust the thickness and length of the side line to suit your nail shape and size.
Q5: How long do side French manicures typically last?
A5: With a good base and top coat, and proper care, a side French manicure can last anywhere from 5 to 10 days, similar to a regular polish manicure. Using gel polish can extend this significantly.
Q6: Can I combine side French designs with other nail art?
A6: Yes! They look great as the sole focus, but you can also pair them with minimalist dots, subtle glitter accents, or even negative space elements. Just ensure the combined elements don’t overcrowd the nail.
—
Elevating Your Manicure Game with Side French Designs
Side French nail designs are more than just a trend; they’re a sophisticated and accessible way to update your manicure. They offer a modern twist on a timeless classic, allowing for endless creative expression. From the simple elegance of the classic side French to the graphic appeal of the double line, there’s a design to suit every style and occasion.
Whether you’re a seasoned nail art enthusiast or just dipping your toes into the world of DIY manicures, these essential looks provide a fantastic starting point. Remember, practice makes perfect, and the most important part is to have fun and choose designs that make you feel confident and beautiful. So grab your polishes and your fine brush, and get ready to rock some seriously chic side French nails! Your hands will thank you for the stylish upgrade.