Side Cut French Nails: Your Step-by-Step Guide to Chic & Modern Manicures!
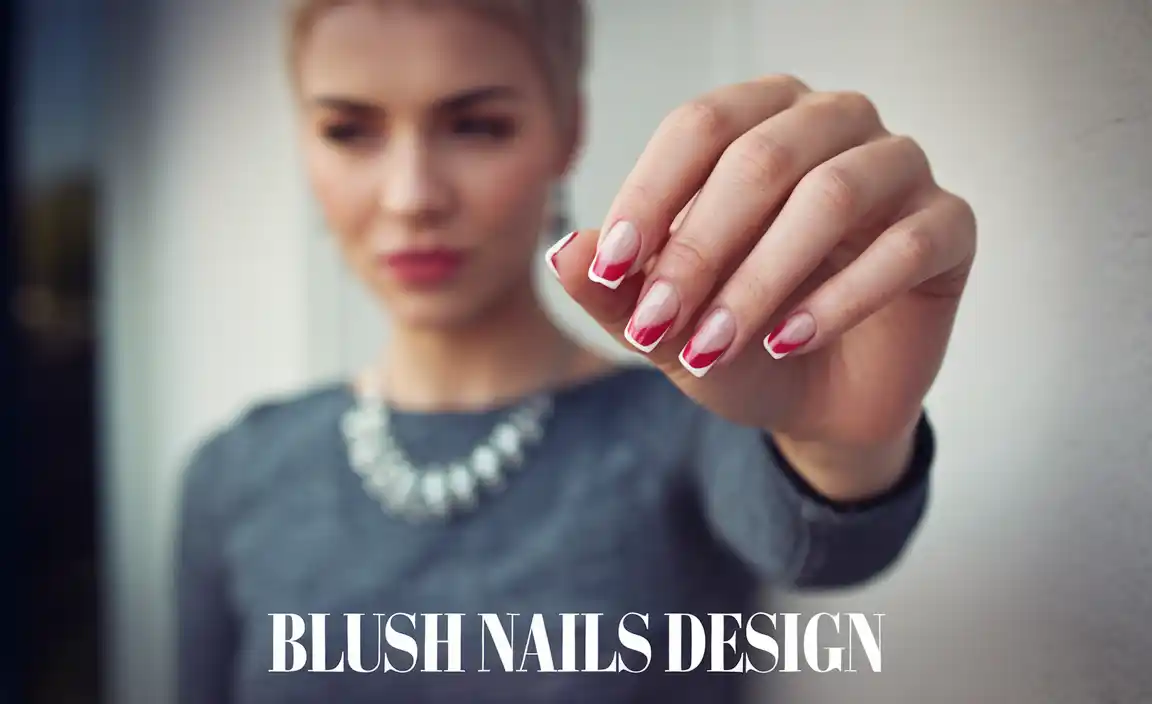
Looking for a fresh twist on a classic? Side cut French nails are your answer! This stylish update to the traditional French manicure places the iconic white tip on the side of your nail, adding a unique, modern flair. Perfect for beginners and seasoned nail art lovers alike, mastering this look is easier than you think. Get ready to elevate your nail game with simple techniques and stunning design ideas!
The Allure of Side Cut French Nails: Why They’re a Must-Try
The French manicure has been a go-to for elegant nails for decades. It’s timeless, chic, and versatile. But what if you’re craving something a little more… you? That’s where side cut French nails come in! Instead of the usual straight white or colored line across the tip, this design cleverly repositions that signature line to the side of the nail bed.
This subtle yet impactful shift does wonders for the nail shape, often creating an illusion of length and a more refined appearance. It’s a fantastic way to keep the classic French vibe while injecting a modern, edgy twist. Whether you’re heading to a job interview, a wedding, or just want to add a touch of sophistication to your everyday look, side cut French nails have you covered.
Plus, they are surprisingly beginner-friendly! You don’t need a steady hand of a surgeon to achieve this look. We’ll break down everything you need to know, from tools to techniques, to help you create salon-worthy nails right at home. So, grab your favorite nail polish, and let’s dive into the world of side cut French nails!
Getting Started: Your Side Cut French Nail Toolkit
Before we start painting, let’s gather our essential tools. Having the right supplies makes all the difference in achieving a smooth, professional-looking finish. Don’t worry if you don’t have everything; many of these are standard nail care items you might already own!
Essential Tools for Your Manicure
- Base Coat: This protects your natural nails from staining and helps your color last longer. Look for a good quality, chip-resistant formula.
- Your Chosen Polish Colors: Typically, this means a sheer nude, pink, or beige for the base, and a crisp white or your favorite color for the side cut.
- Detail Brush or Fine-Tipped Applicator: This is key for precision! A thin nail art brush or even a toothpick can work in a pinch.
- Nail Polish Remover: For cleaning up any mistakes and perfecting your lines.
- Cotton Balls or Pads: To go with your nail polish remover.
- Top Coat: To seal your design, add shine, and prevent chips. A quick-dry top coat is a lifesaver!
- Optional: Nail Art Tape or Stencils: If you want super straight lines or a more defined shape without freehanding.
- Cuticle Oil: For a finishing touch that nourishes your nails and cuticles.
Nail Prep: The Foundation for Flawless Nails
Just like any great artwork, a strong foundation is crucial. Proper nail prep ensures your polish adheres well and your manicure lasts longer. Here’s how to get your nails ready:
- Cleanse: Start by removing any old polish with nail polish remover. Wash your hands thoroughly to get rid of oils and lotions.
- Shape: File your nails to your desired shape. Almond, square, or stiletto – the side cut French looks stunning on most shapes! Ensure you file in one direction to prevent splitting.
- Cuticle Care: Gently push back your cuticles using an orangewood stick or a cuticle pusher. You can apply cuticle remover and let it sit for a minute.
- Buff (Optional): Lightly buff the surface of your nails. This helps polish adhere better, but be gentle – over-buffing can weaken your nails.
- Dehydrate: Wipe each nail with rubbing alcohol or a nail dehydrator. This removes any remaining dust or oils, ensuring optimal polish adhesion.
Mastering the Side Cut French: Step-by-Step Tutorial
Ready to create your own side cut French nails? This is the fun part! We’ll walk you through a simple, effective method that’s perfect for beginners. This technique focuses on creating that signature side accent line.
Method 1: The Freehand Approach (with a Brush)
This method gives you the most control and is easier than it sounds. Patience is your best friend here!
- Apply Base Coat: Paint one or two thin coats of your sheer nude, pink, or beige polish onto each nail. Let it dry completely. This is your canvas!
- Apply Color Polish: Paint another thin coat of your base color if needed, ensuring it’s fully dry.
- Prepare Your Side Line Color: Dip your fine-tipped brush into your white or accent color polish. Wipe off any excess on the rim of the bottle so you have a controlled amount of polish on the brush.
- Create the Side Line: With a steady hand, start at the side of your cuticle area and paint a curved or straight line diagonally across the nail, ending near the opposite side of the free edge. Think of it like a sweeping smile line, but starting from the side. You can decide how thick or thin you want this line to be.
- Refine the Line: Once the initial line is down, you can use your brush (with a tiny bit more polish or even just a clean damp brush) to sharpen the edges or adjust the curve.
- Let it Dry: Allow the side line color to dry completely. This is crucial to prevent smudging.
- Clean Up Edges: Use a small brush dipped in nail polish remover to carefully clean up any wobbly lines or polish on your skin.
- Apply Top Coat: Once everything is dry, apply a generous coat of your favorite top coat. This seals the design and adds a beautiful shine.
- Finish with Cuticle Oil: Apply a drop of cuticle oil to each nail and massage it in for a polished, healthy look.
Method 2: Using Nail Art Tape for Precision
If freehand isn’t your comfort zone, nail art tape is a game-changer for achieving perfectly crisp lines.
- Apply Base Coat and Color: Paint your nails with your base color and let it dry thoroughly.
- Apply Nail Tape: Carefully place a piece of nail art tape across the nail in the desired diagonal position for your side cut line. Press down firmly to ensure a perfect seal.
- Paint Over the Tape: Apply your white or accent color polish over the section of the nail where the tape is placed and slightly beyond. Ensure full coverage.
- Remove Tape While Wet: This is the most important step! While the accent color is still wet, carefully peel off the nail art tape at a 45-degree angle. Doing this while the polish is wet prevents it from peeling off with the tape.
- Let it Dry: Allow the accent color to dry completely.
- Clean Up and Top Coat: Clean up any minor mistakes with your cleanup brush and nail polish remover. Once fully dry, apply your top coat for shine and longevity. Follow with cuticle oil.
Stunning Side Cut French Nail Styles to Inspire You
The beauty of side cut French nails lies in their versatility. You can play with colors, finishes, and embellishments to create a look that’s uniquely yours. Here are some popular and chic styles to get you inspired:
Classic Chic
This is the most straightforward take on the trend. A sheer milky pink or nude base with a crisp white side cut line. It’s elegant, understated, and perfect for any occasion.
Color Pop
Swap out the white for a vibrant color! Think electric blue, hot pink, emerald green, or a soft lavender. This adds a playful and trendy touch.
Glitter Accent
Apply a sheer base, create your side cut line with a fine glitter polish, or even use glitter gel. It’s perfect for parties or a touch of glamour.
Ombre & Gradient
Blend a soft gradient from your cuticle towards the side cut line, or create an ombre effect within the side cut itself. This adds depth and sophistication.
Matte Finish
Give your side cut French nails a modern, contemporary edge by using a matte top coat. It transforms any color combination into something ultra-chic.
Dual Tone
Use two complementary or contrasting colors for the side cut line. For example, a black base with a silver side cut, or a nude base with a metallic gold side accent.
Minimalist Lines
Opt for a very fine, delicate line on the side. This is incredibly sophisticated and subtle, perfect for those who prefer understated elegance. You might explore fine linework with a micro-brush.
Double Side Cut
For the more adventurous, try two thinner side cut lines on opposite sides of the nail, or one on each side for an avant-garde look.
Comparing French Manicure Variations
It’s helpful to see how the side cut French compares to its more traditional counterparts. Each offers a unique aesthetic, and understanding the differences can help you choose your next manicure.
| Manicure Style | Description | Best For |
|---|---|---|
| Classic French | White tip across the entire free edge of the nail, usually on a sheer pink or nude base. | Timeless elegance, formal events, professional settings. |
| Reverse French (Moon Manicure) | The “smile line” is at the cuticle, creating a crescent shape at the base of the nail. | Vintage vibes, a playful twist, highlighting nail health. |
| Side Cut French | The accent line (often white or colored) is placed diagonally across the side of the nail bed. | Modern, chic, elongating the nail shape, a trendy alternative. |
| Deep French | A thicker, more pronounced white tip that extends further down the nail than a classic French. | Bold statement, a more dramatic version of the classic. |
Pro Tips for Perfect Side Cut French Nails
Achieving beautiful side cut French nails is all about technique and a few insider secrets. Here are some tips to help you level up your game, even as a beginner:
- Thin Coats Are Key: Always apply thin coats of polish. Thick coats take longer to dry and are more prone to smudging and bubbling.
- Patience with Drying: Don’t rush the drying process between coats. Use a quick-dry top coat if you’re short on time, but ensure the underlying polish is predominantly dry.
- Clean Your Brush: If you’re freehanding, occasionally clean excess polish off your brush by wiping it on the lip of the bottle or with a lint-free wipe. This ensures precision.
- Practice on a Flat Surface: When painting, make sure your hand is resting on a stable surface. This minimizes jitters and helps create smoother lines.
- Use a Cleanup Brush: A small, flat brush (like a fine art brush) dipped in nail polish remover is your best friend for cleaning up mistakes. Dip it in remover, wipe the excess off on a paper towel, and then carefully trace around your cuticle and the edge of your design to neaten it up.
- Consider Nail Shape: The side cut French looks particularly stunning on almond or stiletto nails, as it emphasizes the shape. However, it works well on square and squoval shapes too!
- Experiment with Color Combinations: Don’t be afraid to try different color pairings. Metallics, neons, pastels, and even black can create striking looks when paired with a complementary base.
- Seal with a Good Top Coat: A high-quality top coat not only adds shine but protects your design from chipping and fading. Reapply your top coat every 2-3 days to extend the life of your manicure.
- Explore Nail Art Resources: Watch demo videos or look at inspirational photos online. Websites like Good Housekeeping’s nail section often feature trending designs and product recommendations that can spark creativity.
Frequently Asked Questions About Side Cut French Nails
Here are some common questions beginner nail art enthusiasts have about side cut French nails.
Q1: What is a side cut French nail design?
A: A side cut French nail design is a creative twist on the classic French manicure. Instead of the traditional white line across the tip of the nail, an accent color line is applied diagonally along one side of the nail bed.
Q2: Is this design difficult for beginners?
A: Not at all! While it requires a little precision, using tools like a fine-tip brush or nail art tape makes it very achievable for beginners. The key is patience and good cleanup.
Q3: What nail polish colors work best for side cut French nails?
A: Classic pairings include a sheer nude or pink base with a white accent line. However, you can get creative with any color combination, such as pastels, brights, metallics, or even dark shades.
Q4: How can I make my side cut line neat and straight?
A: For the neatest lines, use nail art tape as a guide. Apply the tape where you want your line, paint over it, and carefully peel off the tape while the polish is still wet. A fine-tip cleanup brush dipped in nail polish remover is also excellent for refining edges.
Q5: How long do side cut French nails typically last?
A: With proper application, a good base and top coat, and careful maintenance, a side cut French manicure can last anywhere from 7 to 14 days without chipping. Applying a top coat every few days can extend its life.
Q6: Can I do this design on short nails?
A: Absolutely! Side cut French nails can be a fantastic way to make short nails appear longer and more elegant. A thin, well-placed side line can be very flattering.
Q7: Are there any specialized tools I absolutely need?
A: While a fine-tipped detail brush or nail art tape is highly recommended for precision, you can achieve the look with a regular polish brush and a toothpick for cleanup. A good base and top coat are essential for longevity.
Conclusion: Embrace Your Inner Nail Artist!
There you have it – your comprehensive guide to side cut French nails! We’ve explored why this modern take on a classic is so appealing, gathered the essential tools, and walked through step-by-step methods for creating this chic look. From classic white to bold colors and glitter accents, the possibilities for customization are endless.
Remember, nail art is all about self-expression and having fun. Don’t be afraid to experiment with different styles and color combinations. With a little practice and these handy tips, you’ll be creating stunning side cut French manicures that will turn heads. So go ahead, embrace this trendy design, and let your nails do the talking!

