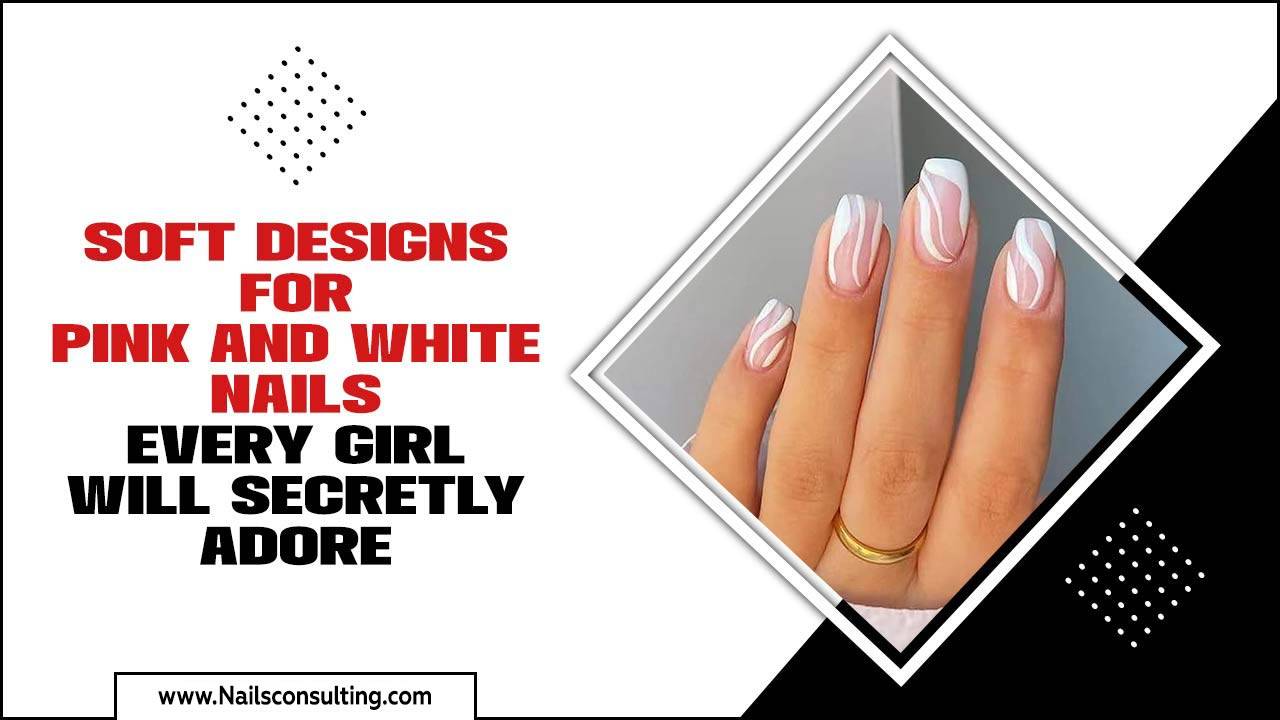
Short swirl nails are a chic and playful way to add personality to your look. This easy-to-achieve nail trend offers a touch of bohemian flair that complements any outfit, proving that great style truly comes in small packages.
Looking for a nail design that’s both stylish and easy to wear? Short swirl nails are your new best friend! They’re perfect for anyone who wants a fun, artistic touch without the fuss of long nails. Whether you’re new to nail art or just want a quick way to elevate your manicure, this trend is for you. We’ll walk you through everything you need to know to create these delightful designs right at home, so get ready to express your unique style!
What are Short Swirl Nails?
Short swirl nails are a manicure style featuring intricate, flowing, and often colorful patterns – the “swirls” – applied to short, practical nail lengths. Think of them as miniature works of art that dance across your fingertips, adding a touch of playful sophistication. This trend embraces creativity and individuality.
The beauty of the swirl design lies in its versatility. It can range from a bold, graphic statement to a soft, pastel dream. Because they’re on short nails, swirl designs feel grounded and wearable for everyday life, from typing at your computer to gardening. They’re a fantastic way to incorporate trending nail art without sacrificing functionality.
Why Choose Short Swirl Nails?
Short nails are inherently practical. They’re less prone to breaking, easier to manage during daily tasks, and often considered more universally flattering. Adding a swirl design to this practical base creates a winning combination.
Here’s why short swirl nails are a brilliant choice:
Chic & Trendy: Swirls are a hugely popular nail art trend, and they look just as fabulous on short nails as they do on longer ones.
Effortless Style: They add an instant pop of personality and sophistication to any outfit, making your hands look polished and put-together.
Beginner-Friendly: The beauty of the swirl is its organic nature. Perfect precision isn’t always necessary; a little artistic flair goes a long way!
Super Versatile: Swirls can be adapted to any color palette, from subtle neutrals to vibrant neons, matching your mood and style.
Practicality Meets Art: You get the benefit of short, manageable nails without sacrificing creativity or style.
Getting Started: Essential Tools for Short Swirl Nails
Before you dive into creating your own short swirl nail masterpieces, let’s gather your arsenal of tools. Don’t worry; you don’t need a nail salon’s worth of equipment! Many of these items are probably already in your beauty stash.
Here’s what you’ll need:
Base Coat: This is crucial for protecting your natural nails and helping your polish adhere better. A good base coat prevents staining and creates a smooth canvas.
Top Coat: Your final step for adding shine, sealing your design, and making your manicure last longer.
Nail Polish Colors: Choose at least two colors for your swirl design, plus a base shade if you’re not using your swirl colors as the base. Think about color combinations that pop or blend harmoniously.
Detail Brushes or Dotting Tools: These are your magic wands for creating swirls.
Detail Brushes: Fine-tipped brushes allow for smooth, flowing lines. You can find specific nail art brushes or even repurpose clean makeup brushes with fine tips.
Dotting Tools: These have metal balls of various sizes at the end. You can use them to create dots that you then connect into swirls, or to create small curved lines.
Toothpick: A budget-friendly alternative for creating delicate swirls and lines.
Nail Polish Remover & Cotton Swabs/Pads: For cleaning up any mistakes (they’ll happen, and that’s okay!).
Nail File and Buffer: To shape your short nails and create a smooth surface for polish.
Tip: Looking to invest in some quality nail art brushes? Check out reputable beauty supply stores or online retailers that offer specialized nail art brush sets. You can often find affordable sets that include various tip sizes perfect for creating delicate lines and intricate swirls.
Step-by-Step Guide to Creating Short Swirl Nails
Ready to unleash your inner nail artist? Follow these simple steps to create stunning short swirl nails. We’ll cover a classic two-color swirl, but remember, the possibilities are endless!
Step 1: Prepare Your Nails
Proper nail prep is the foundation of any great manicure. It ensures your polish lasts longer and looks its best.
1. Shape Your Nails: File your short nails to your desired shape. A classic square, squoval, or soft round shape works beautifully for swirl designs. Keep them all the same length for a uniform look.
2. Buff: Gently buff the surface of your nails to remove any ridges and create a smooth canvas. This also helps polish adhere better. Be gentle; you don’t want to over-buff.
3. Cleanse: Wipe your nails with nail polish remover to get rid of any oils or dust. This step is crucial for polish longevity.
Step 2: Apply Your Base Coat
A good base coat is non-negotiable! It protects your natural nails from staining (especially important with darker or brighter colors) and creates a smooth surface for your polish. Apply one thin layer and let it dry completely.
Step 3: Apply Your Base Color (Optional but Recommended)
While you can create swirls directly on a clear base coat, applying a solid base color first often makes the swirl design pop more.
1. Choose your base color: This could be a neutral like nude, white, or black, or any color that complements your intended swirl colors.
2. Apply two thin coats: Paint your nails with your chosen base color. Thin coats are key to avoiding bubbly or streaky polish. Let the first coat dry completely before applying the second.
3. Allow to dry: Make sure your base color is thoroughly dry before moving on to the swirl design. This might take 5-10 minutes.
Step 4: Create Your Swirls!
Now for the fun part! This is where your creativity shines. We’ll describe a simple, elegant two-color swirl.
Method 1: Using Detail Brushes
1. Dip your brush: Dip the tip of your fine detail brush into your first swirl color. You don’t need a ton of polish – a little goes a long way for delicate lines.
2. Start with a dot or line: Place a small dot or a curved line near the cuticle or the edge of your nail.
3. Draw your swirl: Gently pull the brush to create a curved line, then continue to create a flowing, serpentine shape across the nail. Don’t aim for perfection; organic curves are key to a stylish swirl.
4. Add the second color: Clean your brush thoroughly (or use a separate brush). Dip it into your second swirl color. You can either:
Layer: Carefully paint a thin line next to or within your first swirl.
Create a complementary swirl: Draw a new, smaller swirl that interacts with your first one.
Add accent dots: Place small dots along the swirl or at its ends.
5. Repeat on other nails: Feel free to make each nail slightly different! Some nails could have larger, bolder swirls, while others have more delicate patterns.
Method 2: Using Toothpicks or Dotting Tools
1. Place dots: Apply small dots of your first color onto your base color. Aim for either a line of dots or a cluster.
2. Connect the dots: Use the very tip of a toothpick or a small dotting tool to gently drag and connect the dots, forming a swirl.
3. Add the second color: Use a clean toothpick or dotting tool to add dots of your second color. You can then use the toothpick to gently swirl these dots into the first color or adjacent to them.
Creative Swirl Ideas for Short Nails:
Classic Two-Tone: Two contrasting or harmonizing colors (e.g., black on white, pink on gold).
Pastel Dreams: Soft, muted colors for a dreamy, bohemian vibe.
Monochromatic Magic: Use different shades of the same color for a subtle, sophisticated swirl.
French Swirl: Apply a classic French tip and then add a small swirl detail at the corner.
Accent Nail Swirl: Reserve the elaborate swirls for one or two accent nails and keep the rest of your nails a solid color.
Remember to wipe your brush or toothpick clean between colors to prevent muddying your shades. Take your time and have fun with it! It’s okay if your first attempt isn’t salon-perfect. The charm of short swirl nails is their unique, artistic feel.
Step 5: Clean Up Mistakes
Don’t fret if you get polish where you didn’t intend to!
1. Dip a cotton swab or small brush into nail polish remover.
2. Carefully trace around your nail edges and any areas where you’ve made a mess. This will sharpen up your design and give it a clean finish.
Step 6: Apply Your Top Coat
This is the grand finale and a crucial step for durability and shine!
1. Apply a generous layer of your favorite shiny top coat over your dried swirl design.
2. Cap the free edge: Run your brush along the very tip of your nail to “cap” the edge. This helps prevent chipping and makes your manicure last much longer.
3. Let it dry completely: Be patient! Give your top coat ample time to dry thoroughly to avoid smudging your beautiful new artwork.
Short Swirl Nail Design Inspiration
The beauty of short swirl nails lies in their endless adaptability. Here are some popular design ideas to get your creative juices flowing:
Abstract & Geometric Swirls
These designs take the flowing nature of swirls and give them a modern, edgy twist. Think sharp curves, intersecting lines, and repeating patterns.
Checkerboard Swirl: Combine thin swirl lines with a checkerboard pattern in two complementary colors.
Gradient Swirls: Use a gradient base color and then add swirling lines in a contrasting shade.
Minimalist Swirls: A single, delicate swirl in a contrasting color on a nude or sheer base.
Bohemian & Floral Swirls
Embrace a free-spirited vibe with softer colors and more organic, painterly swirl effects that can mimic floral petals or gentle waves.
Daisy Swirls: Create small daisy-like dots and then connect them with thin swirl lines in green or brown.
Rainbow Swirls: Use multiple bright colors to create vibrant, playful swirls that wrap around the nail.
Earth Tone Swirls: Combine shades of terracotta, mustard, olive green, and cream for a sophisticated, earthy look.
Chic & Sophisticated Swirls
For those who prefer a more refined aesthetic, opt for classic color palettes and subtle swirl placements.
Black and White Swirls: A timeless combination that is always chic and modern.
Gold or Silver Accent Swirls: Add thin metallic swirl lines over a solid color base for a touch of glamour.
French Tip Swirls: Instead of a solid French tip, try a delicate swirl design along the free edge.
Color Palettes to Consider
Neutrals: Beige, cream, taupe, white, black, grey, and metallics.
Pastels: Baby pink, mint green, lavender, pale blue, butter yellow.
Brights: Coral, turquoise, fuchsia, electric blue, neon yellow.
Jewel Tones: Emerald green, sapphire blue, ruby red, amethyst purple.
Pro Tip: For a long-lasting manicure, consider using gel polish. Gel polish requires a UV/LED lamp for curing but offers superior durability and shine, often lasting up to two weeks without chipping. The application process is similar, but ensure you have all the necessary gel polishes, base, and top coats, as well as the curing lamp.
Maintaining Your Short Swirl Nails
Keeping your short swirl nails looking their best is all about a little TLC. Here’s how to make your fabulous art last:
Be Gentle: Avoid using your nails as tools to pry, scrape, or open things. This is the quickest way to chip any nail art.
Moisturize: Keep your cuticles hydrated with cuticle oil. Dry cuticles can lead to snags and imperfections around the nail design. Apply it daily, especially before bed.
Wear Gloves: When doing household chores, especially those involving water or cleaning chemicals, wear rubber gloves. This protects your polish from harsh elements.
Refresh Your Top Coat: If you notice your top coat losing its shine after a few days, you can gently buff the surface and apply another layer of top coat to revive the gloss.
Touch-Ups: If you get a minor chip, you can sometimes carefully repair it with a tiny bit of matching polish and a fine brush, then seal with top coat.
Short Swirl Nails vs. Other Nail Trends
How do short swirl nails stack up against other popular nail designs? Let’s break it down:
| Feature | Short Swirl Nails | Long Stiletto Nails | French Manicure | Minimalist Dot Nails |
| :————— | :————————————————– | :————————————————– | :———————————————- | :————————————————- |
| Length | Short, practical | Very long, statement-making | Any length, classic | Any length |
| Style | Playful, artistic, bohemian, trendy | Glamorous, dramatic, bold | Classic, elegant, clean | Subtle, modern, understated |
| Difficulty | Beginner to intermediate | Intermediate to advanced | Beginner to intermediate | Beginner |
| Maintenance | Low to moderate | High; prone to breakage | Low; requires regular filing | Low |
| Everyday Wear | Excellent; functional and stylish | Challenging; can hinder daily activities | Excellent; versatile | Excellent; unobtrusive |
| Design Focus | Flowing lines, patterns, color play | Shape and length, often detailed art | Clean white tips, classic look | Small, intentional accents |
| Versatility | High; adaptable to colors and styles | Moderate; design often dictates style | High; can be adapted (e.g., colored French) | Moderate; accent focus |
As you can see, short swirl nails offer a fantastic balance of style, individuality, and everyday usability. They’re a trendy choice that doesn’t require a huge commitment in terms of nail length or time.
Frequently Asked Questions About Short Swirl Nails
Q1: Can swirl designs really look good on short nails?
Absolutely! Short nails are the perfect canvas for intricate and playful swirl designs. The smaller size forces a more concentrated and often even more charming application of the pattern. They look sophisticated and fun without being overwhelming.
Q2: What are the best colors for short swirl nails?
The beauty of swirls is their versatility! You can use:
Contrasting colors (e.g., black and white, navy and pink) for a bold look.
Harmonizing colors (e.g., different shades of blue, or peach and gold) for a softer feel.
Neutrals with a metallic swirl for elegance.
Pastels for a dreamy, boho vibe.
Experiment to find what you love!
Q3: How do I make my swirls look neat and not messy?
Practice is key! For neat swirls:
1. Use a very fine detail brush or a toothpick.
2. Dip sparingly into polish.
3. Start with a small dot or line and gently pull to create the curve.
4. Clean up any major mistakes with a fine brush dipped in nail polish remover.
5. A good top coat will also smooth out minor imperfections and give a polished finish.
Q4: Do I need special nail art brushes, or can I use regular polish?
You can definitely use regular nail polish! For tools, while specialized nail art brushes are great, you can achieve wonderful swirls with:
Fine-tipped detail brushes (even clean makeup brushes with fine tips can work).
Toothpicks for thin lines and connecting dots.
* Dotting tools for creating perfectly round dots that can be swirled.
Start with what you have; you can always upgrade later!
Q5: How long do short swirl nails usually last?
With a good base coat, careful application, and a solid top coat (especially capping the free edge), your short swirl nails can last anywhere from 5 to 10 days, sometimes longer, especially if you use gel polish. Regular moisturizing of your cuticles also helps maintain the overall look.
Q6: Can I do swirl nails at home if I’m a beginner?
Yes, absolutely! The beauty of swirl designs is that they are inherently organic and artistic. Perfect symmetry isn’t required. Start with simple two-color designs and less intricate patterns. As you practice, you’ll gain confidence and skill. Don’t be afraid to make mistakes – grab your cleanup brush and start again!
Q7: What’s the difference between a swirl and a marble effect on nails?
While both involve flowing lines and color blending, a swirl typically involves distinct lines that twist and turn, often created with brushes or tools to draw specific patterns. A marble effect is more about organic blending and diffusion of colors, often achieved by dropping colors onto a wet base or creating textures that mimic natural stone. Swirls are generally more controlled, whereas marble is more about creating a fluid, blended look.
Conclusion
Short swirl nails are more than just a trend; they’re a delightful way to infuse personality and artistic flair into your everyday style. They


