Short red nails design is a classic and versatile choice! From bold, solid shades to intricate patterns, short red nails offer endless stunning looks that are both chic and easy to manage. This guide breaks down everything beginners need to know to achieve gorgeous red manicures that make a statement.
Are you dreaming of vibrant, eye-catching nails but think short nails can’t pack a punch? Think again! Short red nails are a timeless trend that exudes confidence and style. Many beginners feel intimidated by nail art, worrying it’s too complicated or time-consuming. But achieving a stunning short red nail design is simpler than you might think. This guide is here to walk you through everything, from picking the perfect shade to easy design ideas you can do at home. Get ready to fall in love with your nails!
Why Short Red Nails Are Always a Win
Red is more than just a color; it’s a statement. When you combine it with the practicality and elegance of short nails, you get a winning combination. Short nails offer comfort and durability for daily tasks, while red brings an undeniable touch of glamour and boldness. Whether you’re heading to the office or a night out, short red nails can effortlessly elevate your look. They suit almost every skin tone and outfit, making them incredibly versatile.
The beauty of short red nails lies in their adaptability. You can opt for a deep, sophisticated crimson for a professional setting or a bright, fiery scarlet for a fun, flirty vibe. The key is understanding various shades and how they can transform your overall aesthetic. Plus, maintaining short nails is generally easier, reducing the risk of chips and breaks, which means your gorgeous red design stays looking flawless for longer. It’s a low-maintenance way to embrace high impact!
Choosing Your Perfect Red Shade
The world of red is vast! Finding the “right” red can feel overwhelming, but it’s all about understanding undertones and the effect you want to achieve. Here’s a quick guide to some popular red shades and who they flatter:
- Classic Cherry Red: A balanced, bright red that works on almost everyone. It’s vibrant and cheerful.
- Deep Crimson/Burgundy: These richer, darker reds have blue or purple undertones. They are sophisticated, perfect for fall and winter, and look stunning on most skin tones, especially those with cooler undertones.
- True Scarlet: A bold, attention-grabbing red with orange undertones. This shade is fantastic for warmer skin tones and brings a fiery energy.
- Coral Red: Leaning towards pink and orange, this is a brighter, more summery red. It’s a beautiful choice for spring and summer and complements warmer skin tones wonderfully.
- Oxblood/Wine Red: A darker, more muted shade of red than burgundy, often with brown undertones. It’s incredibly chic and understatedly sexy.
When in doubt, ask for a sample or look at swatches under natural light. Consider your skin’s undertones – if you have pinkish or blue veins, you likely have cool undertones and might lean towards blues or purples in your reds. If your veins look more green, you probably have warm undertones and will look great in reds with orange or golden hues.
Essential Tools for Your Short Red Nails Design
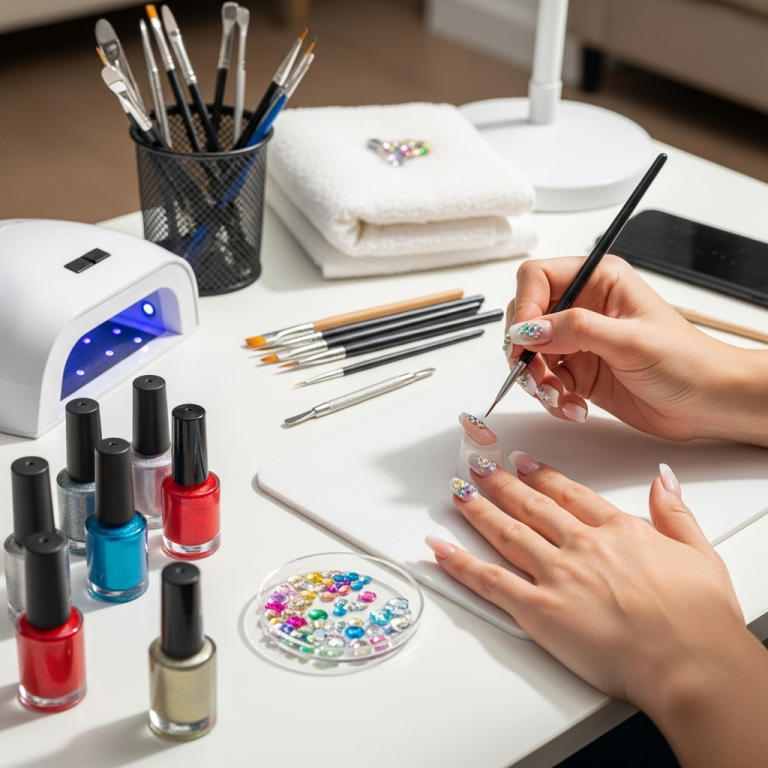
You don’t need a professional salon to achieve salon-worthy short red nails! With a few basic tools, you can create beautiful designs right at home. Here’s what every beginner should have in their nail art arsenal:
| Tool | What it’s for | Beginner Tip |
|---|---|---|
| Nail File | Shaping and smoothing the nail edges. | Use a fine-grit file (around 240 grit) for natural nails to avoid damage. File in one direction. |
| Cuticle Pusher/Orange Stick | Gently pushing back the cuticle for a clean nail base. | Always do this after softening cuticles with cuticle oil or warm water. Be gentle! |
| Base Coat | Protects natural nails and helps polish adhere better. | A good base coat prevents staining from dark polishes like red. |
| Top Coat | Adds shine, protects the polish from chipping, and seals the design. | Look for a quick-dry or gel-like finish top coat for extra durability. |
| Nail Polish Remover | Cleaning up mistakes and removing old polish. | Use an acetone-free remover if you have dry hands or brittle nails. |
| Dotting Tools (or Toothpick) | Creating small dots for simple designs. | A toothpick can work in a pinch! Dip the tip in polish and gently tap on the nail. |
| Thin Detail Brush | For drawing fine lines, swirls, or adding small details. | Clean your brush thoroughly after each use with nail polish remover. |
Having these basics will equip you to tackle simple nail art and ensure a smooth, professional-looking manicure. Remember, practice makes perfect!
Easy Short Red Nails Design Ideas for Beginners
The beauty of short nails is that they are less prone to breakage, making them perfect for everyday wear. When you choose red, you’re already adding a stylish flair. Let’s explore some simple yet stunning designs:
1. The Classic Solid Red
This is the ultimate timeless look. It’s chic, sophisticated, and incredibly effective. For short nails, a solid color can make your hands look elegant and polished.
- Prep: Start with clean, dry nails. File them to your desired short shape (square, squoval, or soft almond are great for short nails). Gently push back your cuticles.
- Base Coat: Apply one thin layer of base coat and let it dry completely. This protects your nails from staining.
- Color Application: Apply your chosen red polish in thin, even coats. Two coats are usually sufficient for opaque coverage. Avoid flooding your cuticles.
- Clean Up: Use a small brush dipped in nail polish remover to clean up any polish on your skin or cuticles.
- Top Coat: Once the red is dry to the touch, apply a generous coat of your favorite top coat. This seals the color and adds shine.
Style Tip: For a bit of extra flair, try a matte top coat instead of glossy for a sophisticated, velvety finish.
2. Red with a Metallic Accent
Adding a touch of metallic—gold, silver, or rose gold—can elevate a simple red manicure instantly. It’s a subtle way to add glamour.
Design Idea: A Metallic French Tip
- Follow steps 1-3 for the Classic Solid Red, painting your entire nail with your chosen red polish.
- Once the red is completely dry, carefully paint a thin line of metallic polish along the tip of your nail. You can use a fine-tipped brush or steady hand. For beginners, using nail art tape can help create a crisp line.
- Let the metallic tip dry completely, then apply a top coat over the entire nail, being careful not to smudge the metallic line.
Design Idea: A Metallic Accent Nail
- Paint all nails in your solid red color.
- On one accent nail (usually the ring finger), apply your metallic polish either as a full nail color or create a simple design like a half-moon at the base.
- Top coat all nails.
3. Simple Dot Designs
Dots are your best friend when you’re starting with nail art! They are easy to make and can be as minimalist or as playful as you like.
Design Idea: Polka Dots
- Paint your nails a solid red or a contrasting color (like white, black, or nude). Let it dry completely.
- Use a dotting tool or the tip of a toothpick dipped in a contrasting polish color (e.g., white dots on red nails, or red dots on nude nails).
- Gently press the dotting tool onto the nail to create a dot. Repeat for as many dots as you desire, spaced evenly or randomly.
- Allow the dots to dry thoroughly before applying a top coat.
Design Idea: Accent Dots
- Paint all your nails a solid red color.
- On one accent nail, use a dotting tool to create a pattern of dots – perhaps a cluster at the base, a line down the center, or scattered randomly.
- Apply a top coat to all nails.
4. Minimalist Lines
Fine lines can add a modern, sophisticated touch to short red nails. This design looks incredibly chic and is surprisingly simple to achieve.
Design Idea: Horizontal or Vertical Lines
- Apply your solid red polish and let it dry completely.
- Using a very thin detail brush (or even the edge of a striping tape), carefully paint a thin line on each nail. You can go horizontally across the middle, vertically from cuticle to tip, or even just along the base.
- Let the lines dry before applying a top coat.
For a cleaner look, you can paint the base red, let it dry, apply a delicate nail art sticker line, and then top coat. Alternatively, use nail striping tape: press it down firmly on a dry nail, paint over it with your accent color, and carefully peel the tape off while the polish is still wet to reveal a crisp line.
5. Simple Geometric Shapes
Bold geometric patterns are on-trend and can be simplified for short nails.
Design Idea: Half-Moon Mani
- Paint your nails the classic red color. Let it dry completely.
- For the half-moon at the base, you can use small circular stickers or nail art guides. Place the sticker on the nail, just above your cuticle line.
- Apply a contrasting color (like nude, white, or metallic) over the exposed part of the nail.
- Carefully remove the sticker before the polish dries completely for clean lines. Let the accent polish dry, then apply a top coat.
6. Subtle Glitter Fade
A touch of glitter can add sparkle without being over the top, perfect for short nails.
Design Idea: Glitter Fade
- Paint your nails a solid red. Let it dry.
- Take a glitter polish (fine glitter works best for a soft look). Start applying it from the tip of your nail, fading it downwards towards the cuticle. You can use the brush from the polish bottle or a makeup sponge for a softer gradient effect.
- Apply a second, lighter layer of glitter fade if desired for more intensity.
- Seal with a top coat. Glitter can be slightly bumpy, so a thicker top coat or two thin coats can help smooth it out.
Nail Care for Short Red Nails
Keeping your nails healthy is crucial for any design to look its best. Red polish, especially deep shades, can sometimes stain natural nails. Taking a few simple steps can prevent this and keep your nail beds looking fresh.
Essential Nail Care Routine:
- Moisturize: Regularly apply cuticle oil and hand cream. This keeps the skin around your nails soft and prevents hangnails. Healthy cuticles make for a cleaner nail bed.
- Use a Base Coat: We can’t stress this enough! A good quality base coat creates a barrier between your nail and the polish, preventing staining, especially with pigmented colors like red. Look for strengthening or ridge-filling base coats for added benefits.
- Proper Removal: When removing your red polish, use an effective nail polish remover. Soak a cotton pad, press it onto the nail for about 30 seconds to dissolve the polish, then gently wipe away. Avoid harsh scrubbing. For stubborn stains, you can try a nail stain remover or a paste made of baking soda and hydrogen peroxide, applied gently.
- Hydration is Key: Drink plenty of water! Hydration from the inside out is vital for healthy nail growth and strength.
- Protect Your Nails: Wear gloves when doing household chores like washing dishes or cleaning, especially when using harsh chemicals. This protects your polish and your natural nails.
Maintaining great nail health ensures that your beautiful short red nails always look their radiant best, whether they’re bare or adorned with a design. Remember, healthy nails are happy nails!
Maintaining Your Short Red Nails Design
Once you’ve achieved your beautiful short red nails, you’ll want them to last! Here are some tips to keep your manicure looking fresh and chip-free:
- Reapply Top Coat: Every 2-3 days, apply a fresh layer of top coat. This refreshes the shine and adds an extra protective layer, helping to prevent chips and extend the life of your manicure.
- Be Gentle: Avoid using your nails as tools. That means no scraping or prying! Short nails are more durable, but being mindful of how you use your hands will make a big difference.
- Touch-Ups: If you notice a small chip or scratch, you can often do a quick touch-up. Carefully file down the rough edge, then apply a thin coat of your red polish followed by a top coat. For metallic accents or detailed designs, you might need to carefully redraw the element before topping it off.
- Cuticle Care: Continue to moisturize your cuticles daily. Dry cuticles can make even the most perfect polish job look unkempt.
- Avoid Soaking: Prolonged soaking in water can weaken the nail and the polish bond. Try to minimize long baths or hand-soaking sessions.
With these simple maintenance tips, your short red nails design will stay stunning and vibrant for as long as possible.
When to Choose Short or Long Red Nails
While this guide focuses on short red nails, it’s worth mentioning the advantages of both lengths. Understanding when each might be more suitable can help you make informed choices about your nail goals.
| Feature | Short Red Nails | Long Red Nails |
|---|---|---|
| Practicality | Highly practical for daily tasks, typing, and active lifestyles. Less prone to snagging and breaking. | Can be snagged or broken more easily. Requires more careful handling. |
| Chic Factor | Effortlessly chic, sophisticated, and modern. A classic look that never goes out of style. | Can be dramatic and attention-grabbing. Ideal for statement looks. |
| Maintenance | Easier to maintain, polish lasts longer with fewer chips. | Requires regular filing to maintain shape, more prone to breaks requiring repairs. |
| Design Potential | Excellent for minimalist designs, solid colors, clean lines, dots, and subtle accents. Can make intricate designs look complex on small canvases. | Offers more surface area for elaborate nail art, detailed patterns, and longer embellishments. |
| Professional Settings | Generally considered more appropriate and professional. | Can sometimes be seen as less professional depending on the workplace and length. |
| Comfort | More comfortable for everyday activities. | Can feel less comfortable for extensive typing or physical work. |
For beginners or those with busy lifestyles, short red nails really shine. They offer all the boldness of red with none of the fuss. If you dream of intricate nail art or a dramatic look, growing your nails out or using enhancements might be an option, but short red nails are a foolproof way to achieve stylish results with confidence.
Common Beginner Questions About Short Red Nails Design
Q1: Will red polish stain my natural nails?
A1: Yes, deep red polishes can sometimes stain natural nails, especially if you skip the base coat. Always apply a good quality base coat before your red polish. If staining occurs, gently buffing the nail surface or using a nail stain remover can help.
Q2: How many coats of red polish should I use?
A2: Apply two thin, even coats for opaque coverage. A single thick coat often leads to streaks and longer drying times. Ensure each coat is dry to the touch before applying the next.
Q3: My red polish is streaky. What can I do?
A3: Streaky polish is usually caused by applying too little polish or uneven pressure. Make sure to load your brush adequately but not


