Short nail design ideas don’t have to be boring! Effortless styles for short nails are all about embracing simplicity, strategic color choices, and smart detailing. You can achieve polished and chic looks with minimal fuss, proving that stunning manicures are accessible to everyone, regardless of nail length.
Do you ever feel like your short nails limit your manicure possibilities? Many of us reach for bold, intricate designs, assuming they only work on long nails. It can be frustrating to see gorgeous nail art and feel like it’s out of reach. But guess what? Short nails are incredibly versatile and can rock stunning designs with ease! You just need the right tips and inspiration.
This guide is here to banish those creative blocks. We’ll explore simple yet impactful short nail design ideas perfect for beginners and busy bees alike. Get ready to discover how to make your short nails your favorite accessory. Let’s dive into styles that are as effortless as they are eye-catching!
Why Short Nails Rock (And How to Style Them!)
Let’s be honest, short nails have a major advantage: they’re practical! They’re less prone to breaking, easier to maintain, and often feel more comfortable for everyday tasks. But “practical” doesn’t have to mean “plain.” The beauty of short nail design ideas lies in their ability to be chic, sophisticated, and fun without demanding hours of intricate work.
The key is to understand what works well with shorter lengths. We’re talking about designs that elongate the finger, utilize negative space effectively, and focus on clean lines or pops of personality. Forget trying to cram a complex scene onto a tiny canvas. Instead, we’ll focus on smart, impactful choices that make a statement.
Think of your short nails as a perfect canvas for sophisticated simplicity. Whether you’re heading to the office, a casual brunch, or a special event, there’s a short nail design idea waiting for you. Ready to transform your mani game?
Effortless Short Nail Design Ideas to Try Now
Here are some proven, beginner-friendly short nail design ideas that deliver maximum style with minimal effort.
1. The Classic French Twist (Mini Style!)
Don’t dismiss the French manicure just because your nails are short! The trick is to keep the white tips very thin and delicate. This elongates the nail bed beautifully.
- Base Color: A sheer nude, pale pink, or milky white.
- Tip Color: Classic white, or get creative with pastels, metallics, or even a subtle shimmer.
- How-to: Paint your entire nail with the base color. Once dry, use a fine-tipped brush or a specialized French tip guide to paint a thin, curved line along the free edge of your nail. Accuracy is key here; a steady hand or guide makes it much easier.
2. Single Accent Nail: Your Go-To Chic Move
This is perhaps the easiest way to add personality without overwhelming your nails. Paint all but one nail a solid, chic color, and then adorn that accent nail!
- Base Color: Choose a sophisticated shade like deep navy, classic red, elegant burgundy, or a trendy sage green.
- Accent Nail Design:
- Simple Dot: Use a dotting tool or the tip of a bobby pin to place a single, contrasting dot near the cuticle or center of the nail.
- Geometric Line: A single, clean vertical or horizontal line in a metallic shade (gold, silver, rose gold) can add a modern touch.
- Glitter Bomb: Cover the accent nail entirely in a beautiful glitter polish for a touch of sparkle.
- Tiny Star or Heart: Small, precise shapes are perfect for accent nails.
- Pro Tip: Ensure the accent design complements your base color. For example, a gold line works wonderfully with a deep red or a rich teal.
3. Minimalist Lines & Geometric Shapes
Clean lines and simple shapes are incredibly effective on short nails. They create visual interest without being cluttered.
- Negative Space Designs: Leave parts of your natural nail showing! Paint a thin outline of a shape (like a square or triangle) near the cuticle, or a single vertical stripe down the center of the nail.
- Half-Moon Manicures: Paint just the tip of your nail in one color and the cuticle area in another, leaving a clean line where they meet. Or, paint the entire nail leaving the half-moon shape at the cuticle bare.
- Color Blocking: Divide your nail into two or three simple sections with clean lines and fill them with complementary colors.
4. Monochromatic Magic
Playing with different shades and finishes of the same color is a sophisticated trick forshort nail design ideas. It looks intentional and put-together.
- Concept: Use varying tones of one color (e.g., light blue, medium blue, dark blue) across your nails.
- Variations:
- Each nail is a different shade of the same color.
- Use two shades: one for the base, and a slightly different shade for a geometric detail or tip.
- Mix finishes: pair a matte shade with a glossy one.
5. Subtle Sparkle & Glitter Accents
A little bit of shimmer goes a long way on short nails. It adds a touch of glam without being over the top.
- Glitter Gradient: Apply a sheer nude or pink base, then blend glitter polish from the tip down towards the cuticle.
- Glitter Stripe: Use a piece of tape to create a sharp line across your nail (horizontally or diagonally) and fill it with a fine glitter polish. Remove tape while polish is still wet.
- Full Glitter Nail: Dedicate one or two accent nails to a full coat of glitter for a dazzling effect. Fine glitters often look more sophisticated on short nails than chunky ones.
6. Matte Finish Mania
Matte topcoats can transform almost any nail polish color into a chic, modern look. It’s an instant upgrade and incredibly easy to achieve.
- How-to: Simply apply a matte topcoat over any dried nail polish color.
- Best Colors: Matte finishes look particularly stunning on deep jewel tones (emerald, sapphire, ruby), muted neutrals (greige, taupe), and even pastels.
- Design Idea: Combine matte and glossy finishes. Paint your nails a solid color with a matte topcoat, then paint a thin, glossy line or simple shape on top.
7. The Power of Polished Neutrals
Neutrals are timeless and always look sophisticated, making them perfect for short nail designs. Think beyond beige!
- Shades: Consider soft greys, creamy whites, muted beiges, warm taupes, and sophisticated olives.
- Design: A single coat of a beautiful neutral polish is chic on its own. You can also experiment with subtle variations, like a barely-there French tip in a slightly lighter or darker neutral shade, or a thin metallic stripe at the base.
8. Tiny Details for Big Impact
Small, well-placed details can make a big difference on short nails.
- Cuticle Art: A tiny dot or a delicate line of metallic polish just above the cuticle.
- Micro-French: Instead of a full tip, just a sliver of color on the very edge of the nail.
- Negative Space Shapes: As mentioned before, a geometric shape or line with parts of the natural nail showing through.
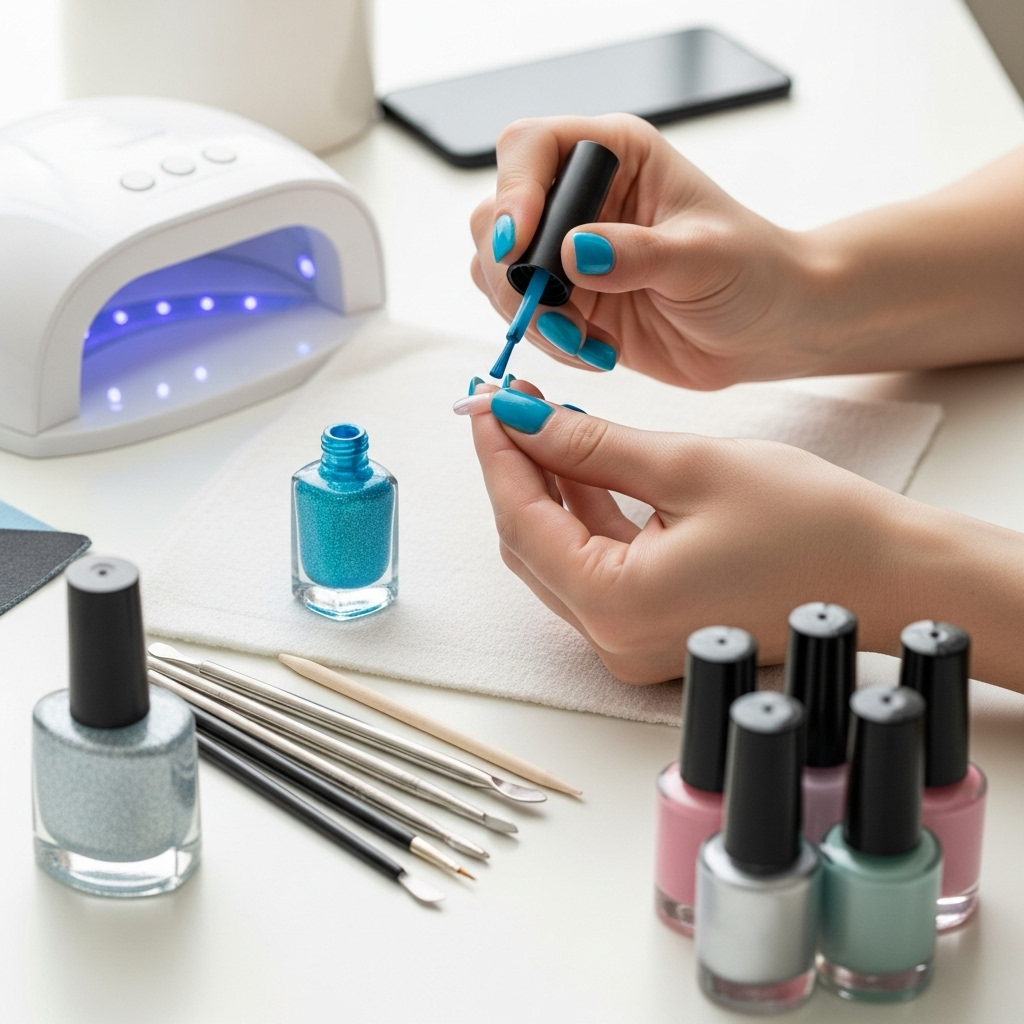
Essential Tools for Effortless Short Nails
You don’t need a pro kit to create these stunning short nail designs. A few simple tools can make all the difference.
Here’s your beginner-friendly toolkit:
- Nail Polish Remover: Essential for clean slates and fixing mistakes. Look for acetone-free options if your nails tend to be dry.
- Cotton Pads/Balls: For applying remover.
- Nail File: To shape your nails. A fine-grit file is best to avoid damaging the nail. Consider a glass nail file for a smooth finish and less breakage. You can find excellent ones from brands like Manicare.
- Buffer: To smooth out any ridges and add a natural shine before applying polish.
- Base Coat: Crucial for preventing staining and helping polish adhere better.
- Top Coat: Seals your design, adds shine (or a matte finish!), and helps prevent chips. A good quick-dry topcoat is a lifesaver!
- Fine-Tipped Brush: For painting delicate lines, dots, or cleaning up edges. You can get these at art supply stores or beauty shops.
- Dotting Tools: Perfect for consistent dots of various sizes. You can often find multi-sized sets affordably.
- Nail Polish Corrector Pen: A handy tool for quickly cleaning up any polish that gets on your skin around the nail.
Step-by-Step: Creating a Chic Minimalist Stripe Design
Let’s walk through a popular and super easy short nail design idea: the minimalist stripe. This looks incredibly polished and is achievable for anyone.
Design Goal: A clean, elegant look with a single metallic stripe.
Tools You’ll Need:
- Nail file and buffer
- Base coat
- Your chosen nail polish color (e.g., deep blue, nude, or classic red)
- Metallic nail polish (gold, silver, or rose gold)
- Fine-tipped brush
- Nail polish remover and cotton pads
- Top coat
Steps:
- Prepare Your Nails: Start with clean, dry nails. File them to your desired shape (a rounded square or soft squoval works great for short nails). Gently buff the surface to smooth out any imperfections. Apply a thin layer of base coat and let it dry completely.
- Apply Your Base Color: Paint your nails with your chosen color. Apply two thin coats for even coverage, allowing each coat to dry for a minute or two before applying the next. Ensure the polish is fully dry before moving on.
- Paint the Stripe: This is where your fine-tipped brush comes in! Dip the brush into your metallic polish. You want just enough polish on the brush, not too much.
- Placement: Decide where you want your stripe. Common placements include:
- Vertical Stripe: Down the center of the nail, from cuticle to tip. This can help elongate the nail.
- Horizontal Stripe: Across the nail, about halfway down or closer to the tip.
- Diagonal Stripe: From one corner to the opposite side.
- Application: With a steady hand, carefully paint a thin, clean line. Go slowly! It’s better to paint a slightly thinner line and go back over it if needed, than to make a thick, wobbly one.
- Placement: Decide where you want your stripe. Common placements include:
- Clean Up Mistakes: If you get any polish on your skin, dip a cotton swab or the tip of your fine brush into nail polish remover and gently clean it up. This makes the final look super professional.
- Seal the Deal: Once the stripe is completely dry, apply a layer of top coat over your entire nail. This will protect your design and add a beautiful gloss or matte finish.
- Final Touch: Let your nails dry thoroughly. You can use a quick-dry topcoat to speed things up!
Nail Shape & Short Nail Design Pairings
The shape of your short nails can also influence which designs look best. While classics like a rounded or squoval shape are universally flattering, experimenting with slight variations can enhance your chosen design.
Here’s a quick guide:
| Nail Shape | Best For Short Nails | Design Recommendations | Why it Works |
|---|---|---|---|
| Round | Classic, very low maintenance. Great for all finger lengths. | Solid colors, simple French tips, minimalist dots, single accent nails. | Follows the natural curve of the fingertip, making it comfortable and less prone to snagging. Simple designs enhance its natural, clean look. |
| Square | Modern and chic. Can make shorter fingers appear a bit wider. | Geometric designs, color blocking, clean lines, half-moon manicures. | The straight edges provide a crisp canvas for designs with sharp lines and defined shapes. |
| Squoval (Soft Square) | A blend of round and square – the best of both worlds! Very popular for short nails. | Almost any design! French tips, gradients, minimalist art, solid colors. | Offers structure like a square but with softer, more durable edges like a round shape. Highly versatile. |
| Almond (Shortened) | Can elongate the finger slightly even when short. Requires a bit more careful filing. | Vertical stripes, delicate lines, single accent nail with a small detail, subtle glitter gradients. | The slight taper at the tip can make designs appear more elegant and can enhance the elongating effect of vertical design elements. |
Advanced Tips for Staying Polished
Even with the simplest short nail design ideas, a few extra steps can elevate your manicure from good to gorgeous.
- Cuticle Care is Key: Well-maintained cuticles make any nail design look more professional. Regularly push back your cuticles and apply cuticle oil daily.
- Clean Edges Matter: Use a small brush dipped in nail polish remover to clean up any smudges around your nail bed after polishing. This makes a huge difference!
- Don’t Skip Topcoat: A good topcoat seals your design, prevents chipping, and adds a beautiful finish. Look for quick-dry formulas if you’re pressed for time.
- Patience with Drying Time: Even with quick-dry topcoats, give your nails a little extra time to fully harden. Avoid doing anything strenuous immediately after painting.
- Shake, Don’t Stir: When your polish starts to separate, gently roll the bottle between your hands instead of shaking it. Shaking can create air bubbles that transfer to your nails.
- Consider Nail Health: For stronger, healthier nails that are a great base for any design, explore resources on proper nail care. The American Academy of Dermatology offers excellent advice.
FAQ: Your Short Nail Design Questions Answered
Got more questions about rocking short nails? We’ve got you covered!
Q1: Can I really do ombre or detailed art on short nails?
A: Absolutely! The key is scale. For ombre, focus on a smooth blend with fewer layers. For detailed art, keep elements small and precise. Think single tiny flowers, small geometric shapes, or delicate lines rather than large, complex images. Single accent nails are your best friend here!
Q2: How do I make my short nails look longer with polish?
A: Vertical design elements are your secret weapon! A thin vertical stripe down the center of your nail, a V-shaped French tip that extends down the nail, or a gradient that darkens towards the tip can create an illusion of length.
Q3: What are the best polish colors for short nails?
A: All colors can work! Lighter, brighter colors can make nails look fresh and clean. Deeper, darker colors can look incredibly chic and sophisticated. Neutrals are always a safe and stylish bet. Don’t be afraid to experiment!
Q4: How often should I change my nail polish on short nails?
A: This is up to personal preference. If your polish is chipped, it’s best to either touch it up or remove it to keep your nails looking neat. For most people, changing polish every 3-7 days maintains a polished look.
Q5: Is it okay to use nail stickers or transfers on short nails?
A: Yes! Nail stickers and transfers are fantastic for short nails because they offer instant detail without the need for precise freehand painting. Choose smaller designs or ones that fit well within the nail shape. Ensure they lay flat against the nail for the best finish.