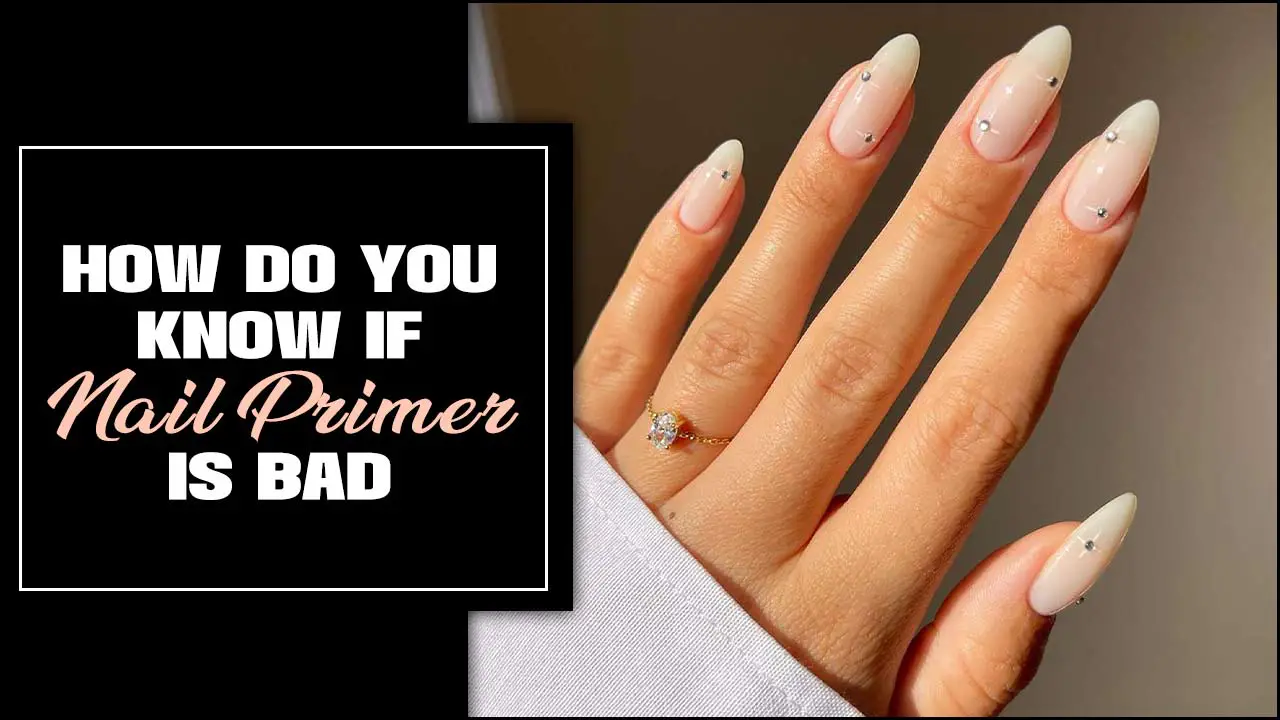
Short milky French nails are a chic, versatile, and understated nail trend perfect for beginners and pros alike. This style offers a sophisticated take on the classic French manicure, with a soft, opaque white or creamy polish for the tips against a sheer, milky base. They’re elegant, easy to achieve, and elevate any look.
Are you dreaming of effortlessly chic nails that are both stylish and simple? Short milky French nails are the perfect answer! Many of us love the polished look of a French manicure but find it tricky to get just right, especially on shorter nails. Sometimes the stark white tips can feel a bit too bold or are just difficult to paint neatly. The good news? We’ve got you covered! This guide will walk you through everything you need to know to create stunning short milky French nails that look professionally done, right in your own home. Get ready to nail this trend with ease!
Why Short Milky French Nails Are a Must-Have
Short milky French nails have taken the beauty world by storm, and for good reason! They’re the epitome of understated elegance and offer a fresh, modern twist on a timeless classic. Unlike the traditional bright white French tips, the “milky” aspect refers to a slightly opaque, soft white or cream shade for the tips, often paired with a sheer, milky, or nude-toned base. This combination is incredibly flattering and versatile.
Here’s why they’re a fan favorite:
- Sophisticated & Understated: They offer a polished look without being overwhelming, making them suitable for any occasion, from the office to a special night out.
- Universally Flattering: The softer color palette complements a wide range of skin tones, giving a more natural and refined appearance.
- Chic & Modern: They feel contemporary and fresh, updating the classic French for today’s trends.
- Works Wonders on Short Nails: The shorter length and softer colors prevent the manicure from looking busy or elongating the nail bed in an unnatural way. They create a clean, healthy appearance.
- Easy to Achieve (with the right tips!): While they look intricate, they are quite achievable for DIY enthusiasts.
Essential Tools & Products for Your Short Milky French Manicure
Before we dive into the step-by-step process, let’s gather our supplies! Having the right tools makes all the difference between a DIY attempt and a salon-worthy finish. Don’t worry, most of these are standard nail care items you might already have.
The Must-Have Kit:
- Nail Polish Remover: For cleaning up any mistakes and prepping the nail.
- Cotton Pads or Balls: To apply the remover.
- Nail File: To shape your nails to your desired short French tip style. Look for a fine-grit file (around 240 grit) for a smoother finish.
- Nail Buffer: To smooth the nail surface and create a base for polish. A 4-way buffer is excellent for this.
- Cuticle Pusher or Orange Stick: To gently push back your cuticles.
- Base Coat: Crucial for protecting your natural nail and helping the polish adhere. A strengthening base coat is a great choice.
- Sheer Milky/Nude Polish: This will be your base color. Choose a shade that’s semi-opaque and gives a soft, milky appearance.
- Opaque White or Cream Polish: For your French tips. A classic bright white can also work, but a softer cream or off-white leans into the “milky” vibe.
- Thin Nail Art Brush or Striping Tool (Optional but Recommended): For precise application of the tip color. A fine-tip brush allows for clean lines. Alternatively, a striping tape can be used for guides.
- Top Coat: To seal your design, add shine, and protect against chips. A quick-dry top coat is a lifesaver!
- Cuticle Oil (Optional but Recommended): To hydrate cuticles after polishing.
Step-by-Step Guide: Creating Short Milky French Nails
Ready to create your own masterpiece? Follow these simple steps for beautiful short milky French nails. We’ll focus on a clean, classic look that’s perfect for beginners.
Step 1: Prep Your Canvas
This is the most important step for a long-lasting manicure! Start by removing any old polish. Then, push back your cuticles gently. If needed, trim any hangnails, but avoid cutting your cuticles as this can lead to infection. Shape your nails using your nail file. For short French nails, aim for a soft square or squoval shape. Keep the length just above your fingertip. Lightly buff the surface of your nails to create a smooth base for the polish to adhere to. Wipe away any dust with a damp cotton pad or a nail brush.
Step 2: Apply Your Base Coat
Paint on one thin layer of your base coat. This protects your nails from staining and provides a good foundation for your color. Let it dry completely. This usually takes about a minute.
Step 3: Paint the Milky Base
Apply one or two thin coats of your sheer milky or nude polish. The goal here is a soft, translucent finish that looks like healthy, natural nails but with a subtle milky enhancement. Allow each coat to dry thoroughly before applying the next. Two thin coats are usually better than one thick one for an even finish. You can find some great sheer polishes from brands like OPI, Essie, or Sally Hansen.
Step 4: Craft Those Chic French Tips
This is where your French tips come to life! There are a few ways to achieve clean lines on short nails:
- Freehand with a Thin Brush: Dip your thin nail art brush into the opaque white or cream polish. Gently paint a thin smile line across the tip of each nail. Less is more here; aim for a delicate tip.
- Using a Stamp or Guide: Some nail brands offer French tip tools or stamps that can help create a clean line. Alternatively, you can use nail vinyls or striping tape as guides. Apply the tape, paint over it, and carefully peel it off once the polish is slightly tacky.
- The “Dip” Method (for a softer line): If you’re having trouble with a crisp line, try dipping the very edge of your nail into the opaque white polish on a palette, or swipe the brush across the tip at an angle for a softer, more diffused look that still defines the tip.
For short nails, keep the white tip line very thin and delicate. A thick white tip can make short nails look stubby. The aim is a subtle enhancement. Don’t worry about perfection on the first try; you can clean up any wobbly lines with a small brush dipped in nail polish remover.
Step 5: Seal and Shine with Top Coat
Once your French tips are perfectly dry, apply a generous layer of top coat. This seals everything in, adds incredible shine, and helps prevent chipping. A good top coat will make your manicure look professionally done and extend its life significantly. For an extra boost, consider a quick-dry top coat if you’re in a hurry. You can explore options like the Seche Vite Dry Fast Top Coat, which is a cult favorite.
Step 6: Hydrate and Admire!
After your top coat has dried for a couple of minutes, apply a drop of cuticle oil to each nail. Gently massage it into your cuticles and nail beds. This rehydrates and nourishes, giving your finished manicure a healthy, complete look. Now, step back and admire your beautiful short milky French nails!
Variations to Elevate Your Short Milky French Nails
While the classic short milky French is stunning on its own, there are so many fun ways to personalize this trend! Don’t be afraid to get creative and make it your own.
Color Play
Who says French tips have to be white? Experiment with different shades for your tips:
- Pastel Tones: Soft pinks, blues, or lavenders for the tips can add a playful yet sophisticated touch.
- Nude or Taupe Tips: For an even more subtle look, try a slightly darker nude or taupe for the tip instead of white.
- Subtle Glitter: A fine iridescent or silver glitter polish for the tip can add a touch of sparkle.
Milky Base Options
The base polish is key to the “milky” effect. Consider these variations:
- Sheer Pink: A hint of soft pink in the base can add warmth and a rosy glow.
- “One Coat” Polishes: Some brands offer “one-coat” sheer milky polishes that provide excellent coverage with just one application.
- Milky White Gel Polishes: For a more durable and glossy finish, opt for milky white semi-transparent gel polishes.
Accent Nails
Make one or two nails stand out:
- Glitter Accent: Apply a full nail of glitter polish on one finger.
- Subtle Chrome: A sweep of iridescent chrome powder over one milky base nail can be ethereal.
- Minimalist Art: Add a single dot, a tiny star, or a thin line of a contrasting color near the cuticle on one nail.
Maintaining Your Short Milky French Nails
A beautiful manicure deserves to last! Proper care can extend the life of your short milky French nails and keep them looking fresh.
Here’s how to keep them looking their best:
- Apply Oil Daily: Reapply cuticle oil every day, or at least twice a day. This keeps your nails and cuticles moisturized and less prone to breakage or lifting.
- Wear Gloves for Chores: When washing dishes, cleaning, or doing any work that involves prolonged water exposure or harsh chemicals, wear rubber gloves. Water and detergents can weaken the polish and cause it to chip or lift.
- Avoid Using Nails as Tools: Resist the urge to use your nails to open cans, scrape labels, or pick at things. This is a fast way to chip or break your polish and natural nail.
- Touch Up If Needed: If you notice a tiny chip or a slight wear on the tip, don’t despair! With a fine brush and your opaque white polish, you can carefully touch up just the tip. A tiny bit of top coat can seal the repair.
- Reapply Top Coat: After about 3-4 days, you can add another layer of top coat over your existing manicure. This refreshes the shine and adds an extra layer of protection.
For a deeper dive into nail health, resources like the American Academy of Dermatology offer excellent advice on maintaining healthy nails. For instance, they emphasize the importance of a balanced diet for nail strength, which is crucial for any manicure to look its best.
Troubleshooting Common Issues
Even with the best intentions, sometimes things don’t go perfectly. Here are a few common hiccups and how to fix them:
Issue: Wobbly or Uneven French Tip Lines
Solution: Don’t panic! Keep a small cleanup brush (an old fine liner brush works great) dipped in nail polish remover nearby. Carefully trace along the uneven line and gently wipe away the excess polish. For future manicures, consider using striping tape or nail vinyls for perfectly straight lines. You can find excellent quality brushes on retailer sites like Amazon. For instance, these fine liner brushes are often recommended for detailed nail art.
Issue: Polish Smudging Before it Dries
Solution: This usually happens when we’re too impatient! If you smudge a nail gently, try to smooth it out with a clean fingertip or a dedicated smudge-fixing tool if you have one. For a more significant smudge, it might be best to gently remove the polish from that nail with remover and start again, or apply cuticle oil around the smudge and gently push it back into place with an orange stick. Always allow ample drying time, especially for the final top coat. Using a quick-dry top coat can significantly reduce smudging risks.
Issue: Tips Look Too Thick or Chunky on Short Nails
Solution: The key to French tips on short nails is subtlety. The aim is a very fine, delicate smile line. If your tips ended up too thick during application, you can carefully use your cleanup brush with remover to slightly refine the edge. For the next attempt, try using less polish on your brush or opt for a thinner design. You might also find that a slightly curved smile line looks more natural on short nails than a very straight one.
Issue: Base Coat Dragging or Streaky
Solution: This often happens if the base coat isn’t fully dry when you apply the color, or if the polish is too thick. Ensure each layer is completely dry to the touch before moving on. Thin your polish by leaving the cap off for a minute or two, or use a nail polish thinner if it’s gotten too thick from use. Apply polish in thin, even strokes.
FAQ: Your Short Milky French Nail Questions Answered
Q1: What exactly is a “milky” nail polish?
A1: Milky polish is a type of nail lacquer that is semi-opaque and has a soft, creamy finish, rather than being completely transparent or fully opaque. It gives a subtle, diffused color that looks natural but enhanced.
Q2: How do I get a clean French tip line on short nails?
A2: For clean lines, try using nail vinyls, striping tape, or a fine nail art brush with a steady hand. Cleanup with a brush dipped in remover is also very effective for refining the line.
Q3: Is it okay to use regular polish for milky French nails, or do I need gel?
A3: You can absolutely use regular nail polish! While gel offers more durability and a higher shine, standard polishes work perfectly for achieving the milky French look. The key is the color finish (sheer milky base, opaque creamy tips) and application.
Q4: How long should my nails be for this style?
A4: This style is specifically designed for short nails! They look best when the free edge (the white tip part) is just a few millimeters long, or even just a very fine line. They work well on nails that are trimmed to be even with or just slightly past the fingertip.
Q5: Can I do this at home without special tools?
A5: Yes! While tools like thin brushes or vinyls help, you can achieve a lovely effect with just basic polish, a steady hand, and some patience. A regular fine file, buffer, base coat, milky polish, white polish, and top coat are truly all you need to start.
Q6: What kind of base color works best for the “milky” effect?
A6: Look for polishes labeled as sheer, nude, nude-pink, or milky white. They should offer a soft, translucent coverage that evens out the nail bed tone without looking fully opaque. You want your natural nail to still peek through slightly for that delicate look.
Conclusion
Short milky French nails are undeniably chic, versatile, and surprisingly easy to achieve at home. They offer a sophisticated, modern take on a classic look that flatters every nail length and hand. From the perfect milky base to the delicate creamy tips, each step contributes to a polished, elegant finish that boosts your confidence and style. Remember, practice makes perfect, so don’t be discouraged if your first attempt isn’t flawless. With the right tools, a little patience, and these simple steps, you can master the art of the short milky French manicure and enjoy beautiful nails that are always in vogue. So go ahead, embrace this trend, and let your nails shine!

