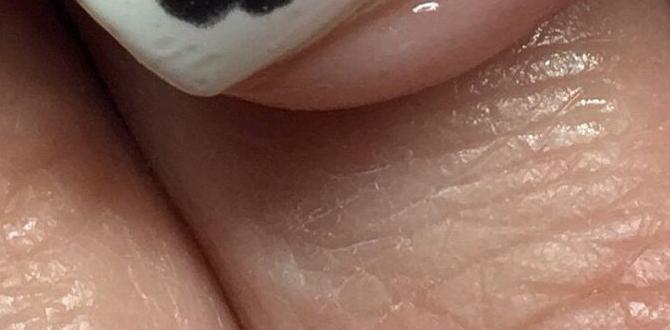
Short milky French nails are a chic, versatile nail trend offering a soft, modern twist on the classic French manicure. Perfect for any occasion, they add subtle elegance with a sheer milky white tip over a natural or pale pink base. This guide will help you achieve this look effortlessly!
Hey nail lovers! Are you looking for a nail style that’s both timeless and totally on-trend? Short milky French nails offer just that! They’re a softer, more modern take on the classic French manicure, giving you that clean, polished look without being too bold. Perfect for work, special events, or just everyday chic, they’re incredibly versatile. Learning how to get them right at home is easier than you think! This guide will walk you through everything you need to know to rock this essential style with confidence. Get ready to fall in love with your nails all over again!
When it comes to achieving a flawless manicure at home, understanding the basic techniques and tools is key. For short milky French nails, we want that delicate balance between a natural-looking base and a creamy, opaque tip. It’s all about precision and the right products. We’ll cover how to prep your nails, apply the polish smoothly, and even share some tips for making them last. Ready to create your own salon-worthy nails? Let’s dive in!
Why Short Milky French Nails Are a Must-Have
There’s a reason why the French manicure has stood the test of time, and the milky French variation is its contemporary evolution.
Subtle Sophistication: Unlike the stark white tips of a traditional French, milky white offers a softer, more diffused line. This makes it incredibly chic and less overpowering, perfect for those who prefer understated elegance.
Versatility: This style is a chameleon! It pairs beautifully with casual outfits for a polished everyday look and equally shines alongside evening wear for a touch of refined glamour.
Flattering for All Nail Lengths: While we’re focusing on short milky Frenchies here, the milky white tip is forgiving and looks stunning on various nail lengths. Short nails, in particular, benefit from this design as it can make them appear longer and more delicate.
Modern Twist: It’s a fresh take on a classic. The milky finish provides a creamy, almost ethereal quality that feels current and fashionable.
Beginner-Friendly: With a little practice, achieving clean lines is totally doable at home. The softer color can also be more forgiving than bright white if your lines aren’t perfectly straight.
Essential Tools for Your Milky French Manicure
Before we get painting, let’s gather your nail toolkit. Having the right supplies makes all the difference in achieving a professional-looking finish.
Nail File: For shaping your nails to that perfect short length.
Cuticle Pusher/Orange Stick: To gently push back and tidy up your cuticles.
Nail Buffer: To smooth out any ridges and create a nice base for polish.
Base Coat: Crucial for protecting your natural nail and helping polish adhere.
Sheer Milky White Polish: The star of the show! You’ll need a polish that’s opaque enough for the tips but still has a milky, translucent quality.
Sheer Pink or Nude Polish: For the nail bed base. A shade that mimics your natural nail tone is ideal.
Thin Nail Art Brush or Striping Tool: For creating clean, precise lines for your French tips. An actual French tip guide can also work, but a brush offers more control.
Top Coat: To seal in your design and add a high-gloss finish.
Rubbing Alcohol or Nail Polish Remover: For cleaning the nail surface.
Cotton Pads/Balls: For applying remover.
Choosing Your Colors: The Perfect Pair
The color palette for short milky French nails is key. You’ll need two main polishes:
1. The Base Color: Opt for a sheer, natural pink, a soft nude, or even a clear polish. The goal is to even out your nail tone subtly. It should be translucent enough that your natural nail shows through a little.
2. The Tip Color: This is where the “milky” comes in. Look for a polish described as milky white, cream, or opaque-sheer white. It shouldn’t be a stark, bright white, but rather something with a soft, opaque quality that still lets a hint of light through. Think of the color of a fresh glass of milk.
Pro Tip: Many brands now offer polishes specifically labeled for French manicures, or have collections with milky finishes. Don’t be afraid to experiment with different shades to find your perfect milky hue!
Step-by-Step: Achieving Short Milky French Nails at Home
Ready to get started? Follow these steps for a beautiful, short milky French manicure.
Step 1: Prep Your Canvas – The Nail Foundation
A clean, smooth nail is the secret to a lasting manicure.
Remove Old Polish: If you have any old nail polish on, remove it completely using a cotton pad and nail polish remover.
Shape Your Nails: File your nails to your desired short length and shape. Squoval (square with rounded edges) or a soft almond shape often looks great with this style on shorter nails. Check out resources like NailPro’s guide to nail shapes for inspiration. Always file in one direction to avoid weakening the nail.
Cuticle Care: Gently push back your cuticles with a cuticle pusher or orange stick. Trim any hangnails carefully, but avoid cutting your cuticles as they protect your nail matrix.
Buff for Smoothness: Lightly buff the surface of your nails. This removes any shine, creating a surface that polish can grip onto better, and smooths out any imperfections. Don’t over-buff, though!
Step 2: Base Coat – The Protective Layer
This step is non-negotiable for nail health and polish longevity.
Apply Base Coat: Apply one thin layer of your chosen base coat polish to each nail. This protects your natural nails from staining by the colored polishes and provides a smooth surface for polish application.
Let it Dry: Allow the base coat to dry completely. This usually takes about a minute.
Step 3: The Base Color – A Natural Hue
Now, let’s add that subtle color to the nail bed.
Apply Sheer Pink/Nude: Apply one or two thin coats of your sheer pink or nude polish. The goal here is to even out your nail color for a uniform, healthy-looking base.
Even Application: Ensure each coat is applied thinly and evenly. Don’t worry if it’s not perfectly opaque; the sheerness is part of the charm and will allow the milky tip to stand out.
Dry Time: Let each coat dry thoroughly before applying the next, and before moving on to the tips.
Step 4: The Milky French Tip – Precision is Key!
This is where the magic happens. You have a few options for applying the milky white tips.
Method A: Using a Thin Nail Art Brush
This method offers the most control.
Load Your Brush: Dip your thin nail art brush into your milky white polish. Wipe off any excess polish on the edge of the bottle to avoid globs.
Create the Smile Line: Gently stroke the brush along the edge of your nail, creating a soft, curved smile line where your natural nail tip begins.
Fill in the Tip: Carefully fill in the tip of the nail with the milky white polish.
Refine: Use a clean brush dipped in nail polish remover to clean up any wobbly lines.
Let it Dry: Allow the tips to dry completely.
Method B: Using French Tip Guides
These adhesive guides can help beginners achieve a straighter line.
Apply Guides: After your base color is completely dry, carefully apply a French tip guide sticker just below where you want your white tip to start. Press down firmly to ensure a good seal.
Paint the Tip: Apply your milky white polish over the exposed tip of the nail, going just above the guide.
Remove Guides Carefully: While the milky white polish is still slightly wet (but not smudgy), gently peel off the guide stickers. If you wait until it’s too dry, you risk peeling off the polish with the sticker.
Clean Up: Use a small brush and remover to fix any imperfections.
Dry Time: Let the tips dry.
Method C: The “Dab and Drag” Technique (for a softer edge)
This can be a bit trickier but creates a very blended look.
Apply Polish: Apply a small amount of milky white polish directly to the tip of your nail with the brush.
Blend: Quickly use a clean, dry brush (or a brush with a tiny bit of acetone on it) to gently feather the edge of the milky white into the base color, creating a soft gradient. This takes practice!
Important Note: If your milky white polish tends to be streaky, a second thin coat might be necessary. Apply it carefully, ensuring the lines are clean. You can find great tutorials on YouTube for visual learners, such as searching for “short milky french nails at home tutorial.”
Step 5: Top Coat – Seal and Shine
The final touch for a glossy, protected finish.
Apply Top Coat: Apply one or two generous coats of a good quality top coat over your entire nail, including the white tips. Make sure to cap the free edge of the nail (paint a little bit on the very edge of the tip) to prevent chipping.
Full Shine: This will seal in your design, add incredible shine, and help your manicure last longer.
Drying: Allow your top coat to dry completely. This is the longest drying stage, so be patient! You can use a quick-dry drops product if you’re in a hurry.
Variations and Creative Touches for Short Milky French Nails
While the classic short milky French is stunning on its own, there are ways to personalize it further.
Subtle Color Pops
Pastel Tips: Instead of pure milky white, try a milky pastel shade like a soft lavender, mint, or baby blue for a hint of color.
Glitter Fade: Add a touch of subtle shimmer by applying a fine iridescent or silver glitter polish just at the edge of the milky white tip, fading it slightly down.
Textured Finishes
Matte Top Coat: Swap your glossy top coat for a matte one. This gives the milky French nails a velvety, sophisticated look that’s super modern.
Subtle Chrome Dust: After your top coat is almost dry (tacky but not wet), you can try gently pressing a very fine iridescent or holographic chrome powder onto the milky white tips for a futuristic shimmer. Seal with another layer of top coat when fully dry.
Minimalist Accents
Single Line Detail: Trace the top edge of your milky white tip with a fine gold or rose gold striping polish for an extra touch of glam.
Tiny Dot: Place a single, tiny dot of metallic polish at the base of your nail, centered where the cuticle line is, for a minimalist detail.
Maintaining Your Short Milky French Nails
To keep your gorgeous nails looking their best for as long as possible, follow these simple maintenance tips:
Reapply Top Coat: Every 2-3 days, apply an additional layer of top coat. This will refresh the shine and reinforce the protective layer, preventing chips and wear.
Moisturize: Keep your hands and nails hydrated by applying cuticle oil and hand cream regularly, especially after washing your hands. Healthy cuticles and nails mean a better-looking manicure.
Be Gentle: Avoid using your nails as tools to open cans, scrape surfaces, or peel labels. This is the quickest way to chip or break them.
Wear Gloves: When doing household chores involving water or harsh cleaning products, wear rubber gloves to protect your manicure. Water can weaken polish, and chemicals can break it down.
Touch-Ups: If you notice a tiny chip or worn edge on the tip, you can carefully touch it up with a bit of your milky white polish and then reapply top coat.
Short Milky French vs. Traditional French Nails
Let’s break down the differences to help you choose your perfect style.
| Feature | Short Milky French Nails | Traditional French Nails |
| :————– | :—————————————————— | :———————————————– |
| Tip Color | Milky, opaque-sheer white; creamy, soft appearance | Bright, opaque white; sharp, crisp appearance |
| Base Color | Sheer pink/nude for a natural, even tone | Clear or sheer pink for a natural look |
| Overall Look| Soft, modern, subtle elegance, ethereal | Classic, clean, bold, traditional |
| Versatility | Highly versatile; works for casual & formal | Classic and versatile; often seen as more formal |
| Beginner Friendliness | Generally more forgiving lines due to color softness | Can be harder to get crisp white lines |
| Modernity | Trendier, contemporary feel | Timeless, classic appeal |
Frequently Asked Questions (FAQ)
Here are some common questions beginners have about short milky French nails.
Q1: What kind of polish is best for the “milky” effect?
A1: Look for polishes labeled “milky white,” “creamy white,” or “opaque sheer white.” They should have good coverage but still look soft, not stark like a bright white. Brands often have specific collections for French manicures that include these shades.
Q2: How do I get my French tips to look even and not wobbly on short nails?
A2: Patience is key! Use a thin nail art brush, load it with just enough polish, and keep your hand steady. Resting your wrist on a table can help. French tip guide stickers can also assist beginners in creating a straighter line.
Q3: My milky white polish looks streaky. What can I do?
A3: Streaky polish is often due to inconsistent application or thin formulas. Ensure you’re applying thin, even coats. If the formula is inherently streaky, you might need a second thin coat after the first one dries, or consider a different brand. A good top coat can also help smooth things out.
Q4: How long should short milky French nails last?
A4: With proper application and maintenance (especially regular top coat application), you can expect short milky French nails to last anywhere from 7 to 14 days before needing a refresh or full reapplication.
Q5: Can I do milky French nails over gel polish or acrylics?
A5: Absolutely! Short milky French nails look fantastic over gel polish or acrylic enhancements. You would apply the base color and milky white tips after the gel or acrylic structure is cured and shaped, then finish with a gel or regular top coat.
Q6: What’s the difference between milky French and a classic white French?
A6: The main difference is the opacity and tone of the tip. Classic French uses a bright, opaque white for a crisp line, while milky French uses a softer, creamier white that’s less stark and often has a slightly translucent quality, giving it a more modern and gentle look. Check out Cosmopolitan’s guide to French manicure types for more visual distinctions.
Q7: Can I achieve the milky effect with regular nail polish, or do I need special products?
A7: You can definitely achieve the milky effect with regular nail polish! You just need to select the right shades. Look for those “milky white” and “sheer nude/pink” polishes. You don’t necessarily need specialized products, just careful color selection and application technique.
Conclusion: Your Go-To Chic Manicure
There you have it! Short milky French nails are your new best friend for a look that’s effortlessly chic, modern, and incredibly wearable. Whether you’re a nail art novice or looking to refresh your go-to style, this design offers a sophisticated yet approachable way to elevate your nails. From the careful prep to the final glossy top coat, each step brings you closer to that perfect, polished finish.
Remember, the beauty of this style lies in its softness and versatility. Have fun experimenting with the shades of milky white and sheer base colors to find what truly makes your nails shine. Don’t be afraid to try a matte finish or a tiny accent for a personal touch. With a little practice, you’ll be mastering those French tips at home in no time. So go ahead, embrace the elegance of short milky French nails, and let your beautifully manicured hands do the talking! You’ve got this!

