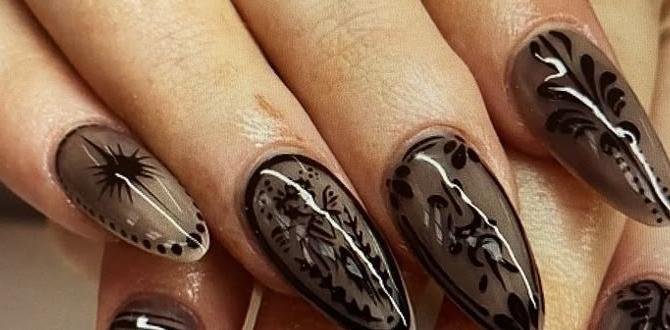
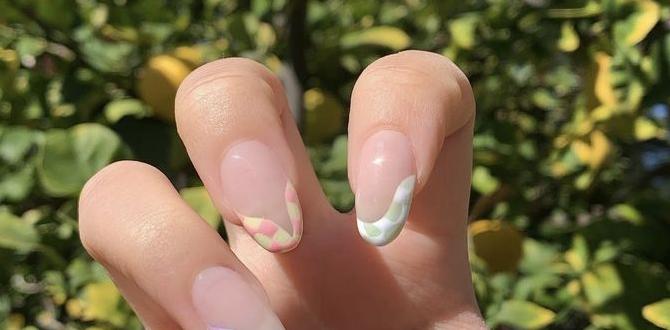
Short matte nails design is all about achieving a chic, sophisticated look that’s surprisingly easy to master. This guide offers essential tips and stunning design ideas perfect for beginners, proving that elegant nails don’t require long lengths. Get ready to elevate your at-home manicures with effortless style!
Are you dreaming of that effortlessly chic, sophisticated nail look? Short nails can be absolutely stunning, and the matte finish takes them to a whole new level of style. But sometimes, achieving that perfect matte look at home can feel a little tricky, right? You might worry about smudging, getting an even finish, or even finding the right designs that work for shorter lengths. Don’t you worry, friend! With a few simple tricks and some inspiring ideas, you’ll be rocking gorgeous short matte nails design in no time. We’re going to walk through everything you need to know, making it super easy and fun.
Why We Love Short Matte Nails Design
Short matte nails have become a massive trend for so many good reasons! They offer a sophisticated, modern vibe that’s both understated and incredibly stylish. Unlike glossy finishes, matte nails don’t catch the light as much, which can actually make them look more elegant and less prone to showing minor imperfections. Plus, the texture of matte polish is just divine – it’s velvety and luxurious!
Here’s why short matte nails are a win for everyone:
- Chic & Sophisticated: They instantly elevate any look, from casual to formal.
- Practicality: Shorter nails are less likely to break and are easier to manage for daily tasks.
- Versatile: The matte finish pairs beautifully with almost any color and design.
- Trendy: It’s a modern twist on classic manicures that’s always in style.
- Beginner-Friendly: Many matte looks are simple to achieve at home.
If you’ve ever felt limited by shorter nail lengths, get ready to be inspired! The short matte nails design world is vast and beautiful.
Getting Started: Your Essential Matte Nail Toolkit
Before we dive into the fun designs, let’s make sure you have the right tools to get that perfect matte finish. Think of this as your essential starter pack for nail artistry!
Must-Have Tools for Matte Manicures
- Nail File: For shaping your nails to perfection. A medium-grit file is great for gentle shaping, while a finer grit can be used for smoothing edges. Ensure your files are clean and dry. You can find great tips on proper nail filing techniques from resources like the American Academy of Dermatology.
- Cuticle Pusher/Orange Stick: To gently push back your cuticles for a clean canvas.
- Base Coat: Crucial for protecting your natural nail and helping polish adhere.
- Your Chosen Nail Polish Colors: Experiment with a few shades you love!
- Matte Top Coat: This is the magic ingredient! It transforms any glossy polish into a beautiful matte finish.
- Optional: Dotting Tools, Thin Brushes, Stencils/Stickers: For adding simple but stunning design elements.
Choosing Your Polishes
The beauty of short matte nails design is that almost any nail polish color looks amazing with a matte top coat. However, some colors really shine:
- Deep jewel tones: Emerald green, sapphire blue, ruby red, and amethyst purple look incredibly rich and luxurious in a matte finish.
- Classic neutrals: Beige, taupe, and soft grays offer an understated elegance.
- Bold brights: Don’t shy away from vibrant colors! A matte finish can give them a unique, modern edge.
- Black and white: These are timeless and always chic in matte.
The “How-To”: Achieving the Perfect Matte Finish
Getting that flawless matte look at home is easier than you think! Follow these simple steps, and you’ll be amazed at the results.
Step-by-Step Guide to a Matte Manicure
- Prep Your Nails: Start by cleaning your nails and pushing back your cuticles. Gently buff any ridges on your nail surface for a smooth finish. Shape your nails to your desired length and shape using your nail file.
- Apply Base Coat: Apply one thin layer of your favorite base coat. This protects your nails from staining and helps your polish last longer. Let it dry completely.
- Apply Your Color(s): Apply two thin coats of your chosen nail polish color. Allow each coat to dry almost completely before applying the next. Working in thin layers is key for an even, streak-free finish.
- Let it Dry (Almost!): This is an important step. Let your colored polish dry for at least 3-5 minutes. You want it dry to the touch but not fully cured. This prevents the matte top coat from dragging the color.
- Apply Matte Top Coat: Now for the magic! Apply one even layer of your matte top coat over the dried color polish. Be generous enough to get full coverage but avoid thick, gloopy application.
- Let it Cure: Allow your matte top coat to dry completely. This usually takes about 5-10 minutes, but check your product’s instructions. Avoid touching them too soon!
- Admire Your Work! You’ve just created a stunning short matte nails design!
Pro Tip: If you’re using a quick-dry polish, let it dry for a minute or two longer before applying the matte top coat to avoid the polish becoming slightly shiny from the quick-dry agent.
Stunning Short Matte Nails Design Ideas for Beginners
Now for the fun part! Even with short nails, you can create incredibly stylish looks. We’ll focus on designs that are simple, elegant, and perfect for those new to nail art.
1. The Classic Monochrome Matte
This is the ultimate beginner-friendly short matte nails design. It’s chic, effortless, and always looks sophisticated.
- How to do it: Simply choose one color you love, apply it as per the step-by-step guide above, and finish with a matte top coat.
- Why it works: The simplicity of a single color in a matte finish is its superpower. It’s clean, modern, and highlights the beautiful texture.
- Must-try colors: Black, deep burgundy, forest green, nude beige, or a soft dusty rose.
2. Subtle Two-Tone Matte
Adding a second complementary color can add a touch of interest without being overwhelming.
- How to do it: Paint all nails in your base color and apply the matte top coat. Once dry, use a fine brush or a striping tape to add a contrasting color to just the tips or along the cuticle line. Seal with another layer of matte top coat.
- Why it works: It’s a simple color block or accent that feels intentional and stylish.
- Pairs well with: A dark grey base with a lighter grey tip, or a navy base with a sky blue accent.
3. The Minimalist Dot Trend
Tiny dots can make a big impact, especially with a matte finish!
- How to do it: After applying your matte color and top coat, use a dotting tool (or the end of a bobby pin!) dipped in a contrasting polish color to add a few small dots to each nail. Keep them sparse and artfully placed.
- Why it works: It’s super simple, adds a playful yet elegant detail, and is very forgiving.
- Placement ideas: A single dot near the cuticle, a small cluster at the base, or a few scattered across the nail.
4. The Accent Nail with a Touch of Shine
This is a fantastic way to play with textures and add a focal point to your manicure.
- How to do it: Do a full matte manicure on all nails except for one accent nail (usually the ring finger). On the accent nail, apply a glossy top coat over the dried color.
- Why it works: The contrast between matte and glossy creates a sophisticated visual interest.
- Pro Tip: Ensure the colors are the same or very similar for a cohesive look.
5. Simple Geometric Shapes
Using stencils or freehand lines can create sharp, modern designs.
- How to do it: Paint your nails in a base matte color. Once dry, use a fine brush and a contrasting color to paint a simple geometric shape – a V-shape at the tip, a straight line down the center, or a half-moon at the base. Seal with a matte top coat. For cleaner lines, you can use nail tape.
- Why it works: Geometric designs always look sharp and contemporary, and the matte finish enhances their graphic appeal.
- Design Tip: Start with simple lines or shapes. Precision comes with practice!
6. The Subtle Glitter Fade
A touch of glitter can make your matte nails pop, especially for a special occasion.
- How to do it: After applying your matte polish and top coat, take a sheer glitter polish and gently dab or sponge it onto the tips of your nails, creating a gradient effect. Let it dry, then apply a final matte top coat over the whole nail. The matte top coat will tone down the glitter’s shine, making it look more integrated and less flashy.
- Why it works: It adds just a hint of sparkle without overpowering the matte aesthetic.
- Color Combos: A nude matte base with subtle champagne glitter fade, or a deep navy matte with a dark grey glitter fade.
The Power of Preparation: Ensuring Longevity
We all want our beautiful manicures to last, right? For short matte nails design, proper preparation and post-manicure care are key to keeping them looking fresh.
Pre-Application Tips for Durability
- Cleanliness is Key: Ensure your nails and hands are completely free of oils, lotions, and dust before you start. Even a tiny bit of residue can affect polish adherence. Use an alcohol wipe or nail polish remover to clean your nails thoroughly.
- Smooth Surface: A smooth nail surface takes polish better. Gently buff away any ridges.
- Cuticle Care: Well-maintained cuticles make a huge difference in the overall appearance and longevity of your manicure.
- Base Coat is Non-Negotiable: Never skip your base coat! It creates a barrier, prevents staining, and provides a grip for the color polish.
Post-Manicure Care for Matte Nails
Matte finishes, while beautiful, can sometimes be a bit more delicate than glossy ones. Here’s how to keep them pristine:
- Be Gentle: Avoid using your nails as tools. Try to avoid harsh scrubbing or prolonged contact with water, especially immediately after application.
- Moisturize (Strategically): While you want to keep your nails from drying out, avoid applying cuticle oil directly onto the matte finish immediately after application, as it can sometimes cause a temporary shine. Moisturize your hands and cuticles, and if you need to revive your nails, apply a tiny amount of oil and gently buff it in.
- Touch Ups: For minor chips or wear, you can carefully apply a thin layer of matte top coat to the affected area.
- Avoid Harsh Chemicals: Just like with glossy polish, cleaning products and other harsh chemicals can degrade the finish over time. Wear gloves when doing chores!
Troubleshooting Common Matte Nail Issues
Even with the best intentions, sometimes things don’t go exactly as planned. Here are some common issues and how to fix them:
| Problem | Solution |
|---|---|
| Uneven or Streaky Finish | This usually happens with too-thin coats of color polish or if the polish was applied too thickly. Ensure your color coats are thin and even. If it’s already dry and streaky, a thicker, even coat of matte top coat can sometimes even it out. |
| Shiny Spots or Patches | This can happen if the color polish wasn’t dry enough before the matte top coat was applied, or if the top coat was applied too thinly in spots. Let your color dry for longer (5-7 minutes) before applying the matte top coat. Apply the matte top coat evenly and in one good layer. |
| Smudging | Matte polish can take a little longer to fully harden than some glossy polishes. Be patient and let your nails air dry for a good 10-15 minutes after applying the matte top coat. Avoid doing anything with your hands right after your manicure. |
| Matte Top Coat Looks Too Thick | Use thinner coats. If you’ve already applied a thick coat, gently buff it down once dry and apply another thin coat. Ensure your matte top coat bottle isn’t old and goopy; if it is, it might be time for a new one. |
Beyond the Basics: Exploring More Advanced Matte Techniques
Once you’re comfortable with the basics, don’t be afraid to experiment! Short matte nails design can also incorporate more intricate elements.
Using Decals and Transfers
Nail decals and water marbling transfers are fantastic for adding detailed designs without requiring advanced freehand skills. Apply them over a fully dried matte base and seal with a matte top coat. This can add intricate patterns or images to your manicure with minimal effort.
Ombre and Gradient Effects
While slightly more challenging, creating matte ombre or gradient effects is possible. You can use a makeup sponge to gently dab colors together over your matte base before applying your final matte top coat. The matte finish helps to diffuse the colors beautifully.
Matte French Manicure
Give the classic French manicure a modern twist! Use colored polish for the tips, or even a subtle French tip using a slightly lighter or darker shade of your base matte color. The matte finish makes it look incredibly sophisticated.
The Velvet Effect
For an ultra-luxe look, try using nail velvet powder. Apply a layer of colored polish, a matte top coat (while still wet), sprinkle velvet powder on top, let it set, then gently brush off the excess. Instant texture!
FAQ: Your Short Matte Nails Design Questions Answered
Here are some common questions beginners have about creating and maintaining short matte nails design.
How do I make my matte nails less streaky?
Streaky matte nails are often caused by uneven application of the color polish or the matte top coat. Always apply polish in thin, even coats. Ensure each layer is nearly dry before the next. If the color is streaky, a smooth, well-applied matte top coat can sometimes help disguise minor imperfections.
Can I put a glossy top coat over a matte manicure?
Yes, you absolutely can! This is a popular technique to create contrast. You can use a glossy top coat on accent nails or to create specific designs within a matte manicure. Just ensure your matte layer is fully dry first.
How long do matte nails typically last?
The longevity of matte nails is very similar to glossy manicures. With proper prep, application, and care, they can last anywhere from 5-7 days, sometimes longer. The key is avoiding harsh chemicals and excessive moisture.
Will matte polish chip more easily than glossy polish?
Matte finishes can sometimes feel a bit more delicate because they lack the hard, shiny shield of a glossy top coat. However, if applied correctly with a good quality matte top coat and with careful handling, they should hold up just as well as glossy nails.
Is there a specific way to remove matte nail polish?
No, matte nail polish is removed the same way as regular glossy nail polish. Use your favorite acetone or non-acetone nail polish remover with a cotton pad. For

