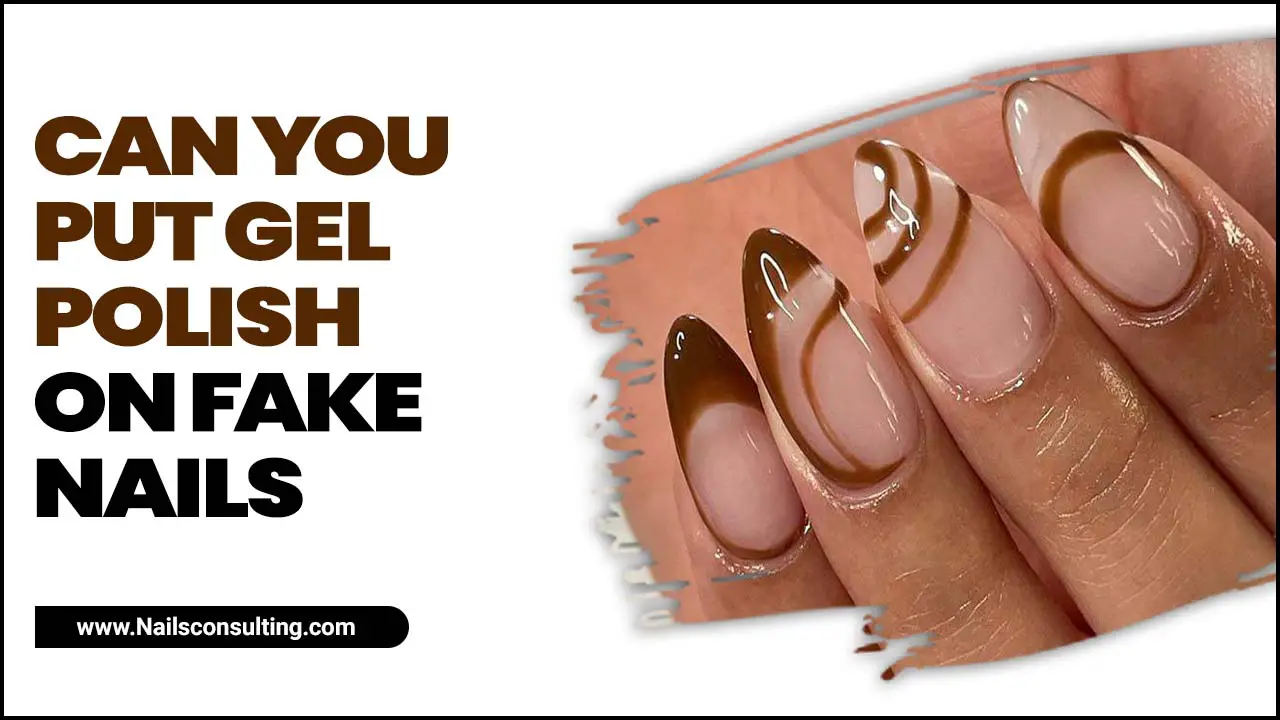
Get gorgeous, glossy short nails with these easy design ideas! Perfect for beginners, this guide reveals simple techniques to achieve effortless glam that’s chic, durable, and totally achievable at home.
Tired of nail designs that look complicated or chip easily? You’re not alone! Many of us dream of those elegant, shiny nails we see on social media, but think they require a pro. The good news? Achieving a chic, glossy look on short nails is simpler than you might imagine, and it’s perfect for everyday wear. Short nails are naturally sturdier and less prone to breakage, making them a fantastic canvas for stunning designs. Let’s dive into how you can create your own effortlessly glamorous short glossy nails, even if you’re just starting out! Get ready to transform your nails into mini masterpieces.
<h2>Why Short Glossy Nails Are a Win-Win</h2>
<p>Short nails are often underestimated, but they offer the perfect blend of practicality and style. They’re comfortable for daily tasks, less likely to snag or break, and surprisingly versatile when it comes to designs. Adding a glossy finish elevates any look, making your nails appear polished and sophisticated. It’s that touch of shine that screams “put-together” without demanding hours of salon time.</p>
<p>Think about it: when you’re typing, cooking, or even just running errands, long nails can be a hindrance. Short nails, on the other hand, are your best friend. And a glossy finish? It’s like a little bit of magic that makes even the simplest color look incredibly chic. It’s the ultimate low-maintenance way to feel fabulous. Plus, they’re perfect for showcasing a clean, elegant aesthetic without being overwhelming. It’s style that works with your life, not against it.</p>
<h3>The Allure of Gloss</h3>
<p>The glossy finish does more than just make your nails shine; it adds depth and richness to any color. It reflects light beautifully, making your nails look healthy and vibrant. This high-shine effect is universally flattering and instantly elevates your manicure, making it suitable for any occasion, from a casual day out to a special evening event. It’s the secret weapon for that clean, sophisticated nail look everyone admires.</p>
<p>A glossy top coat acts like a protective shield, too! It helps to prevent your polish from chipping and fading, meaning your gorgeous manicure lasts longer. Imagine your favorite polish, amplified by a mirror-like sheen that keeps it looking fresh for days. It’s the finishing touch that makes all the difference, turning a simple paint job into a professional-looking manicure.</p>
<h2>Essential Tools for Your Glossy Nail Journey</h2>
<p>Before we start creating some fabulous designs, let’s gather our essential tools. Having the right supplies makes the whole process smoother and more enjoyable. You don’t need a professional kit to achieve salon-worthy results. Here’s a simple list of what you’ll need to get started on your short glossy nails design adventure:</p>
<ul>
<li><strong>Nail File:</strong> For shaping your nails. A fine-grit file is best to avoid damaging the nail.</li>
<li><strong>Cuticle Pusher/Orange Wood Stick:</strong> To gently push back your cuticles for a clean nail bed.</li>
<li><strong>Nail Polish Remover:</strong> Acetone-free removers are gentler on the nails and surrounding skin.</li>
<li><strong>Cotton Pads/Balls:</strong> To apply the nail polish remover.</li>
<li><strong>Base Coat:</strong> Crucial for protecting your natural nails and helping polish adhere better.</li>
<li><strong>Nail Polish Colors:</strong> Your chosen shades for the design.</li>
<li><strong>Top Coat:</strong> This is key for that high-gloss finish and also adds durability.</li>
<li><strong>Optional Decor:</strong> Glitter, rhinestones, or striping tape if you want to add extra flair.</li>
<li><strong>Fine-Tip Brush or Toothpick:</strong> For adding details or cleaning up edges.</li>
</ul>
<h3>The Power of Prep: Nail Preparation Steps</h3>
<p>A great manicure starts with well-prepped nails. This step is non-negotiable for a smooth application and a long-lasting finish. Think of it as painting a wall – you wouldn’t paint directly over dirt and peeling paint, right? Your nails deserve the same care!</p>
<ol>
<li><strong>Cleanse:</strong> Start by removing any old polish with a good nail polish remover. Ensure your nails are completely dry and free of oils.</li>
<li><strong>Shape:</strong> Gently file your nails into your desired shape. For short nails, a squoval (square with rounded edges) or a gentle round shape is very popular and practical. Always file in one direction to prevent splitting.</li>
<li><strong>Cuticle Care:</strong> Apply a tiny bit of cuticle oil or even just a dab of lotion around your nails. Gently push back your cuticles with a cuticle pusher or an orange wood stick. Avoid cutting them if you’re a beginner, as this can lead to infection.</li>
<li><strong>Buff (Optional):</strong> If your nails have ridges, you can very lightly buff the surface to create a smoother canvas. Be gentle – don’t overdo it!</li>
<li><strong>Clean Again:</strong> Wipe your nails with alcohol or a nail cleanser to remove any dust or oils from filing and buffing.</li>
</ol>
<h2>Effortless Short Glossy Nails Design Ideas for Beginners</h2>
<p>Ready for the fun part? Let’s explore some super easy yet incredibly chic short glossy nails designs that anyone can do. These ideas focus on simplicity, impact, and that desirable glossy finish.</p>
<h3>1. The Classic Glossy Solid Color</h3>
<p>Sometimes, less is truly more. A single, perfectly applied glossy color can be incredibly sophisticated. It’s the foundation of many beautiful manicures and looks stunning on short nails.</p>
<h4>How-To Steps:</h4>
<ol>
<li><strong>Apply Base Coat:</strong> One thin layer is all you need. Let it dry completely.</li>
<li><strong>First Color Coat:</strong> Apply your chosen nail polish color in thin, even strokes. Avoid flooding the cuticle area. Let it dry for a minute or two.</li>
<li><strong>Second Color Coat:</strong> Apply a second thin coat for full opacity. Again, let it dry partially.</li>
<li><strong>Seal with Top Coat:</strong> This is where the magic happens! Apply a generous layer of glossy top coat. Make sure to cap the free edge of your nail by running the brush along the tip. This seals the polish and prevents chipping.</li>
</ol>
<h3>2. The Chic Glossy French Tip</h3>
<p>The French manicure gets a modern, glossy update. Instead of opaque white tips, opt for a sheer glossy finish with a hint of subtle color or even just a clear glossy tip on a nude or sheer pink base. This is incredibly elegant on short nails.</p>
<h4>How-To Steps:</h4>
<ol>
<li><strong>Base Coat:</strong> Apply a sheer nude or light pink base coat and let it dry.</li>
<li><strong>Create the Tip:</strong> This is the trickiest part for beginners! You can use a fine-tip brush dipped in white or a complementary color polish to draw a thin line across the tip of your nail. Alternatively, use nail guides for a cleaner line.</li>
<li><strong>Clean Up:</strong> Dip a small brush into nail polish remover and carefully neaten the lines of your tips.</li>
<li><strong>Add Sheen:</strong> Apply a clear, glossy top coat over the entire nail to unify the look and add shine.</li>
</ol>
<h3>3. The Minimalist Glossy Accent Nail</h3>
<p>Want a touch of design without going overboard? Paint all your nails one solid glossy color, and then add a simple design to one accent nail (usually the ring finger).</p>
<h4>How-To Steps:</h4>
<ol>
<li><strong>Paint Nails:</strong> Apply your base coat, two coats of your chosen solid glossy color, and your top coat on four of your fingers.</li>
<li><strong>Accent Nail Prep:</strong> Apply the same base coat and color to your accent nail.</li>
<li><strong>Add Simple Design:</strong> While the accent nail color is still wet (or after it has dried, depending on your design), use a fine-tip brush, toothpick, or dotting tool to add a simple design. Ideas include:
<ul>
<li>A single dot at the base of the nail.</li>
<li>A thin vertical or horizontal stripe.</li>
<li>A small heart.</li>
</ul>
</li>
<li><strong>Top Coat:</strong> Once the design is dry, apply a top coat over the accent nail and then over all your nails to seal everything in and provide that glossy finish.</li>
</ol>
<h3>4. The Subtle Glossy Gradient (Ombre)</h3>
<p>The ombre effect, where colors blend seamlessly, can be achieved easily with a makeup sponge. For a subtle glossy look, choose shades that are close in tone or a neutral base with a pop of color.</p>
<h4>How-To Steps:</h4>
<ol>
<li><strong>Base Coat:</strong> Apply your base coat and let it dry.</li>
<li><strong>Prepare Sponge:</strong> Cut a makeup sponge into a small, manageable piece. You can slightly dampen it if you prefer.</li>
<li><strong>Apply Polish to Sponge:</strong> Paint two slightly different shades of polish vertically onto the sponge, close together. Work quickly, as the polish will start to dry.</li>
<li><strong>Dab Onto Nail:</strong> Gently dab the sponge onto your nail, starting from the cuticle and dabbing upwards. You might need to reapply polish to the sponge and dab a couple of times to build up the color transition.</li>
<li><strong>Clean Up Edges:</strong> Use a small brush dipped in nail polish remover to clean up any polish that got onto your skin.</li>
<li><strong>Repeat on Other Nails:</strong> Clean the sponge and repeat for each nail.</li>
<li><strong>Seal with Top Coat:</strong> Once all nails are done and dry, apply a generous layer of glossy top coat to blend the transition slightly and give that beautiful shine.</li>
</ol>
<h3>5. The Glittery Glossy Accent</h3>
<p>Add a touch of sparkle! A solid glossy base with a glitter accent nail is a classic for a reason. It’s eye-catching and surprisingly easy to achieve.</p>
<h4>How-To Steps:</h4>
<ol>
<li><strong>Base Coat Everything:</strong> Apply base coat, two coats of your chosen solid glossy polish, and then top coat on all nails except your accent nail.</li>
<li><strong>Accent Nail Color:</strong> Apply base coat to your accent nail, then apply one or two coats of your solid polish color. Let it dry completely.</li>
<li><strong>Glitter Application:</strong> Apply a generous amount of glossy top coat to your accent nail. While the top coat is still wet, carefully pat a fine glitter polish or loose glitter onto the nail. Ensure full coverage.</li>
<li><strong>Seal Sparkle:</strong> Once the glitter is dry to the touch, apply another layer of top coat over the glitter to smooth it out and lock it in. Then, go over all your nails with a final layer of top coat for ultimate gloss.</li>
</ol>
<h3>6. The Subtle Stripe Design</h3>
<p>Thin, metallic stripes can add a touch of modern sophistication. This design is perfect for short nails as it elongates them visually.</p>
<h4>How-To Steps:</h4>
<ol>
<li><strong>Full Manicure:</strong> Complete your base coat, two coats of solid glossy color, and your top coat on all nails. Let them dry completely.</li>
<li><strong>Apply Stripe:</strong> For a crisp line, use striping tape. Apply a piece of metallic striping tape horizontally or diagonally across one or two nails. Press down firmly to ensure it adheres smoothly.</li>
<li><strong>Seal Over Tape:</strong> Carefully apply a thin layer of top coat over the striping tape and the surrounding nail. This helps seal the tape and protect the design.</li>
<li><strong>Alternative (Freehand):</strong> If not using tape, use a metallic polish with a very fine brush or a dotting tool to draw a thin stripe across a dried, polished nail. Be patient and steady!</li>
<li><strong>Final Top Coat:</strong> Once the stripe and sealer coat are dry, apply a final layer of top coat over all nails for that unbeatable glossy shine.</li>
</ol>
<h3>7. The Reverse French Glossy Tip&


