Short Chrome Nails Design: Stunningly Chic Looks. Get gorgeous, high-shine chrome nails in a short length! This guide breaks down easy techniques and chic design ideas perfect for beginners wanting a trendy, sophisticated manicure that’s surprisingly simple to achieve at home.
Are you dreaming of that dazzling, mirror-like finish on your nails but think it’s only for salons or long nails? Think again! Short chrome nails are totally achievable and incredibly chic. Many people feel intimidated by chrome polish or think it won’t look good on shorter lengths, leading to settling for less exciting manicures. But don’t worry, I’m here to show you how to get that stunning, high-shine effect right at your fingertips, no matter your nail length. We’ll dive into simple techniques and share some super stylish design ideas that are perfect for beginners. Get ready to elevate your nail game!
Why Short Chrome Nails Are a Must-Try Trend
Short nails are practical, elegant, and make a statement all on their own. Adding a chrome finish takes them to a whole new level of fabulous. Here’s why this trend is amazing, especially for those who prefer shorter nail lengths:
Sophisticated Shine: Chrome offers a unique, metallic gleam that’s eye-catching without being over-the-top. It’s like a polished jewel for your fingertips.
Versatility: Chrome looks fantastic on any nail shape, but it’s particularly striking on short, neat nails that showcase the smooth, unbroken reflection.
Durability: When applied correctly, chrome manicures can be surprisingly long-lasting, especially when done with gel polish.
Chic Modernity: This trend feels current and stylish, adding a touch of futuristic flair to any outfit.
Beginner Friendly: The basic application of chrome powder is simpler than you might think, making it an excellent DIY project.
Essential Tools for Your Short Chrome Nails Journey
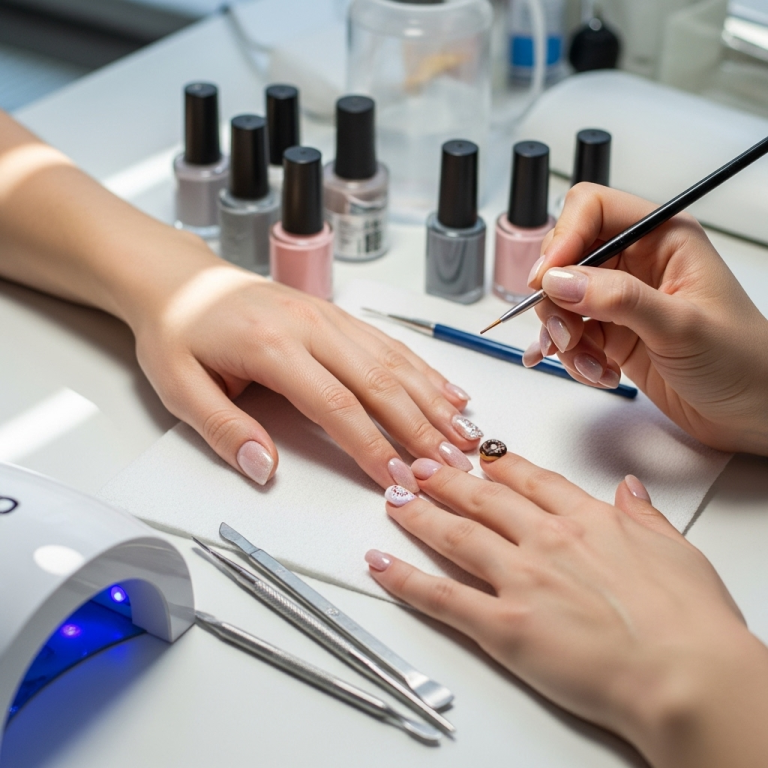
To achieve that flawless chrome effect at home, you’ll need a few key items. Don’t worry if you don’t have everything; many are readily available at beauty supply stores or online.
| Tool | What it Does | Why You Need It | Beginner Tip |
|---|---|---|---|
| Base Coat/Gel Base Coat | Protects your natural nails and provides a smooth surface. | Prevents staining and helps polish adhere better. | Choose a good quality, non-yellowing base coat. |
| Color Polish (Black is best for chrome) / Gel Color | The underlying color that shows through the chrome effect. | Black creates the deepest, most reflective chrome. | A true black gel polish works wonders. |
| No-Wipe Gel Top Coat | Seals your manicure and provides the shiny surface for chrome. | The tackiness after curing locks in the chrome powder. | Crucial for the chrome to stick! |
| Chrome Nail Powder (Mirror Powder) | The magical ingredient that creates the metallic shine. | This is what gives you the chrome effect. | Start with a basic silver or a popular color like rose gold. |
| Silicone Applicator Tool or Eyeshadow Sponge Tip | Used to rub the chrome powder onto the nail. | Provides a smooth, even application without streaks. | The sponge tip brush that comes with some powders works great! |
| UV/LED Nail Lamp | Cures gel polish and the applied chrome powder. | Gel polish needs curing to harden. | Make sure it’s powerful enough for gel polish (usually 36W or higher). |
| Cuticle Pusher & Nail File | Prepares the nail surface. | Clean cuticles and a smoothly filed nail are essential. | Gently push back cuticles to avoid polish flooding. |
| Lint-Free Wipes | Cleans excess dust or residue without leaving fibers. | Important for a clean application. | A clean brush can also be used to dust off excess powder. |
Step-by-Step: Achieving Your Short Chrome Nails Look
Ready to get started? Following these simple steps will guide you to beautiful, short chrome nails.
Prep is Key!
1. Clean and Shape: Start by removing any old polish. Gently push back your cuticles using a cuticle pusher. Ensure your nails are clean and dry. Then, file your nails to your desired short shape. Squoval, round, or a subtle almond all look fantastic with chrome.
2. Buff & Cleanse: Lightly buff the surface of your natural nails with a fine-grit buffer. This creates a smooth canvas and helps the polish adhere. Wipe away any dust with a lint-free wipe.
The Gel Base & Color Application
3. Apply Base Coat: Apply a thin, even layer of your gel base coat. Be careful not to flood your cuticles.
4. Cure: Place your nails under your UV/LED lamp and cure according to the manufacturer’s instructions (usually 30-60 seconds).
5. Apply Color Polish: Apply one thin coat of your chosen color polish. For the most dramatic chrome effect, a true black gel polish is highly recommended. If your polish is streaky, apply a second thin coat.
6. Cure Again: Cure each color coat under the UV/LED lamp as you did with the base coat.
The Chrome Magic
7. Apply No-Wipe Top Coat: This is a crucial step! Apply a thin, even layer of your no-wipe gel top coat over the color. This creates the sticky surface that the chrome powder needs to adhere to.
8. Cure the Top Coat: Cure this layer under the lamp. Make sure it’s fully cured, but don’t over-cure, as this can make it harder for the powder to stick.
9. Apply Chrome Powder: Dip your silicone applicator tool or sponge tip into the chrome nail powder. Gently rub the powder onto the cured no-wipe top coat in a buffing, circular motion. Apply enough pressure to saturate the surface. You’ll see the shine start to appear!
10. Buff for Shine: Continue buffing until the entire nail surface is covered with a metallic sheen. Work quickly but gently.
11. Dust Off Excess: Use a soft brush or a lint-free wipe to gently remove any loose chrome powder from the nail and surrounding skin.
12. Seal the Deal with Top Coat: Apply another thin, even layer of your no-wipe gel top coat. This seals in the chrome powder and gives it that super high-gloss finish. Ensure you cap the free edge by swiping the brush along the tip of your nail to prevent chipping.
13. Final Cure: Cure for the final time under your UV/LED lamp.
And voilà! You have stunning short chrome nails!
Chic Short Chrome Nail Design Ideas
While a full chrome manicure is beautiful on its own, you can also use chrome accents to create unique and eye-catching designs. Here are some beginner-friendly ideas for your short nails:
1. The Classic Full Chrome
Description: The ultimate statement! Your entire nail is coated in a dazzling, mirror-like finish.
Best For: Anyone who wants maximum impact.
How-To: Simply follow the full step-by-step guide above. Silver, gold, rose gold, or even iridescent chrome powders look amazing as a full nail color.
2. Chrome French Tips
Description: A modern twist on a timeless classic. Instead of white tips, use a vibrant chrome shade.
Best For: Those who love a sophisticated, updated look.
How-To:
1. Complete steps 1-6 of the main tutorial (prep, base color, cure).
2. Apply a thin layer of clear gel top coat (not the no-wipe yet!) and cure. This creates a barrier.
3. Apply your no-wipe gel top coat only to the tips of the nails where you want the chrome. Cure this.
4. Rub your chrome powder onto the no-wipe top coat on the tips.
5. Dust off excess.
6. Apply one thin layer of regular gel top coat over the entire nail, ensuring you cap the edges. Cure.
7. If you want the line between the tip and the nail bed to be sharp and clean, you can apply the clear gel base, cure, then use striping tape to cover the tip and apply your solid color to the rest of the nail. Remove tape, cure, then apply the chrome to the tip!
3. Chrome Accent Nail
Description: One or two nails are fully chromed, while the others feature a solid color polish.
Best For: Adding a touch of glam without overwhelming the manicure.
How-To: Perform the full chrome steps on your chosen accent nail(s). Apply your solid color polish on the remaining nails, following the standard gel manicure process (base, color, color, cure, top coat, cure).
4. Chrome Ombre (Gradient)
Description: A seamless blend from a solid color into a shiny chrome finish.
Best For: A gradient effect that’s smooth and modern.
How-To:
1. Apply your base color (e.g., a soft pink, nude, or even black) and cure.
2. Apply your no-wipe gel top coat to the entire nail and cure.
3. Using your applicator, lightly pick up chrome powder and gently tap or blend it onto the tips of the nails, working your way down to create a gradient. You can use a clean brush to feather the transition.
4. Dust off excess and apply a full gel top coat to seal. Cure.
5. Chrome Geometric Accents
Description: Use chrome powder to create sharp lines, dots, or geometric shapes on a solid base color.
Best For: Edgy, artistic designs.
How-To:
1. Do a full gel manicure with your desired solid color and cure.
2. Apply a thin layer of regular gel top coat (not no-wipe) and cure. This allows you to strategically place the chrome.
3. Using a fine nail art brush and a bit of gel and chrome powder mixture, paint your design directly onto the cured top coat.
4. Alternatively, you can use a stamping plate with geometric designs, apply gel polish to the design, use a stamper, and then immediately “hot stamp” the design onto the uncured sticky surface of the chrome mirror powder on your nail. This is for more advanced users!
5. Once your design is in place, cure it.
6. Seal the entire nail with another layer of gel top coat. Cure.
6. Chrome Half-Moon
Description: A retro-inspired design where the cuticle area, or the tip, is highlighted with chrome.
Best For: A vintage feel with a modern metallic twist.
How-To: Similar to French tips, use a striper tape or a fine brush to create a distinct line. Apply no-wipe gel top coat to the half-moon area only, cure, rub in chrome powder, dust off, and then apply a final top coat over the entire nail.
Maintaining Your Short Chrome Nails
To keep your short chrome nails looking their best, a little aftercare goes a long way:
Avoid Harsh Chemicals: Wear gloves when doing dishes or cleaning to protect your manicure from harsh detergents.
Moisturize: Keep your cuticles and hands hydrated with cuticle oil and lotion. Dry skin can make any manicure look less polished.
Be Gentle: While durable, chrome finishes can be scratched. Avoid using your nails as tools.
* Touch-Ups: If you get a slight chip or wear on an edge, a careful touch-up with a gel top coat can often extend the life of your manicure.
Frequently Asked Questions About Short Chrome Nails
Q1: Can I do chrome nails on short natural nails without gel?
A1: It’s tricky! Traditional nail polish doesn’t have the sticky residue needed for chrome powder to adhere well. While some powders claim to work over regular polish, the shine is usually less intense and doesn’t last as long. For the best, long-lasting chrome shine, gel polish is the way to go.
Q2: My chrome powder isn’t rubbing on smoothly, it’s patchy. What am I doing wrong?
A2: Most often, this is due to the no-wipe top coat not being fully cured, or being covered by a regular top coat. Ensure your no-wipe top coat is cured properly under the lamp (check the recommended time). If you applied a regular top coat before the chrome, you’ll need to start over with a properly cured no-wipe top coat. Also, make sure you’re using enough pressure when rubbing the powder.
Q3: Which color base polish looks best under chrome?
A3: Black is the most popular base color for chrome because it creates the deepest, most reflective mirror effect. However, different colors can give unique results! A white base can create a pastel, opalescent chrome. A nude base can give a softer, pearly chrome. Experiment with different colors to see what effects you can achieve.
Q4: How long do short chrome gel nails typically last?
A4: With proper application and care, gel chrome manicures can last for 2-3 weeks on average. The key is ensuring good nail prep, no-wipe top coat application, and sealing the edges well with your final top coat.
Q5: What’s the difference between mirror powder and chrome powder?
A5: In the beauty world, these terms are generally used interchangeably. “Mirror powder” or “chrome powder” refers to the fine metallic pigment that creates the high-shine, reflective finish. You might see variations like “holographic powder” for a rainbow effect or “aurora powder” for an iridescent shimmer, but the application method is typically the same.
Q6: Can I remove chrome gel nails at home?
A6: Yes! You can remove gel chrome nails at home. The most effective way is to soak them in acetone. Lightly file off the top layer of your gel top coat to break the seal, then soak cotton balls in acetone, place them on your nails, and wrap with foil. Let them soak for about 10-15 minutes, then gently PUSH the gel off with an orangewood stick or cuticle pusher. Never PULL or SCRAPE harshly.
Conclusion
As you can see, achieving stunning short chrome nails is well within your reach, even for beginners! The key is using the right tools, particularly a good quality no-wipe gel top coat, and taking your time with the application process. Whether you opt for a full-coverage mirror shine, chic chrome French tips, or a subtle accent nail, this trend adds a sophisticated, modern edge to any look. Don’t be afraid to experiment with different colors and designs; the possibilities are vast! So, gather your supplies, follow these simple steps, and get ready to flaunt your dazzling new manicure. You’ve got this, and your nails will thank you for it!


