Discover short black nails design: the chic, versatile, and surprisingly easy way to elevate your look. Learn simple techniques and stunning ideas to master this timeless trend, perfect for any occasion and skill level.
Short black nails are a total game-changer! They look super sophisticated without being fussy. If you’ve ever felt like nail art is too complicated or just not for you, let’s change that. Black polish is the ultimate blank canvas, and when your nails are short, it’s even easier to manage and looks incredibly chic. We’re going to walk through everything you need to know, from prepping your nails to adding those little touches that make a big difference. Get ready to feel amazing with your new favorite nail style!
The Undeniable Appeal of Short Black Nails
Why are short black nails so popular? It’s simple! They are the epitome of effortless cool. Whether you’re heading to work, a casual brunch, or a fancy night out, black nails on short tips are always appropriate. They offer a polished finish that’s both bold and understated, making them incredibly versatile. For beginners, short nails are much easier to manage for DIY manicures. Less polish to apply, less chance of smudging, and a much neater finish often results. Plus, short nails are generally healthier and less prone to breaking.
Why Black? The Ultimate Nail Color
Black isn’t just a color; it’s a statement. Here’s why it’s a genius choice for your nails:
- Elegance Personified: Black instantly adds a touch of sophistication to any look.
- Universally Flattering: It complements all skin tones beautifully.
- Timeless Trend: Black nails never go out of style.
- Easy to Pair: It matches virtually any outfit or accessory.
- Confidence Booster: There’s something undeniably powerful about a good black manicure.
Getting Started: Essential Tools for Your Short Black Nails
Before we dive into designs, let’s gather our essential tools. Don’t worry, you probably have most of these already! Having the right supplies makes the process so much smoother and the results so much better.
- Nail File: For shaping your nails to a flattering short length. A glass nail file is great for preventing snags.
- Nail Buffer: To smooth out any ridges and create a nice surface for polish.
- Cuticle Pusher or Orange Stick: To gently push back your cuticles for a clean look.
- Base Coat: Crucial for protecting your natural nail and helping polish adhere.
- Black Nail Polish: Your star ingredient! Choose a formula you love.
- Top Coat: For shine, protection, and to prevent chips.
- Optional: Top Coat Sealant: Some top coats offer extra shine and durability.
- Cotton Balls/Pads and Nail Polish Remover: For clean-up and mistakes.
- Cuticle Oil: To moisturize after your manicure.
For a more polished finish, consider investing in a good quality brush set designed for nail art, even simple ones. A thin striping brush or a dotting tool can open up a world of design possibilities.
The Perfect Prep: Laying the Foundation
A fantastic manicure starts with proper preparation. This step is non-negotiable for a lasting and beautiful finish. Rushing this part can lead to a manicure that chips quickly!
Step-by-Step Nail Prep:
- Remove Old Polish: Make sure all traces of previous polish are gone with nail polish remover and a cotton pad.
- Shape Your Nails: Trim your nails to your desired short length. Then, use your nail file to shape them. Square, squoval, or a soft round shape all look great on short nails. Always file in one direction to prevent weak, peeling edges. Refer to resources like NHS advice on nail care for healthy tips.
- Push Back Cuticles: Gently push your cuticles back using a cuticle pusher or an orange stick. Avoid cutting them, as this can lead to infection.
- Buff Your Nails: Lightly buff the surface of your nails to smooth out any ridges and create a slightly matte finish. This helps the polish grip better.
- Cleanse: Wipe your nails with a lint-free cloth or rubbing alcohol to remove any dust or oils.
- Apply Base Coat: This is key! Apply one thin layer of base coat and let it dry completely. It protects your nails from staining and provides a smooth surface for the color.
Applying Short Black Nail Polish Like a Pro
Now for the fun part! Applying black polish can sometimes be tricky because it’s opaque and can show streaks easily. Follow these steps for a flawless application:
- Start with Color: Apply your first thin coat of black nail polish. Start in the middle of the nail, near the cuticle, and brush upwards towards the free edge. Then, do a stroke down each side.
- Avoid Thick Coats: Thin coats are your best friend! It’s better to apply two or three thin coats than one thick, gloopy one. Thick coats take forever to dry and are more prone to smudging.
- Second Coat: Let the first coat dry for at least 1-2 minutes. Apply a second thin coat, ensuring you cover any bald spots. The opacity of black polish often requires two coats for a smooth, even finish.
- Third Coat (If Needed): If you can still see streaks or unevenness, apply a third thin coat. Wait for it to dry completely.
- Clean Up Edges: Dip a small, flat brush (an old eyeliner brush works well!) into nail polish remover and carefully trace around your cuticle line and the edges of your nail. This creates super clean lines and makes your manicure look professionally done.
Genius Short Black Nails Design Ideas for Beginners
Ready to add some pizzazz? These designs are easy, achievable, and look incredibly chic on short black nails.
1. The Classic Glossy Black
Sometimes, less is more. A perfectly applied, high-gloss black manicure is a timeless classic. It’s sophisticated, sleek, and always in style. The key here is a flawless application and a killer top coat for maximum shine.
2. Matte Black Magic
Switch up the finish! A matte top coat over black polish gives an incredibly chic, velvety look. It’s subtle yet striking and feels incredibly modern. If you don’t have a matte top coat, you can often buy matte black polishes directly.
3. Subtle Sparkle: Glitter Accent Nail
Want a touch of glam? Paint one nail on each hand with a black glitter polish or a clear polish with fine black glitter. Or, try a fine silver or gold glitter as a French tip on your black nails. It adds just enough sparkle without being overwhelming.
4. The Minimalist Dot
This is super easy and looks so polished! Use a dotting tool or the tip of a bobby pin to place a single dot on each nail. You can place it at the base of the nail, in the center, or on the side. Use white, silver, gold, or even a contrasting color like red for the dot.
5. Simple Stripes
Use a fine striper brush or a toothpick. You can paint a single thin line vertically, horizontally, or diagonally across your black nail. Silver, white, or a metallic shade works beautifully as a stripe color. For a foolproof option, try nail art tape! Apply it over dry black polish, paint over it, and peel it off while the top paint is still wet.
6. The Chic French Tip (Black Edition)
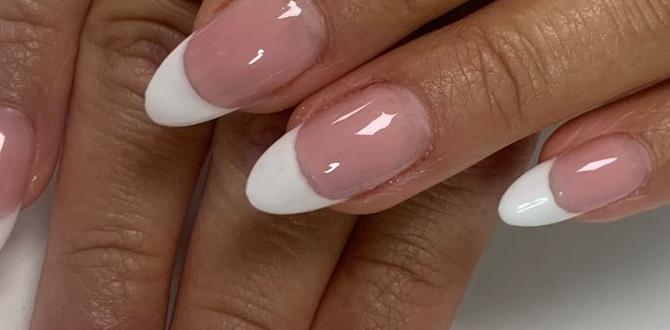
Forget the classic white tip! Try a thin black French tip on a nude or clear base, or even a black tip on a black base for a subtle tonal variation. For a bolder look, use a metallic color like silver or gold for the tip on your black nails.
7. Negative Space Designs
This trend looks super modern. Leave a small section of your nail bare (no polish) while painting the rest black. You can create geometric shapes, half-moons, or just a simple stripe of bare nail. This requires a steady hand or the use of nail art tape for clean lines.
8. Tiny Heart Accent
Paint a tiny heart at the base of one or two nails using a contrasting color like white, red, or gold. It’s a sweet and feminine detail that’s surprisingly easy to do with a fine brush.
9. Graphic Geometric Shapes
Using nail art tape or a steady hand with a fine brush, create simple geometric shapes like triangles, squares, or lines. You can fill them in with a contrasting color or leave them as negative space. A simple diagonal line across the nail is very effective.
10. The Subtle Metallic Accent
Apply a small amount of metallic foil or a metallic chrome powder to a section of your nail, or just on the tip. This can be done with a sticky base or by rubbing the powder over a tacky layer of polish.
Essential Short Black Nails Design Kits
For those who want to experiment with more intricate designs, a few basic kits can be a lifesaver. These aren’t things you need to start, but they make creating specific looks much easier.
Beginner Nail Art Tool Kit
Typically includes:
- Dotting Tools: Various sizes for different sized dots.
- Fine-tip Brushes: For drawing thin lines and details.
- Striping Tape: For crisp, straight lines and geometric designs.
- Stencils: Pre-cut shapes to help with intricate patterns.
Foil Transfer Kit
Contains:
- Nail Foil Glue: A special adhesive that dries tacky.
- Transfer Foils: Sheets of metallic or holographic foils in various designs.
Using these kits allows you to achieve professional-looking details without needing advanced artistic skills. Think of them as your creative shortcuts!
Maintenance: Keeping Your Short Black Nails Looking Fresh
Your gorgeous black nails won’t stay perfect forever without a little care. Here’s how to extend their life and keep them looking sharp:
- Reapply Top Coat: Every 2-3 days, add another layer of top coat. This seals in your polish and brings back the shine.
- Moisturize: Apply cuticle oil daily to keep your nails and the surrounding skin hydrated. Dry cuticles can peel and detract from your manicure.
- Be Gentle: Avoid using your nails as tools. Don’t pick, scrape, or pry with them, as this is a fast track to chips and breaks.
- Quick Fixes: If you get a small chip, you can sometimes file it smooth and reapply a thin layer of black polish, then top coat. For a more noticeable fix, a single glitter accent nail can help camouflage minor imperfections.
Short Black Nails: Pros and Cons
Like any beauty trend, short black nails have their upsides and potential downsides. Let’s take a quick look!
| Pros | Cons |
|---|---|
| Extremely versatile and chic | Can show chips more obviously than lighter colors |
| Universally flattering on all skin tones | Requires careful application to avoid streaks |
| Easy to maintain and style for beginners | Might not be suitable for very conservative workplaces |
| Short nails are generally healthier and less prone to breakage | Can sometimes look harsh if not shaped or polished well |
| Pairs well with any outfit and occasion | Removing black polish can sometimes stain surrounding skin if not careful |
FAQ: Your Short Black Nails Questions Answered
Q1: Are short black nails suitable for all occasions?
Absolutely! Short black nails are incredibly versatile. They can go from a casual daytime look to a sophisticated evening ensemble, making them appropriate for almost any occasion, including professional settings depending on your workplace culture.
Q2: What’s the best way to shape short nails?
For short nails, a square, squoval (square with rounded edges), or a soft round shape is usually best. These shapes help your fingers look longer and prevent snags. Always use a fine-grit file and move in one direction to avoid damaging the nail.
Q3: Can I achieve a streak-free black polish application?
Yes! The key is to apply thin coats and allow each one to dry slightly before applying the next. Avoid overloading your brush. Three thin coats are usually better than two thick ones for a smooth, opaque finish. Also, clean up the edges with a brush dipped in nail polish remover.
Q4: How do I prevent black nail polish from staining my fingers?
A good base coat is your best defense! Always apply a protective base coat before your color. For cleanup, use a small, angled brush dipped in nail polish remover to carefully clean around the cuticle line and the sides of your nails. If there’s still a slight stain, try gently buffing the very tip of your nail or using a whitening toothpaste on a cotton swab.
Q5: What colors pair well with short black nails for accent designs?
Almost any color! Metallics like silver, gold, and rose gold are classic. White, red, and deep jewel tones like emerald or sapphire offer a sophisticated contrast. For something bolder, try neon accents or even pastels for a surprising twist.
Q6: How often should I reapply my top coat?
To keep your black nails looking glossy and chip-free, reapply your top coat every 2-3 days. This adds an extra layer of protection and revives the shine, significantly extending the life of your manicure.
Conclusion: Embrace Your Bold, Beautiful Black Nails!
Short black nails are more than just a trend; they’re a style essential. They offer a powerful yet understated elegance that’s incredibly easy to achieve. From the flawless glossy finish to simple yet impactful designs, there’s a short black nail look for everyone. We’ve covered everything you need to know, from the best prep techniques and application tips to easy design ideas and maintenance secrets. So grab your favorite black polish, a trusty top coat, and get ready to rock those chic, confident short black nails. Embrace the simplicity, celebrate the style, and enjoy the endless compliments!

