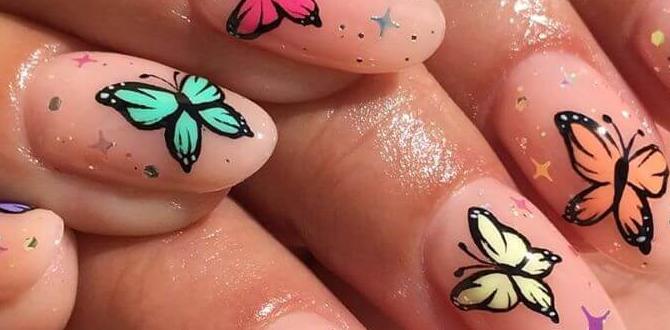
Shimmer nails add a touch of dazzling magic to any look, and achieving that effortless sparkle is easier than you think! This guide breaks down simple techniques, essential tools, and pro tips to get you glowing. You’ll learn to create stunning shimmer nails at home, no matter your skill level, for a look that’s radiant and uniquely you.
Want to add a little sparkle to your life? Shimmer nails are the perfect way to do it! They’re glamorous, fun, and surprisingly easy to achieve, even if you’re just starting out. Many of us love the idea of nails that catch the light and glimmer beautifully, but worry it might be too complicated or messy. Don’t fret! With a few simple tricks and the right approach, you can create gorgeous shimmer nails that turn heads. Get ready to discover how easy it is to master this dazzling trend. We’ll walk you through everything, step-by-step.
Why Shimmer Nails Are Your New Best Friend
Shimmer nails offer a sophisticated kind of shine that’s less in-your-face than full glitter but still packs a luminous punch. They’re incredibly versatile, perfect for everyday wear, special occasions, or just when you want to feel a little extra special. The subtle sparkle can elevate any outfit and mood. Plus, they’re forgiving for beginners because minor imperfections often blend right in with the shimmer.
Understanding Shimmer: What’s the Magic?
Before we dive into the how-to, let’s quickly touch on what makes nails shimmer. It’s all about tiny reflective particles suspended in polish or applied as a separate layer. These particles catch and bounce light, creating that beautiful glow. You’ll find shimmer in various forms:
Shimmer Nail Polish: This is the most common type, with shimmer particles mixed directly into the polish formula.
Shimmer Top Coats: These are clear or tinted polishes loaded with shimmer particles that you apply over your base color for an added sparkly effect.
Chrome/Mirror Powders: While not strictly “shimmer,” these powders create an intense, reflective metallic finish that often gets grouped with sparkly nail effects.
Pigment Powders: Ultra-fine powders that can create iridescent or holographic effects when applied over a base coat.
Essential Tools for Shimmer Nail Success
You don’t need a professional salon to get amazing shimmer nails. Here are the basic tools that will make your DIY manicure a breeze:
Nail File and Buffer: To shape your nails and create a smooth surface.
Cuticle Pusher or Orange Stick: To gently push back and tidy your cuticles.
Base Coat: Crucial for protecting your natural nails and helping polish adhere.
Your Chosen Shimmer Polish or Top Coat: The star of the show!
Top Coat: To seal in your design and add extra shine and durability.
Nail Polish Remover and Cotton Pads: For clean-up and mistakes.
Optional: Lint-free Wipes: For a streak-free finish when removing polish.
Optional: Small Brush or Sponges: For specific application techniques.
Getting Started: Nail Prep is Key!
Just like any great manicure, a little prep goes a long way for shimmer nails. A clean, smooth canvas ensures your sparkle looks its best.
1. Cleanse: Start by removing any old nail polish. Use a good quality nail polish remover and cotton pads. For a streak-free finish, consider using lint-free wipes.
2. Shape: Gently file your nails into your desired shape. Always file in one direction to prevent splitting or weakening.
3. Buff: Lightly buff the surface of your nails. This removes ridges and creates a smooth base for the polish to adhere to. Don’t over-buff, as this can thin your nails.
4. Cuticle Care: Gently push back your cuticles with a cuticle pusher or orange stick. If you have any hangnails or excess cuticle skin, carefully trim them away with cuticle nippers.
5. Wipe Down: Clean your nails with nail polish remover one last time to remove any dust or oils. This ensures the polish will stick well.
Effortless Shimmer Nail Techniques for Beginners
Ready to add some gleam? Here are some easy techniques to achieve stunning shimmer nails at home.
Technique 1: The Classic Shimmer Polish
This is the most straightforward way to get shimmer nails.
1. Apply Base Coat: Paint a thin, even layer of base coat and let it dry completely.
2. First Coat of Shimmer: Apply your chosen shimmer nail polish. Most shimmer polishes provide good coverage in two coats. Work from the base of your nail to the tip, using smooth, even strokes. Let the first coat dry for a minute or two.
3. Second Coat: Apply a second coat of the shimmer polish. This coat will usually build up the intensity of the shimmer and ensure full, opaque coverage. Let this layer dry thoroughly.
4. Apply Top Coat: Once the shimmer polish is completely dry, apply a layer of clear top coat. This seals in the color, protects the shimmer, and adds a protective glossy finish.
Technique 2: The Shimmer Top Coat Effect
This technique is fantastic for adding a touch of shimmer to any existing nail color.
1. Apply Your Base Color: Paint your nails with your favorite regular nail polish color. Apply one or two coats as you normally would and let it dry completely.
2. Apply Shimmer Top Coat: Once your base color is dry, apply a layer of shimmer top coat over it. You can apply one coat for a subtle hint of sparkle or layer a couple of coats for more intense shimmer.
3. Finish with Top Coat: After the shimmer top coat has dried, apply a regular clear top coat to lock everything in and provide shine and protection.
Technique 3: The Gradient Shimmer
Create a beautiful fading effect with shimmer.
1. Base Color: Apply your base color nail polish as usual (one or two coats, fully dried).
2. Apply Shimmer to Tip: Take your shimmer polish. Apply a coat of shimmer polish only to the tips of your nails.
3. Blend the Edges: While the shimmer polish is still wet, use a clean, thin brush (or even the brush from the shimmer polish, with minimal product) to gently blend the edge between the base color and the shimmer. Gently dab or feather upwards from the shimmer into the base color. This takes a little practice! Work quickly before the polish dries too much.
4. Repeat (if needed): If you want more shimmer at the tips or a more blended look, you can add a little more shimmer polish to the tips and blend again.
5. Top Coat: Once you’re happy with the gradient and it’s dry, apply your clear top coat to seal the design.
Technique 4: Subtle Shimmer with Sponge
This method is excellent for a delicate, diffused shimmer effect.
1. Base Color: Apply your base color nail polish and let it dry completely.
2. Prepare Your Sponge: Cut a small piece from a makeup sponge (a soft kitchen sponge can also work).
3. Apply Shimmer: Dab a small amount of your shimmer polish onto your sponge.
4. Tap onto Nails: Gently tap the sponge onto the tips of your nails, or over the entire nail, gradually building up the shimmer intensity. This technique allows for a more subtle, dust-like shimmer application.
5. Blend (Optional): If the shimmer looks too solid, you can use a clean brush or finger to gently blend the edges slightly while it’s still wet.
6. Clean Up Edges: Use a small brush dipped in nail polish remover to clean up any shimmer that got on your skin.
7. Top Coat: Once dry, apply a generous layer of clear top coat to smooth out the texture and seal the shimmer.
Pro Tips for Extra Sparkle and Shine
Want to take your shimmer nails from good to absolutely dazzling? Here are some insider tips:
Layering is Your Friend: Don’t be afraid to layer shimmer top coats over different base colors. A subtle shimmer top coat can transform a matte finish into a glossy, luminous look.
The Power of the Black Base: Applying a sheer shimmer polish or top coat over a black or deep colored base can create a stunning, almost iridescent or duochrome effect. The dark base makes the shimmer particles pop and appear richer.
Consider the Particle Size: Shimmer polishes come with different sizes of reflective particles. Finer particles give a subtle glow, while larger particles create more obvious sparkle. Choose based on the look you want.
Smooth Application is Key: Shimmer polishes can sometimes be streaky. Apply thin, even coats and avoid going over the polish too much once it starts to dry. Let each coat dry sufficiently before applying the next.
Nail Health Matters: Healthy nails provide the best base for any manicure. Keeping your nails moisturized and strong will make them look better with or without shimmer. For more on nail health, consult resources like the American Academy of Dermatology’s guidelines on nail care.
Clean Brushes for Clean Lines: If you’re doing intricate designs or blending shimmer, ensure your brushes are clean. Use a lint-free wipe with a little nail polish remover to clean them between steps.
Don’t Skip the Top Coat: This is non-negotiable for shimmer nails. It smooths out any texture from the shimmer particles, adds gloss, and prevents chipping. For an extra long-lasting manicure, consider a gel top coat if you use gel polish.
Shimmer Nail Inspiration: Designs to Try
Once you’ve mastered the basics, you can get creative!
Full Shimmer: A classic for a reason. Paint all your nails in a beautiful shimmer shade.
Accent Nail: Paint all nails one color and use a shimmery polish on just one accent nail (usually the ring finger).
French Shimmer: Apply a sheer shimmery polish over your entire nail, and then add a precise line of a bolder shimmer polish on the tips.
Ombre Shimmer: Create a gradient effect that goes from a solid color at the base to full shimmer at the tips, or vice versa.
Under the Shimmer: Apply a solid color, then use a sheer shimmer polish over it to subtly enhance the base color with a luminous glow.
Troubleshooting Common Shimmer Nail Issues
Even experienced DIYers run into minor hiccups. Here are solutions to common shimmer nail problems:
Problem: Streaky Application
Solution: Ensure your polish is well-mixed. Apply thinner coats, allowing each to dry for a minute before applying the next. Avoid overworking the polish on the nail. A good top coat can help even out minor streaks.
Problem: Shimmer Looks Clumpy
Solution: This can happen if too much polish is applied or if the particles aren’t evenly dispersed. Try applying thinner coats. If the shimmer is old or has separated badly, it might be time for a new bottle. Gentle dabbing motions with a sponge can sometimes help blend clumpy areas.
Problem: Shimmer Not Sparkly Enough
Solution: Apply a second or even a third thin coat. A colored shimmer top coat over a matching base color can deepen the shimmer effect without adding a completely new hue. Ensure your top coat is clear and glossy, not matte.
Problem: Difficulty Achieving a Smooth Finish
Solution: Shimmer particles can sometimes create a textured surface. A good quality smoothing base coat and a generous, even layer of top coat are your best friends here. For very textured shimmer polishes, a ridge-filling base coat can help significantly.
Problem: Shimmer Polish Dries Too Quickly
Solution: Work in sections. Apply the polish to one nail at a time, finishing it before moving to the next. Keep your polish bottles closed when not in use to prevent them from thickening too fast. Adding a drop of nail polish thinner can sometimes revive an old, thick polish.
Shimmer Nail Products: What to Look For
When you’re shopping for shimmer nail products, consider these factors:
Color Range: Shimmer polishes come in every color imaginable, from subtle nudes to vibrant jewel tones. Top coats can be clear, iridescent, or tinted.
Particle Size & Type: Fine shimmer offers a soft glow, while glittery particles provide more distinct sparkle. Look for iridescent or holographic finishes for added dimension.
Formulation: Standard lacquer is widely available. Gel polishes offer longer wear if you have a UV/LED lamp.
Brand Reputation: Reputable brands often offer better-quality formulations that apply smoothly and last longer. Check reviews to see what other users say about application and wear.
To give you an idea of what’s out there, let’s look at a comparison of shimmer polish types.
| Shimmer Type | Particle Size | Finish | Best For | Ease of Application |
| :——————- | :—————– | :——————— | :—————————————— | :—————— |
| Fine Shimmer | Very small | Subtle, lit-from-within glow | Everyday wear, professional settings | Very Easy |
| Micro-Glitter | Small | More noticeable sparkle | Adding enhancement, soft glamour | Easy |
| Larger Glitter | Medium to large | Bold, distinct sparkle | Special occasions, statement nails | Medium |
| Duochrome/Holographic | Varies | Color-shifting, rainbow-like | Unique effects, eye-catching designs | Medium |
| Shimmer Top Coat | Fine to micro-glitter | Enhances base color | Adding shimmer to any polish, subtle sparkle | Easy |
Frequently Asked Questions About Shimmer Nails
Q1: Can I achieve shimmer nails at home if I’m a complete beginner?
A1: Absolutely! The easiest way to start is with a shimmer nail polish or a shimmer top coat over your favorite color. These require minimal skill and offer beautiful results.
Q2: How do I make my shimmer nails last longer?
A2: Proper nail preparation is key! Make sure your nails are clean, dry, and free of oils. Always use a base coat and finish with one or two generous layers of a good quality top coat. Reapply your top coat every few days to refresh the shine and protection.
Q3: Is shimmer nail polish difficult to remove?
A3: Generally, shimmer nail polish removes just like regular polish. You might need to let the remover soak on a cotton pad for a few moments to help dissolve the particles, especially if it has larger glitter. Non-acetone removers are often gentler if you have dry nails.
Q4: Can I mix shimmer polish with regular polish?
A4: You can achieve a subtle mixed effect by applying a shimmer top coat over a regular polish. For creating your own custom shimmer polish, you can add loose shimmer pigments to a clear polish base, but this is a more advanced DIY technique that requires caution and the right materials.
Q5: Do shimmer nails look good on short nails?
A5: Yes! Shimmer nails are fantastic on all nail lengths. On short nails, finer shimmers can create an elegant, polished appearance, while slightly larger particle shimmers can add fun and personality.
Q6: How many coats of shimmer polish should I use?
A6: This depends on the polish! Most shimmer polishes achieve good coverage in two coats. Some sheerer shimmers might need three coats for full opacity or to build up intensity. Always let each coat dry a minute or two before applying the next.
Q7: What’s the difference between shimmer and glitter nails?
A7: Shimmer usually refers to very fine, reflective particles that give a soft glow or subtle sparkle. Glitter nails typically use larger, chunkier particles that are more distinct and provide a bolder sparkle. Shimmer is generally more diffused and less textured than glitter.
The Bottom Line: Embrace Your Inner Sparkle!
Shimmer nails are a fantastic way to add a touch of effortless glamour to your look. From a subtle glow to a dazzling shine, there’s a shimmer effect for everyone and every occasion. By following these simple steps, using the right tools, and trying out different techniques, you can achieve beautiful, sparkling nails right in your own home. Don’t be afraid to experiment and find the shimmer styles that make you feel confident and radiant. So go ahead, grab that shimmery polish, and let your nails shine!
Your nails are a canvas for self-expression, and shimmer nail art is a wonderful way to play with light, color, and texture. Whether you’re opting for a full-coverage glimmer or a delicate accent, the key is to start with well-prepped nails and work with thin, even layers. Remember that practice makes perfect, and even slight imperfections can blend beautifully with the natural appeal of shimmer. For more advanced nail art inspiration and techniques, you can explore resources on reputable beauty blogs or even channels dedicated to nail artistry. Enjoy the process of creating your own dazzling shimmer nails, and wear your sparkle with pride!

