Sheer glaze nails offer a delicate, luminous finish that’s perfect for any occasion. This effortless trend adds a touch of sophistication with a sheer, glossy coat, creating a healthy-looking sheen. Easy to apply and customize with subtle pops of color or shimmer, sheer glaze nails are a beginner-friendly way to achieve a polished and chic manicure that feels light and airy.
Looking for that effortlessly chic manicure? Sheer glaze nails might just be your new best friend! This trend is all about a subtle, luminous finish that makes your nails look polished and healthy. It’s like a whisper of color and a whole lot of shine. If you’ve ever struggled with thick, opaque polishes or wanted a manicure that feels light and airy, you’re in the right place. We’re going to break down exactly what sheer glaze nails are and how you can achieve these stunning looks right at home. Get ready to fall in love with this simple yet sophisticated nail style!
What Exactly Are Sheer Glaze Nails?
Imagine the beautiful, subtle sheen of a perfectly glazed donut, but on your nails. That’s the essence of sheer glaze nails! These aren’t your typical opaque polishes. Instead, they use translucent or semi-translucent formulas that allow a hint of your natural nail color to show through. The key is the luminous, glassy finish that looks incredibly sophisticated and clean. Think of it as a “your nails but better” kind of vibe.
The beauty of sheer glaze nails lies in their versatility. They work wonderfully on their own for an understated elegance, or they can be layered over other colors or adorned with subtle accents like glitter or fine lines. This trend is a fantastic choice for anyone who prefers a more natural look but still wants that “done” manicure feel. It’s also surprisingly forgiving, making it perfect for DIY nail enthusiasts.
Why You’ll Love Sheer Glaze Nails: The Perks
This trend isn’t just pretty; it’s practical and adaptable. Let’s dive into some of the reasons why sheer glaze nails are a must-try:
- Effortless Application: Because the formulas are sheer, minor imperfections are less noticeable than with opaque polishes. This makes them much more beginner-friendly.
- Natural Beauty: They enhance the natural look of your nails, giving a healthy, clean appearance without looking heavy.
- Versatile Style: Sheer glazes are the perfect base for subtle nail art, french tips, or can be worn alone for minimalist chic.
- Subtle Sophistication: They add a touch of polish and elegance to any outfit, from casual to formal.
- Lightweight Feel: Unlike thick gels or acrylics, sheer glazes feel light and comfortable on the nail.
- Easy to Maintain: They tend to “grow out” more gracefully, meaning less noticeable lines at the cuticle.
Getting Started: Your Sheer Glaze Toolkit
Before you dive into creating your own sheer glaze masterpiece, let’s gather the essentials. You don’t need a whole salon’s worth of equipment; just a few key items will set you up for success.
Must-Have Tools and Products:
- Base Coat: Essential for protecting your natural nail and helping your polish adhere better.
- Sheer Glaze Polish(es): This is your star player! Look for polishes labeled “sheer,” “jelly,” or “glaze.” They come in a spectrum of colors, from milky whites and soft pinks to peachy nudes and even sheer blues. Brands like OPI, Essie, and Gelish have lovely sheer options. You can also achieve a sheer effect by thinning out a more opaque polish with a clear top coat, but dedicated sheer formulas offer the best consistency.
- Top Coat: Crucial for sealing your design, adding that signature high-gloss finish, and protecting your manicure from chips. A good quality, quick-dry top coat is always a win.
- Nail File and Buffer: To shape your nails and gently smooth the nail surface for an even application.
- Cuticle Pusher/Orange Stick: For gently tidying up the cuticle area.
- Lint-Free Wipes: Great for cleaning the nail plate before polish and for removing excess product.
- Rubbing Alcohol or Nail Polish Remover: To ensure your nails are clean and free of oils.
- Optional: Dotting Tools, Fine Brushes, Glitter: If you plan to add a little extra flair!
Having these items on hand ensures a smooth process and a beautiful end result. Remember, good preparation is key to any long-lasting and beautiful manicure!
Step-by-Step: How to Achieve Sheer Glaze Perfection
Ready to get those gorgeous sheer glaze nails? Follow these simple steps for a professional-looking manicure at home.
Preparation is Key:
- Clean Your Nails: Start by removing any old polish. Wash your hands thoroughly with soap and water.
- Shape Your Nails: Use a nail file to shape your nails to your desired length and contour. File in one direction to avoid weakening the nail.
- Buff the Surface: Gently buff the surface of each nail with a buffer. This creates a smooth canvas and helps the polish adhere better. Don’t over-buff!
- Push Back Cuticles: Gently push back your cuticles using a cuticle pusher or an orange stick. This gives you a clean nail bed to work with.
- Cleanse the Nail Plate: Swipe each nail with rubbing alcohol or nail polish remover on a lint-free wipe. This removes any oils or dust, ensuring a clean surface for the polish.
Application Time:
- Apply Base Coat: Apply a thin, even layer of your base coat. Let it dry completely (usually 1-2 minutes). This step is vital for protecting your natural nail and ensuring your manicure lasts longer.
- Apply Your Sheer Glaze Polish: This is where the magic happens!
- First Coat: Apply one thin coat of your chosen sheer glaze polish. Start from the cuticle and brush towards the free edge. Don’t worry if it looks streaky or uneven; that’s normal for sheer polishes. Let this coat dry for 2-3 minutes.
- Second Coat: Apply a second thin coat. This will build up the opacity and deepen the color slightly, creating that beautiful glazed effect. Again, let it dry for 2-3 minutes. You can add a third coat if you want a more saturated color, but remember the goal is sheer, not opaque!
- Apply Top Coat: Once your sheer glaze coats are completely dry, apply a generous layer of your top coat. Make sure to cap the free edge by running your brush along the tip of your nail. This helps prevent chipping and extends the life of your manicure.
- Drying and Finishing: Let your top coat dry thoroughly. For a faster dry, you can use a quick-dry spray or let your nails air dry. If you’re using gel polish, cure it under a UV/LED lamp according to the product instructions.
And voilà! You have beautiful, sheer glaze nails that are both elegant and easy to achieve. The key is thin coats and patience between layers.
Stunning Sheer Glaze Nail Design Ideas
Sheer glaze nails are a fantastic canvas for creativity. Whether you’re a minimalist or love a bit of sparkle, there’s a design for you. Here are some popular and easy-to-achieve looks:
1. The Classic Sheer Gloss
Concept: This is the purest form of the trend. A single, sheer tinted polish in your favorite shade, finished with a high-gloss top coat. It’s clean, sophisticated, and radiates health.
How-to: Follow the step-by-step guide above using one to two coats of a sheer pink, peach, or milky white polish.
2. Sheer & Shimmer
Concept: Add a touch of sparkle to your sheer base. This can be as subtle as a whisper of micro-glitter or a more pronounced shimmer strategically placed.
How-to:
- Apply your sheer glaze as usual.
- Optional: Before the top coat, gently dab fine glitter or iridescent flakes onto specific areas (e.g., the cuticle, the center of the nail, or just the tips) using a brush or your fingertip.
- Seal with a thick layer of top coat to smooth out the texture and encapsulate the glitter.
3. The Gradient Glaze (Ombre)
Concept: A soft transition of color, often from nude to pink, or one sheer shade to another. This creates a beautiful, natural-looking depth.
How-to:
- Start with a sheer nude or light pink on the entire nail.
- Using a makeup sponge, gently tap a slightly different sheer shade (e.g., a sheerer pink on top of nude) towards the tips or cuticle.
- Apply a sheer glaze polish over the whole nail to blend the colors seamlessly.
- Finish with a top coat.
For a more precise gradient, you can also use striping tape after the first sheer coat dries to mask off sections and apply different shades.
4. Sheer French Tips
Concept: A modern take on the classic French manicure. Instead of opaque white, use a sheer white or pearlescent polish for the tips, or even a sheer color contrast.
How-to:
- Apply a sheer nude or pink base coat to your entire nail.
- Use a fine art brush or striping tape to carefully paint the tips with a sheer white, milky, or pearlescent polish.
- Ensure the tip color is also sheer, maintaining the overall light and airy feel.
- Carefully remove any tape while the polish is still slightly wet.
- Seal with a top coat.
5. The Jelly Sandwich
Concept: A playful technique where glitter or foil is sandwiched between two sheer layers. This gives the glitter an embedded, almost 3D look.
How-to:
- Apply one thin coat of your sheer glaze polish. Let dry.
- Place your desired glitter, flakes, or even small pieces of holographic foil onto the sticky surface of the polish.
- Apply another thin coat of the same sheer glaze polish (or a slightly different one) over the glitter to embed it.
- Apply a final, thicker layer of top coat for a smooth finish.
6. Encapsulated Accents
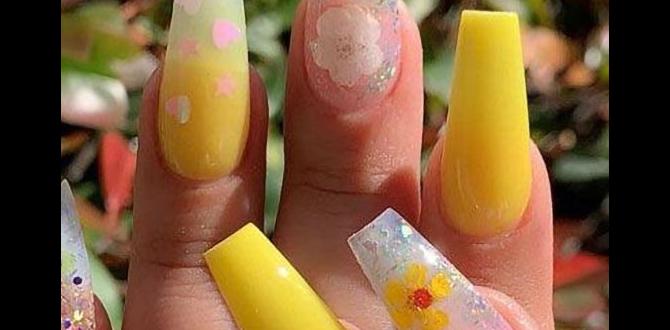
Concept: Tiny, delicate designs like small flowers, stars, or even thin lines are placed on the nail and then “encapsulated” with a sheer glaze. This creates an illusion of depth, as if the design is floating within the nail color.
How-to:
- Apply your base coat and one layer of sheer glaze.
- Carefully place your chosen accent (e.g., dried flowers, foil art, hand-painted delicate lines) onto the nail.
- Apply a thin layer of sheer glaze over the accent to secure it.
- Apply another coat or two of sheer glaze to fully encapsulate the design, ensuring it’s completely smooth.
- Finish with a top coat.
Pro Tips for Longevity and Shine
Want your sheer glaze nails to look fabulous for as long as possible? It comes down to technique and care. Here are some insider tips:
- Thin Coats Are Your Friend: Resist the urge to slather on thick coats. Thin layers dry faster, are less likely to smudge, and build up beautifully for that sheer effect.
- Cap That Edge: Always swipe your brush along the free edge of your nail with both base coat and top coat. This creates a seal and significantly reduces chipping.
- Don’t Skip the Base and Top Coat: We can’t say it enough! They are the unsung heroes of manicure longevity and shine. A good quality top coat is especially important for that glossy, “glazed” look. Consider a gel-like top coat for extra shine and durability, even with regular polish.
- Allow Adequate Drying Time: Patience is a virtue, especially with nail polish. Ensure each layer is dry to the touch before applying the next. This prevents air bubbles and smudging.
- Hydrate Your Cuticles: Healthy cuticles lead to healthy-looking nails. Regularly apply cuticle oil to keep them moisturized. This also prevents dry skin around the nail from looking unsightly against your polished nails. For more on cuticle care, check out the National Center for Complementary and Integrative Health’s guide on skin and beauty products, which touches upon ingredient awareness.
- Wear Gloves for Chores: Protect your beautiful manicure from harsh chemicals and prolonged water exposure by wearing gloves when doing dishes, cleaning, or gardening.
- Touch-Ups are Easy: If you notice a tiny chip or wear on the edge, it’s often easy to fix with a tiny dab of top coat, or even a thin layer of polish on that specific spot, blended out.
Comparing Sheer Glaze Polish Types
Not all sheer polishes are created equal. Understanding the differences can help you choose the best product for your desired look and application ease. Here’s a quick comparison:
| Polish Type | Description | Pros | Cons | Best For |
|---|---|---|---|---|
| Traditional Lacquer (Sheer) | Standard nail polish formulas with translucent pigments. Available in a wide range of brands and colors. | Widely available, affordable, easy to find. No special lamps needed. | Can chip more easily, may require more coats for desired opacity, drying time. | Beginners, quick changes, budget-friendly manicures. |
| Jelly Polishes | Highly translucent polishes with a vibrant, glass-like finish. Often more pigmented than traditional sheer polishes. | Intense, luminous color. Great for layering and creating depth (like jelly sandwiches). Unique “jelly” effect. | May show brush strokes more easily. Still requires multiple coats for desired opacity. | Achieving a vibrant, stained-glass effect; layering techniques. |
| Gel Polishes (Sheer) | Translucent gel formulas that require curing under a UV/LED lamp. | Incredibly durable, high-gloss finish, long-lasting (2-3 weeks), less prone to chipping or smudging if applied correctly. | Requires a UV/LED lamp and often a specific base/top coat system. Removal can be more involved. | Those seeking maximum durability and a salon-quality shine that lasts. |
| “Your Nails But Better” Formulas | Often milky, pink, or nude tinted polishes designed to enhance the natural nail. Can be sheer or semi-opaque. | Super natural, healthy-looking finish. Minimalist and elegant. Very forgiving. | Limited color options; may not offer enough color payoff for some. | Achieving a subtle, everyday polished look; those who prefer a very natural enhancement. |
FAQs About Sheer Glaze Nails
Q1: How many coats of sheer glaze polish do I need?
A: Typically, two to three thin coats are recommended. One coat will give a very subtle hint of color. Two coats build up the color and shine for a lovely glazed effect. Three coats can be used if you desire a more saturated, translucent color. The key is to apply thin coats and let each one dry adequately.
Q2: Can I use regular nail polish to create a sheer look?


