Shamrock French tips are a playful and stylish twist on the classic French manicure, incorporating a lucky green shamrock design into the white tip. They’re perfect for adding a festive touch to your nails, especially around St. Patrick’s Day, or just for lifting your mood any day of the year. Learn how to create these adorable nail art accents with simple steps and common tools.
Hey nail lovers! Lisa Drew here from Nailerguy, and I’m so excited to talk about a nail art trend that’s both adorable and surprisingly easy to achieve: Shamrock French Tips! Have you ever looked at a classic French manicure and thought, “I wish I could add just a little something extra?” Or maybe you’ve seen those super cute shamrock designs and thought they were only for the pros. Well, you’re in for a treat because we’re going to break down how to get this playful, festive look right at home. It’s the perfect way to add a touch of luck and fun to your fingertips. Get ready to impress yourself and everyone around you with your newfound nail art skills!
What Exactly Are Shamrock French Tips?
Think of the classic French manicure: a clean, neutral base with a crisp white tip. Now, imagine replacing a small part of that tip, or adding a tiny, darling shamrock shape right onto the white tip. That’s the magic of shamrock French tips! It’s a way to take a sophisticated nail look and give it a whimsical, celebratory twist. They are especially popular around St. Patrick’s Day, but honestly, why limit luck to just one day? These little green gems can brighten up any manicure, bringing a touch of playful charm and a hint of nature’s bounty to your nails.
Why They’re “Ingenious & Essential” for Your Nail Art Collection
Why “ingenious and essential,” you ask? Let’s break it down:
- Versatility: While a classic French tip is timeless, the shamrock French tip offers a fun, seasonal variation. It’s a way to express a bit more personality without committing to a full-nail, intricate design.
- Beginner-Friendly: Unlike complex 3D nail art or elaborate hand-painted scenes, the shamrock is a relatively simple shape. With a few basic tools and a bit of practice, even nail art novices can master this design.
- Subtle Statement: It’s not an “in-your-face” design. The shamrock is typically small and incorporated into the existing French tip structure. This makes it elegant enough for everyday wear or for events where you want a touch of flair without being overly flashy.
- Mood Booster: Let’s be real – a tiny shamrock on your nail just makes everything feel a little more cheerful and lucky. It’s a small detail that can have a big impact on your day.
- Seasonal Celebration: For St. Patrick’s Day or any time you want to embrace a bit of Irish luck, this design is perfectly on-theme. It’s a festive nod without being a full-on costume for your nails.
Gathering Your Essential Tools
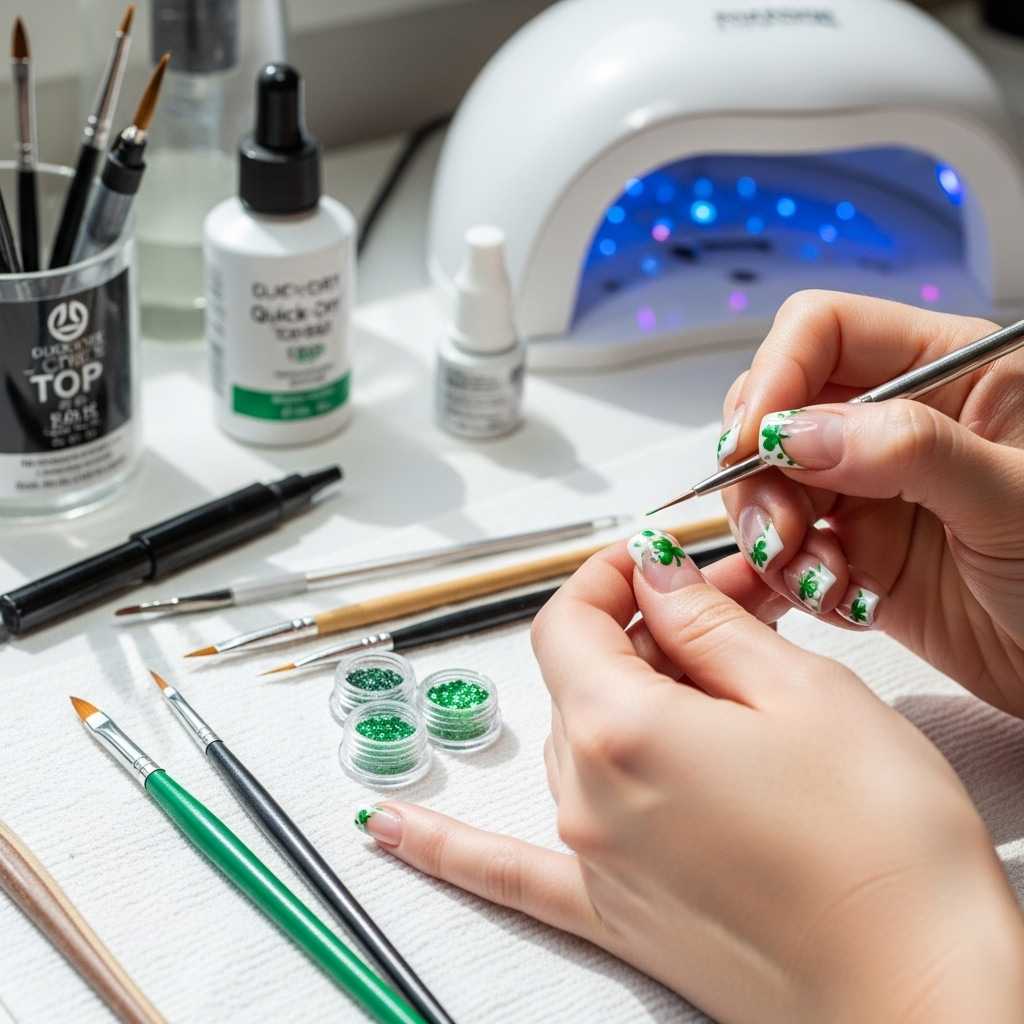
Before we dive into the creative part, let’s make sure you have the right gear. Don’t worry, you probably have most of these items already! For creating beautiful shamrock French tips, here’s what you’ll need:
- Base Coat: To protect your natural nails and help your polish adhere better.
- Nude or Pale Pink Nail Polish: This will be your base color.
- White Nail Polish: For the French tip and the white part of the shamrock.
- Green Nail Polish: A vibrant or muted green – your preference! This is for the shamrock outline or fill.
- Fine-Tipped Nail Art Brush or Dotting Tool: A detail brush is essential for painting the small shamrock shapes. A dotting tool with a small bead can also work for creating the basic shape.
- Top Coat: To seal your design and give it a glossy finish.
- Nail Polish Remover and Cotton Swabs: For cleaning up any mistakes. We all make them!
- Optional: Cuticle Oil: To nourish your cuticles after the manicure is complete.
A Quick Guide to Nail Art Tools
Let’s take a closer look at some of the most crucial tools for this specific design:
| Tool | Purpose | Beginner Tip |
|---|---|---|
| Fine-Tipped Nail Art Brush | Painting intricate details like the shamrock curves, stems, and outlines. | Look for brushes with synthetic bristles that are firm but flexible. A “liner” brush is ideal for drawing thin, consistent lines. |
| Dotting Tool | Creating small dots which can be joined together to form the shamrock shape, or used for the tiny dots of detail. | These come in various tip sizes. Start with a medium-sized tip for the main shamrock leaves, and a smaller one for details. Dipping the tip in a bit of nail polish remover can help you get smaller dots. |
| Thin Nail Polish Bottles (optional) | Some brands offer polishes with extra-thin, precise brushes built-in, which can be great for details. | If you often do nail art, consider investing in a few “detail” polishes. Otherwise, a good brush and regular polish work wonders. |
| Clean-up Brush (angled or fine tip) | Precisely removing errant polish from around the cuticle and nail edges. | A small, angled synthetic brush dipped in nail polish remover is perfect for cleaning up. Make sure it’s a brush you won’t mind using for clean-up only! |
Step-by-Step: Creating Your Shamrock French Tips
Ready to get your green on? Follow these simple steps to create adorable shamrock French tips that will have you feeling lucky!
Step 1: Prep Your Nails
Like any great manicure, it all starts with a good foundation. Ensure your nails are clean, dry, and free of any old polish. Gently push back your cuticles. If you like a perfectly shaped nail, this is also the time to file them into your desired shape. A smooth surface is key for a flawless finish.
Step 2: Apply Your Base Coat
Start with a thin, even layer of your chosen base coat. This protects your nails and helps the colors pop. Let it dry completely.
Step 3: Paint Your Base Color
Apply one or two thin coats of your nude or pale pink nail polish. Choose a color that complements your skin tone. Let each coat dry thoroughly. Patience here really pays off!
Step 4: Create the French Tip
Now for the classic French tip! You can do this in a couple of ways:
- Freehand: Carefully paint a curved white line across the tip of each nail using your white polish. Aim for a consistent curve.
- Using a Guide (optional): You can use French tip guide stickers if you want a super crisp line, though for this design, a slightly less rigid line is perfectly fine as the shamrock will be the star.
Let the white tip dry completely. This is crucial; if it’s still wet, your shamrock will smudge!
Step 5: Design Your Shamrock
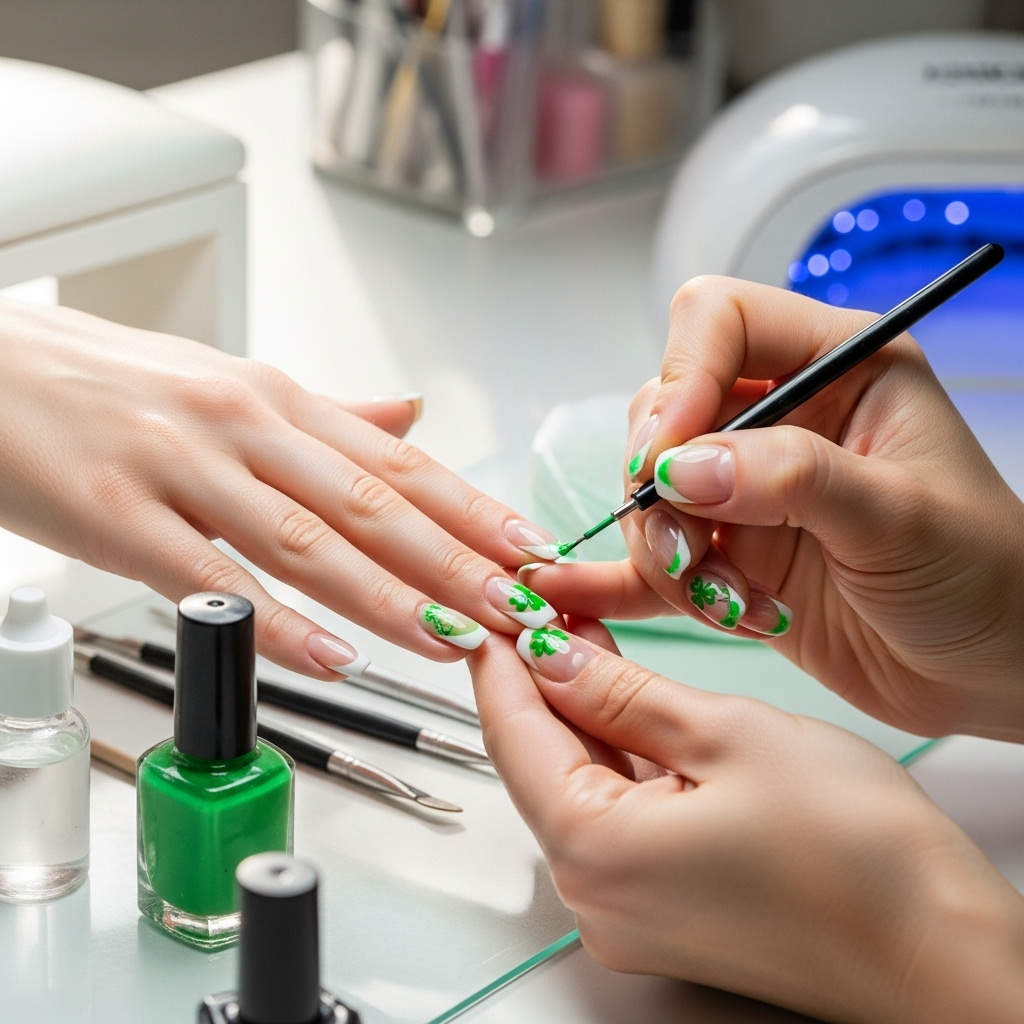
This is where the magic happens! Grab your green nail polish and your fine-tipped nail art brush or dotting tool.
Method 1: Dotting Tool Charm
- Dip your dotting tool into the green polish.
- On the white tip of your nail, create three small dots in a triangular formation. These will be the three leaves of your shamrock.
- Carefully connect these dots with your dotting tool or a very fine brush, creating curved lines to form rounded leaves.
- Add a small dot or a tiny line at the base where the leaves meet to create the stem.
Method 2: Brushwork Brilliance
- Dip your fine-tipped brush into the green polish.
- Paint a small, slightly curved “V” or “heart” shape for each of the three leaves. You can do this by making two small curved lines that meet at a point for one leaf, and repeating this three times.
- Alternatively, use your brush to paint three separate, rounded lobes that slightly overlap at the base.
- Connect the leaves with a small stem painted with your brush.
Remember, practice makes perfect! Don’t worry if your first few shamrocks aren’t symmetrical. Even slightly imperfect ones are incredibly charming.
Step 6: Add Optional Details (White Outline)
For an extra pop and a more defined look, you can take a tiny bit of white polish on your fine brush and carefully outline each green leaf of the shamrock. This makes the shamrock stand out even more against the green polish. Or, add small white dots inside the green to give it dimension.
Step 7: Apply Your Top Coat
Once all your shamrock designs are completely dry, it’s time for the grand finale! Apply a layer of clear top coat over your entire nail. This seals in your design, adds a beautiful shine, and helps your manicure last longer. Make sure to cap the free edge of your nail to prevent chipping.
Step 8: Clean Up and Moisturize
Gently use a cotton swab dipped in nail polish remover to clean up any polish that might have gotten on your skin or cuticles. Finish by applying a drop of cuticle oil to each nail. It makes your cuticles look healthy and adds a lovely finishing touch.
Variations on the Shamrock Theme
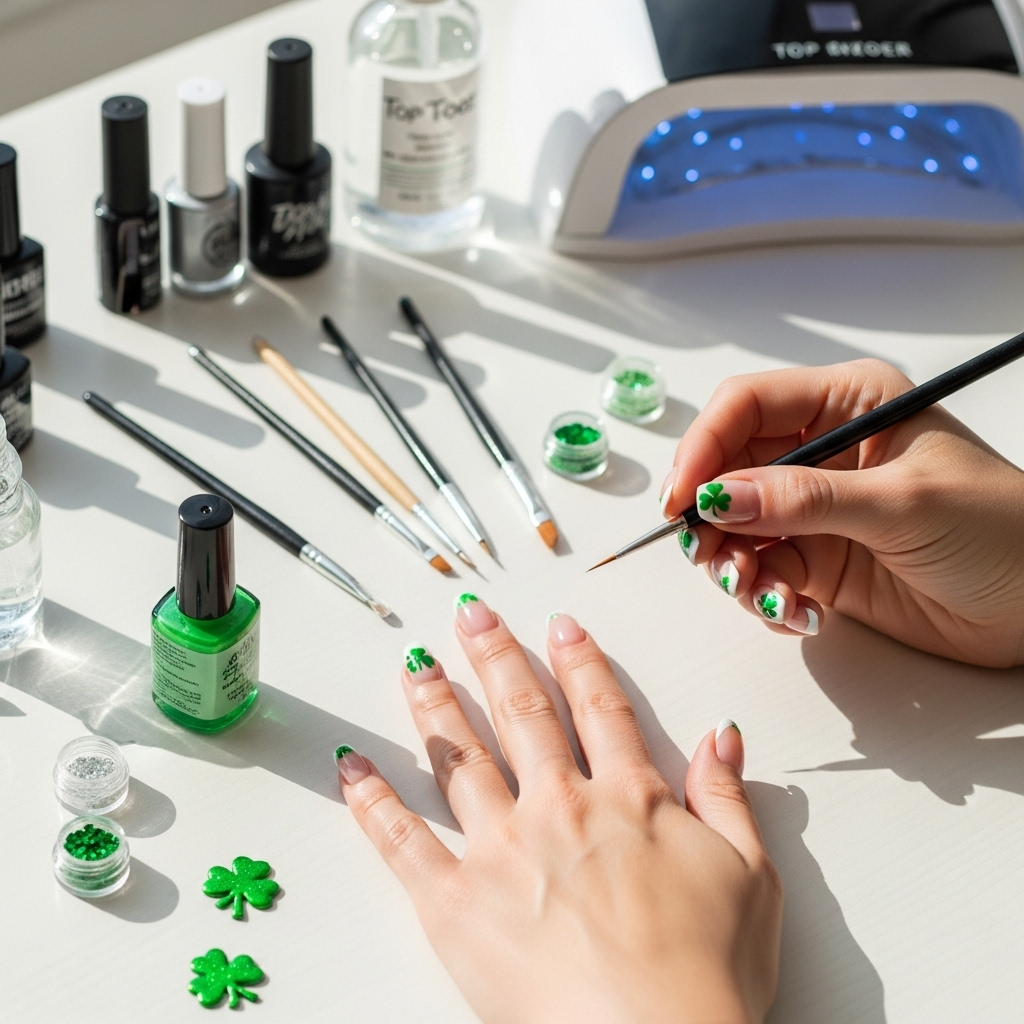
Once you’ve mastered the basic shamrock French tip, feel free to get creative! Here are some fun ways to switch up the design:
- Color Play: Instead of green, try a metallic gold or silver for a bit of sparkle. Or use different shades of green for an ombre effect!
- Placement is Key: Experiment with placing the shamrock on just one or two nails, or try it on the side of the nail instead of centered on the tip.
- Full Nail Shamrocks: For a bolder look, paint a full-color French tip and then add a larger shamrock design on top of the colored tip.
- Glittery Greens: Use a green glitter polish to create your shamrock for an extra dazzling effect. You can even add a clear glitter topcoat over the whole nail.
- Minimalist Dots: Instead of a fully painted shamrock, try making three small green dots in the shamrock formation on your white tip. It’s super subtle and chic.
Troubleshooting Common Issues
Even the most nail-savvy among us run into a few snags from time to time. Here are some common issues you might encounter with shamrock French tips and how to fix them:
| Problem | Solution |
|---|---|
| My shamrock design smudged the white tip. | Ensure both your base color and the white tip are completely dry before attempting to paint the shamrock. You can speed up drying with a quick-dry spray or by placing nails in the freezer for a minute or two (be cautious, this can sometimes make polish brittle if done excessively). If it smudges slightly, you might be able to carefully touch it up with more white polish on your brush. |
| The green polish is too sheer and looks streaky. | Apply at least two thin coats of the green polish. You can also use a slightly more opaque green nail polish, or for very sheer polishes, you might consider painting a tiny white base “shape” first to help the green pop better. |
| My shamrock shapes are uneven or wobbly. | It takes practice! Try practicing on a piece of paper or a nail file first. When painting, keep your hand steady by resting your pinky finger on your work surface. Use a fine-tipped brush and less polish for more control. If one nail is really off, just use a cotton swab with nail polish remover to gently erase it and try again. A slightly imperfect shamrock still looks cute! |
| My French tip line is messy. | If you’re struggling with freehanding, try using nail guides or even a piece of tape cut into a curve. For cleanup, a small, angled brush dipped in nail polish remover is your best friend. Just gently sweep away any polish that’s gone over the line. |
| The polish chips easily. | Ensure you have a good base coat and a strong top coat. Crucially, “cap” the free edge of your nails by running your top coat brush along the very tip of your nails. This creates a seal that helps prevent chipping. Reapply top coat every couple of days if you notice your shine fading. |
Don’t get discouraged if your first attempt isn’t salon-perfect. Nail art takes patience and a steady hand, and even the smallest imperfections can add to the charm of a DIY manicure. Remember, you’re creating art!
Shamrock French Tips in the Context of Nail Health
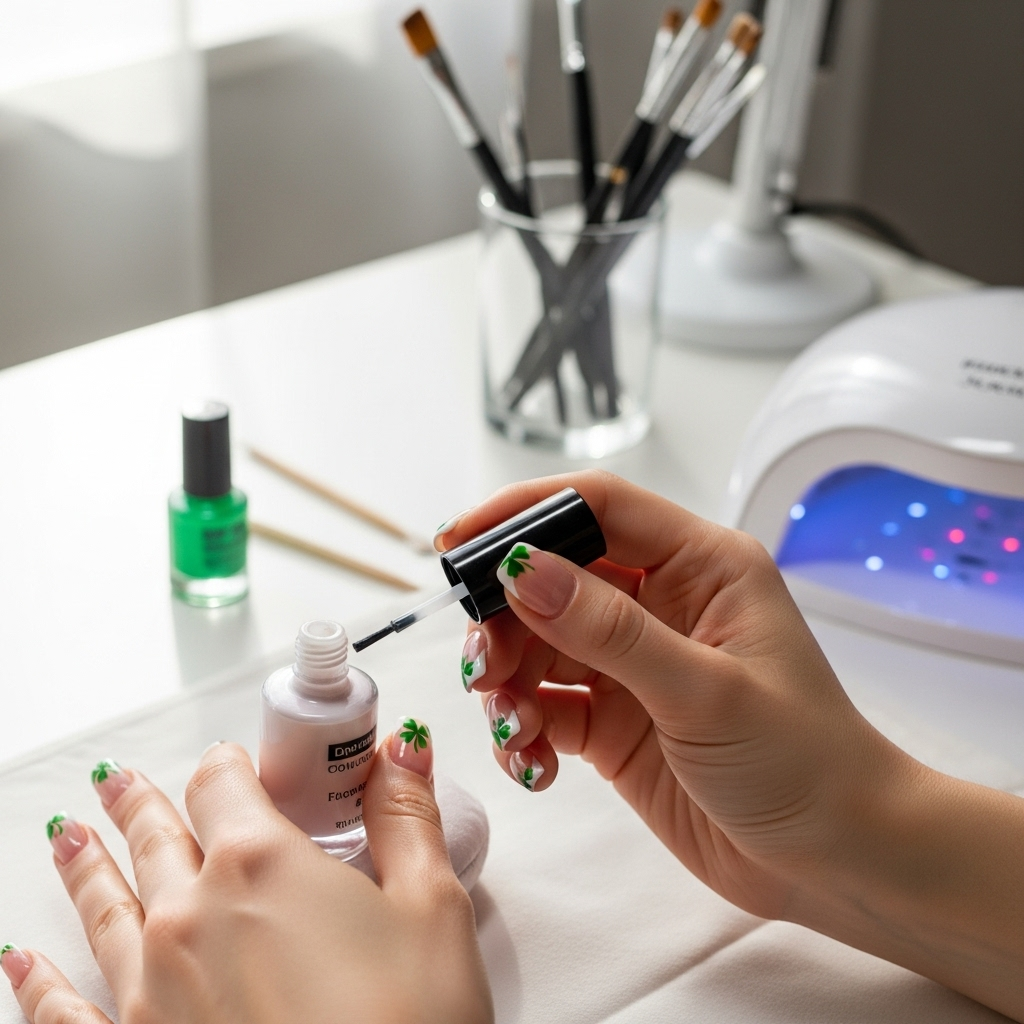
While we love a good nail art design, Nailerguy is all about healthy nails! So, how do shamrock French tips fit into a nail health routine? Pretty seamlessly, actually.
The key is in the preparation and aftercare. Using a good quality base coat, as we discussed in the steps, is vital. It creates a barrier between your natural nail and the colored polish, preventing staining. Stains are more common with darker pigments, but it’s always good practice. The American Academy of Dermatology Association recommends using a base coat for this very reason, stating it “helps prevent polish from staining your nails yellow or brown.”
Proper removal is also crucial. Resist the urge to peel or pick at your polish. Use an acetone-free nail polish remover, especially if you have dry or brittle nails. Acetone can be very drying. Always follow up with moisturizer. For shamrock French tips, since the design is relatively small and focused on the tip, it doesn’t put extreme stress on the nail plate compared to a full glitter overload or textured application. Just remember to keep those cuticles hydrated!
Frequently Asked Questions About Shamrock French Tips
Q1: How long do shamrock French tips usually last?
A1: With a good base coat, a solid top coat, and proper care, shamrock French tips can last anywhere from 5 to 10 days. Reapplying top coat every 2-3 days can help extend their life and keep them shiny.
Q2: Can I do shamrock French tips on short nails?
A2: Absolutely! Shamrock French tips are incredibly versatile and look fantastic on short nails. You might just need to scale down the size of your shamrock slightly to keep it proportionate.
Q3: What if I don’t have nail art brushes? Can I still do this?
A3: Yes! A toothpick or a fine-tipped stylus from a basic nail art kit can work for creating the dots that form the shamrock shape. You can also use the edge of a regular polish brush for painting small lines, but be very careful with control.
Q4: Is it hard to get the shamrock shape right?
A4: It can take a little practice, but the shamrock is a forgiving shape! Think of it as three rounded lobes connected by a stem. Don’t aim for perfect symmetry; a slightly quirky shamrock is just as charming. Many tutorials available online, like those found on Nailpro magazine’s website, offer visual guides that can help you see the motion of painting the shape.
Q5: Can I use nail stickers for the shamrock part?
A5: Yes, you can! There are often tiny shamrock stickers available at beauty supply stores or online. Apply these on top of your dried white tips for a quick and perfectly formed shamrock. Seal them with a top coat.
Q6: What’s the best way to remove shamrock French tips?
A6: Soak a cotton ball or pad in nail polish remover (preferably acetone-free if your nails are dry). Press it onto the nail for about 30 seconds to a minute to loosen the polish, then gently wipe away the color. Cleanse your hands and apply cuticle oil.
Conclusion: Embrace Your Inner Luck!
There you have it! Shamrock French tips are a delightful way to add personality, festivity, and a touch of Irish luck to your manicure. Whether you’re prepping for St. Patrick’s Day or just want to inject some fun into your week, this design proves that sophisticated nail art can be

