Ready to bloom with gorgeous rose flower nail design ideas? This guide offers beginner-friendly tips and essential advice to create stunning, nature-inspired manicures right at home. Learn simple techniques and creative styles to achieve a beautiful rose look on your nails.
Dreaming of a manicure that’s delicate, romantic, and utterly chic? Rose flower nail designs are a timeless classic that never goes out of style. Whether you love bold, statement blooms or subtle, whisper-soft petals, there’s a rose design waiting to grace your fingertips. But if you’re new to nail art, the thought of painting intricate flowers might seem a little intimidating. Don’t worry, lovely! We’re here to break down everything you need to know to achieve beautiful rose nail art, no matter your skill level. Get ready to unleash your inner artist and create some truly stunning nail looks!
Why Rose Flower Nail Designs Are Always a Hit
Roses have always symbolized love, beauty, and passion, and these emotions translate beautifully onto our nails. They offer a perfect blend of elegance and charm, making them suitable for any occasion – from a casual day out to a special event like a wedding or a romantic date. Plus, the versatility of rose designs means you can go as simple or as detailed as you like. Think soft watercolor roses for a bohemian vibe, detailed 3D roses for a touch of luxury, or minimalist line art roses for a modern twist. The possibilities are truly endless, making rose flower nail designs a perennially popular choice for creative self-expression.
Essential Tools for Your Rose Nail Art Journey
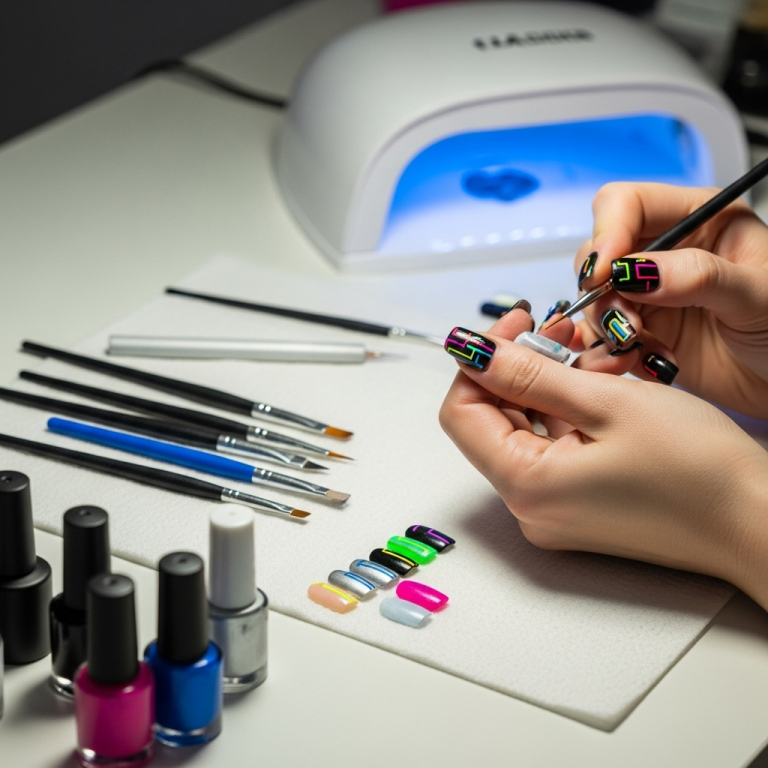
Before we dive into the fun part – creating the designs – let’s gather your nail art toolkit. Having the right tools makes the process so much smoother and helps you achieve professional-looking results. You don’t need a whole nail salon at home; a few key items will get you started!
The Must-Have Items:
- Base Coat: Protects your natural nails from staining and helps your polish adhere.
- Top Coat: Seals your design, adds shine, and makes your manicure last longer.
- Nail Polish Colors: You’ll need your chosen base color, shades of pink, red, or white for the rose petals, and green for leaves.
- Fine-Tipped Nail Art Brushes: These are crucial for drawing delicate lines and shaping petals. A set with various fine tips is ideal.
- Dotting Tools: Perfect for creating small dots that can be shaped into petals or used as accents.
- Toothpick or Orange Stick: Handy for fine-tuning details, cleaning up edges, and even creating simple petal shapes.
- Nail Polish Remover and Cotton Swabs: For inevitable little oopsies and cleaning up stray polish around the cuticles.
- Patience and Practice: The most important tools of all!
Simple Rose Flower Nail Design Ideas for Beginners
Feeling a bit nervous about your first attempt? No worries! We’ve got some super easy rose designs that are perfect for beginners. These focus on building confidence and getting you comfortable with the basic techniques.
1. The Dot Petal Rose
This is a fantastic starting point! It uses simple dots to build up the rose shape.
- Start with your base color and apply one or two coats. Let it dry completely.
- Using a dotting tool or the tip of a fine brush, place a small dot of your rose color (e.g., pink) in the center of your nail.
- Around this center dot, create slightly larger dots, overlapping them a little. Think of them as petals unfurling.
- Continue adding dots in a circular motion, making them progressively larger and more outward-facing to form the outer petals.
- Once you’re happy with the rose shape, use a fine green brush to add small leaf shapes at the base of the rose.
- Finish with a clear top coat.
2. The Swirl Rose
This technique creates a softer, more abstract rose effect.
- Apply your base color and let it dry.
- Dip a fine-tipped brush into your rose colored polish.
- Starting from the center, swirl the polish in a loose spiral motion. Don’t worry about making it perfect; the randomness adds to the charm.
- You can add tiny dots at the end of the swirl to mimic petal tips if you like.
- Add green leaves with your brush.
- Seal with a top coat.
3. The Simple Line Rose
Minimalist and elegant, this design uses just a few lines to suggest a rose.
- After applying your base color, let it dry.
- With a very fine brush and your rose polish, draw a small, loose spiral in the center.
- From this spiral, draw a few curved lines radiating outwards, mimicking the shape of petals. You can even just make a few comma-like strokes coming from the center swirl.
- Add small green lines for leaves.
- Cap it off with a top coat.
Intermediate Rose Flower Nail Design Techniques
Once you’re feeling more confident, you can try these designs that involve a little more shaping and layering.
1. The Layered Petal Rose
This method involves painting individual petal shapes for a more defined look.
- Apply base coat and desired nail color.
- Using a fine brush, paint a small curved line for the center of the rose.
- Around this, paint slightly larger, overlapping curved shapes to represent petals. You can use a slightly lighter or darker shade of your rose color to add depth.
- Focus on creating a sense of overlap and dimension.
- Add leaves in green.
- Finish with a top coat.
2. Watercolor Roses
Achieve a dreamy, soft effect by layering translucent washes of color.
- Paint your nails a light, neutral color or white as a base.
- In a small dish or on a palette, thin down your rose-colored polishes with a bit of clear polish until they are very sheer.
- Using a damp (not wet!) brush or sponge, lightly dab and blend the sheer colors onto your nail in a circular motion, building up the rose shape gradually.
- You can use a darker shade for the center and lighter shades for the outer petals.
- Add subtle green leaves with a thin brush.
- Let dry thoroughly before applying a thick layer of top coat to smooth out any texture.
3. French Tip Roses
A lovely twist on the classic French manicure.
- Apply your base and color.
- Paint your French tips in a color of your choice (e.g., soft pink or white).
- Once the tips are dry, use a fine brush to paint a small rose design on one or two of the tips. You can use the dot or swirl method for this.
- Add tiny green leaves.
- Apply a top coat.
Advanced Rose Flower Nail Design Ideas
Ready to take your rose nail art to the next level? These techniques will give your manicures that extra bit of flair and artistry.
1. 3D Acrylic or Gel Roses
For a dramatic, textured look, 3D art is the way to go. This typically involves using acrylic powders and monomer liquid or builder gels. These are applied in small balls and then sculpted into petals using specialized brushes and tools. This technique requires practice and specific products, often best learned through dedicated courses or by watching detailed tutorials from experienced nail technicians. For instance, exploring resources from an organization like the American Rose Society can offer visual inspiration for petal shapes and arrangements.
2. Hand-Painted Roses with Shading
This involves using multiple shades of the same color and a fine brush to create depth and dimension on a flat surface. You’ll paint base petals, then use lighter shades to highlight and darker shades to add shadows, mimicking the natural curves and shadows of a real rose. This technique is similar to traditional painting and requires a steady hand and an understanding of light and shadow.
3. Embellished Roses
Incorporate small rhinestones, glitter, or even tiny charms to enhance your painted roses. A tiny pearl or a bit of gold foil placed strategically can add sparkle and sophistication. For example, a small gold stud at the center of a rose can look like a beautiful stamen, or a cluster of clear rhinestones can add a dewdrop effect.
Color Palettes and Combinations for Rose Nails
The beauty of rose designs lies in their color flexibility. While classic red and pink roses are stunning, don’t be afraid to experiment!
Classic & Romantic
- Deep Reds & Burgundies: For a passionate, sophisticated look.
- Soft Pinks & Peaches: For a delicate, feminine feel.
- Creamy Whites & Ivories: Ethereal and elegant, these pair beautifully with green leaves.
Modern & Trendy
- Pastel Roses: Think lavender, sky blue, or mint green roses for a whimsical touch.
- Monochromatic: Different shades of the same color (e.g., light to dark pink) create depth.
- Black & White: A striking contrast for a bold, graphic look. Paint black roses on a white background or vice versa.
- Ombre Roses: Blend different colors into your rose petals for a unique effect.
Tropical & Bold
- Coral & Peach: Vibrant and summery.
- Yellow Roses: For a cheerful, sunny vibe.
- Two-Tone Roses: Combine two contrasting colors within one rose, like pink and orange.
Tips for Long-Lasting Rose Nail Designs
You’ve put in the effort to create beautiful rose nails, so you’ll want them to last! Here are some pro tips:
- Prep is Key: Always start with clean, dry nails. Push back your cuticles and gently buff the surface for optimal polish adhesion.
- Seal the Deal: Apply a thin layer of base coat before your color and always finish with a good quality top coat. Make sure to cap off your free edge – that’s the tip of your nail – with the top coat to prevent chipping.
- Avoid Water Immediately: Try to keep your hands dry for at least an hour or two after applying your final coat of polish to allow it to fully cure.
- Wear Gloves: When doing chores like washing dishes or cleaning, wear rubber gloves. This protects your manicure from harsh chemicals and excessive moisture.
- Touch-Ups: If a tiny chip occurs, you can often fix it with a carefully applied dot of polish or a bit of top coat to prevent it from worsening.
Common Mistakes and How to Avoid Them
We’ve all been there! Here are some common pitfalls and how to sidestep them on your rose nail art adventure.
Mistake 1: Rushing the Drying Time
Solution: Patience is your best friend! Ensure each layer of polish is completely dry before applying the next. Use a quick-dry top coat if you’re short on time. A quick blast of cool air from a hairdryer can also help speed things up.
Mistake 2: Clumpy Polish
Solution: Old or thick polish can lead to an uneven, clumpy finish. Thin out polishes with a nail polish thinner if they’ve become too gooey. Avoid shaking polish vigorously; instead, roll the bottle gently between your palms to mix.
Mistake 3: Overworking the Design
Solution: Especially with simpler techniques like dotting or swirling, less is often more. Don’t keep adding polish until it becomes a mess. Step back and assess your progress. For detailed painting, use light, decisive strokes.
Mistake 4: Neglecting the Base and Top Coat
Solution: This is crucial! A base coat prevents staining and promotes adhesion. A top coat protects your design, adds shine, and extends wear. Never skip these steps!
Mistake 5: Using the Wrong Brush
Solution: Trying to draw fine details with a thick brush is like trying to write a novel with a crayon! Invest in a good set of fine-tipped nail art brushes. For beginners, a brush with a very fine tip is essential for creating defined petals and lines.
Frequently Asked Questions (FAQ)
Q1: What are the best nail polish colors for rose designs?
A1: Classic choices include various shades of red, pink, and white for the roses, and green for the leaves. However, you can use almost any color! Pastels, deep jewel tones, and even neons can create unique and beautiful rose nail art.
Q2: Do I need special nail polish for rose designs?
A2: Not at all! Standard nail polishes work perfectly. You’ll benefit most from having polishes with good pigmentation and a range of colors. For advanced techniques like 3D art, you might need acrylic or gel products, but for painting, regular polish is fine.
Q3: How can I make my rose nail art look more realistic?
A3: To achieve a more realistic look, focus on layering and shading. Use slightly different shades of your chosen color to mimic light and shadow on the petals. Think about the natural curvature of rose petals and try to replicate that with your brush strokes. Adding subtle gradients and contours will make a big difference.
Q4: Can I combine rose designs with other nail art elements?
A4: Absolutely! Roses pair wonderfully with glitter, rhinestones, foil accents, or even other floral elements. You could have a single rose on one nail and a French tip with subtle floral accents on others, or create a full floral scene. The key is balance so the design doesn’t become too busy.
Q5: My rose designs look shaky. How can I get steadier lines?
A5: Practice is the number one solution! Sit comfortably with your elbows supported, which helps stabilize your hands. You can also try painting on an accent nail or even a piece of paper first to warm up. For very fine lines, ensure your brush is clean and not overloaded with polish.
Q6: How do I clean up smudged rose nail art?
A6: Dip a small, stiff brush (like an angled eyeliner brush or a specialized cleanup brush) or a cotton swab into nail polish remover. Carefully trace around the edges of your design to remove any stray polish or smudges. Be gentle to avoid disturbing the main design.
Conclusion: Your Blooming Manicure Awaits!
There you have it, a complete guide to creating beautiful rose flower nail designs! From simple dots to more intricate painting methods, we’ve covered everything you need to get started. Remember, nail art is all about having fun and expressing yourself. Don’t be discouraged if your first few attempts aren’t perfect – every artist starts somewhere! With a little practice, the right tools, and these helpful tips, you’ll be creating stunning, romantic rose manicures in no time. So, gather your polishes, grab your brushes, and let your creativity bloom. Your gorgeous, petal-perfect nails are just a few brushstrokes away!


