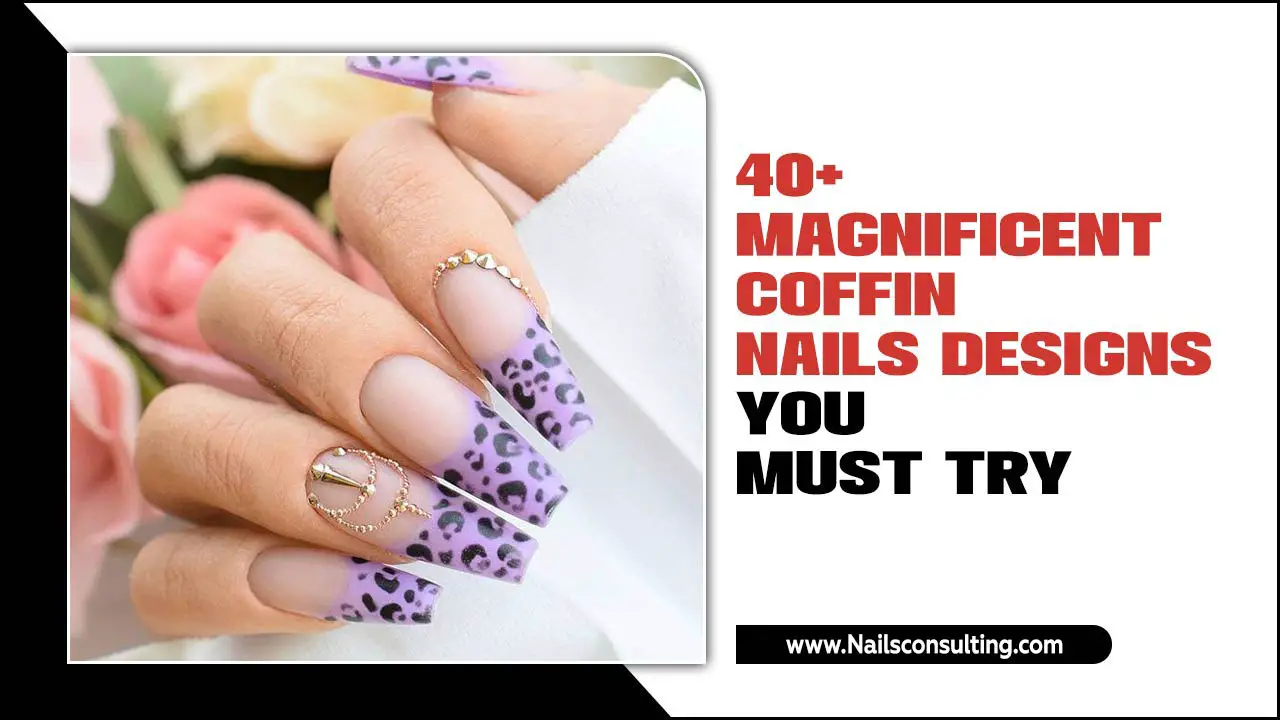
Rococo nail designs are delicate, ornate, and luxurious patterns inspired by the 18th-century art movement. They often feature intricate swirls, florals, pearls, and pastel colors, perfect for adding a touch of elegance and sophistication to your manicure. This guide will help you master these beautiful designs with simple steps and tips.
Dreaming of nails that look like they stepped right out of a fairytale? Rococo nail designs are the answer! They bring to mind elegant ballrooms, flowing silks, and a touch of playful charm. But sometimes, these intricate looks can seem a bit intimidating, right? You might think you need a steady hand of a surgeon or years of art school training. Don’t worry! We’re going to break down Rococo nail art into simple, achievable steps. Get ready to create stunning manicures that are surprisingly easy to do yourself.
In this guide, we’ll explore what makes Rococo nails so special. We’ll dive into the key elements and colors. Then, we’ll walk through how to create your own masterpieces, no matter your skill level. We’ll also cover the essential tools you’ll need and give you plenty of inspiration. Let’s get started on creating your most elegant nails yet!
What Exactly Are Rococo Nail Designs?
Imagine looking at an 18th-century painting filled with soft curves, delicate flowers, and a sense of lighthearted luxury. That’s the essence of Rococo style! This art movement, popular in Europe roughly between 1730 and 1760, was all about opulence, elegance, and a touch of playful whimsy. Think Versailles, Marie Antoinette, and intricate details that delight the eye.
When we translate this to nail art, Rococo designs capture that same feeling. They are characterized by:
- Delicate Swirls and Curls: Think fine lines that twirl and loop, much like ornate scrollwork found on furniture or picture frames.
- Floral Motifs: Small, dainty flowers, often rendered in soft colors, are a staple. These can be simple blossoms or more elaborate arrangements.
- Lace-like Patterns: Intricate, filigree-style designs that mimic fine lace are very popular.
- Pearls and Embellishments: Tiny pearls, beads, or even small rhinestones add a three-dimensional element and a touch of preciousness.
- Soft, Pastel Color Palettes: Softer shades like baby pink, light blue, mint green, lavender, cream, and gold are commonly used.
- Asymmetry and Playfulness: While elegant, Rococo also had a lighter, more informal feel than earlier Baroque styles, which can translate to charming, not-too-perfect designs.
Unlike sharp, modern geometric designs, Rococo is all about soft edges and flowing lines. It’s a style that feels both classic and incredibly chic.
Why You’ll Love Rococo Nails
Rococo nail designs offer a beautiful way to express sophistication and a love for intricate details. Even though they look complex, they’re surprisingly versatile and can be adapted for various skill levels.
- Elegance for Any Occasion: Whether it’s a wedding, a fancy dinner, or just brightening your everyday look, Rococo nails add a touch of refined beauty.
- Timeless Appeal: This style transcends fleeting trends, offering a classic aesthetic that always feels stylish.
- Customizable Complexity: You can go as simple or as intricate as you like! A single delicate floral accent nail can be just as impactful as a full set of elaborate designs.
- Skill-Building Fun: Practicing Rococo designs can actually help improve your fine motor skills and precision for all kinds of nail art.
- A Touch of Luxury: They bring a feeling of pampering and indulgence, making you feel special every time you look at your hands.
Ready to dive into creating your own Rococo-inspired nails? Let’s gather what you’ll need!
Essential Tools for Rococo Nail Designs
Don’t let the intricate designs fool you! With the right tools, creating Rococo nail art becomes much more manageable. Here’s a breakdown of what you’ll want to have on hand.
| Tool | What it’s for | Beginner Tip |
|---|---|---|
| Fine-Tipped Nail Art Brushes | Drawing thin lines, swirls, and small details. Look for brushes with a very fine, pointed tip. | Start with one or two brushes. A striper brush (long, thin bristles) and a detail brush (short, fine point) are great to begin with. |
| Dotting Tools | Creating small dots for flowers or patterns, and placing tiny embellishments like pearls. They come in various tip sizes. | A set with multiple sizes is helpful. Even a toothpick can work in a pinch for small dots! |
| Nail Polish/Gels in Rococo Colors | Your base colors and the colors for your designs. Pastels, creams, gold, and white are key. | Stock up on essential pastels and a good quality white or cream polish for intricate details. For longevity, consider gel polishes. |
| Top Coat & Base Coat | Base coat protects your natural nail and helps polish adhere better. Top coat seals and protects your design, adding shine (or a matte finish). | Always use a base coat! A good, smooth top coat can make even simple designs look professionally done. For gels, you’ll need a gel base and top coat. |
| Tweezers | Picking up and placing small embellishments like pearls, rhinestones, or glitter. | Fine-tipped or angled tweezers offer the best precision for delicate items. |
| Nail Polish Remover & Cotton Swabs/Pads | Cleaning up mistakes and cleaning your brushes. | Keep a steady supply! Cotton swabs are essential for detailed cleanup around the cuticle. Dip them lightly in remover. |
| Optional: Nail Art Gems/Pearls/Studs | Adding 3D elements for extra texture and luxury. | Start with a small pack of self-adhesive pearls or tiny white beads. They instantly elevate a design. |
| Optional: Dotting Tool Swirl Guide/Stencils | For those who want a little extra help with consistent shapes. | These can be helpful for practicing consistency before attempting freehand. |
| Optional: UV/LED Lamp (for Gel Polish) | If you choose to use gel polish, this is crucial for curing the polish. Gel polish offers superior durability and shine. | Research reputable brands like OPI Gel, Gelish, or Beetles Gel Polish. Ensure the lamp wattage is suitable for the polish you choose. Learn more about UV vs. LED nail lamps at Nail Polish Direct to understand their functionality. |
Remember, you don’t need every single item on day one. Start with the basics – good brushes, base/top coat, your polishes, and maybe some tweezers or a dotting tool. You can always add more as you get comfortable!
How to Create Simple Rococo Nail Designs: A Step-by-Step Guide
Let’s bring those elegant Rococo vibes to your fingertips! We’ll start with a few beginner-friendly design ideas.
Design Idea 1: The Delicate Swirl Accent Nail
This is a fantastic way to dip your toes into Rococo. Focus on one or two nails for a subtle yet chic look.
- Prep Your Nails: Start with clean, shaped nails. Apply a base coat and let it dry completely.
- Apply Base Color: Paint your nails with your chosen pastel shade (e.g., pale pink, baby blue). Apply two thin coats for even coverage and let them dry thoroughly. If using gel, cure each coat according to the lamp’s instructions.
- Focus on the Accent Nail: On one or two nails (like your ring finger), it’s time for the magic!
- Dip Your Brush: Get a small amount of white, cream, or gold polish on your fine-tipped detail brush. Wipe off excess on a paper towel so you have a controlled amount of polish.
- Start the Swirl: Gently touch the brush to the nail near the cuticle or side. In a flowing motion, create a delicate swirl or a series of small curls. Think of tracing a soft ‘S’ shape or a tiny loop. The key is a light touch and smooth movement.
- Add More Detail (Optional): You can add a few tiny dots using a dotting tool next to your swirl, or a second, smaller swirl.
- Add a Pearl (Optional): Using tweezers, pick up a tiny pearl or bead. Apply a small dot of top coat where you want the pearl to go, then gently place the pearl on the dot.
- Seal the Deal: Once your design is completely dry (or gel is cured), apply a generous layer of top coat. This will smooth out any texture and protect your beautiful art.
Design Idea 2: The Tiny Floral Accent
Floral motifs are a Rococo hallmark. This design is achievable with a dotting tool and a fine brush.
- Prep and Base Color: As before, prep your nails, apply a base coat, and then your chosen pastel color. Ensure it’s fully dry or cured.
- Create the Flower Center: Using a dotting tool with white or a contrasting pastel color, place a small dot on your accent nail. This will be the center of your flower.
- Draw Petals: With a fine detail brush dipped in white or a soft pink/lavender polish, carefully draw tiny, soft petal shapes around the central dot. You can do simple teardrop shapes or soft curves. Aim for 3-5 petals. Remember, Rococo flowers are delicate, not bold.
- Add Leaves (Optional): With a fine brush and a light green polish, add tiny, curved leaf shapes next to, or peeking from behind, the petals.
- Enhance with Dots: Use a tiny dotting tool or the tip of your brush to add a few very small dots around the flower, mimicking tiny buds or dew drops.
- Add a Touch of Gold (Optional): A tiny, thin swirl of gold polish in a corner of the nail can add that extra Rococo flair.
- Finish with Top Coat: Once everything is dry or cured, seal your floral masterpiece with a good top coat.
Design Idea 3: The Lace-Inspired Pattern
This might sound tricky, but we’ll simplify it for a beautiful effect.
- Prep and Base Color: Apply your base coat and a solid pastel color. Let it dry completely.
- Choose Your Color: White, cream, or a light gold polish works best for delicate patterns.
- Create Simple Arches: Using your fine detail brush, paint a few soft, curved arches across your accent nail, starting from one side and gently sweeping across. Don’t worry if they aren’t perfectly uniform; slight variations add character.
- Connect with Lines: Draw very fine, short, vertical lines connecting the tops of your arches, creating a simplified lace-like effect.
- Add Tiny Dots: In the spaces between your arches and lines, add tiny dots using your dotting tool.
- Repeat or Vary: You can repeat this pattern or create a slightly different delicate design in another corner of the nail.
- Embellish with Pearls (Optional): Add a few tiny pearls along the curve of one of the arches or at the base of the nail.
- Seal and Shine: Apply your top coat carefully, ensuring all the details are covered and protected.
Pro Tips for Beginners:
- Practice on Paper: Before you even touch your nails, practice your swirls and lines on a piece of paper or a nail art practice mat. This helps you get a feel for the brush and polish consistency.
- Thin Coats are Key: Always apply polish in thin, even coats. This prevents bulkiness and makes intricate designs easier to execute.
- Don’t Be Afraid to Clean Up: Keep your cotton swabs and nail polish remover handy. Mistakes happen! A carefully placed Q-tip dipped in remover can fix small errors without ruining your base color.
- Let it Dry: Patience is crucial! Ensure each layer of polish is dry to the touch before adding the next design element, especially if you’re not using gel.
- Start Small: Focus on one accent nail first. Once you’re confident, you can expand to more nails.
- Inspiration is Everywhere: Look at Rococo art, historical patterns, even doilies for inspiration on lines and shapes.
Rococo Color Palettes: Choosing Your Pastels and Golds
The colors used in Rococo designs are just as important as the patterns themselves. They evoke a sense of lightness, romance, and luxury.
The Core Palette:
- Pastel Pinks
- Baby Blues
- Mint Greens
- Soft Lavenders
- Creamy Whites & Ivories
- Pale Peach or Apricot
These soft hues create a gentle, dreamy base for your designs. They are calming and universally flattering.
The Metallic Accent:
- Gold: This is the essential metallic for Rococo. Use it for fine lines, swirls, or tiny details. It adds that instant touch of opulence and sophistication.
- Rose Gold: A softer, more modern alternative that can also work beautifully.
- Silver: While less traditional for pure Rococo, a very delicate silver can sometimes be used for intricate patterns, leaning more towards a Regency or Neoclassical feel but still elegant.
Color Combinations to Try:
| Base Color | Design Color(s) | Accents |
|---|---|---|
| Pale Pink | White, Cream | Gold lines, tiny pearls |
| Baby Blue | White, Silver (delicate) | Small floral dots in white or pink |
| Mint Green | White, Cream | Gold swirls, tiny bead flowers |
| Cream | Pastel Pink, Baby Blue, Gold | Delicate gold filigree |
| Lavender | White, Cream | Tiny white dots, maybe a single pearl |
When layering colors, remember the Rococo aesthetic: keep it light and airy. Avoid harsh contrasts. The goal is a harmonious and delicate effect.
Taking Your Rococo Designs to the Next Level
Once you’re comfortable with the basics, you can start experimenting with more advanced techniques and elements.
Mastering the Fine Line:
The key to elegant Rococo lines is practice and the right polish consistency. If your polish is too thick, it will be clumpy. If it’s too thin, it will be sheer and hard to control. A good rule of thumb is to aim for a consistency similar to whole milk.
- Brush Control: Hold your brush like a pencil, but with a relaxed grip. Let the brush do the work.
- Polish Load: Don’t overload your brush. A small, controlled amount of polish is best.
- Speed: Don’t paint too fast! A medium, steady pace allows for smoother lines.
For thinner lines that are consistently perfect, you might consider using a specialized striper polish that already has a super fine brush.
Incorporating 3D Embellishments:
Tiny pearls, beads, and micro-glitter can add incredible dimension. For adhering these:
- 3D Gel or Acrylic: For a secure, lasting hold, especially with heavier embellishments, you can use a small amount of clear 3D gel or acrylic to “glue” them in place before capping with top coat. Apply a tiny bead of 3D gel to where you want the embellishment, place it with tweezers, and


