Ring Nail Designs: Effortlessly Chic. Create stunning ring nail designs with simple techniques and inspiring ideas. Learn to adorn your nails like jewelry, adding a touch of sparkle and sophistication to your everyday look. Perfect for beginners, these designs are achievable and stylish!
Dreaming of nails that look like beautiful rings? You’re in the right place! Many of us love the idea of jeweled-up nails, but think it’s too difficult to do ourselves. It’s easy to feel a bit overwhelmed when you see intricate nail art. But what if I told you that creating stunning ring nail designs is totally doable, even if you’re just starting out? Get ready to discover how to add that extra sparkle to your fingertips with simple, gorgeous ideas that will make your nails feel like precious adornments. Let’s dive into the fun world of ring nails!
What Are Ring Nail Designs?
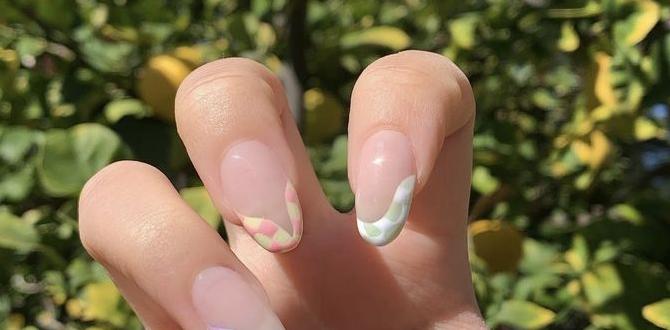
Ring nail designs are manicures that mimic the look of jewelry. Instead of wearing actual rings, the nail art itself creates the illusion of a ring on your finger. This can be done using various techniques, from simple metallic accents to intricate patterns that resemble popular ring styles. They’re a fantastic way to accessorize your hands without the need for physical jewelry. Think elegant bands, sparkling solitaires, or even intricate filigree patterns – all crafted on your nails!
Why Try Ring Nail Designs?
There are so many reasons to love ring nail designs! They’re incredibly versatile and can be adapted for any occasion, from a casual day out to a glamorous evening event. Plus, they offer a unique way to express your personal style and creativity. If you’re looking for an easy yet impactful way to elevate your manicure, ring nail designs are an excellent choice. They can make your hands look polished and sophisticated with minimal effort.
Benefits of Ring Nail Designs:
- Accessorize Effortlessly: They act as built-in jewelry for your nails, saving you from wearing actual rings if you prefer.
- Budget-Friendly Glamour: Achieve a high-end look without the cost of real jewelry.
- Versatile Style: Easily match your nail design to your outfit or mood.
- Boosts Confidence: Beautifully adorned nails can make you feel more put-together and confident.
- Creative Expression: A fun canvas to explore your artistic side.
- Perfect for Any Occasion: Dress them up or down as needed.
Essential Tools for Ring Nail Designs
Before we start creating, let’s gather our supplies! You don’t need a lot of fancy equipment to achieve beautiful ring nail designs. Most of these items are readily available at beauty stores or online. Having the right tools makes the process smoother and helps you achieve cleaner, more professional-looking results.
| Tool | What It’s For | Why It’s Helpful |
|---|---|---|
| Base Coat | Protects your natural nail and helps polish last longer. | Prevents staining and creates a smooth canvas. |
| Top Coat | Seals your design and adds shine. | Protects the art from chipping and gives a glossy finish. |
| Nail Polish in Your Desired Colors | The building blocks of your design! | Choose metallics, glitters, or complementary shades. |
| Fine-Tipped Nail Art Brushes | For drawing lines, dots, and intricate details. | Precision is key for delicate ring designs. |
| Dotting Tools | Creating perfect dots and small circular patterns. | Assists in symmetrical and uniform dot placement. |
| Striping Tape or Fine Transfer Foil Tape | For creating clean, straight lines and geometric shapes. | A game-changer for crisp edges and defined bands. |
| Tweezers | Picking up small embellishments like rhinestones or studs. | Ensures precise placement of tiny decorative elements. |
| Rhinestones, Glitter, or Studs (Optional) | Adding 3D elements and extra sparkle. | The ultimate way to make your ring design pop! |
| Nail Polish Remover & Cotton Pads | For cleaning up mistakes. | Essential for any nail art project. |
Beginner-Friendly Ring Nail Design Ideas
Ready to get creative? These ideas are perfect for beginners. They focus on simple techniques that deliver maximum impact. You’ll be surprised at how quickly you can master them!
1. The Simple Metallic Band
This is perhaps the easiest and most popular ring nail design. It creates the illusion of a sleek metal band around your nail.
How to Create:
- Start with a clean, prepped nail. Apply your favorite base coat and let it dry completely.
- Paint your nails with your chosen base polish color. A nude, pastel, or classic black works beautifully here. Let it dry thoroughly.
- Once the base color is dry, carefully apply a metallic polish (gold, silver, rose gold) around the base of your nail, forming a “band.” You can use a fine-tip brush for precision or carefully paint a thin line with the metallic polish applicator.
- For a cleaner look, apply striping tape around the base of your nail, leaving a small gap where you want your metallic band. Paint the metallic polish over the tape, remove the tape immediately while the polish is wet, and reveal a sharp band.
- Let the metallic band dry completely.
- Finish with a good quality top coat to seal everything in.
2. The Sparkling Accent Band
This design elevates the simple metallic band by adding a touch of glitter or tiny rhinestones.
How to Create:
- Apply base coat and your desired base nail polish, just like in the previous design. Let it dry completely.
- Using a fine nail art brush and a metallic polish, draw a thin band around the cuticle or the tip of your nail.
- While the metallic polish is still wet, carefully place a line of fine glitter or tiny rhinestones onto the wet polish using tweezers. For glitter, you can dip the wet metallic line into a pot of glitter.
- Alternatively, use a dotting tool to apply a clear top coat or nail glue in a band shape, then carefully adhere your chosen embellishments.
- Gently press down the embellishments to ensure they are secured.
- Apply a top coat, being careful not to dislodge the embellishments. You might need to apply a slightly thicker layer of top coat over the gems for a smooth finish.
3. The Double Band Chic
Two is better than one! This design uses two parallel bands to create a more modern, layered ring effect.
How to Create:
- Paint your nails with your chosen base color after applying base coat. Let it dry fully.
- Using a thin nail art brush or striping tape, create two parallel lines of metallic polish. You can place them side-by-side near the cuticle, or one above the other on the nail. Measure the distance between them for a balanced look.
- If using striping tape, apply tape to create the first band, then apply another piece of tape parallel to it, leaving a gap for the metallic polish. Or, paint one band, let it dry, then apply tape for the second band. It’s often easiest to use tape to mask off the areas around where you want your bands.
- Fill in the space between the tape with your metallic polish.
- Remove the tape while the polish is still wet.
- Let the bands dry completely and seal with a top coat.
4. The Gem Accent Ring
This design focuses on a single, standout “gem” at the center of your nail, mimicking an engagement ring or a statement cocktail ring.
How to Create:
- Apply base coat and your base nail color. Let dry.
- Using a fine brush and a metallic polish, paint a thin band around the cuticle – the base of your nail.
- Then, paint a coordinating (or contrasting) metallic band on the opposite side, at the tip of your nail.
- In the center, where the two bands would conceptually meet if they were real rings, place a larger rhinestone or a cluster of smaller gems using nail glue or a thick top coat.
- Let the glue dry completely.
- Apply a careful top coat around the gems, avoiding flooding them.
5. The Geometric Ring Illusion
This design plays with shapes and lines to create a more abstract, modern ring effect.
How to Create:
- Start with a perfectly dry base color.
- Get creative with striping tape! You can create geometric shapes like squares, triangles, or even intersecting lines using metallic or contrasting colors.
- For example, place two pieces of striping tape parallel to each other on the nail. Then, place two more pieces perpendicular to create a “frame.”
- Paint the exposed nails with your accent color. Remove tape carefully.
- You can add a small dot or a tiny gem in the center of a square or triangle for a focal point.
- Seal with a top coat.
6. The Dot and Line Band
Simple yet effective, this design uses dots and lines to create a delicate ring effect.
How to Create:
- Apply your base color and let it dry.
- Using a dotting tool and a metallic polish, create a ring of evenly spaced dots around the cuticle or middle of the nail.
- Once the dots are dry, use a very fine nail art brush with the same metallic polish to connect the dots with thin, linear strokes.
- Alternatively, use a metallic polish to draw a thin band, and then use a dotting tool to add small metallic dots along the edges for texture.
- Seal with a top coat.
7. The Dual-Tone Band
This sophisticated design uses two different metallic colors to create a layered band effect.
How to Create:
- Apply your base color and let it dry.
- Using striping tape or a fine brush, apply your first metallic color (e.g., gold) to create a band around the cuticle. Let it dry completely.
- Apply a second piece of striping tape adjacent to the first band, or about 1-2mm away from it.
- Apply your second metallic color (e.g., rose gold or silver) in the gap between the two tape lines or next to the first band.
- Carefully remove the second piece of tape while the polish is wet.
- Let the second band dry and seal with a top coat.
Advanced Ring Nail Design Elements (For When You’re Ready!)
Once you’ve mastered the basics, you might want to explore more intricate elements. These can be added to your beginner designs or used as inspiration for more complex creations. Think of these as ways to level up your nail art game!
Delicate Filigree Patterns
Filigree involves intricate, swirling, and lace-like designs. You can achieve this with very fine brushes and a steady hand to create ornamental patterns around the nail shape. These patterns mimic antique jewelry and add a touch of vintage elegance. For inspiration on intricate patterns, you can look at metalworking designs or art nouveau illustrations.
Gem Clusters and Settings
Instead of a single gem, try creating a cluster of small stones that resemble the setting of a ring. Use different sizes and shapes of rhinestones (like small rounds, baguettes, or even tiny pearls) to create a more realistic and dazzling effect. Think about how real jewelry settings are constructed – often tapering or varying in size.
Engraved Looks
This technique mimics the look of engraved metal. You can achieve this by using a dark polish (like black or deep navy) over a metallic base. Once the dark polish is semi-dry, use a needle or a very fine brush to gently scratch away the top layer, revealing the metallic base underneath in a pattern. It takes practice but yields a unique textured look. Resources on engraving techniques in metal can offer visual queues.
Multi-color Bands
Go beyond single metallics! Combine different colored metallic polishes or even use a metallic with a complementary solid color to create a multi-toned band. This adds depth and visual interest, making your ring design truly unique.
Pearl Accents
Pearls are classic and elegant. Small pearl beads or even tiny actual freshwater pearls can be attached to your nail art to create a sophisticated, timeless ring design. These are perfect for bridal manicures or adding a touch of refined glamour.
How to Make Your Ring Nail Designs Last
You’ve put in the effort to create a beautiful design; now you want it to last! Proper application and maintenance are key to extending the life of your ring nail art.
1. Prepwork is King:
- Clean Nails: Ensure your nails are clean, dry, and free of oils or old polish.
- Cuticle Care: Gently push back your cuticles. This gives you a clean canvas and makes the polish appear to grow further up your nail.
- Buffing (Optional): Lightly buff your nail surface to create a smooth base for polish adhesion.
- Base Coat is Non-Negotiable: A good quality base coat protects your nails from staining and provides a sticky surface for polish to grip onto.
2. Application Techniques:
- Thin Coats: Apply polish in thin, even coats rather than one thick one. This helps them dry faster and reduces the risk of smudging.
- Cap the Edge: When applying your polish and top coat, swipe a little bit along the free edge (the tip) of your nail. This seals the polish and helps prevent chipping.
- Let Each Layer Dry: Be patient! Allow each coat of polish (base, color, design elements, top coat) to dry sufficiently before moving on to the next. This is crucial for preventing lifting and smudging.
- Be Gentle with Embellishments: If you’re using rhinestones or studs, gently press them into the wet polish or glue. Avoid excessive pressure that could break them.
3. Sealing the Deal with Top Coat:
- Generous Top Coat: Apply a liberal layer of your favorite high-shine, quick-drying top coat.
- Reapply Top Coat: To keep your design looking fresh, reapply a thin layer of top coat every 2-3 days. This will refresh the shine and reinforce the protective layer.
4. Daily Care:
- Wear Gloves: Protect your nails from harsh chemicals and excessive water exposure by wearing rubber gloves when washing dishes, cleaning, or gardening.
- Avoid Using Nails as Tools: Resist the urge to scratch, pry, or open things with your nails. This is a major cause of chips and snags.
- Moisturize: Keep your hands and nails hydrated with cuticle oil and hand cream. Healthy nails are less


