Ribbon nail designs are a chic and surprisingly easy way to elevate your manicure to a work of art. With simple techniques, you can create beautiful, intricate-looking ribbon patterns that add flair and personality to your nails, perfect for both everyday wear and special occasions.
Ever look at those gorgeous, perfectly drawn ribbons on nails and think, “There’s NO way I can do that”? You’re not alone! Many of us admire intricate nail art from afar, feeling it’s too complicated for a DIY project. But what if I told you that stunning ribbon nail designs are actually within your reach? Even if you’re just starting out with nail art, you can master these techniques. Get ready to transform your nails into something truly special with these easy-to-follow steps and creative ideas. We’ll break down everything you need to know!
What Are Ribbon Nail Designs?
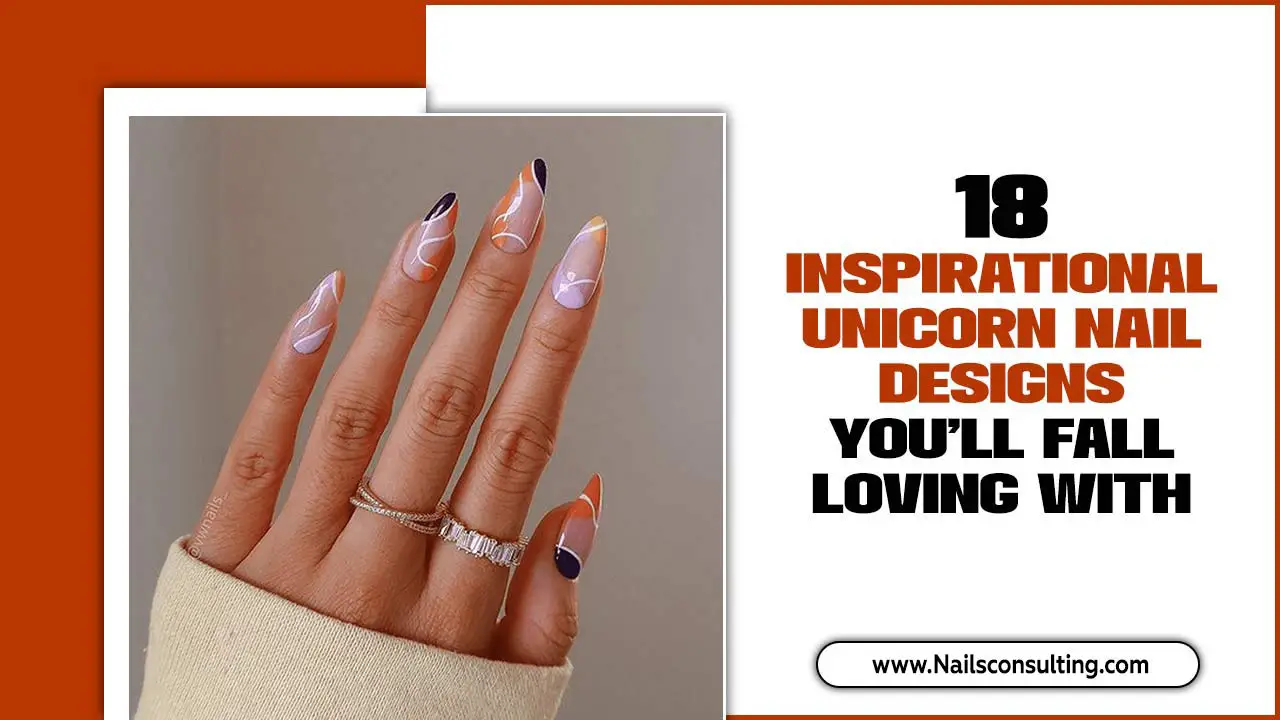
Ribbon nail designs are a popular nail art trend that mimics the look of ribbons, bows, or elegant fabric folds on your nails. These designs can range from simple, minimalist lines suggesting a ribbon’s edge to more complex, shaded patterns that give the illusion of three-dimensional bows. They add a touch of sophistication, playfulness, or even a touch of whimsy to any manicure, making your nails stand out.
The beauty of ribbon designs lies in their versatility. They can be adapted to fit any nail shape and length, and they work wonderfully with a vast array of colors and finishes. Whether you’re aiming for a dainty, delicate look or a bold, statement-making style, ribbon nail art offers a creative avenue to explore. It’s a fantastic way to express your personal style and add a unique touch to your overall appearance.
Why Choose Ribbon Nail Designs?
There are so many reasons why ribbon nail designs have captured the hearts of nail enthusiasts everywhere. They aren’t just pretty; they’re practical and adaptable!
- Versatility: They can be painted in any color, paired with different finishes (matte, glossy, glitter), and incorporated into various nail art styles.
- Chic Sophistication: Ribbon designs instantly add an element of elegance and polish to your nails, making them look incredibly put-together.
- Subtle or Bold: You can opt for a delicate single line for a minimalist vibe or create intricate bow details for a more striking effect.
- Beginner-Friendly Options: While some ribbon designs can be complex, many are surprisingly easy to achieve with basic tools and techniques.
- Occasion-Ready: From everyday wear to weddings and parties, ribbon nails can be tailored to suit any event.
- Expressive: They offer a fun way to showcase your creativity and personal style on your fingertips.
Essential Tools & Materials for Ribbon Nail Designs
Before we dive into the fun of creating these designs, let’s gather our supplies! Having the right tools makes all the difference. Don’t worry if you don’t have professional equipment; many everyday items can work.
Nail Polish & Base/Top Coats
- Base Coat: This is crucial for protecting your natural nails from staining and helping your polish adhere better.
- Color Polishes: Choose the colors you want for your ribbon design and your base nail color.
- Top Coat: This seals your design, adds shine, and helps your manicure last longer. A quick-dry top coat is a lifesaver!
Application Tools
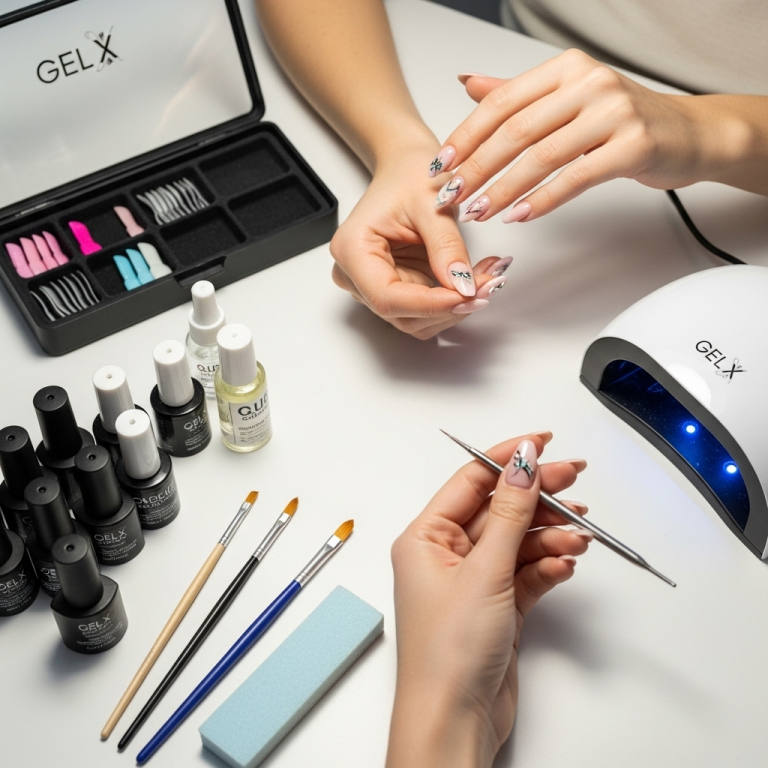
- Fine-Tipped Detail Brush: This is your best friend for drawing clean lines and intricate details. Look for synthetic bristles for easy cleaning.
- Dotting Tool: While great for dots, the ball end can also be used to create small, rounded shapes or blend lines subtly.
- Toothpick: A readily available alternative to a detail brush for drawing thin lines or creating small accents.
- Striper Brush: These have long, thin bristles that are perfect for creating long, smooth strokes that mimic ribbon.
You can often find multi-packs of nail art brushes and dotting tools online or at beauty supply stores. Starting with a basic set is a great way to build your nail art toolkit! For more on essential nail art tools, check out this guide on nail art for beginners from Healthline.
Optional (But Helpful!)
- Nail Polish Remover & Cotton Swabs: For cleaning up any mistakes easily and precisely.
- Palette or Piece of Foil: To easily dispense small amounts of polish for your brush to pick up.
- Nail Art Lamp (UV/LED): If you’re using gel polish, this is essential for curing each layer.
Easy Ribbon Nail Design Techniques for Beginners
Ready to get creative? Let’s start with some simple techniques that will have you making beautiful ribbon designs in no time. Remember, practice makes progress!
Method 1: The Simple Line Ribbon
This is the most basic and often the most elegant way to create a ribbon-like effect. It’s perfect for a minimalist look or for practicing your steady hand.
- Prep Your Nails: Start with clean, dry nails. Apply a base coat and let it dry completely. Paint your nails with your desired base color and let it dry thoroughly.
- Load Your Brush: Dip your fine-tipped detail brush or toothpick into your accent polish color. You only need a small amount on the tip of the brush.
- Draw the Ribbon Line: Gently draw a single, steady line across your nail. You can place it near the cuticle, in the center, or diagonally. The key is a smooth, unbroken stroke.
- Add Depth (Optional): For a subtle shadow effect, you can add a slightly darker or lighter shade of your accent color very thinly alongside the main ribbon line.
- Seal the Deal: Once the polish is completely dry, apply a clear top coat to protect your design and add shine.
Method 2: The Folded Ribbon Effect
This technique creates a bit more dimension, making it look like the ribbon is folded or creased.
- Prep Nails: As always, start with a clean base coat and your chosen nail color. Ensure it’s fully dry.
- Outline the Shape: Using your detail brush and accent color, paint a slightly curved, elongated “U” shape. This will be the main body of your folded ribbon.
- Create a “Fold”: From one end of the “U,” draw a smaller, curved line that tucks back under itself, creating the illusion of a fold. Repeat on the other side, or just on one side for a simpler look.
- Add a Bow Knot (Optional): At the point where the ribbon folds, you can add a small dot or a tiny, slightly darker “knot” shape to secure the bow.
- Shading for Dimension: To enhance the 3D effect, add a touch of darker polish to the shadowed areas (e.g., under the fold, where the ribbon tucks). Blend gently with a clean brush or toothpick.
- Top Coat Power: Once everything is dry, finish with a protective top coat.
Method 3: The Bow Detail
This is where we get a bit more playful and create an actual bow shape!
- Base and Color: Apply your base coat and desired nail color. Let it dry completely.
- Draw the Loops: Using your detail brush and accent polish, paint two curved loops on one side of your nail, resembling the loops of a bow. Think of an upside-down “3” shape on each side.
- Add the Knot: In the center, where the loops meet, paint a small, rounded shape or a dot to represent the knot of the bow.
- Drape the Tails: From the knot, draw two small, thin lines or simple V-shapes angling downwards, as if the ribbon tails are hanging.
- Highlight and Shadow: For added realism, subtly highlight the tops of the loops with a lighter shade and add a touch of darker polish to the undersides or where the knot meets the loops.
- Seal and Shine: Apply your top coat once everything is dry.
Popular Ribbon Nail Color Combinations
The color you choose for your ribbon design can dramatically change the overall look. Here are some popular and chic combinations to inspire you:
| Base Color | Ribbon Color | Vibe/Occasion |
|---|---|---|
| Classic Red | Gold or White | Glamorous, Festive, Bold |
| Nude or Beige | Black or Deep Burgundy | Sophisticated, Chic, Everyday Elegance |
| Baby Pink or Pastel Blue | Silver or White | Sweet, Delicate, Bridal/Spring |
| Black | Hot Pink or Electric Blue | Edgy, Playful, Statement-Making |
| Emerald Green | Rose Gold or Cream | Luxurious, Rich, Seasonal |
| White | Pastel Yellow or Light Grey | Clean, Fresh, Minimalist |
| Deep Navy | Pearlescent White or Light Gold | Understated Luxury, Evening Wear |
Don’t be afraid to experiment! You can even try glitter polishes for the ribbon part for extra sparkle, or use a matte top coat after your gloss top coat for a sophisticated, “velvet ribbon” look.
Advanced Ribbon Nail Design Techniques
Once you’ve mastered the basics, you might want to try some techniques that add even more dimension and detail. These can elevate your ribbon nails from pretty to absolutely stunning!
1. Ombre Ribbons
Instead of a solid color, create a ribbon that transitions smoothly from one shade to another. This works wonderfully for a softer, more blended effect.
- Base: Apply your base coat and nail color.
- Ombre Polish: Load your detail brush with two complementary shades of polish (e.g., light pink and medium pink).
- Blend on Nail: Gently paint the ombre effect directly onto the nail where you want your ribbon. You can use a clean, slightly damp brush to blend the transition.
- Refine: Once dry, you can go over the edges with a fine brush for definition.
- Top Coat: Apply a clear top coat.
2. Gel Polish Ribbon Designs
Using gel polish offers a super smooth finish and incredible durability, but it requires a UV/LED lamp for curing. The application process is similar to regular polish, but each layer needs to be cured under the lamp.
- Prep & Application: Apply base coat, cure. Apply color coat, cure.
- Design: Paint your ribbon design using gel polish colors and your detail brush.
- Cure: Cure under the UV/LED lamp according to the gel polish instructions. You might need to cure multiple layers for opacity or depth.
- Clean Up: Wipe off any sticky residue with a lint-free wipe and nail cleanser.
- Top Coat: Apply gel top coat, cure.
Gel polish’s self-leveling properties can make it easier to achieve smooth, seamless ribbon lines, but remember that mistakes are harder to fix once cured! Practice on a nail art tip first if you’re new to gel.
3. Textured Ribbons
Add a tactile element to your ribbon designs. This can be achieved using textured polishes or by adding fine glitter or bead elements.
- Glitter Ribbons: Paint your ribbon design with regular polish or gel, then while it’s still wet (or use a clear top coat as “glue”), gently sprinkle fine glitter over the design. Tap off the excess.
- 3D Accents: You can even use small rhinestones or micro-beads to create the knot of a bow for a truly dimensional effect. Use a strong nail glue or clear gel top coat to adhere them.
4. Reverse French Ribbon
Combine the classic French tip with a ribbon design. Instead of a white tip, paint a ribbon that curves along the smile line. Or, apply a ribbon design on top of a colored French tip.
For a more advanced option, consider incorporating these designs with other popular trends, such as negative space manicures or marble effects. The possibilities are truly endless!
Tips for Achieving Flawless Ribbon Nail Designs
Even the simplest design can become tricky if you rush or don’t have a few tricks up your sleeve. Here are some tips to help you achieve salon-worthy ribbon nails at home:
- Steady Your Hand: Rest your wrist or forearm on a stable surface. You can even brace your pinky finger against the table or another finger to create a more stable painting platform.
- Small Amounts of Polish: Don’t load your brush with too much polish. It’s easier to add more than to remove excess. Wipe any excess off your brush on the edge of the polish bottle or your palette.
- Clean Your Brush Frequently: Between strokes or when changing colors, wipe your brush on a lint-free wipe or paper towel to remove excess polish and prevent color mixing.
- Clean Up Mistakes Immediately: Keep acetone or nail polish remover and a fine-tipped brush (like a cleanup brush or a clean eyeliner brush) or cotton swabs handy. Dip the brush in remover and carefully wipe away any slips before the polish dries.
- Patience is Key: Allow each layer of polish to dry completely before applying the next. Rushing this step is the number one cause of smudging and messy designs.
- Work in Good Lighting: Natural light is best, but a well-lit area with a bright lamp will also help you see clearly and control your strokes.
- Practice Makes Perfect: Don’t get discouraged if your first few attempts aren’t perfect. Keep practicing on nail art tips or spare nails, and you’ll see improvement with every try.
Maintaining Your Ribbon Nail Designs
You’ve put in the effort to create beautiful ribbon nails, so you’ll want them to last! Good aftercare is essential.
- Always Use a Top Coat: Apply a fresh layer of top coat every 2-3 days to refresh the shine and protect your design from chipping and wear.
- Moisturize: Keep your cuticles and hands hydrated with cuticle oil and hand cream. Dry skin can make nails look less polished and can lead to polish chipping.
- Wear Gloves: When doing household chores, gardening, or anything that involves prolonged contact with water or cleaning chemicals, wear rubber gloves. Water and harsh chemicals can break down the polish and weaken nails.
- Avoid Using Nails as Tools: Resist the urge to use your nails to scrape, pry, or open things. This is a sure way to chip or break your manicure.
- Touch-Ups: For minor chips, you might be able to carefully touch them up with a bit of your base color and a thin layer of top coat.
Following these simple maintenance tips can help your gorgeous ribbon nail designs stay looking fresh and fabulous for as long as possible!
Frequently Asked Questions About Ribbon Nail Designs
Let’s dive into some common questions beginner nail art enthusiasts have about ribbon designs.
Q1: Can I do ribbon nail designs with regular nail polish, or do I need special polish?
A1: You can absolutely do ribbon nail designs with regular nail polish! All you need is a good fine-tipped brush or even a toothpick. While gel polish offers a long-lasting, high-shine finish, regular polish works just as well for creating the designs themselves. Just ensure each layer is fully dry before moving to the next.
Q2: What’s the best way to get clean, thin lines for ribbon designs?
A2: The trick is to use a brush with fine, synthetic bristles designed for nail art. Always load the brush with a small amount of polish. Wipe off any excess on the bottle neck or a palette. Then, use a light, steady hand, gliding the brush smoothly across the nail. Rest your hand for stability!
Q3: My ribbon lines always end up looking shaky. What can I do?
A3: Shaky lines are super common when starting out! Try these tips: 1. Stabilize your hand: Rest your painting wrist or forearm firmly on a table. 2. Don’t press too hard: Let the brush do the work. 3. Use less polish: A lighter touch with less product often means smoother lines. 4. Practice on paper: Before moving to your


