Unlock dazzling nails with simple rhinestone application for a chic, sparkly look that’s surprisingly easy for beginners to achieve at home.
Welcome, nail lovers! Do you dream of nails that catch the light and turn heads? Maybe you’ve seen stunning rhinestone designs online and thought, “That’s way too complicated for me!” Well, I’m here to tell you it’s not! Adding sparkle to your fingertips is totally achievable, even if you’re new to nail art. We’ll walk through everything, from picking the right rhinestones to making them stick like a pro. Get ready to add some fabulous bling to your next manicure!
Frequently Asked Questions About Rhinestone Nail Designs
What are the best rhinestones for nails?
For beginners, acrylic rhinestones are a great choice! They’re lightweight, come in many colors and shapes, and are affordable. Glass rhinestones offer more sparkle but can be a bit heavier and pricier. Look for flat-backed ones, as they’re easiest to apply.
What glue should I use for rhinestones on nails?
A good nail glue or a specialized rhinestone gel/top coat works best. Regular nail polish can work for very small, lightweight gems, but they might not last as long. For secure, long-lasting bling, a dedicated nail glue or top coat designed for gems is ideal.
How do I make rhinestones stay on my nails?
The key is proper prep and application! Ensure your nail polish is fully dry, use a strong adhesive like nail glue or rhinestone gel, and seal the edges of the rhinestones with a top coat. This creates a protective barrier to keep them from snagging or falling off.
Can I put rhinestones on gel nails?
Absolutely! Gel nails are fantastic for rhinestones because their sticky inhibition layer (the tacky surface after curing) helps them adhere. You can also use rhinestone gel or top coat with gel polish for extra security. Just remember to cure each layer and the rhinestones properly under a UV/LED lamp.
How do I remove rhinestones from my nails safely?
Soak your nails in acetone-based nail polish remover for about 10-15 minutes. This should soften the glue. Gently use an orangewood stick or cuticle pusher to lift the rhinestones. Be patient; forcing them off can damage your natural nails.
How long do rhinestone nail designs usually last?
With careful application and sealing, rhinestone designs can last anywhere from a few days to over a week, especially on gel or acrylic nails. Natural polish manicures might see them last a bit less time, perhaps 3-5 days, depending on how active your hands are.
Where can I buy rhinestones for my nails?
You can find nail art rhinestones at beauty supply stores, many drugstores, online retailers like Amazon, and specialized craft or nail art websites. They come in a huge variety of sizes, shapes, and colors to suit any style!
Let’s Talk Bling: Understanding Rhinestones for Nails
Nail rhinestones are tiny, decorative gems that add instant
glamour and sparkle to any manicure. They come in all sorts of materials, sizes,
and shapes, from tiny, subtle crystals to bold, colorful jewels. For beginners,
focusing on the most user-friendly options will make your rhinestone journey
sparkle right from the start!
Types of Nail Rhinestones
Acrylic Rhinestones: These are usually the most budget-friendly and lightweight. They’re great for practicing and come in a vast array of colors and finishes.
Glass Rhinestones: These offer superior sparkle and brilliance, mimicking real crystals. They can be a bit heavier and more expensive but deliver a high-end look.
Crystals (e.g., Swarovski): For ultimate luxury and shine, these are top-tier. They’re precise, incredibly sparkly, and durable, though they come with a higher price tag.
Pearls: While not strictly “rhinestones,” faux pearls are a popular embellishment that provides a different kind of elegance.
Shapes and Sizes
Rhinestones come in countless shapes: classic round diamonds, teardrops, squares, hearts, stars, and more! Sizes also vary greatly, from micro-dots (rhinestuds) perfect for subtle accents to larger statement gems. As a beginner, round rhinestones in sizes like SS4 (1.5mm) to SS10 (2.8mm) are excellent starting points.
Your Sparkly Toolkit: Essential Tools for Rhinestone Nails
Before you dive into gluing, let’s gather your essential tools. Having the right items makes the process smoother and your designs last longer.
Must-Have Supplies:
Nail Polish or Gel Polish: Your base color.
Top Coat: Crucial for sealing and shine. A “no-wipe” or “hard” top coat is often recommended for durability.
Nail Glue or Rhinestone Gel: The adhesive that keeps your bling in place. Nail glue is readily available. Rhinestone gels are UV-cured and offer incredible hold, especially for larger stones. You can learn more about proper nail care and the use of various polish types on the Nail Magazine’s educational section.
Tweezers or Wax Pencil: For picking up and placing tiny rhinestones precisely. A wax pencil is fantastic for beginners as it picks up gems easily and releases them gently.
Rhinestone Sampler Pack: To try out different sizes, shapes, and colors.
Small Brush or Dotting Tool: For applying glue or top coat precisely.
Optional but Helpful:
Nail File and Buffer: For nail prep.
Cuticle Pusher: For tidying up the nail bed.
Alcohol Wipe or Cleanser: To clean the nail surface before applying polish.
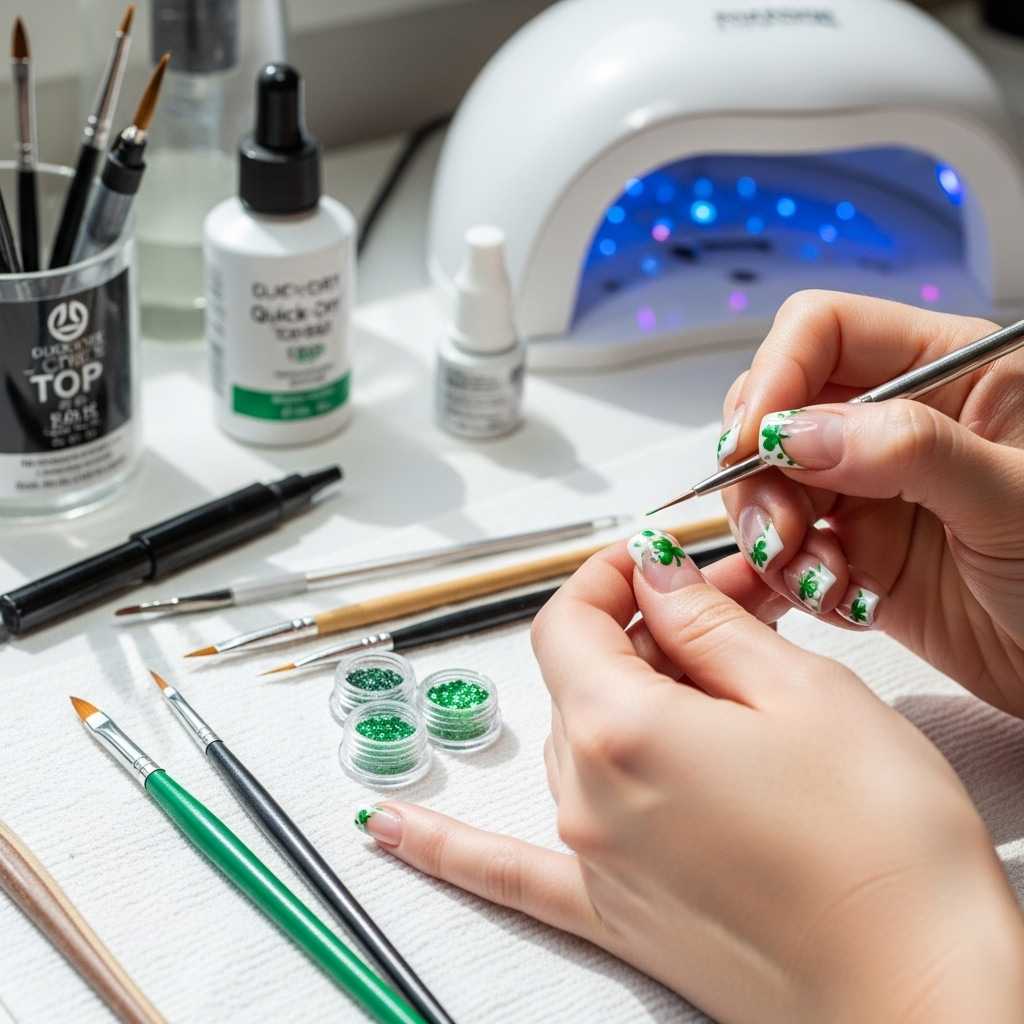
How to Apply Rhinestones: Step-by-Step for Sparkle
Applying rhinestones might seem daunting, but with a little practice, you’ll be a pro in no time. Here are two popular methods for different polish types.
Method 1: Using Regular Nail Polish
This method is great for beginners who are already comfortable with traditional nail polish.
- Prep Your Nails: Start with clean, dry nails. File them to your desired shape and gently push back your cuticles.
- Apply Base Coat: Apply a thin layer of base coat and let it dry completely.
- Apply Color Polish: Apply 1-2 coats of your chosen nail polish color. Ensure each coat is fully dry before moving on. This is key! Applying gems to wet polish will cause them to sink and look messy.
- Apply Adhesive:
- Option A (For smaller gems): Apply a small dot of nail glue or a dab of your top coat where you want the rhinestone to go. Work on one nail or even one gem at a time, as polish and glue dry quickly.
- Option B (For larger gems or longer wear): Apply a slightly larger dot of nail glue.
- Place the Rhinestone: Using your tweezers or wax pencil, carefully pick up a rhinestone and gently press it into the glue or top coat.
- Seal the Deal: Once the rhinestone is in place and the glue is somewhat set, carefully apply a thin layer of top coat around the rhinestone, being careful not to cover the top of the gem itself. This helps to secure the edges. If using nail glue, wait a minute or two for it to fully dry before applying the top coat.
- Let it Dry: Allow your nails to dry completely. Avoid touching anything with your freshly adorned nails for at least 15-20 minutes to prevent smudging or dislodging the gems.
Method 2: Using Gel Polish (Recommended for Durability)
Gel polish provides a fantastic base for rhinestones, offering excellent longevity.
- Prep Your Nails: Clean and shape your nails as usual. Apply a nail dehydrator if you have one.
- Apply Base Coat: Apply a thin layer of gel base coat and cure under a UV/LED lamp according to the manufacturer’s instructions (usually 30-60 seconds).
- Apply Color Coat: Apply 1-2 coats of your colored gel polish, curing each layer as directed.
- Apply Top Coat (for placement): Apply a thin layer of gel top coat (a sticky, non-wipe one is great for this, but any will work) to the area where you want to place the rhinestones. Do NOT cure it yet.
- Place the Rhinestones: Using your tweezers or wax pencil, pick up your chosen rhinestones and place them directly onto the uncured top coat. The sticky gel will hold them in place temporarily.
- Cure: Once all your rhinestones are placed, carefully cure the nail under your UV/LED lamp for the recommended time (usually 60-90 seconds). This hardens not only the gel but also secures the rhinestones.
- Optional Sealant: For extra security, especially with larger or heavier rhinestones, you can apply a tiny bead of rhinestone-specific gel or a strong top coat around the base of each rhinestone after curing. Be very careful not to flood the stone. Cure again if using a gel product.
- Clean Up: If you used a sticky top coat and there’s any remaining tackiness, you can gently wipe it away with an alcohol wipe after the final cure.
Sparkling Essential Looks: Beginner-Friendly Rhinestone Nail Design Ideas
Ready to get inspired? These designs are classic, elegant, and incredibly easy to replicate. They prove that you don’t need complex techniques to achieve a show-stopping sparkle!
1. The Classic Accent Nail
Description: This is the ultimate starter design. Pick one nail on each hand (usually the ring finger) and adorn it with a few strategically placed rhinestones. It’s subtle but incredibly chic.
How to: Apply your base color to all nails. On your chosen accent nail, apply a small dot of nail glue or top coat. Use your tweezers or wax pencil to place 3-5 small to medium-sized rhinestones in a simple pattern – a small cluster, a line, or just scattered. Seal around the edges with top coat.
Why it works: It’s low-commitment, quick, and adds just the right amount of bling without being overwhelming.
2. The Delicate Outline
Description: Using tiny rhinestones to trace the edge of your nail or a French tip. This creates a sophisticated, almost jewelry-like effect.
How to: Once your colored polish is dry, use a fine-tip brush to apply small dots of nail glue or a thin line of rhinestone gel along the desired edge (e.g., the smile line of a French tip or the free edge of the nail). Carefully place your smallest rhinestones (like SS3 or SS4) along the adhesive. Seal the edges as usual with top coat.
Why it works: It feels very high-fashion and is surprisingly easy to execute with small stones.
3. The Single Statement Gem
Description: Sometimes, less is more! A single, slightly larger or more uniquely shaped rhinestone placed thoughtfully can be incredibly impactful.
How to: Apply your polish and let it dry completely. Place one slightly larger rhinestone (like a teardrop or a faceted gem) on the nail bed, perhaps near the cuticle or in the center of the nail. Use a good amount of nail glue or rhinestone gel for secure adhesion. Consider backing it with a circle of smaller gems for added drama if desired.
Why it works: It’s minimalist, modern, and draws attention to the beauty of the stone itself.
4. The Subtle Sparkle Fade (Ombre Gems)
Description: A gradient of rhinestones that starts denser at the cuticle or tip and gradually fades out. This is a beautiful way to incorporate bling without it being too heavy.
How to: Apply your colored polish and ensure it’s completely dry. Start by placing your largest rhinestones closest to the cuticle or tip. Then, use progressively smaller rhinestones as you move towards the center of the nail, creating a gentle fade. Use nail glue for each stone and be sure to seal the surrounding edges.
Why it works: It adds dimension and a touch of magic that feels more organic than a solid block of gems.
5. The Simple Stripe
Description: A clean, straight line of rhinestones running vertically, horizontally, or diagonally across the nail. This offers a graphic, modern edge.
How to: Decide on the placement of your stripe. Apply nail glue or rhinestone gel in a thin, straight line. Use your tweezers to carefully place rhinestones (all the same size usually looks best for this) side-by-side along the adhesive. Seal around the edges once dry.
Why it works: It’s bold, clean, and incredibly effective for adding a structured sparkle.
Rhinestone Nail Design Inspiration
Here’s a quick look at some popular rhinestone placements and their typical vibes.
| Design Idea | Typical Placement | Best For | Beginner Friendliness |
|---|---|---|---|
| Accent Nail Cluster | One nail per hand, clustered near cuticle or center. | Everyday elegance, subtle glam. | Very High |
| French Tip Outline | Following the white tip line. | Sophisticated, chic, modern French. | High (with small stones) |
| Single Statement Gem | Center of nail, near cuticle, or accent nail. | Minimalist, modern, bold statement. | Very High |
| Full Nail Coverage (Sparse) | Scattered evenly or with a dense start fading out. | Full glam, maximalist sparkle. | Medium (can be time-consuming) |
| Vertical/Horizontal Stripe | Across the nail bed, any direction. | Graphic, modern, streamlined look. | High |
Pro Tips for Long-Lasting Sparkle
Want your rhinestones to stay put and keep shining? Here are some secrets from the nail pros:
Work on Dry Polish: This cannot be stressed enough for regular polish. If your polish isn’t 100% dry, your gems will sink.
Use the Right Adhesive: For everyday wear with regular polish, a good nail glue or a strong top coat is essential. For gel, rhinestone gels or even a thick top coat before curing offer the best hold.
Seal, Seal, Seal: Once your rhinestones are applied and the glue/gel is dry/cured, a careful application of top coat around the base of the stones is crucial. Avoid flooding the gems themselves, as this can dull their shine. A fine-tipped brush or a specialized detailing brush is perfect for this.
Be Gentle: After applying rhinestones, give them ample time to dry or cure. Try to avoid activities that might snag or put pressure on your nails, like digging in your purse or washing dishes without gloves.
Consider Your Lifestyle: If you have a very hands-on job or frequently use your hands for tasks, you might want to opt for fewer rhinestones or stick to designs with smaller gems that are less likely to catch on things.
Cleanliness is Key: Make sure your nails are clean and free from oils before you start. This helps your adhesive bond better. A quick wipe with alcohol can do wonders.
Avoiding Common Rhinestone Nail Mistakes
Even the best of us make mistakes! Here’s how to sidestep a few common pitfalls when working with rhinestones:
The “Too Wet” Polish Trap: Applying rhinestones to polish that hasn’t fully dried. This is the number one reason for gems sinking or falling off quickly with regular polish.
Too Much Glue/Top Coat: Over-applying adhesive can cause it to ooze out from under the stone, looking messy. Use just enough to secure the gem.
Flooding the Gems: Applying top coat directly over the entire surface of the rhinestone. This almost always dulls their sparkle. Stick to applying top coat around the edges.
Rushing the Drying/Curing Process: Not giving your adhesive enough time to set properly. Patience is a virtue, especially in nail art!
Using the Wrong Tools: Trying to pick up tiny rhinestones with your fingers will lead to frustration.